The WordPress Image Block lets you add images to your WordPress posts or pages. With the Block, you can easily upload images from your computer, select images from your media library, or even from external URLs.
The Image Block also allows you to resize the image by dragging its handles or entering specific dimensions. You can also adjust the image alignment, add alternative text (alt text) for accessibility, and set a caption for the image.
I’ll show you a complete guide on how to add an image to WordPress using the Gutenberg image block and customize its settings.
What is the Gutenberg Image Block?
The Gutenberg Image block is a default block of the editor in WordPress. It allows you to insert images individually into your desired web posts and pages. It also provides options to add a caption, link, alt text, and more to the image. You can align the image to the left, right, or center, and resize it as you need.
You can also place the image block within the column and row blocks to present your content without disturbing the web layout. After the block is added, you can add an image whether from the media library or from your local drive.
How to Add an Image to WordPress Using the Gutenberg Image Block
Although most WordPress blocks are very easy to use, not all of them are familiar to common users because they don’t have many use cases. But the WordPress Image block is a common Gutenberg block that is used so frequently in all types of websites.
And the process of using this block is also very simple. Let’s explore how to use the Gutenberg Image block for adding images to the WordPress websites.
Step 01: Add the Image Block to Your Post or Page Editor
Open the post or page where you want to add images. Click the (+) icon to add a new block. Type Image in the search box to find the Image block. Hit the block to add it to your post or page.
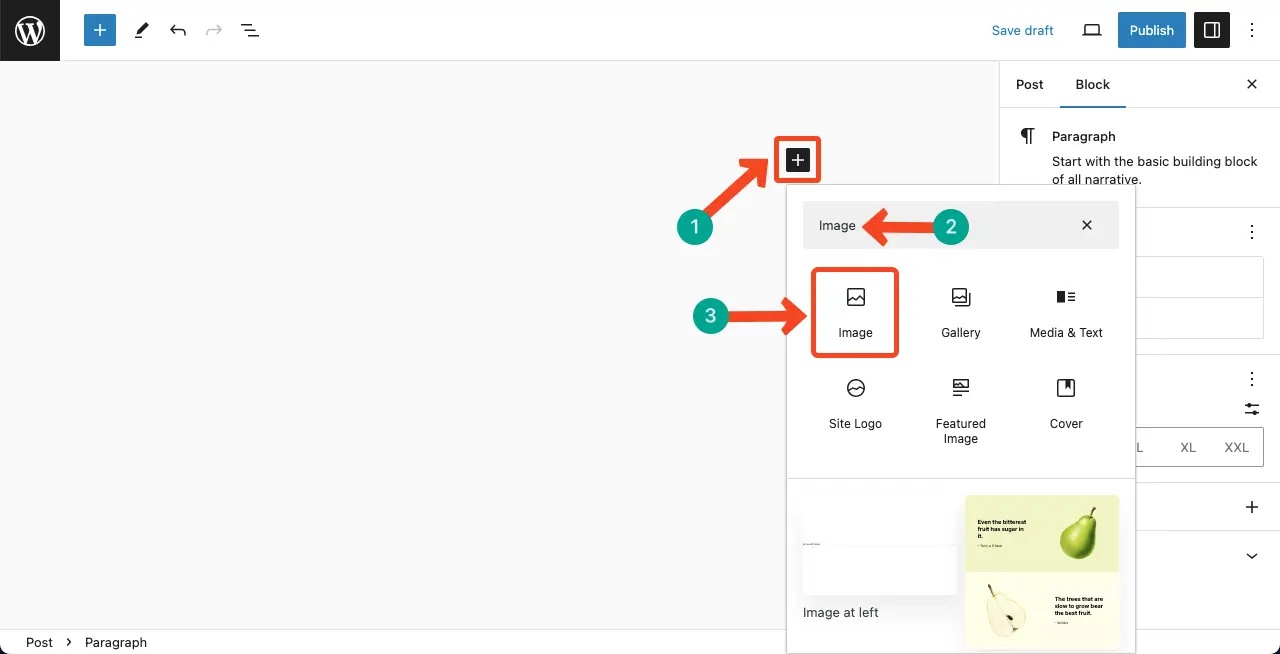
Step 02: Add Images to the Block
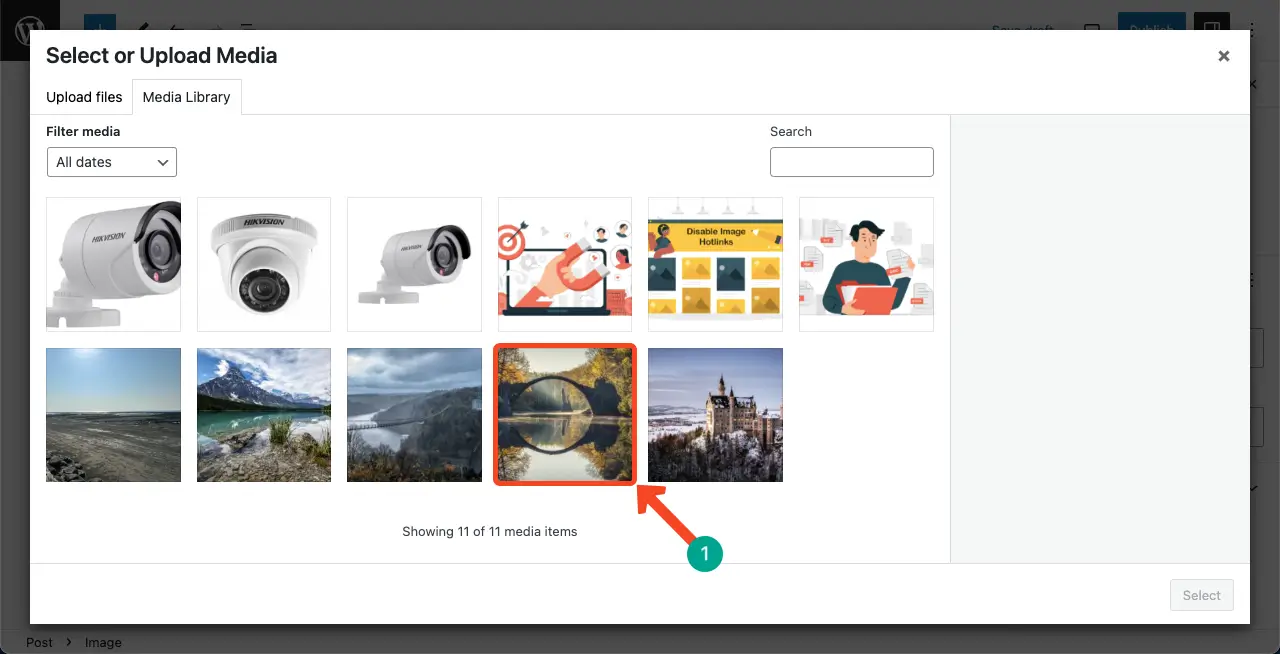
You’ll get two options after the block is added – Upload and Media Library. The Upload option will let you add images from your local or cloud drives. The Media Library will let you add images that are already in your backend.

For this tutorial, we’ll add images using the Media Library option. Click the image you want to insert.
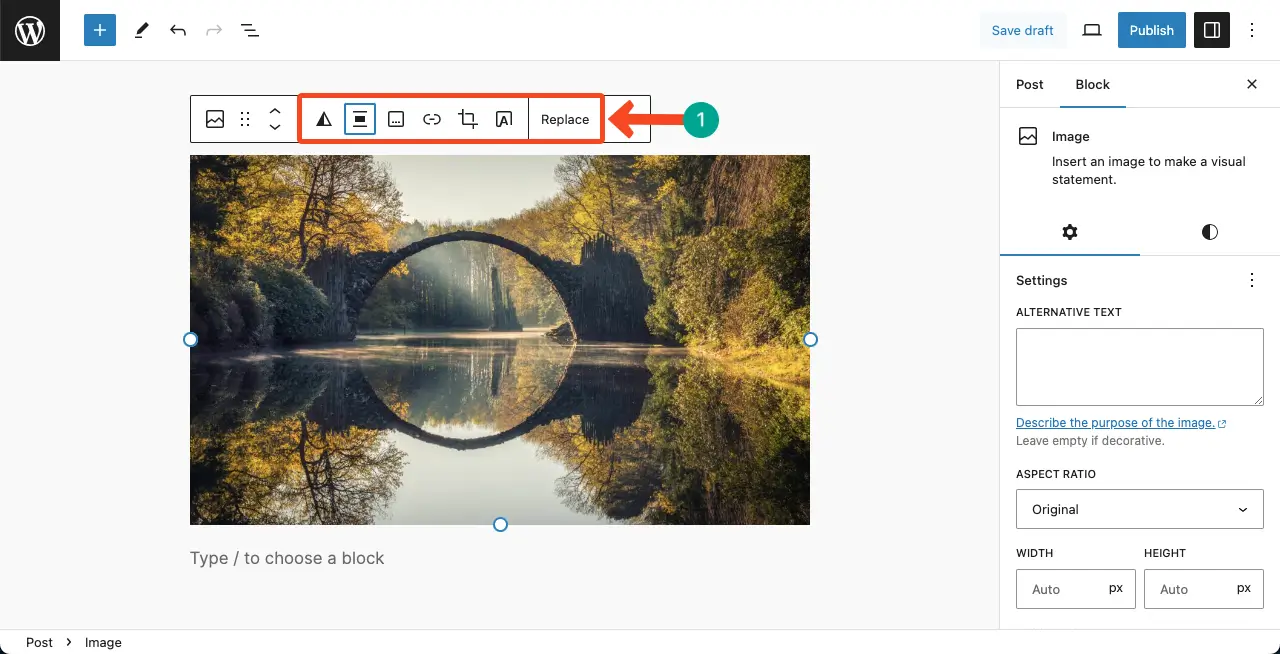
Step 03: Customize the Image on Your Gutenberg Editor
First of all, you’ll get half a dozen options on the Gutenberg toolbar to customize the image. Things you can do with the toolbar are apply the duotone filter, align, Add a caption, insert a link, crop, add text over the image, and replace it with another image.
I have covered articles on how to use all these options on the Gutenberg toolbar. I have listed the article links at the end of this post.
By keeping the circular handle icon selected, you can increase or decrease the image size by dragging.
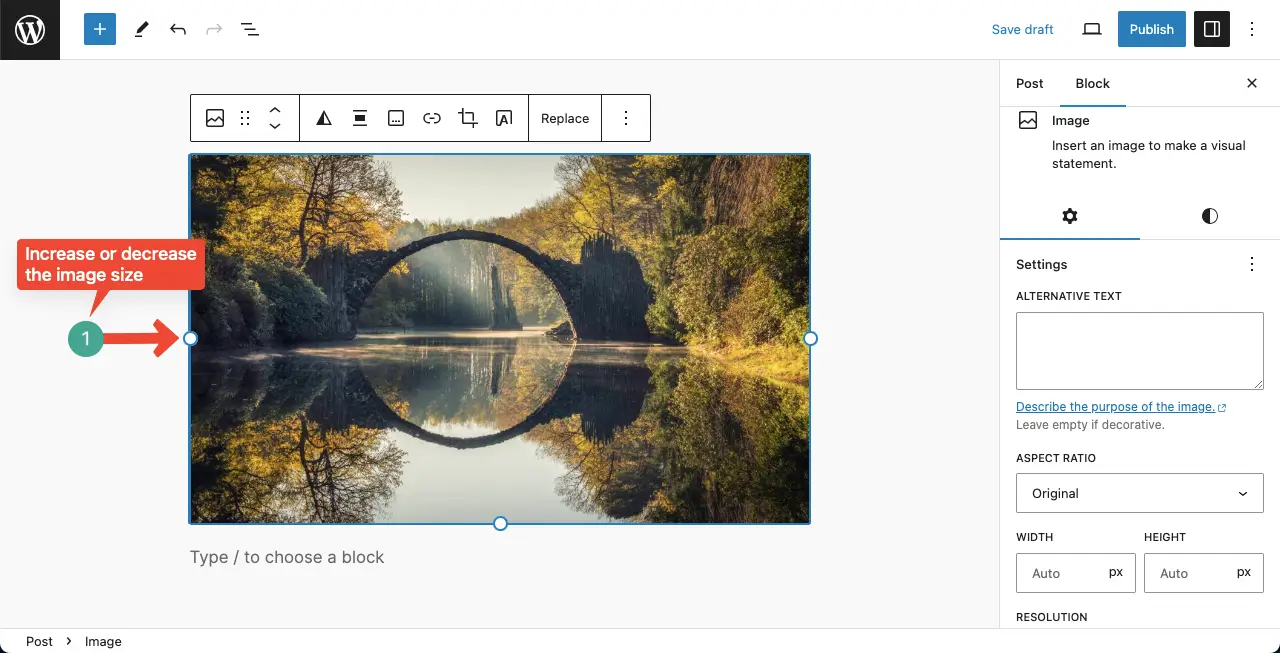
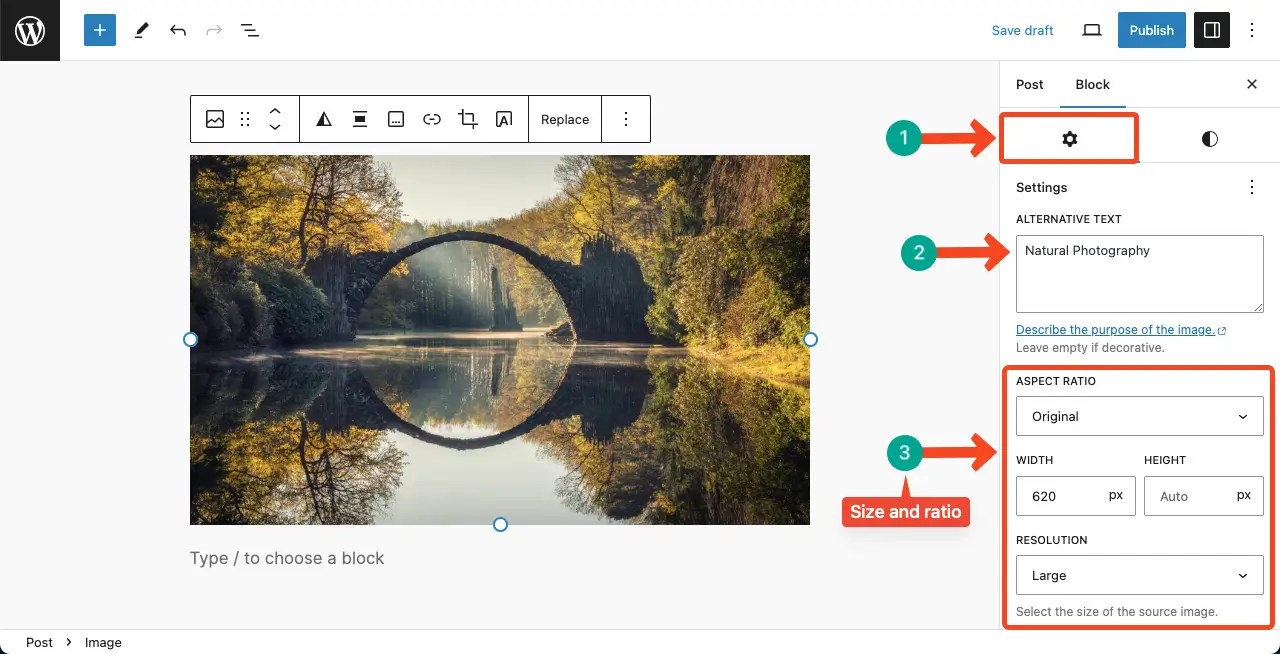
Come to the Settings tab. You can set the alternative text for the image. After that, you can set the aspect ratio, width, and resolution of the image.
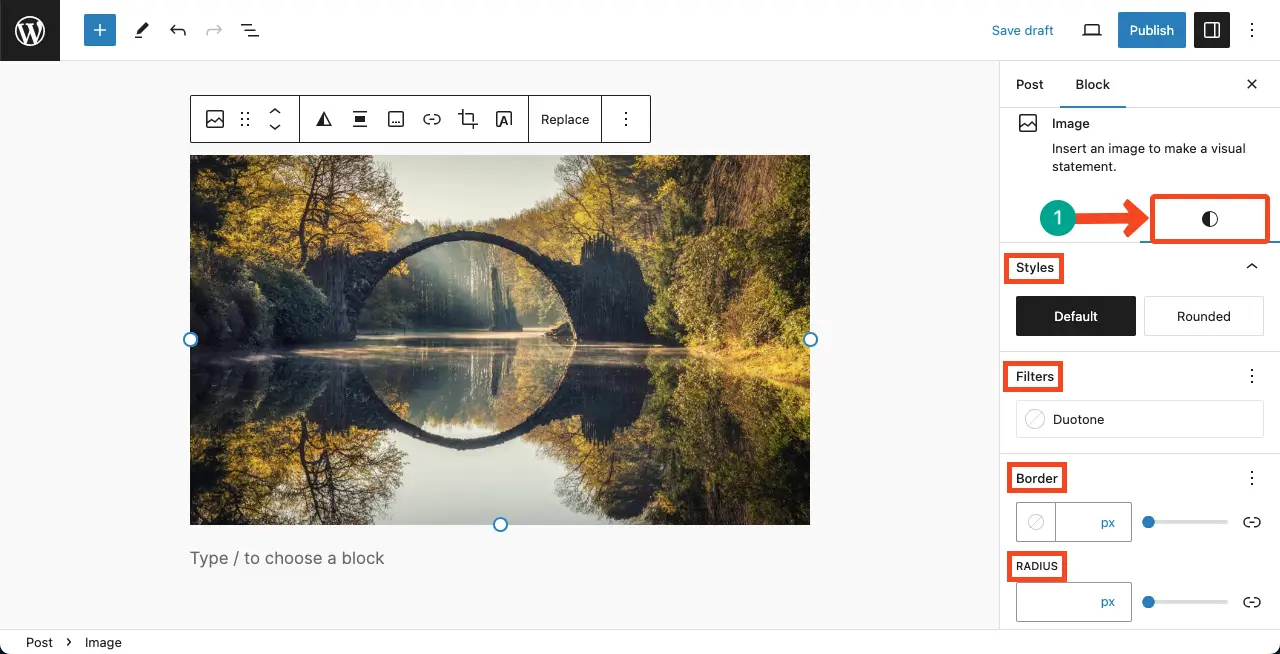
Next, come to the Styles tab. You can customize the block style, filters, border, and radius using the respective options in this tab.
Thus, you can add images to your WordPress posts and pages using the WordPress Image Block. Explore how to add alt text to images in WordPress.
Best Practices for Using the Gutenberg Image Block
Images are a crucial element for any website. Failing to use and present this element smartly can cause a loss of your website’s image. There are several issues you must consider when using the Image block and adding images to your website. Take a look at them below.
1. Choose the Right Image Format
Use high-quality images that are optimized for the web. JPEG is the most common format for photographs, while PNG is suitable for images with transparency. Consider the file size and compression to ensure fast loading times.
2. Provide Descriptive Alt Text
Alt text is important for accessibility and search engine optimization. Describe what your image represents using relevant keywords when appropriate. This will help visually impaired users understand the content of your images when they appear in search results.
3. Compress the Image Size
There are many free and paid image compression tools that you must use before uploading images to your site. By shrinking their additional weights, you can make your site lightweight and load fast, improving user experiences.
4. Consider Image Alignment
Align your images to the left, right, or center based on your content layout and design. This helps create a visually appealing and balanced presentation.
5. Link Images When Relevant
If your image is clickable and leads to another page or resource, consider adding a link to it. This can be useful for directing users to related content or external sources. Learn how to link an image in WordPress.
FAQ on How to Add an Image to WordPress Using the Gutenberg Image Block
What are the best online image compression tools?
1. TinyPNG
2. ImageRecycle
3. Ezgif
4. JPEG Optimizer
5. Compressnow
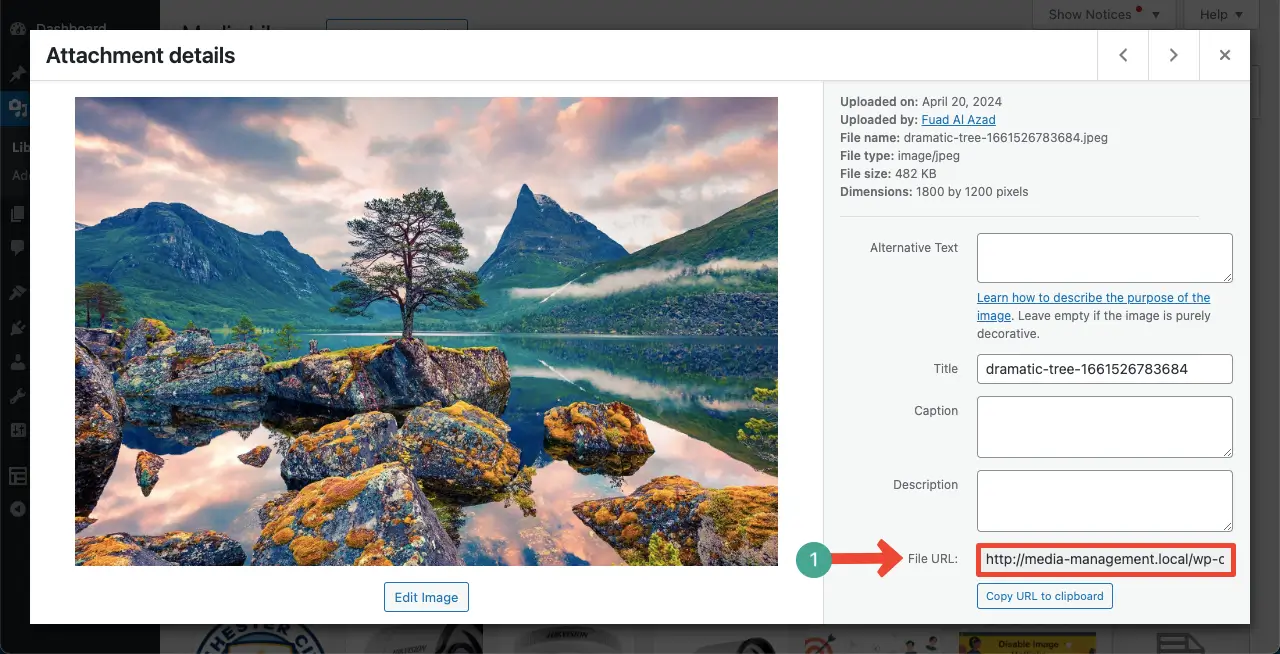
How can I change the image ULR in WordPress?
Go to WordPress Dashboard > Media Library. Find your image and click on it.
The image will open up with a new window and several options on the right side. You will get the File URL option on the right side of the image.
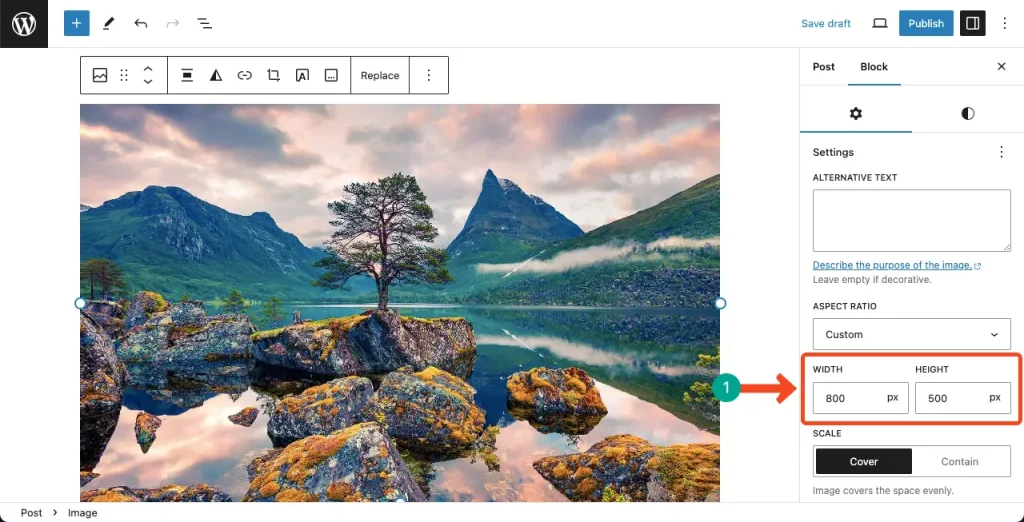
How can I change the image size on WordPress?
Add the image to the Gutenberg editor. Come to the Settings tab on the right sidebar.
You’ll see the option to adjust the Width and Height of the image. By placing your desired values to the boxes, you can change size of the image in WordPress.
What is the best image size for WordPress?
Determining the best image size for WordPress can depend on various factors, including the theme you are using and the specific requirements of your website.
However, For regular blog posts, a commonly recommended image size is 1920 x 1080 pixels, as it works well on both blogs and social media channels.
Plus, it’s important to maintain the aspect ratio of your images. Horizontal images with a ratio in the 16:9 range are often recommended for regular blog posts.
What is the full size of different types of images in WordPress?
Thumbnail = 150px
Large = 1024px
Full size = The original size of your image
Conclusion
Before ending the post, we have some suggestions for you. Optimize all your images before uploading them to keep your WordPress posts and pages lightweight. Also, images can be resized to the appropriate dimensions and compressed to reduce file size without compromising quality.
Avoid uploading multiple copies of the same image. WordPress has a Media Library where all uploaded images are stored. Instead of uploading a new copy, simply insert the image from the Media Library when reusing it in another post or page.
This helps save storage space and keeps your media library organized. Let me know through the comment section if love this post. Follow the links below to learn how to further customize images on WordPress.