We all know that visuals play a crucial part in engaging and attracting audiences to web content. This is why we tend to add different types of images to our blog posts and pages. But often our images contain unnecessary white spaces. It’s better to avoid those white spaces to keep images more meaningful.
With software like Photoshop, Canva, and Illustrator, we can easily remove those unnecessary parts by cropping. But what about when those photos are already uploaded to WordPress? Is there any way we can crop them on WordPress? Yes, there is a way.
The Gutenberg block of WordPress includes a default cropping option by which we can remove the unnecessary white space. In this article, I will guide you on how to crop an image in WordPress using this option on the Gutenberg toolbar.
What Is WordPress Crop Image?
Image cropping in WordPress refers to the process of selecting and trimming a specific area of an image to remove unwanted parts or to resize it to fit a particular aspect ratio. WordPress provides built-in image editing capabilities that allow users to crop, rotate, scale, and flip images directly within the WordPress dashboard, without the need for additional software or plugins.
Cropping an image in WordPress can be done in a few simple steps. First, you need to access the Media Library and select the image you want to crop. Then, using the built-in image editor, you can drag your mouse to select the desired area of the image.
I have explained the process methods in the following parts.
Method One: How to Crop an Image in WordPress Using the Gutenberg Toolbar
Gutenberg Toolbar comes with numerous options by which you can craft wonderful content for your website. It includes a cropping option by which you can crop any image on the editor. I’ll show you this process in this section.
Step 01: Add an Image to the Gutenberg Editor and Select the Crop Option
Add an image to your post or page editor from the local drive or your media library. The Gutenberg toolbar will instantly appear on top. You’ll see the Crop option on the toolbar. Click the Crop option.
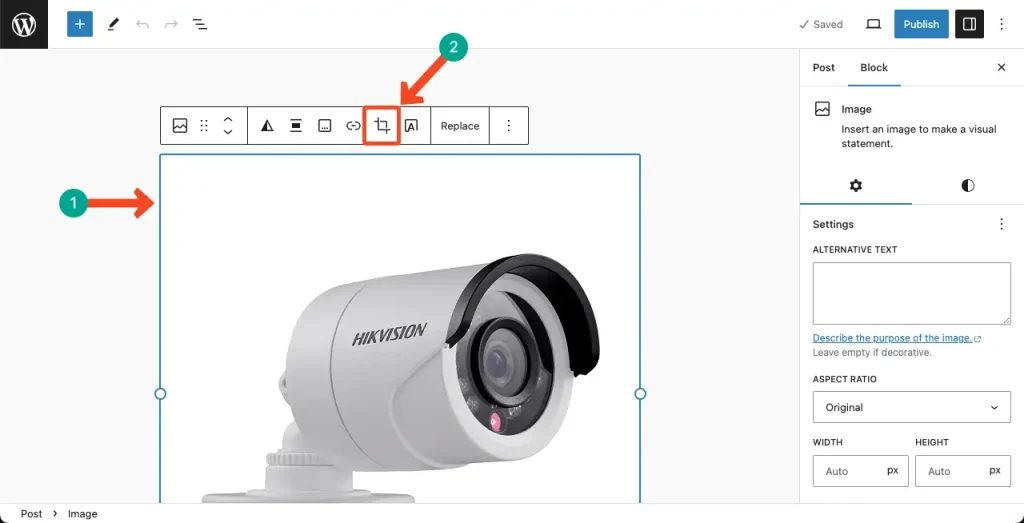
Step 02: Set an Aspect Ratio and Crop the Image
A new option named Aspect Ratio will appear on the toolbar. Click Aspect Ratio.
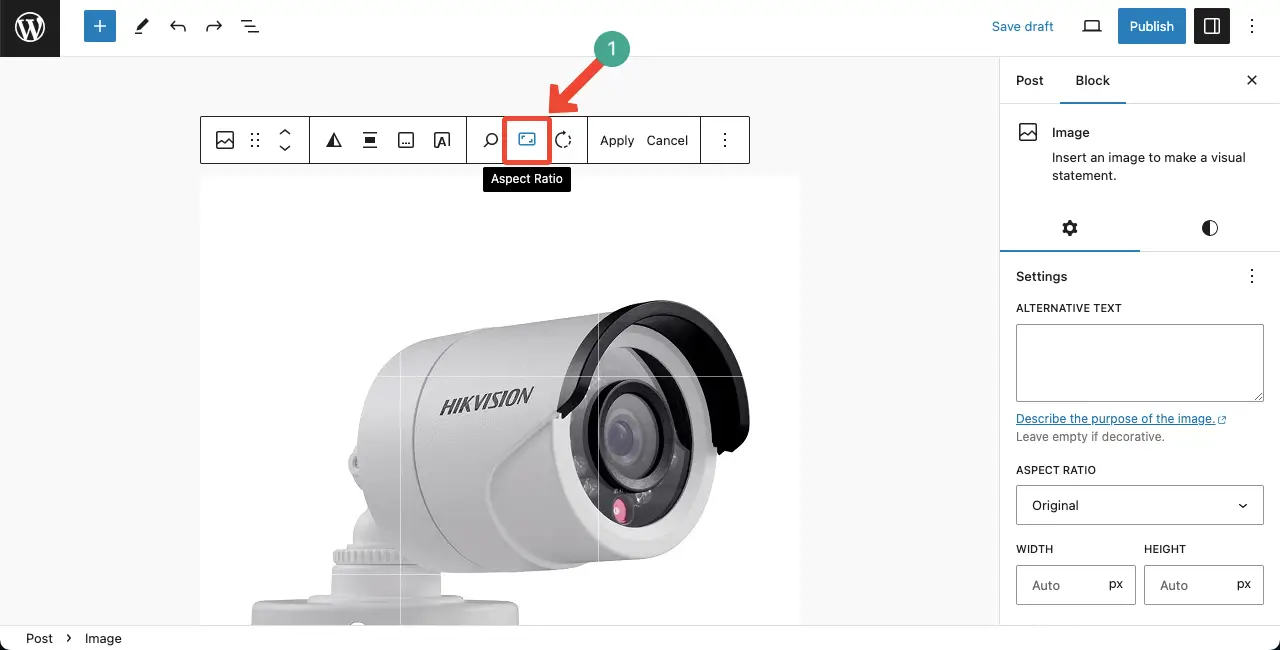
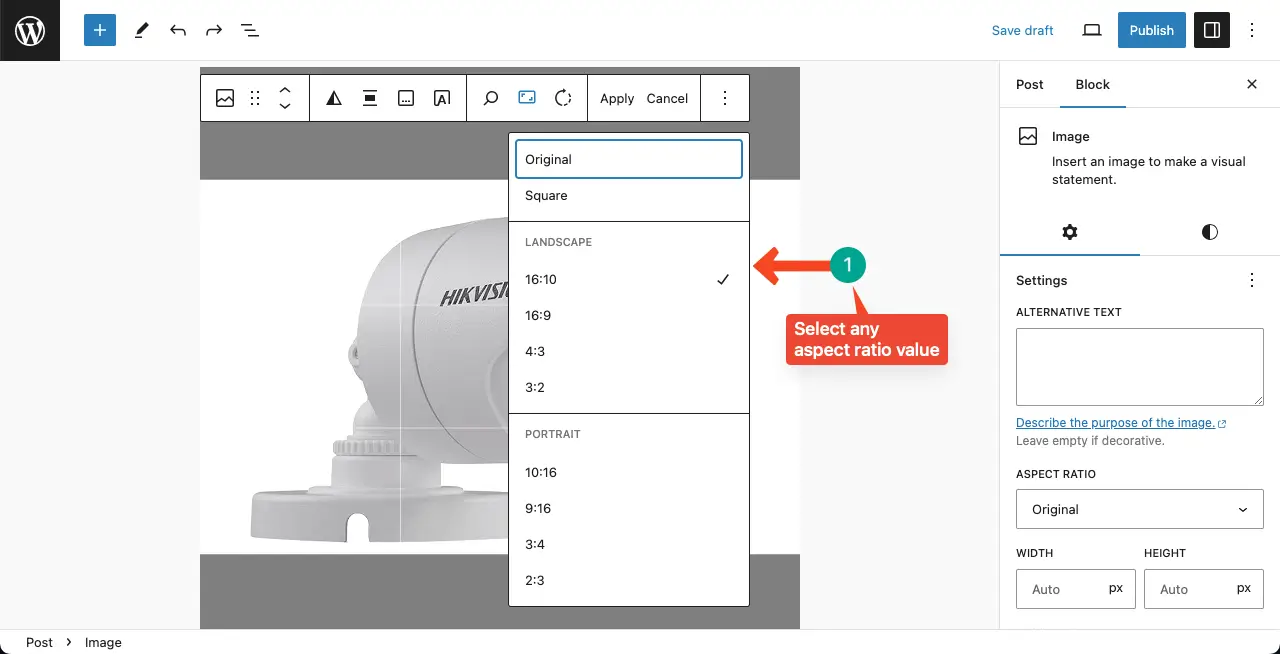
A list will appear with some default aspect ratio values. Select any suitable aspect ratio value from the list.
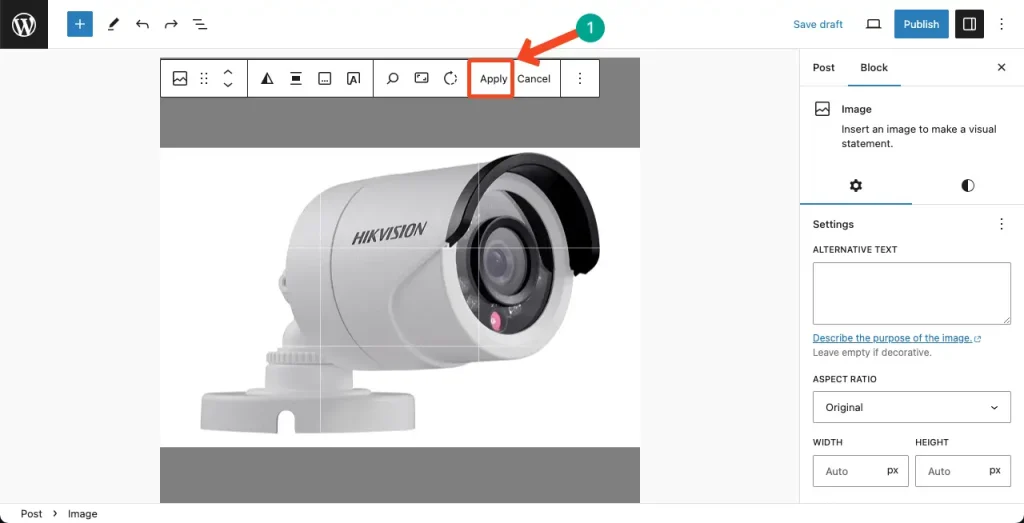
You may zoom in/out the image to fit it within the aspect ratio.
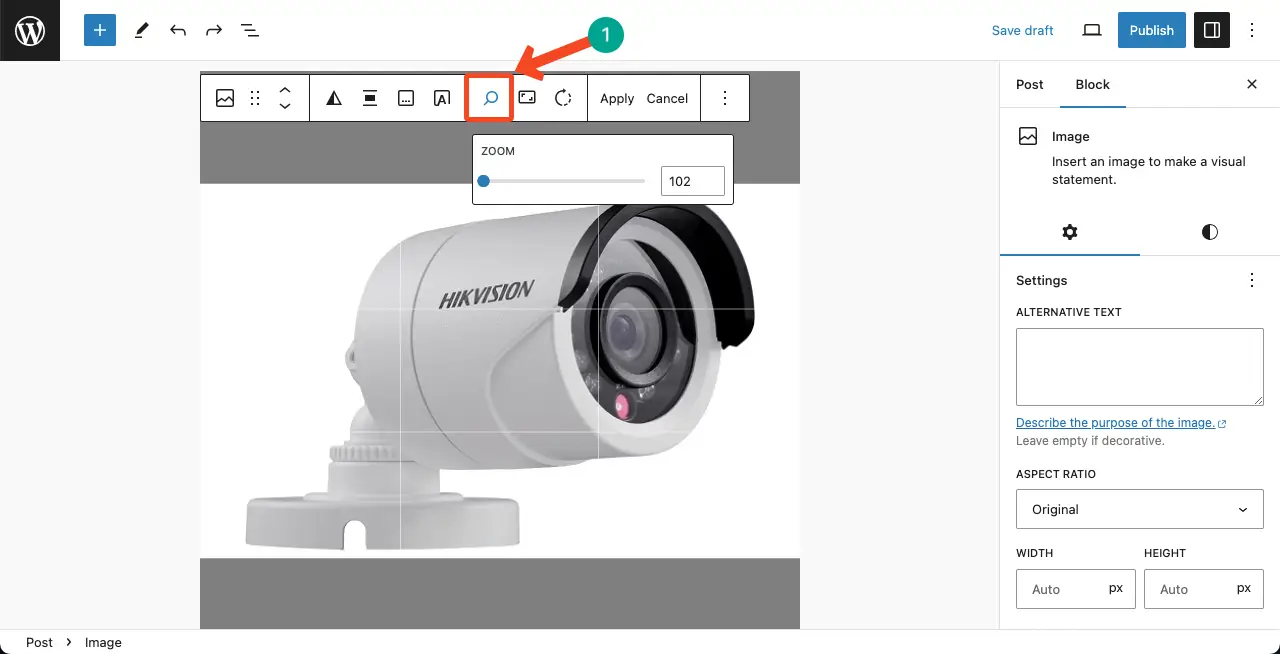
Once you are done, hit the Apply option.
Here’s a guide on how to add alt text to images in WordPress.
Step 03: Preview the Image You Have Cropped
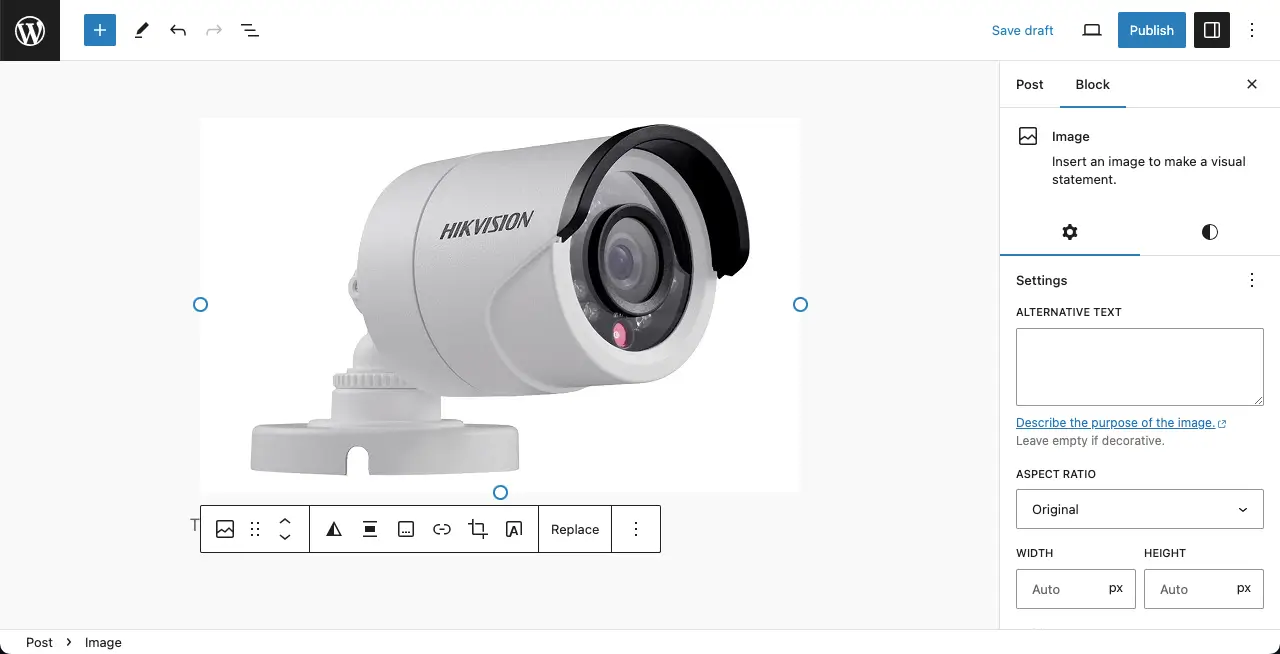
You’ll see the image has been cropped perfectly as per your aspect ratio. Thus, you can crop images using the Gutenberg toolbar on the editor.
Method Two: How to Crop an Image in WordPress from the Media Library
You can also crop your images from the media library as well and save the cropped ones as a separate copy. Check the method in this section with me.
Step 01: Select an Image in Your Media Library
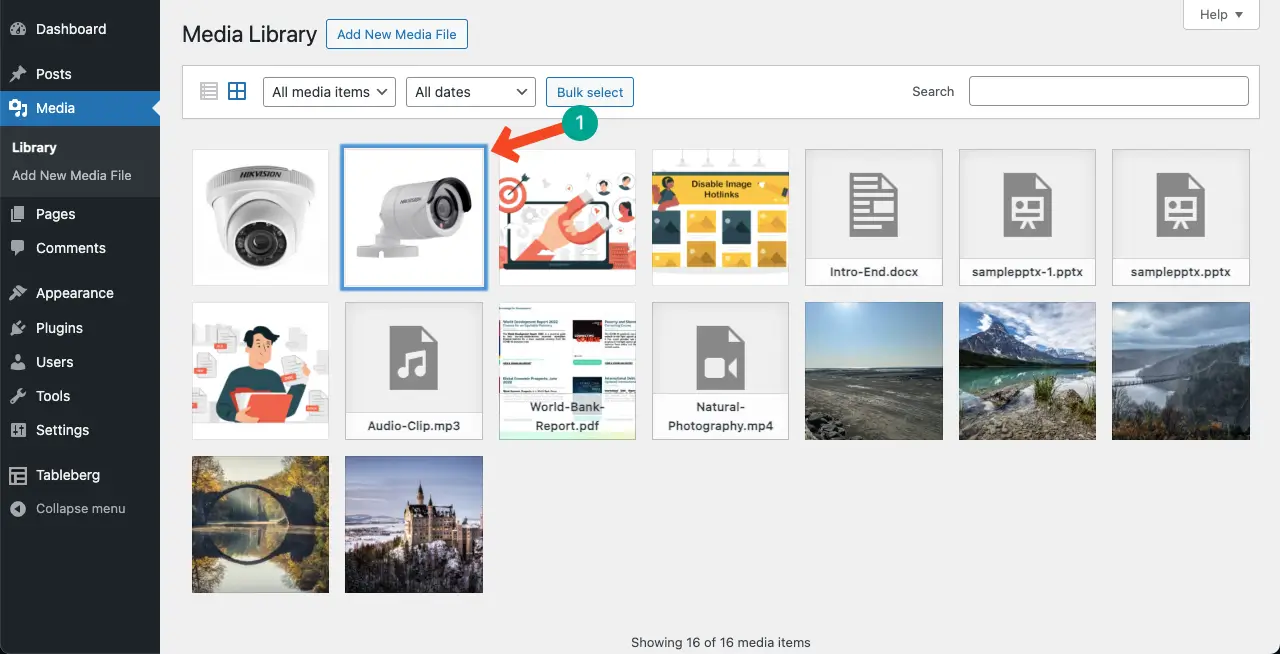
Go to your media library and select the image you want to crop. Click on it.
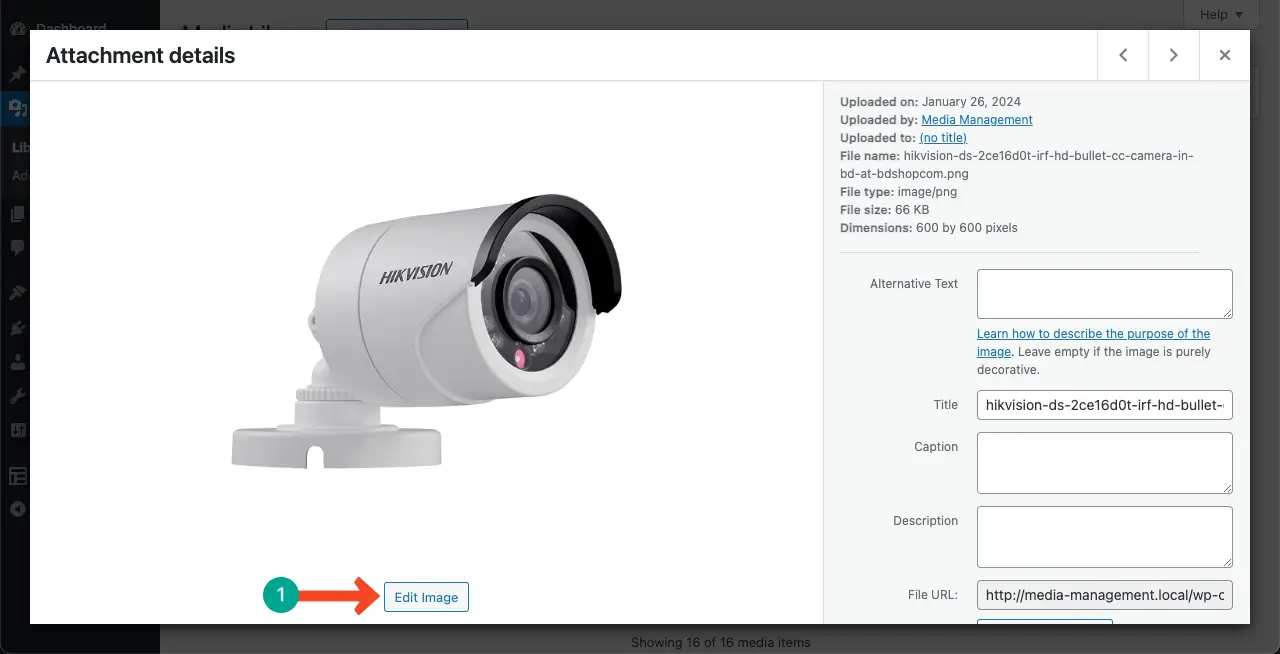
A new window will open. Click the Edit Image button.
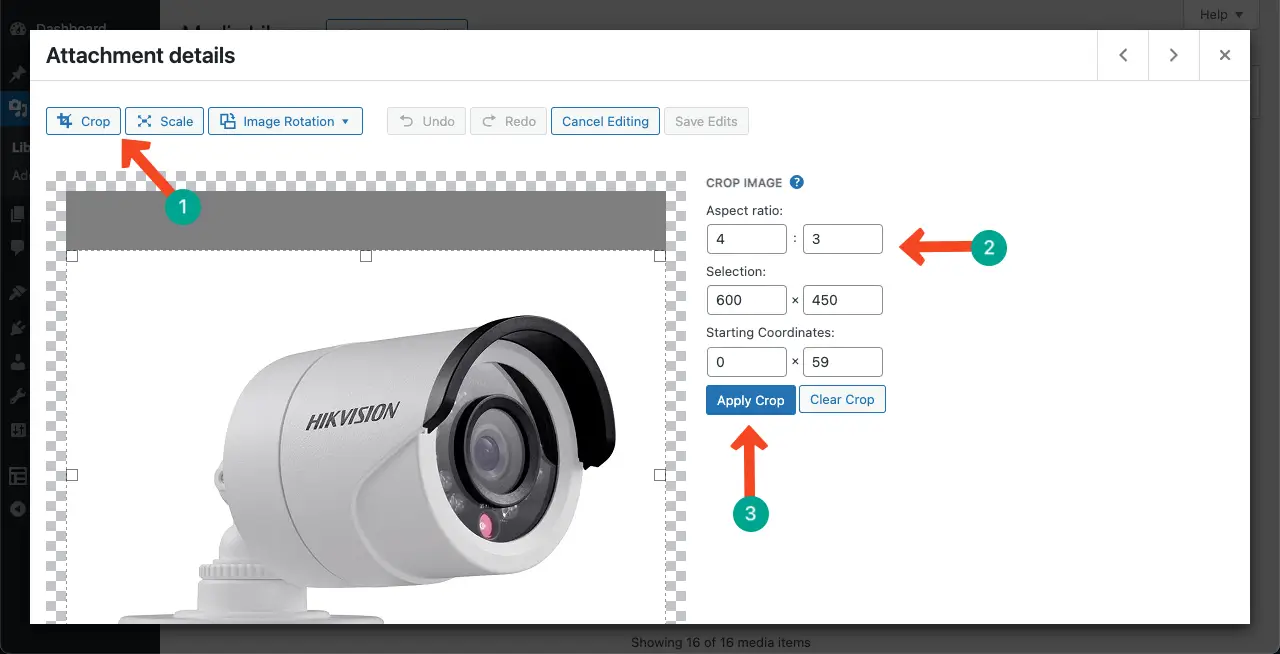
Step 02: Select the Crop Option and Set the Aspect Ratio
Click the Crop option on the top-left corner. You’ll be allowed to set the Aspect Ratio manually on the right side of the image.
Once done, click the Apply Ratio button.
Step 03: Save the Cropped Image
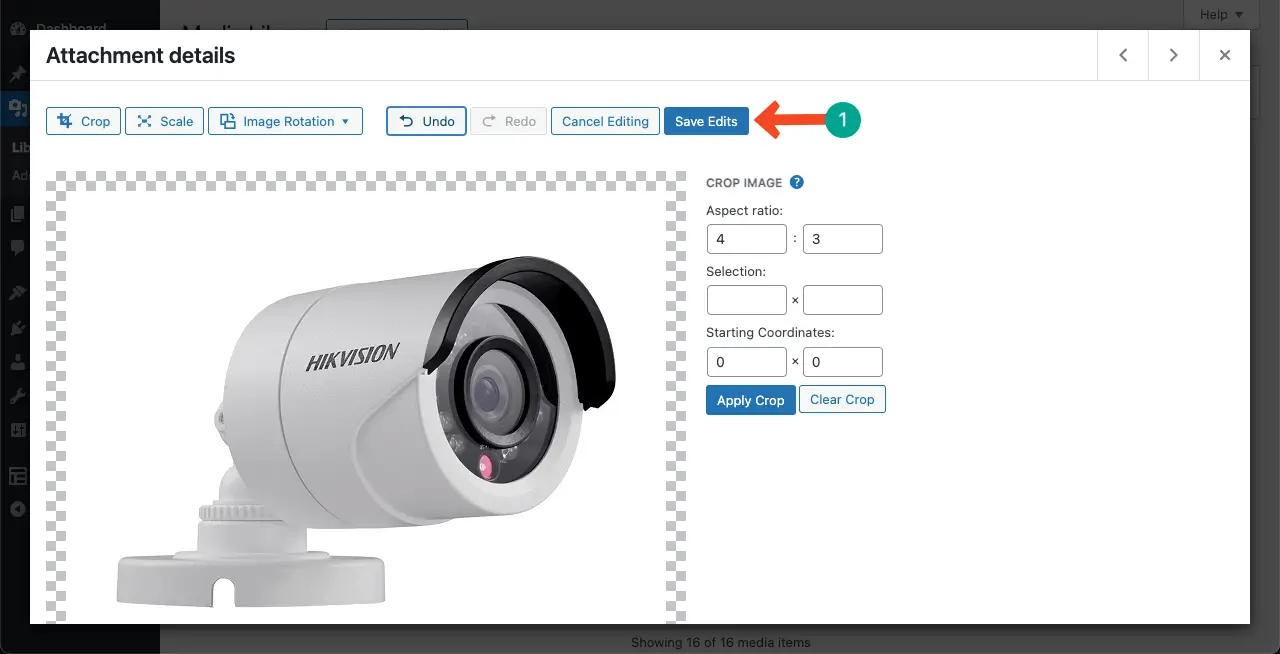
The Image will be cropped in a second. Click the Save Edit button at the end to save this image as a separate file.
Learn how to use the Duotone filter in WordPress.
Best Practices to Consider While Cropping Images in WordPress
There are several mistakes people often make while cropping images in WordPress. You must be careful when you do this with your images. Below, I have explained several best practices you must consider while cropping images in WordPress.
1. Consider Aspect Ratio
The aspect ratio is the relationship between the width and height of the image. WordPress allows you to specify the aspect ratio while cropping, ensuring that the image maintains its proportions. This is particularly useful when you want to crop images for specific purposes, like thumbnails or fitting images into a specific layout.
2. Preserve Image Proportions
To maintain the original proportions of an image while cropping, you can hold the shift key while resizing your selection. This ensures that the image doesn’t get distorted and remains visually appealing.
3. Use the Buil-in Image Editing Tool
WordPress provides built-in image editing tools that allow you to crop, rotate, scale, and flip images. These tools are accessible through the Media Library and offer a convenient way to make quick edits to your images without the need for external software or plugins.
4. Consider Image Compression
Along with cropping, it’s important to optimize your images for web performance. Consider using image compression techniques or plugins to reduce the file size of your images without compromising their quality. This helps improve website loading times and overall user experience.
5. Consider Automation for Bulk Image Collection
For websites with a large number of images, manually cropping each image can be time-consuming. Consider using automation tools or plugins that can streamline the cropping process and save you valuable time.
Conclusion
Hope after reading this article, you won’t have to depend on third-party tools for cropping your images before uploading them to WordPress. You can do it right on your WordPress site.
The Gutenberg Toolbar is a powerful toolset. You can do so many things to your content using the tools on this toolbar. Let’s take a detailed look in the Gutenberg Toolbar.
