The WordPress Gallery Block helps you display multiple images collectively in a single location on your post or page, customizing the layout and appearance of the gallery. Users can scroll or click on particular images to see them separately.
The Gallery block could be a wonderful option for eCommerce websites. It will enable you to showcase the images of any product from different perspectives in a single location. I’ll show you how to create a photo gallery in WordPress using the default WordPress Gallery block.
Step 01: Add the Gallery Block to Your Post or Page
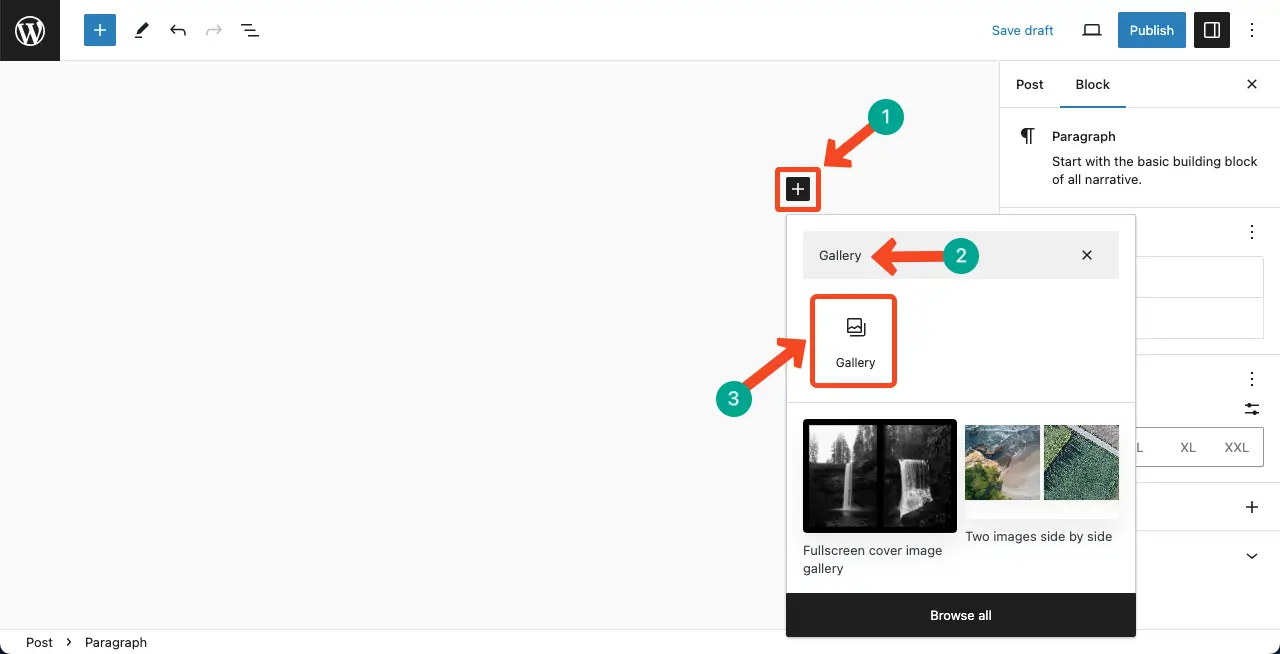
Log in to your WordPress dashboard. Open a new post or edit an existing one. Click on the (+) button to add a new block.
Search for the Gallery block by typing it in the block library. Click the block to add it to your post or page after it appears below.
Step 02: Add Images to the Gallery Block
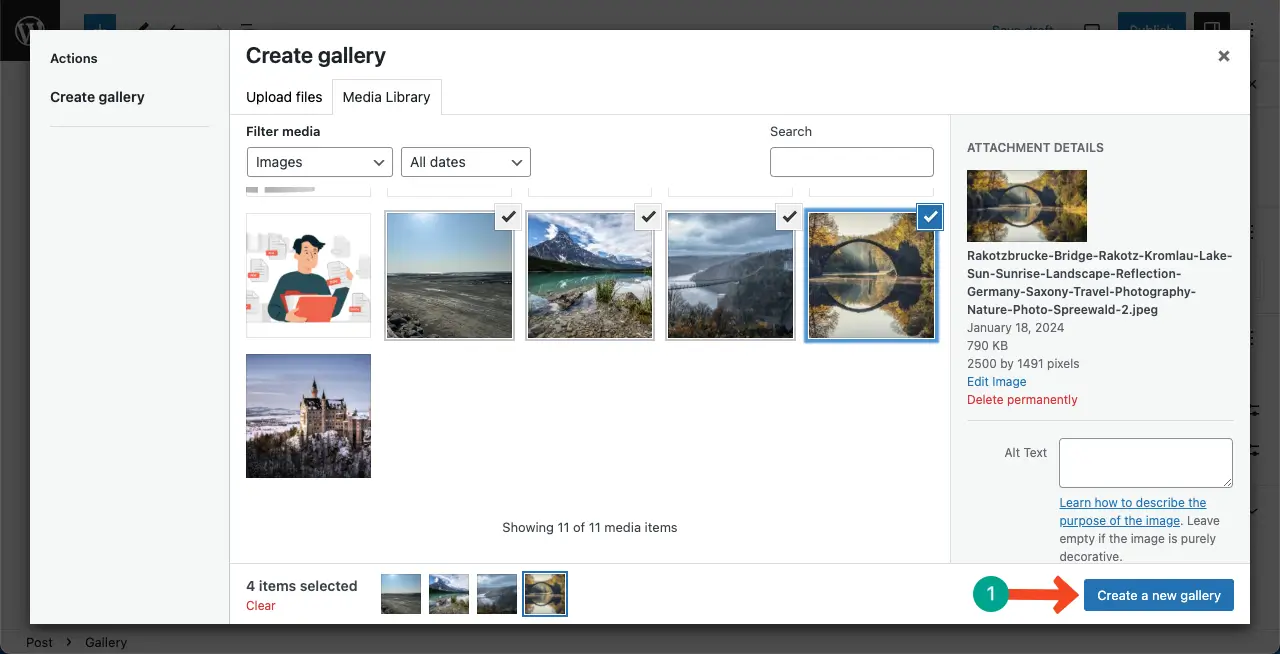
Click the Upload button to add images from your local/cloud drives. Or, select Media Library to add images from your backend if they already exist there.

We’ve selected the Media Library option for this tutorial because we already have some images in the backend. Select the images and hit the Create a new gallery button at the end.
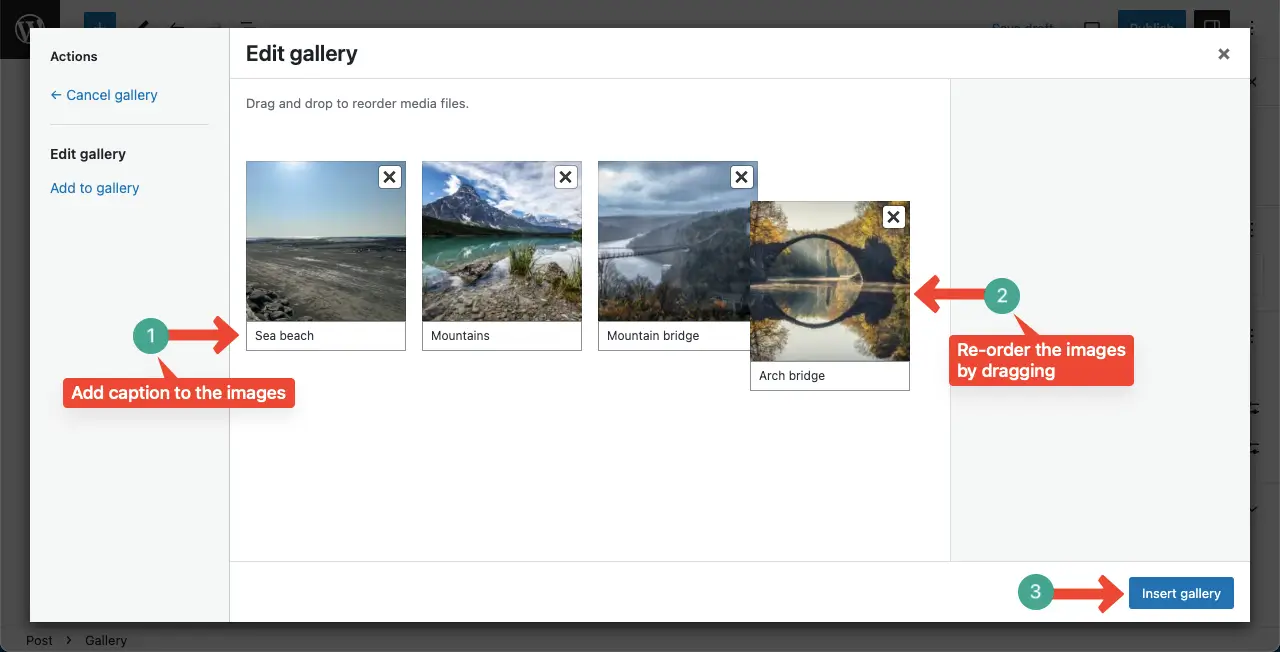
It’s better if you add a caption for each image. This will help you in SEO as well. You’ll get the caption-adding option below each image. You can also re-order images by dragging them.
Once your configuration is done on this page, hit the Insert Gallery button.
Step 03: Customize the Gallery Images on the Gutenberg Editor
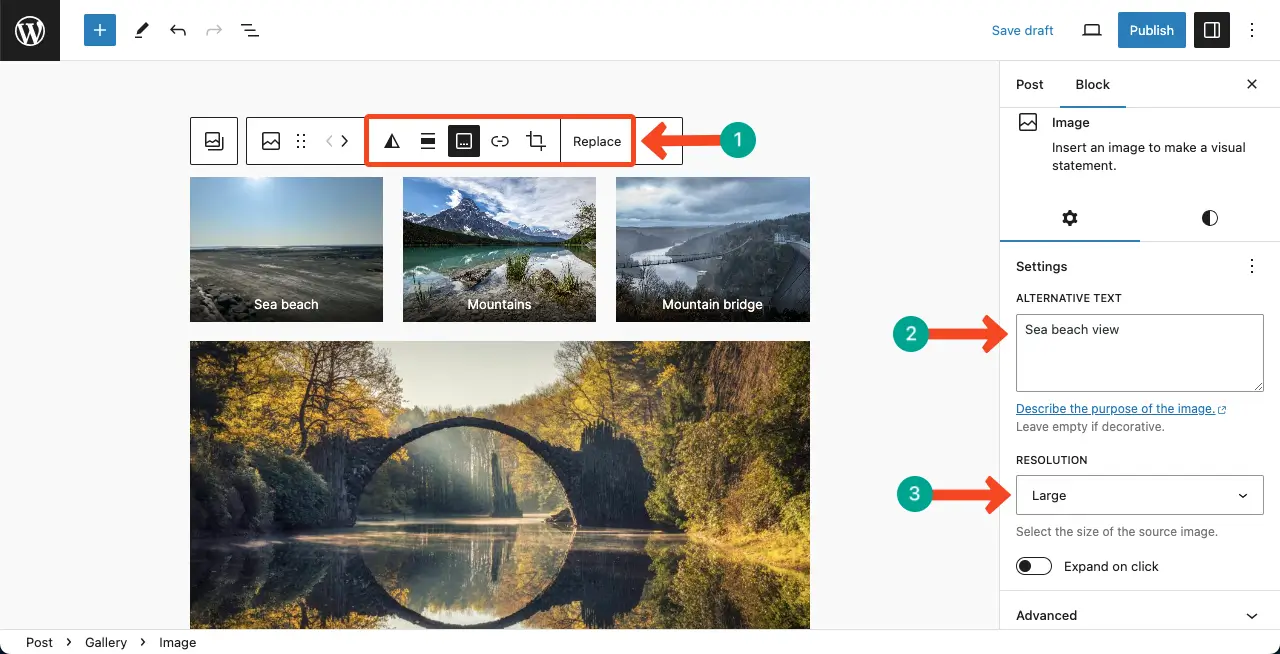
Your photos will be displayed on the editor in a few seconds. Now, you can further customize them separately. For example, select an image you want to customize by clicking on it.
The Gutenberg toolbar will appear on top. You’ll see Duotone, Align, Remove/Add Caption, Insert Link, Crop, and Replace options. Using them, you can apply respective customizations.
After that, you can add alt-text for each image on the Alternative Box on the right sidebar and change the photo resolution. Remember, caption and alternative text aren’t the same thing. So, you must add the alternative text here for images.
Note: I have already covered articles on each option on this website explaining how to use them. I’ve linked those articles at the end of this post.
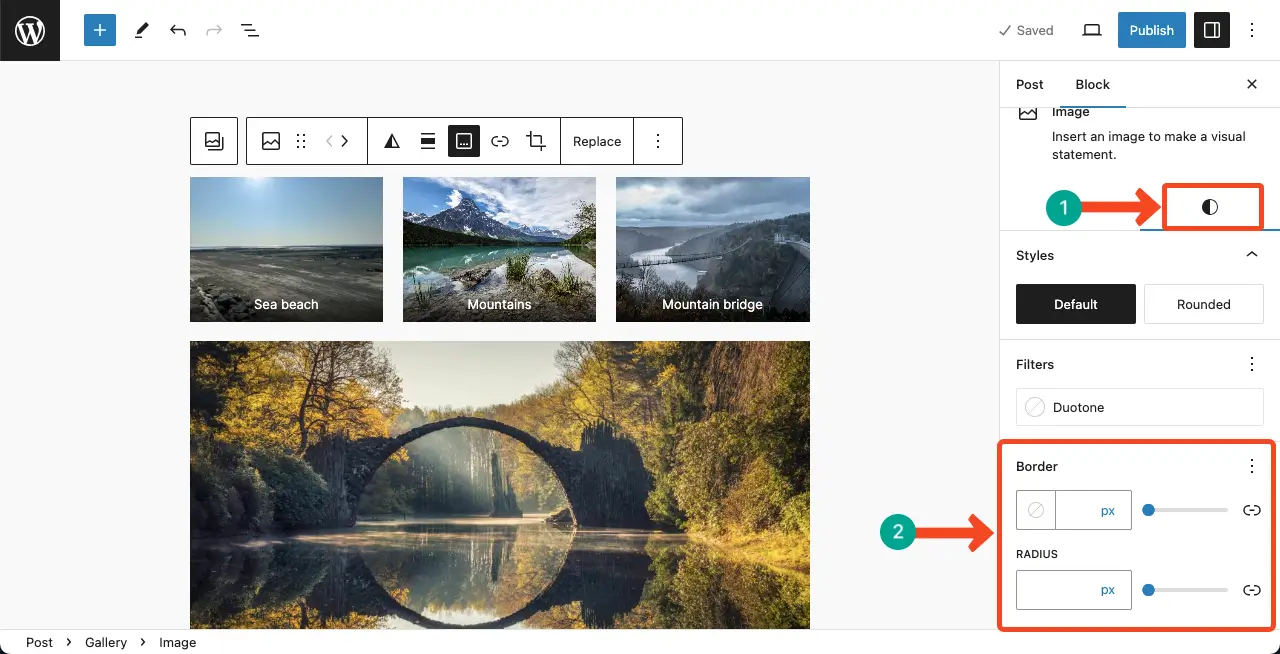
Step 04: Customize the Gallery Photos’ Layout
Come to the Styles tab. You can apply Duotone to your images from this tab as well. Alongside, you can change the border and radius for each image.
Thus, you can create a photo gallery on your website using the WordPress Gallery block. Learn how to add alt text in WordPress.
Best Practices in Using the WordPress Gallery Block
I will now cover some best practices for using the WordPress Gallery block by which you can use this block more efficiently for better outputs. Keep reading.
1. Optimize Images
Optimize all the images before uploading them to your site. By optimization, you can shrink the unnecessary weight of the images. This can help load your website at a good speed.
2. Number of Columns
The Gallery block allows you to display your images in multiple columns. You can select between one and eight columns, and the images will automatically arrange themselves into the configuration. Experiment with different column settings to find the layout that works best for your gallery.
3. Crop Images
Enabling the ‘Crop images’ feature is recommended, especially when you have images of various sizes and shapes. This feature ensures that your gallery looks clean and consistent by cropping images to a uniform size.
4. Customization
The Gallery block provides options for customization. You can adjust settings such as image size, colors, and alignment to match your website’s design and style. Take advantage of these customization options to create visually appealing galleries.
5. Use a Gallery Plugin
Consider using a gallery-specific plugin to enhance the functionality and features of the default WordPress Gallery block. There are several plugins available that offer additional options for creating dynamic and interactive image galleries.
Conclusion
With the default WordPress Gallery Block, you can display your images in a single layout. But there are many popular gallery types, like horizontal, vertical, and mosaic, which aren’t possible to create with this default block.
Remember to regularly update your WordPress installation and plugins to ensure compatibility and access to the latest features and improvements. By following these best practices, you can create visually stunning and engaging image galleries on your WordPress website.
Let me know if there’s anything else I can assist you with! Stay tuned and have a nice day.