
After opening any image file on a mobile or desktop device, you can explore the previous and next image files serially by using the Next and Previous options.
By using the WordPress next post block, you can serially explore all the next posts after entering any specific post. That’s why you no longer have to come to the blog archive page and open the next post.
Through this article, I will present how to add and use the next post block in WordPress.
What Is the WordPress Next Post Block in Gutenberg?
The WordPress Next Post Block in Gutenberg is a specific block that allows web users to keep navigating the following posts published in an orderly manner.
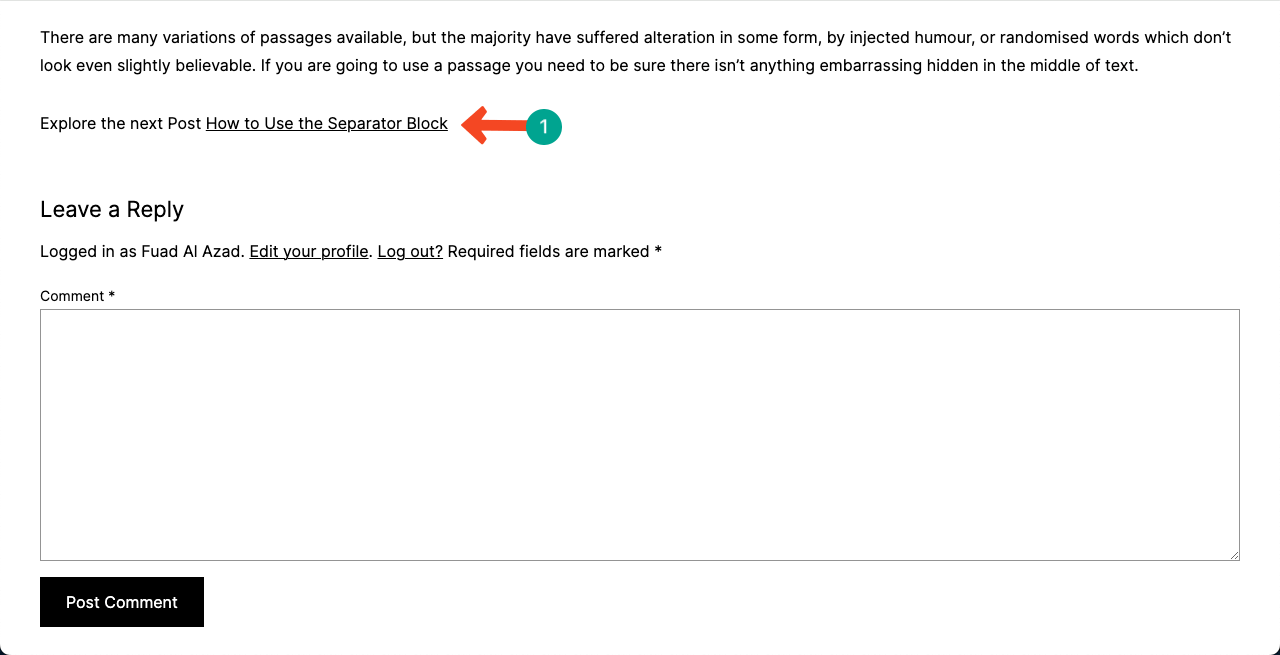
By inserting the Next Post block into a post or page, you can display the next post link that directs readers to the following posts/pages.
This feature encourages readers to explore more of the website’s content and offers a seamless transition between different pieces of information.
How to Add and Use the WordPress Next Post Block in Gutenberg
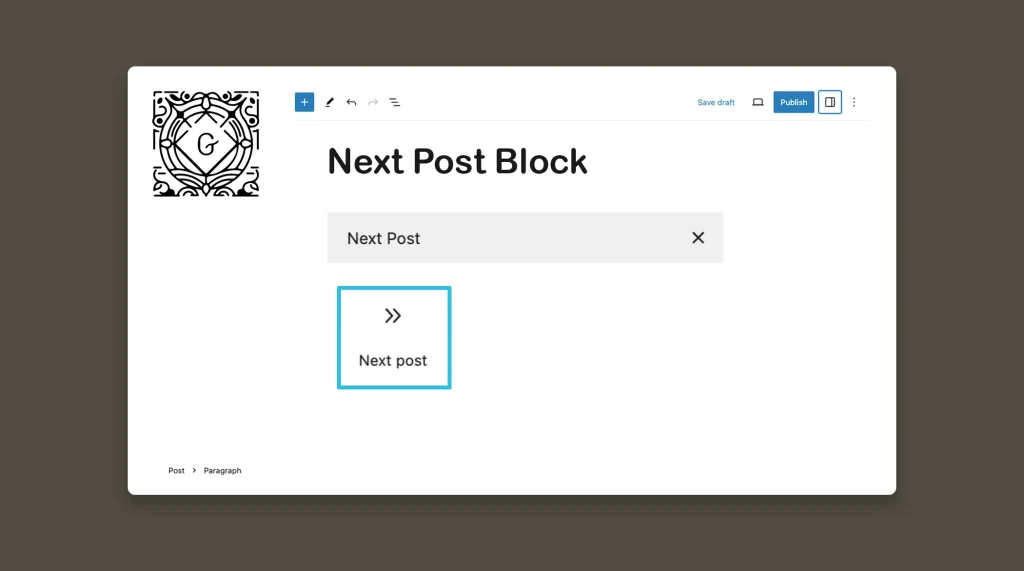
The Next Post block is a default Gutenberg block which you will find in the block library.
Here is a step-by-step guide on how to add and use the WordPress Next Post Block in Gutenberg.
Step 01: Open a Post and Add the Next Post Block
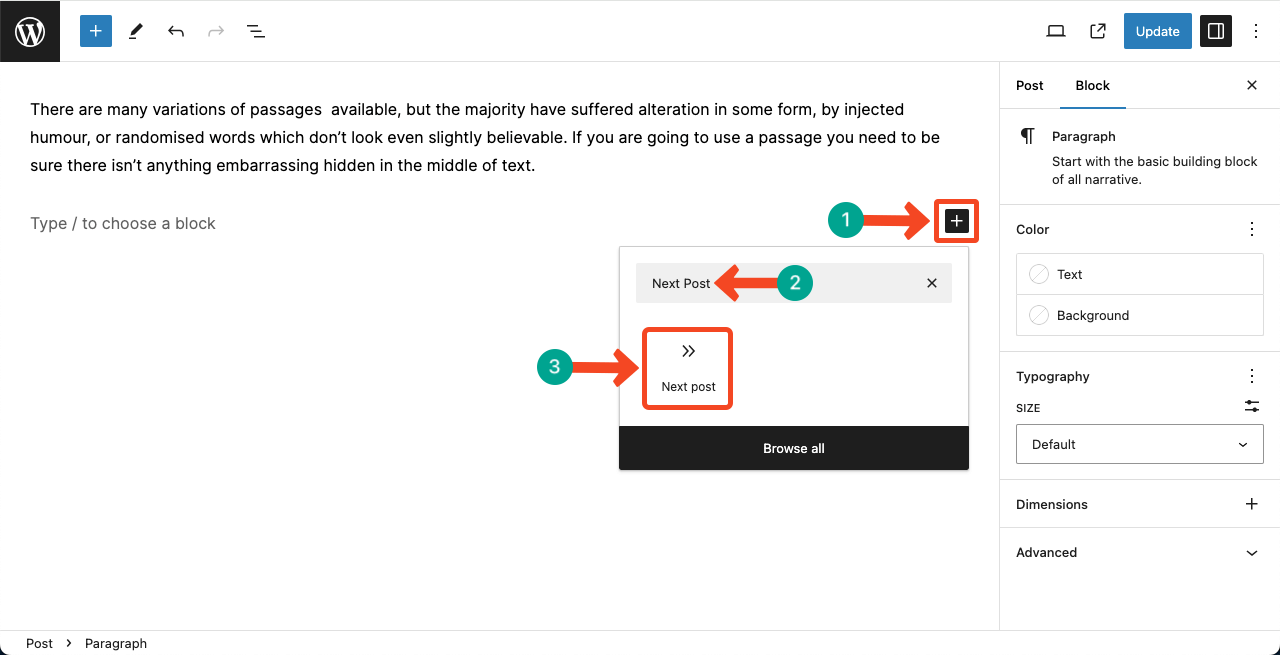
Open the post where you want to add the block. To add the Next Post block, click on the plus (+) icon to open the block library.
Search for the Next Post block in the block library. Or use the shortcut “/next” to directly insert the Next Post block.
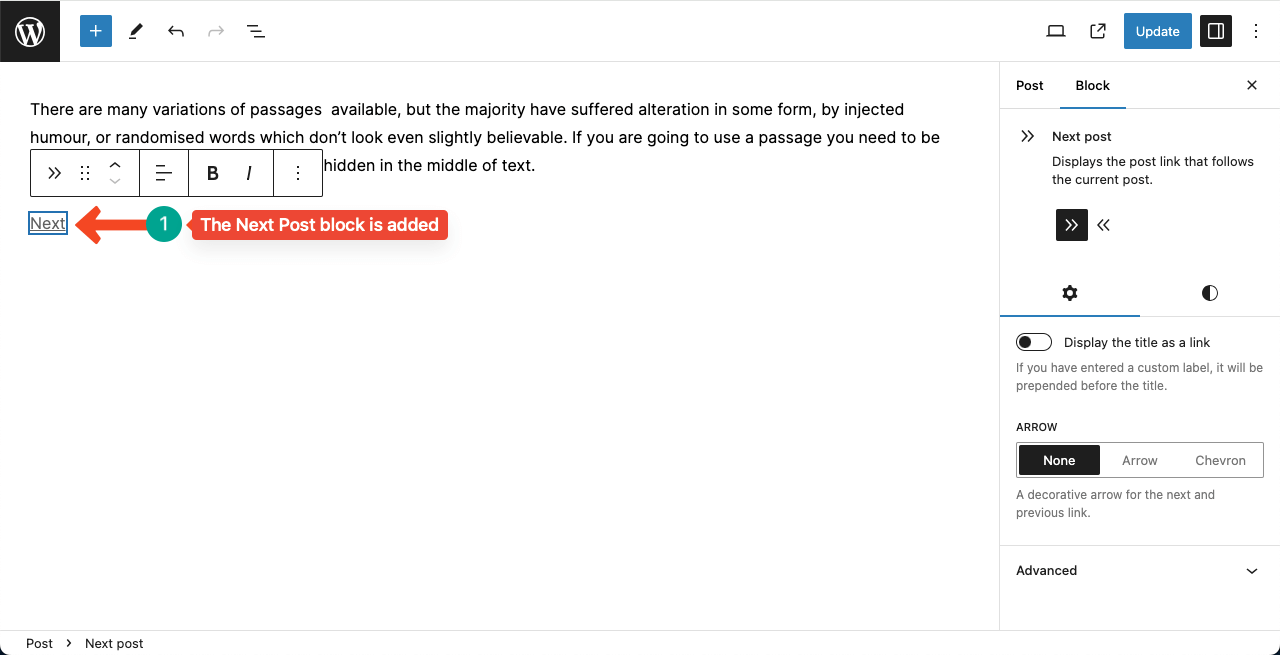
You can see the WordPress Next Post block has been added to the post instantly.
The block automatically displays a link that can take you to the next post once clicked.
Step 02: Write a Copy for the WordPress Next Post Block
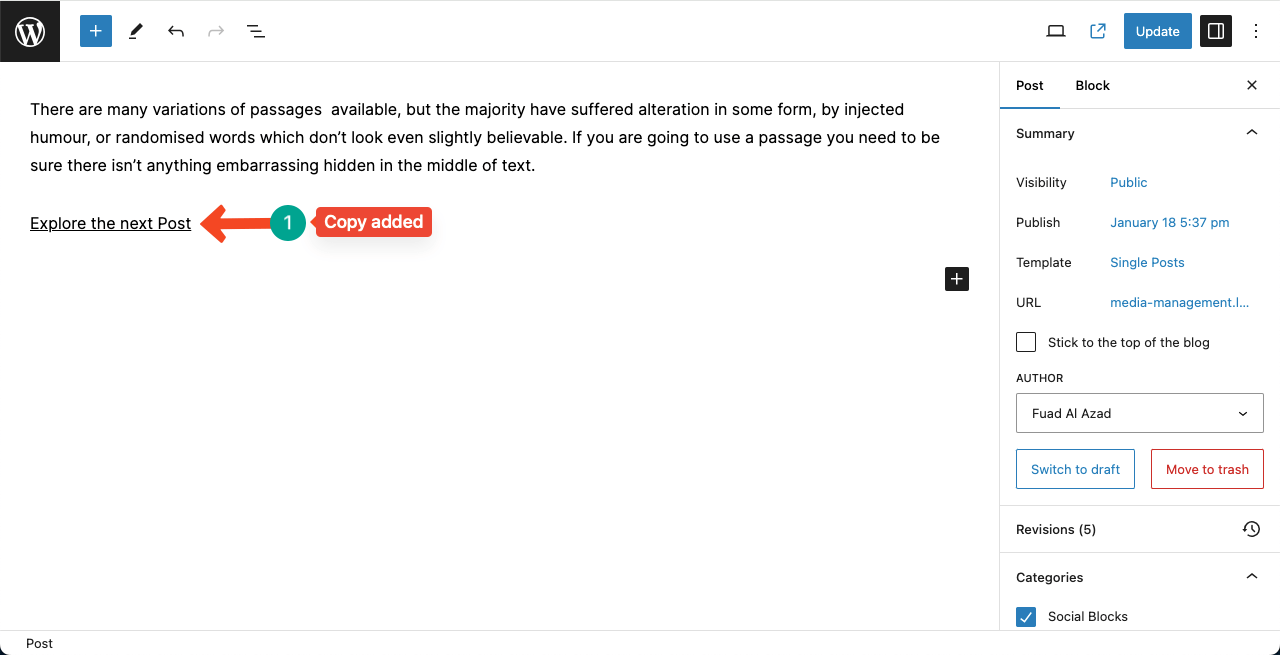
Place your cursor on the Next Post block. This will allow you to write a copy for the block.

You can see that I have added a copy to the block.
Step 03: Configure Settings of the WordPress Next Post Block
Come to the Settings tab on the right sidebar. Toggle on the option ‘Display the title as a link.’
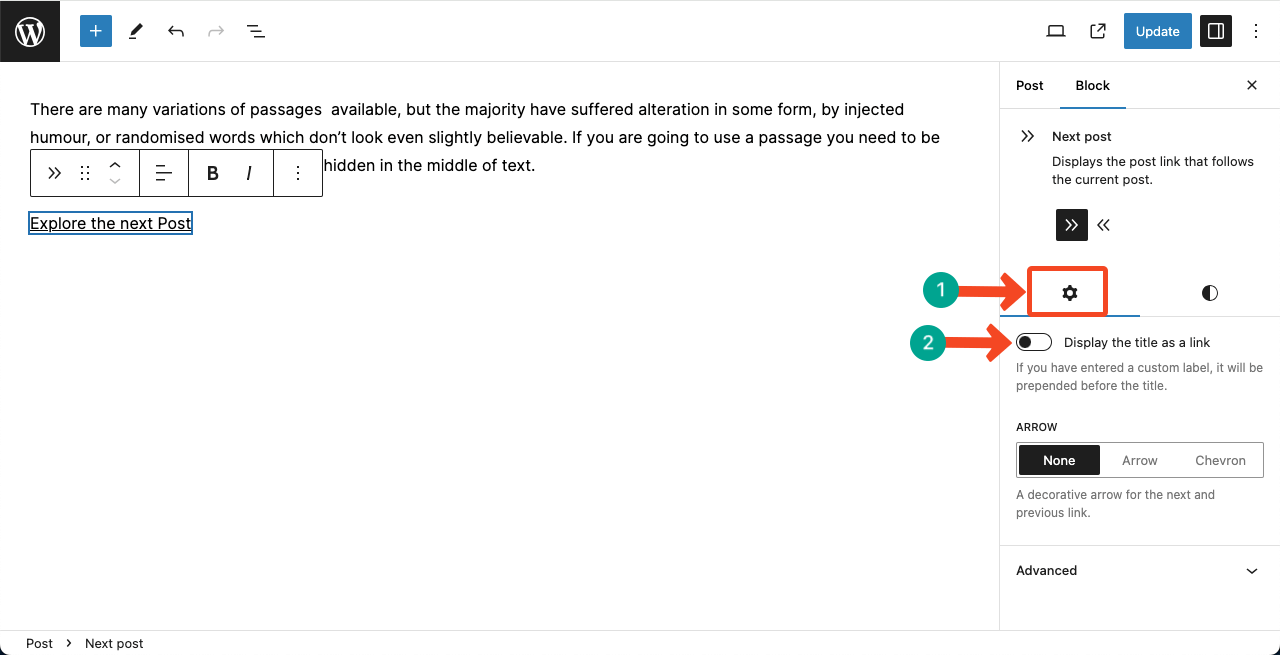
Toggling on this option will showcase the next post name with a clickable link within the block. You’ll see the blog post’s name only in the frontend.
From the Arrow section, you can add an arrow sign to the WordPress Next Post block.
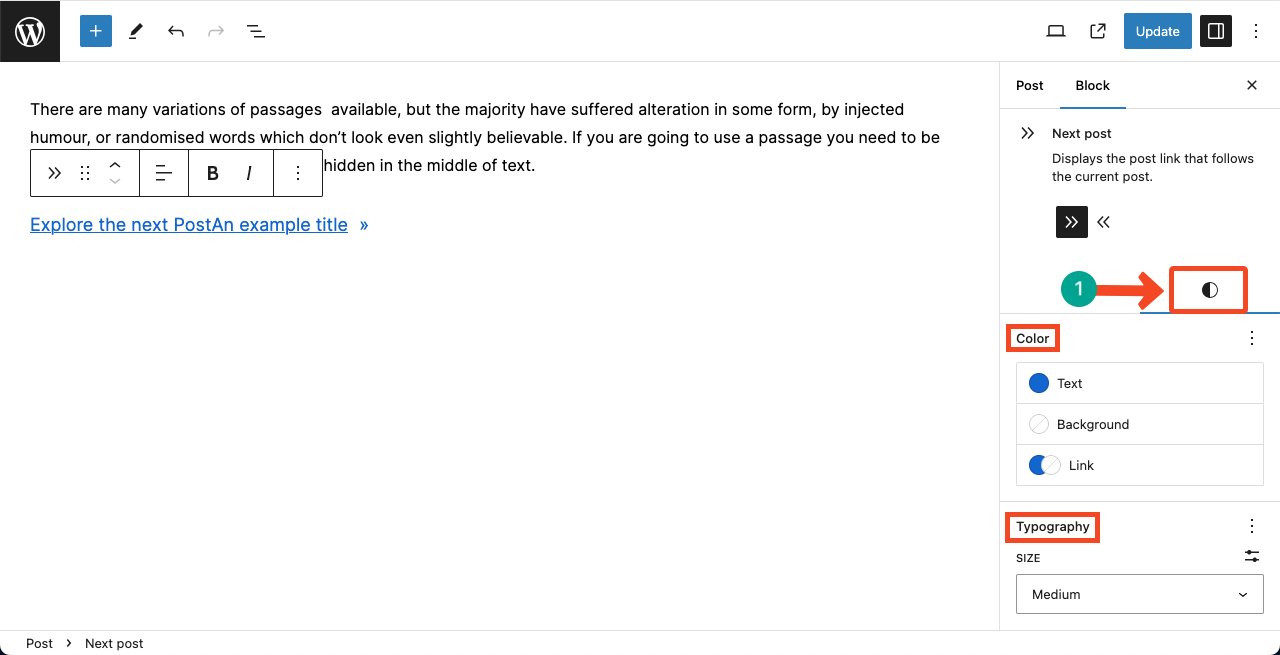
Step 04: Stylize the WordPress Next Post Block
Next, come to the Styles tab. You can define the block text color, background color, link color, and typography.
Thus, you can add and use the WordPress Next Post block in the Gutenberg editor.
Conclusion
Remember, if you add this block only to a single blog post, it will not appear in other blog posts. If you want the block to appear on all posts, you have to add it to the single blog post template.
I will show you how to create and design the single blog post template in WordPress in the future. But for now, keep exploring the Gutenberg blocks with me.
