The Paragraph is one of the most fundamental blocks in WordPress. It allows us to add text to posts and pages, serving as the main body of the content. Whenever you open a post or page on WordPress, you’ll get the paragraph block first in the editor.
Without the Paragraph block, you cannot curate new content and publish it for your audiences. In this article, I will show you how to use the WordPress Paragraph block in WordPress with a detailed guide.
What is the WordPress Paragraph Block?
The WordPress Paragraph block allows you to add and format text content in your WordPress posts and pages. It is the default block type for adding text to the editor, making it the block you will likely use the most. You can use various formatting options on the block to customize the appearance of your texts.
These options include basic formatting like bold, italics, and strikethrough, which can be accessed through the Gutenberg toolbar. You can also modify the alignment, font size, color, and background color of the text within the Paragraph Block.
In addition to the basic formatting options, the Paragraph Block also allows you to insert links and shortcodes.
Use the WordPress Paragraph Block in Gutenberg Editor
The Paragraph block is one of the easiest blocks in the Gutenberg editor. Even a beginner can use this block like a pro. In this section, I will explain the process of using this block. Keep reading.
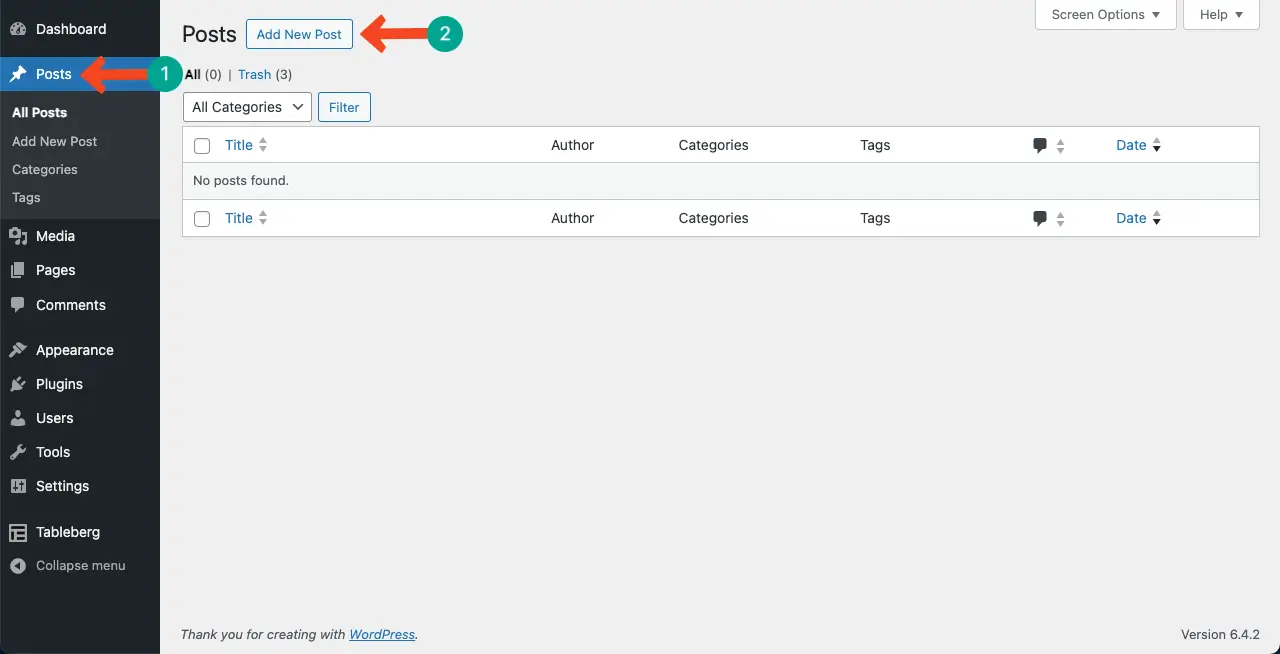
Step 01: Open a Post or Page First
Navigate to Dashboard > Posts > Add New Post. To open a page, you have to navigate to Dashboard > Pages > Add New Page. For this tutorial, we are creating a post.
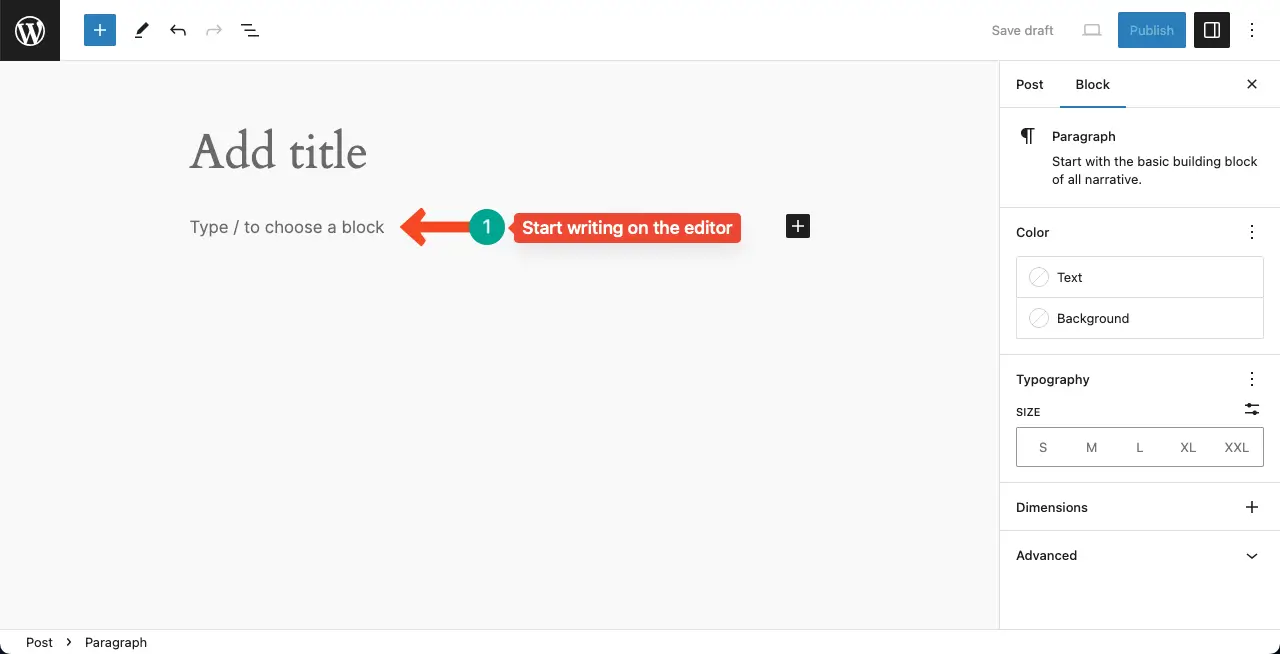
Step 02: Start Writing on the Paragraph Block
The Paragraph block comes by default with the Gutenberg editor. You don’t have to find and add it to the editor. Once the post or page is opened, start writing on the editor.
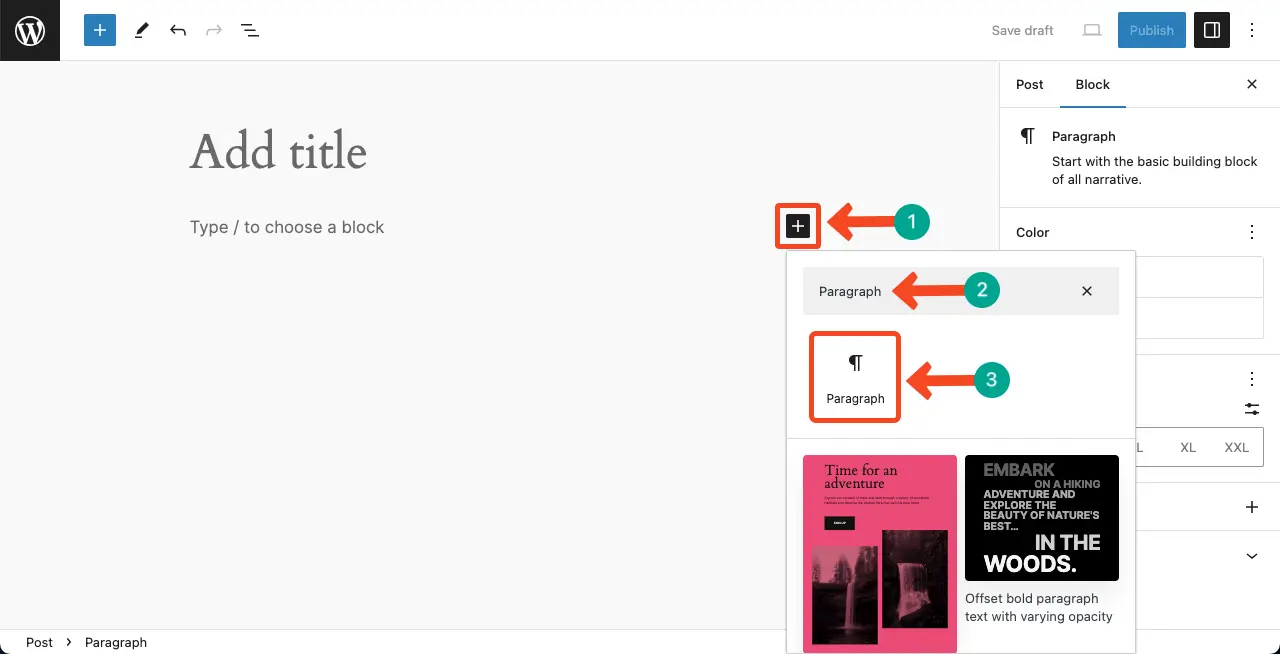
Note: If you still want to explore how to find the paragraph block, press the plus (+) icon in the editor. Type Paragraph in the search block. The block will appear in a second. Hit it to add the block to your post/page.
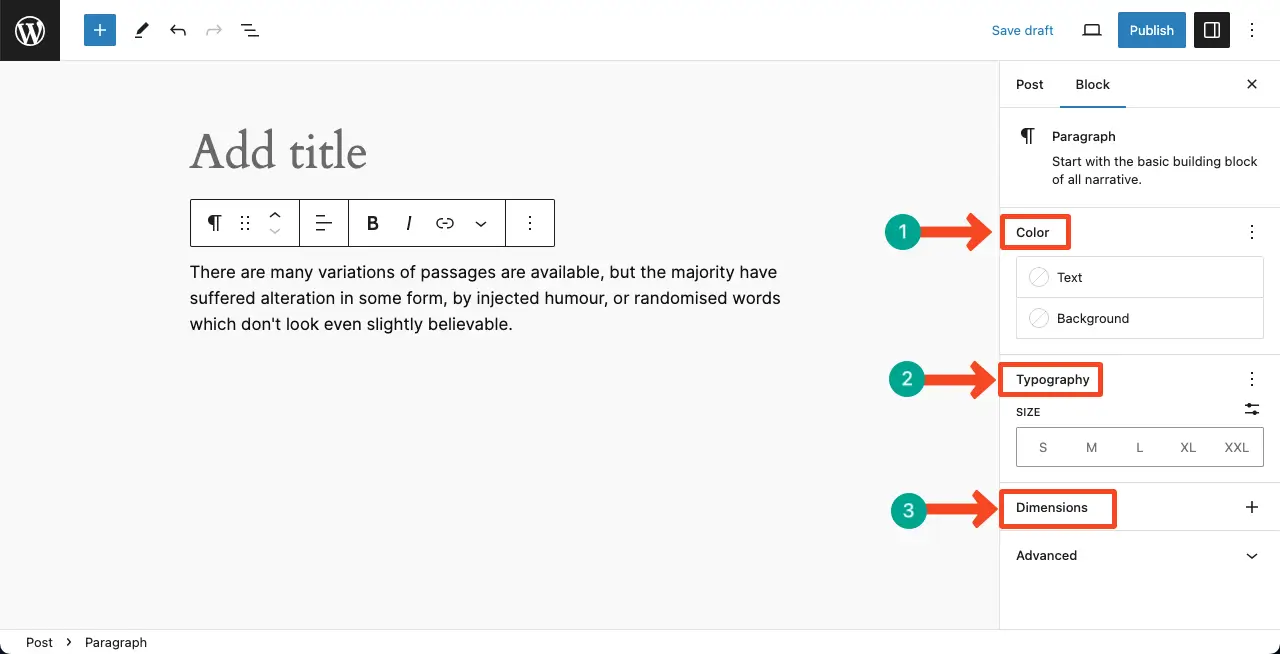
Step 03: Customize the Paragraph Block
You’ll get the customization options on the right sidebar. Using them, you can customize the text color, background color, typography, font size, and block dimensions.
Learn how to add alt text in WordPress.
Use Advanced Text Block as an Alternative to the Paragraph Block
If you don’t love the default paragraph block, you can use the Advanced Text block of the Kadence Blocks plugin as an alternative. It offers numerous customization options to make your paragraph/text content eye-catching. Let’s see how to use this block.
Step 01: Install and Activate the Kadence Blocks Plugin
Go to Plugins > Add New Plugin. Find the Kadence Blocks plugin. Install and Activate the plugin.

Step 02: Add the Text (Adv) Block to the Editor
Add the Text (Adv) block to the editor by clicking the plus (+) icon.
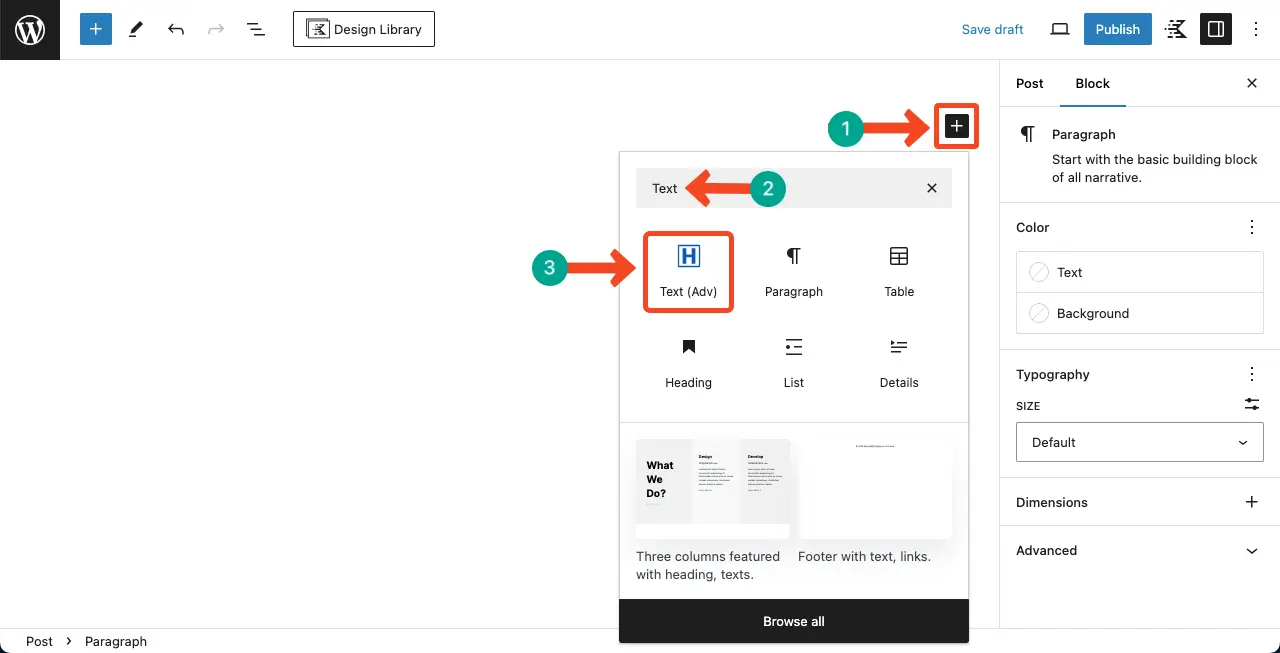
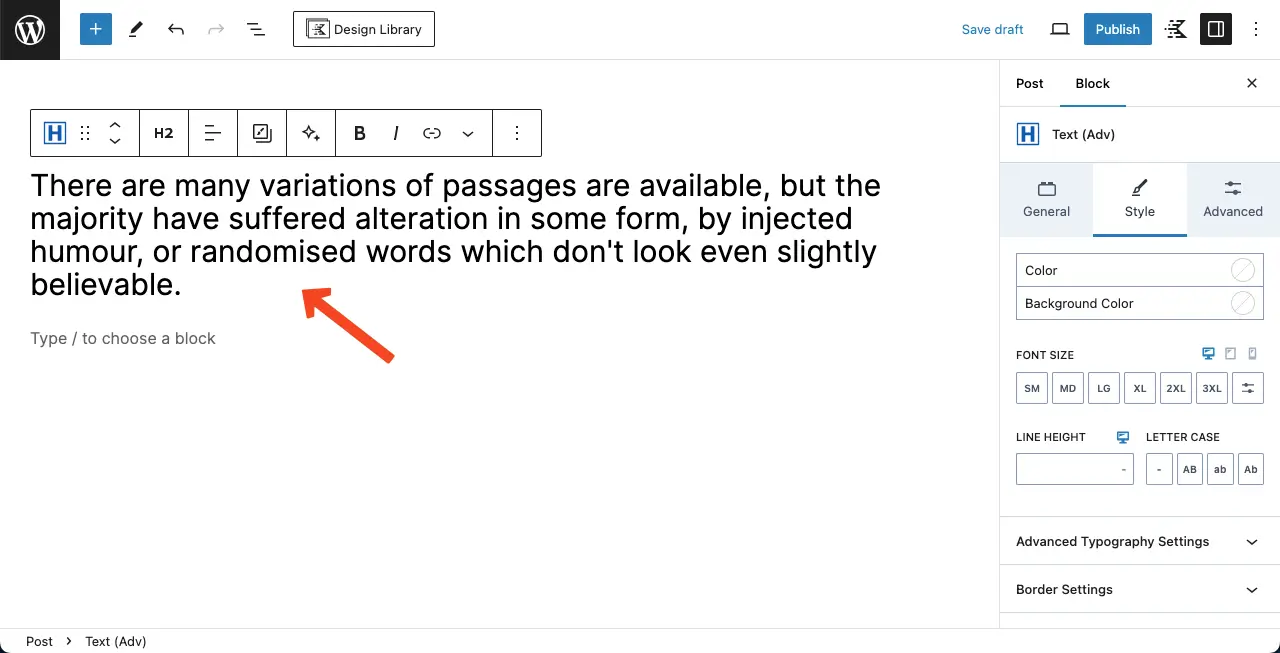
Add some text content to the block.
Step 03: Change Settings of the Text (Adv) Block
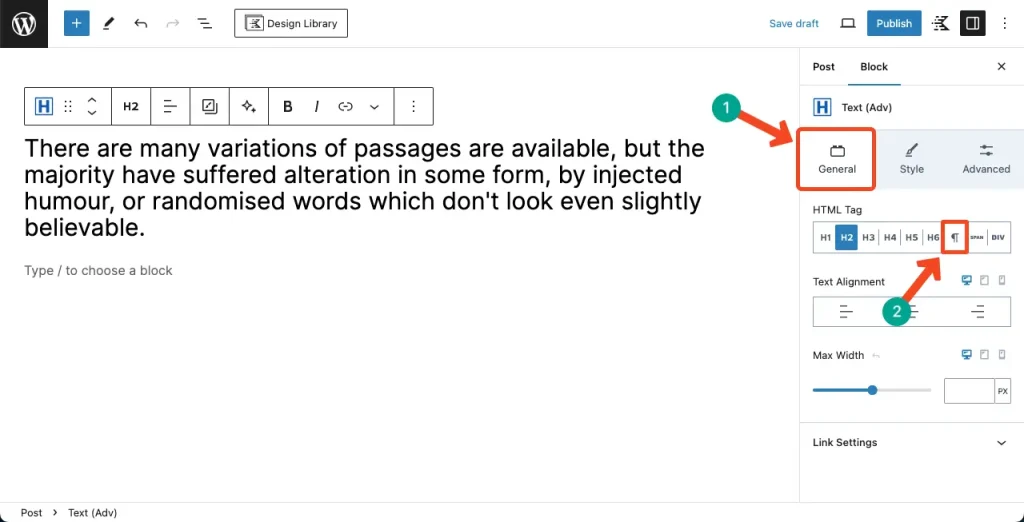
By default, the block is set to the HTML Tag H2. But text/paragraph blocks shouldn’t be in a title tag. So, select the paragraph tab for the block.
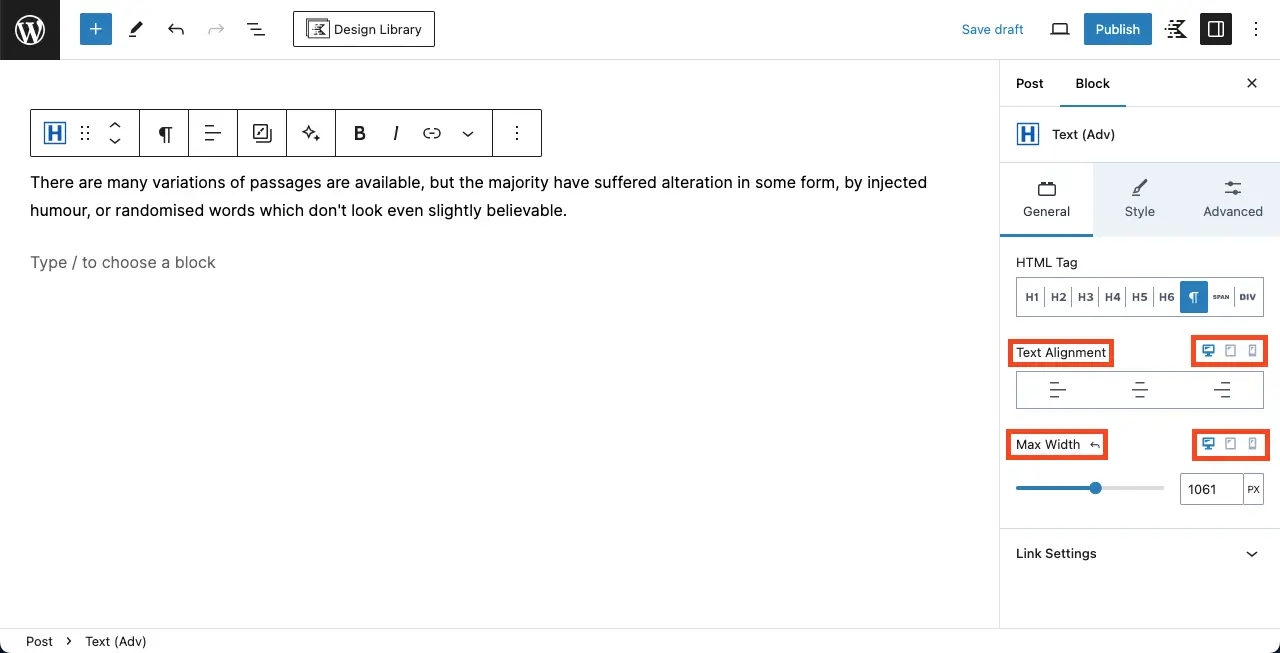
After that, set the alignment and maximum width of the block as you wish. You can set the alignment and maximum width separately for different devices and screen sizes.
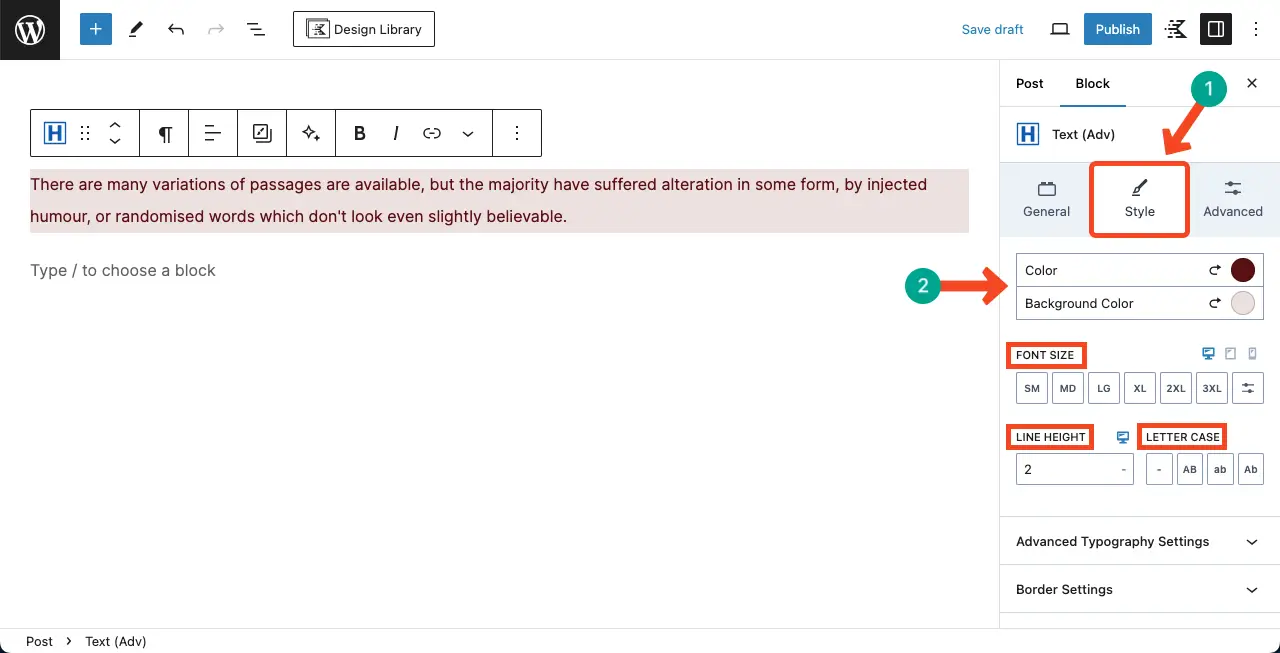
Step 04: Stylize the Text (Adv) Block
Come to the Style tab. You can change the text color, background color, font size, line height, and letter case. Do the customizations as you want.
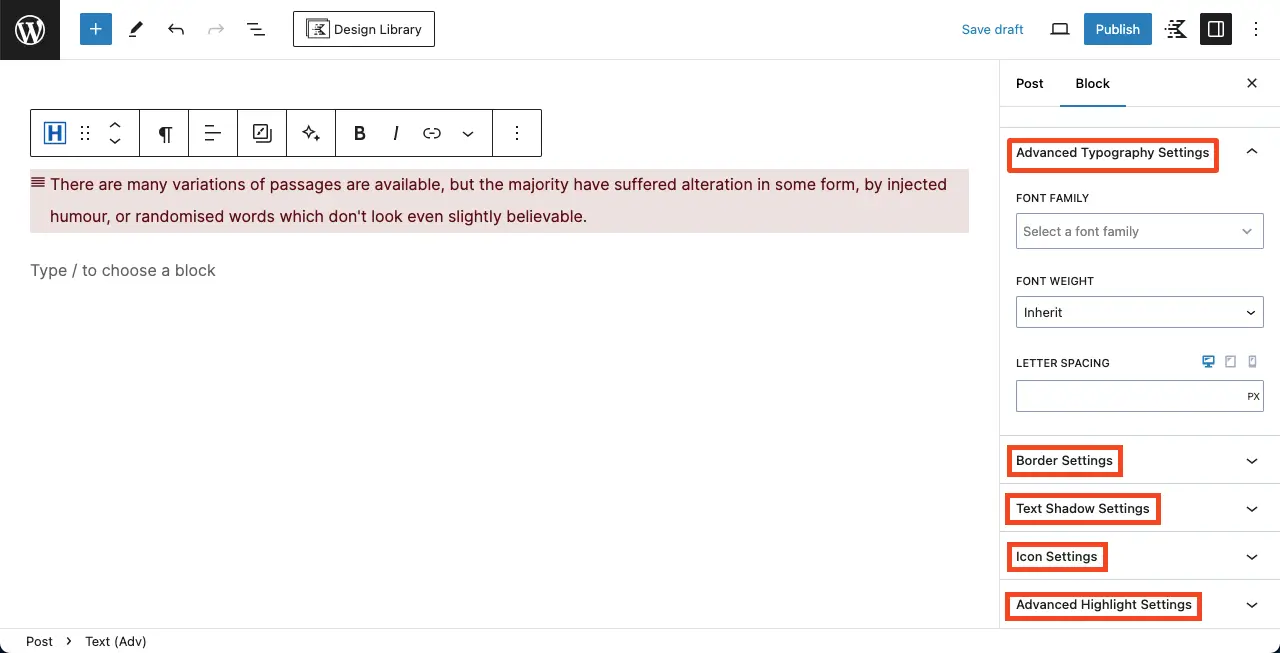
Scroll down the Styles tab a bit more. You’ll find the following more stylizing options under the tab.
- Advanced Typography Settings: Change font family, font weight, and letter spacing.
- Border Settings: Set a border, its width, and border radius.
- Text Shadow Settings: Enable a text shadow.
- Icon Settings: Add an icon from a massive collection, change the icon size, position and align the icon, etc.
- Advanced Highlight Settings: If you have used the other options well, you won’t need to use this.
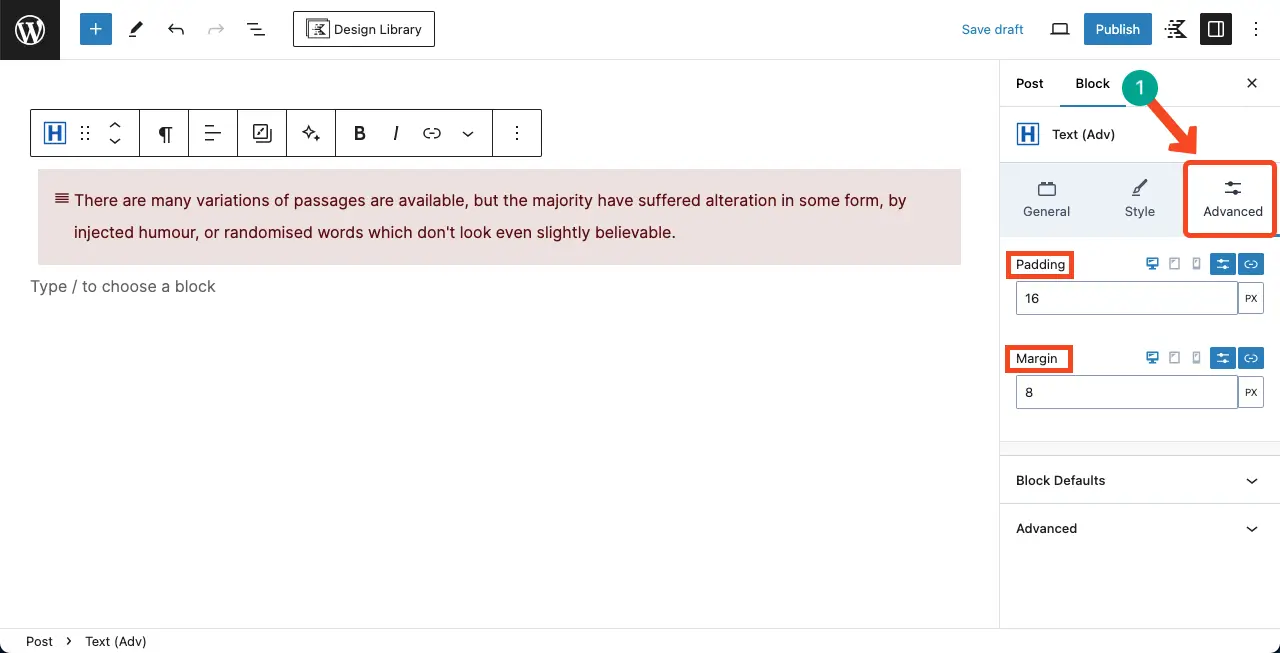
Next, land on the Advanced tab. You can customize padding and margin for the block from here.
Thus, you can use the Text (adv) block of the Kadence block.
Plugins That Have the Advanced Text Block
There are several other plugins that have the Advanced Text block which you can try alternatively on your site. They are:
Best Practices of Using the WordPress Paragraph Block
As the entire infrastructure of any post or page largely depends on the Paragraph block, it’s important for you to understand the best practices effective for it. I have listed some best practices that can help you use the block very perfectly.
1. Keep Paragraphs Concise
The WordPress Paragraph block is designed to showcase your content in a clean and organized manner. To improve readability, aim to keep your paragraphs concise and focused. Break up longer paragraphs into shorter ones to make it easier for your readers to digest the information.
2. Use Headings for Structure
While the Paragraph block is great for regular text content, consider using headings to break up your content and provide structure. Headings not only help readers navigate through your content but also improve search engine optimization (SEO) by highlighting the main topics and subtopics of your article.
3. Utilize Formatting Options
The Gutenberg Editor offers a range of formatting options within the Paragraph Block. Take advantage of these options to enhance the visual appeal of your content. Experiment with bold, italics, bullet points, and other formatting features to emphasize important points and make your text more engaging.
4. Maintain a Suitable Styling
Eye-soothing stylization is crucial for a professional-looking website or blog. Make sure to maintain consistent font sizes, line heights, and colors throughout your paragraphs. This will give your content a cohesive and polished appearance.
5. Proofread and Edit
Before publishing your content, always proofread and edit your paragraphs. Check for spelling and grammatical errors, ensure the flow of your content is smooth, and make any necessary adjustments to improve clarity and coherence.
6. Preview Your Content
The Gutenberg Editor allows you to preview your content in real time. Take advantage of this feature to see how your paragraphs look within the overall design of your website. Make any necessary adjustments to ensure your paragraphs are appealing and fit seamlessly into the overall aesthetic.
FAQ on the WordPress Paragraph Block in Gutenberg Editor
What types of content can I add to WordPress Paragraph blocks?
You can add text content, formatting options, links, inline images, shortcodes, and keyboard shortcuts to the paragraph block.
How to delete a WordPress Paragraph block?
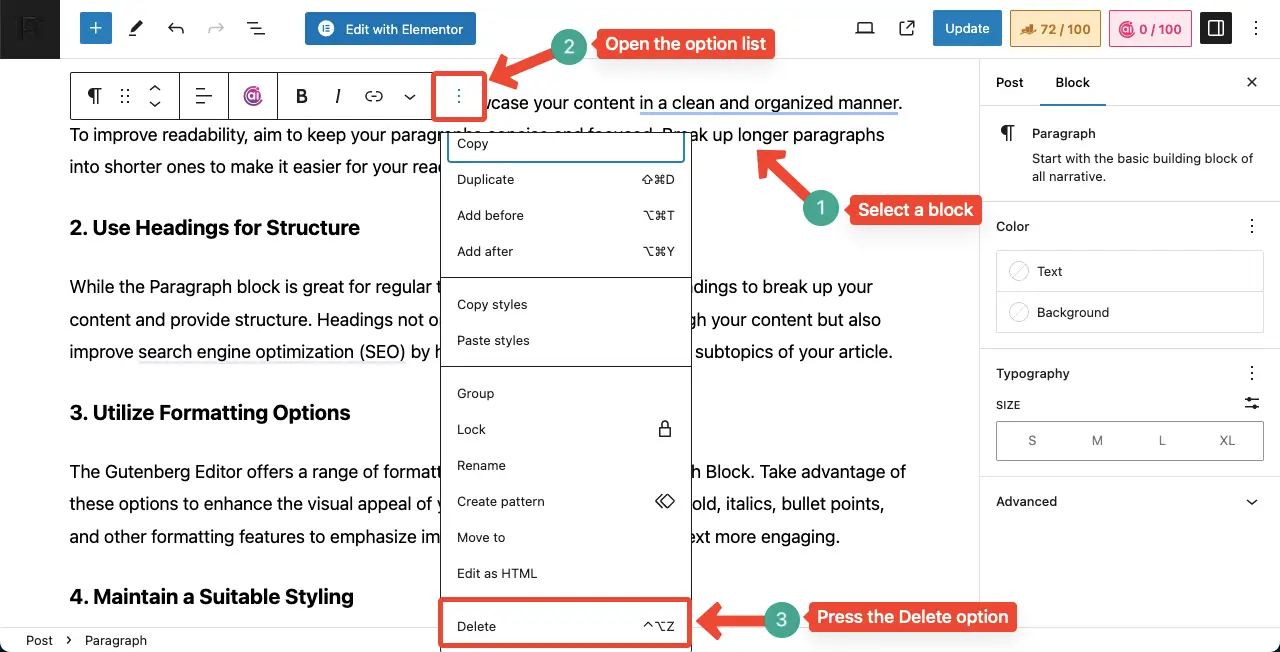
1. Select the particular WordPress Paragraph block
2. Click the three-dot icon on the Gutenberg toolbar
3. Hit the Delete option at the end of the list
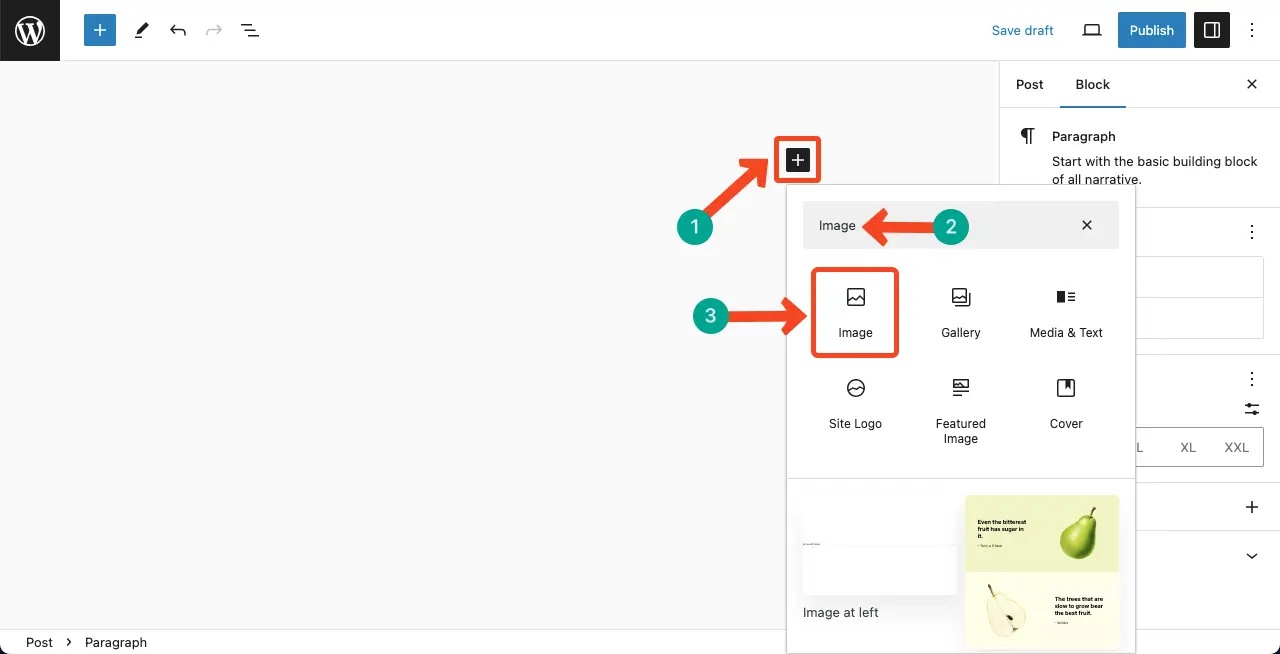
Can I insert images within the WordPress Paragraph Block?
Well, Gutenberg offers you a separate image block by which you can add images to your content. The WordPress Paragraph block is specifically for adding text. Below is a screenshot of the Image block. Learn how to use the WordPress Image block.
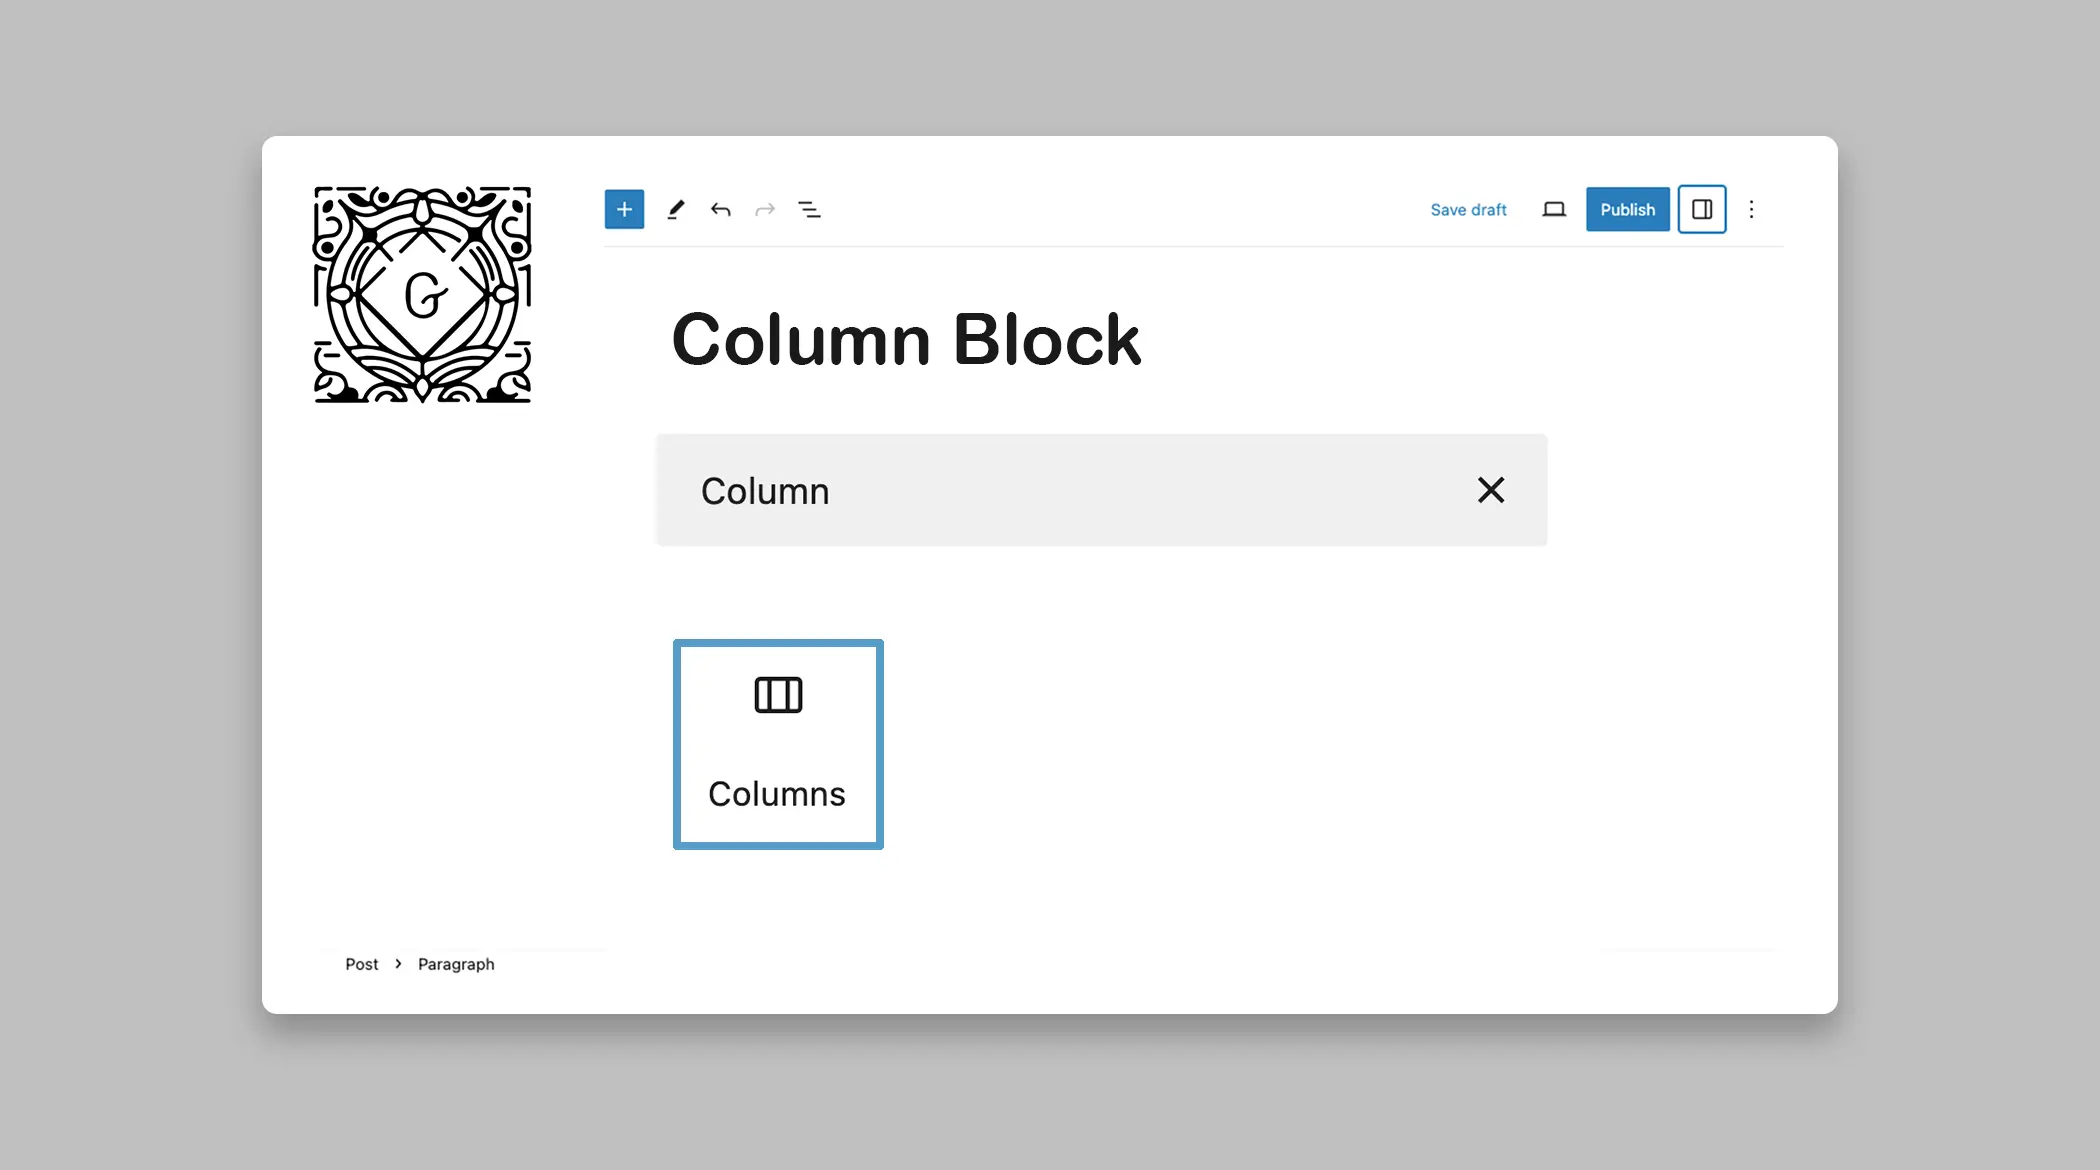
Can I display texts in multiple columns on the Paragraph block?
Here, you have to use the Column block like the image block.
Final Note!
With its versatility and range of formatting options, the Paragraph block empowers you to create the engaging and captivating content you want. But you must be a master over the block. Otherwise, it will be nothing but a simple tool by which you can write content.
Once you grow expertise, you will be able to customize content with the block that looks superb and have the ability to hook readers for a long time.
By using the Paragraph block properly, you can deliver your desired information most convincingly. Before leaving the page, remember to save your changes regularly as you work on your posts and pages.