The Tag Cloud block is a dynamic feature in WordPress that allows you to display the tags of your website with a compelling visual representation. It can help visitors easily identify popular topics and navigate to relevant content with just a click.
In this article, I’ll explain to you what the WordPress Tag Cloud block is and how to use it on your website. Get started!
What is the WordPress Tag Cloud Block?
Tags are keywords or phrases that you assign to your posts or pages to categorize and organize your content. The Tag Cloud is a default WordPress block by which you can display the tags you have created so far on your site on any post or page you want.
The reason to call this block a cloud is because it arranges and displays all the tags in a cloud-like format. The size of each tag corresponds to its frequency of use, meaning tags that are used more frequently will appear larger in the cloud, while less frequently used tags will appear smaller.
When a visitor clicks on a tag in the cloud, they are taken to a page displaying all the posts or pages that have been assigned that particular tag. This makes it easy for users to find related content and explore different topics on your website.
How to Add to Tag Cloud Block to WordPress
Adding the Tag Cloud block to your website will take only a few steps.
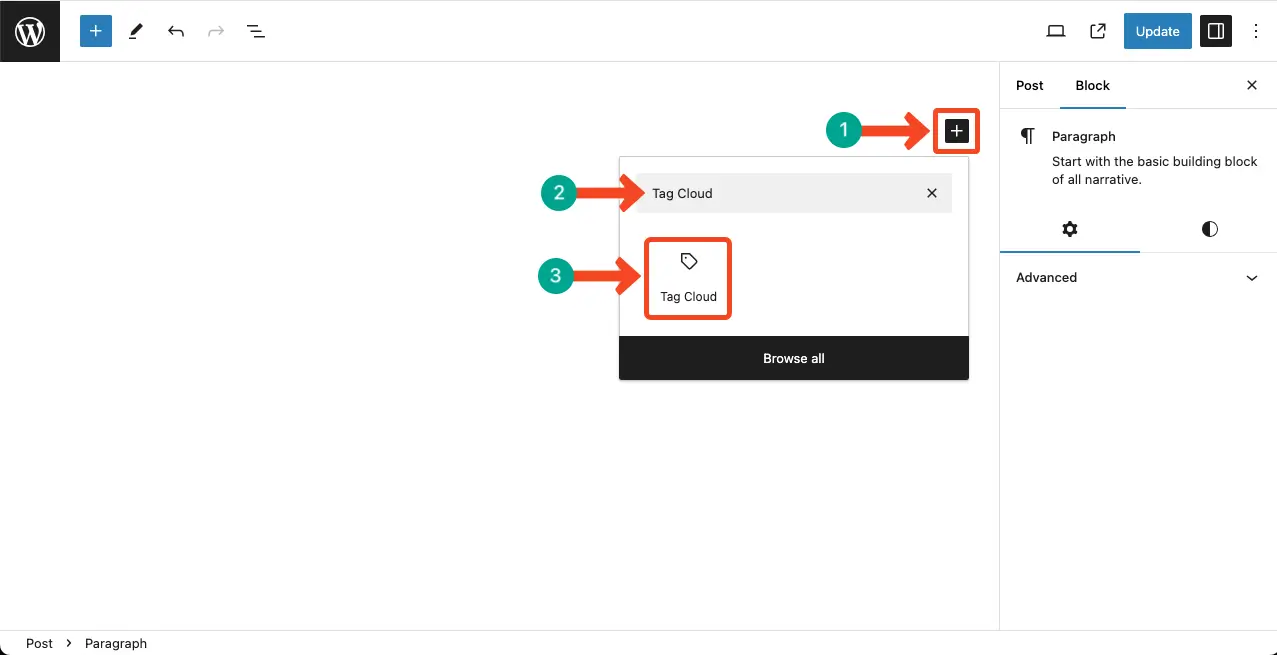
Step 01: Find and Add the WordPress Tag Cloud Block to Your Site
Find the Tag Cloud block in the block library by typing its name in the search box. Hit the block icon to add it to your desired post or page.
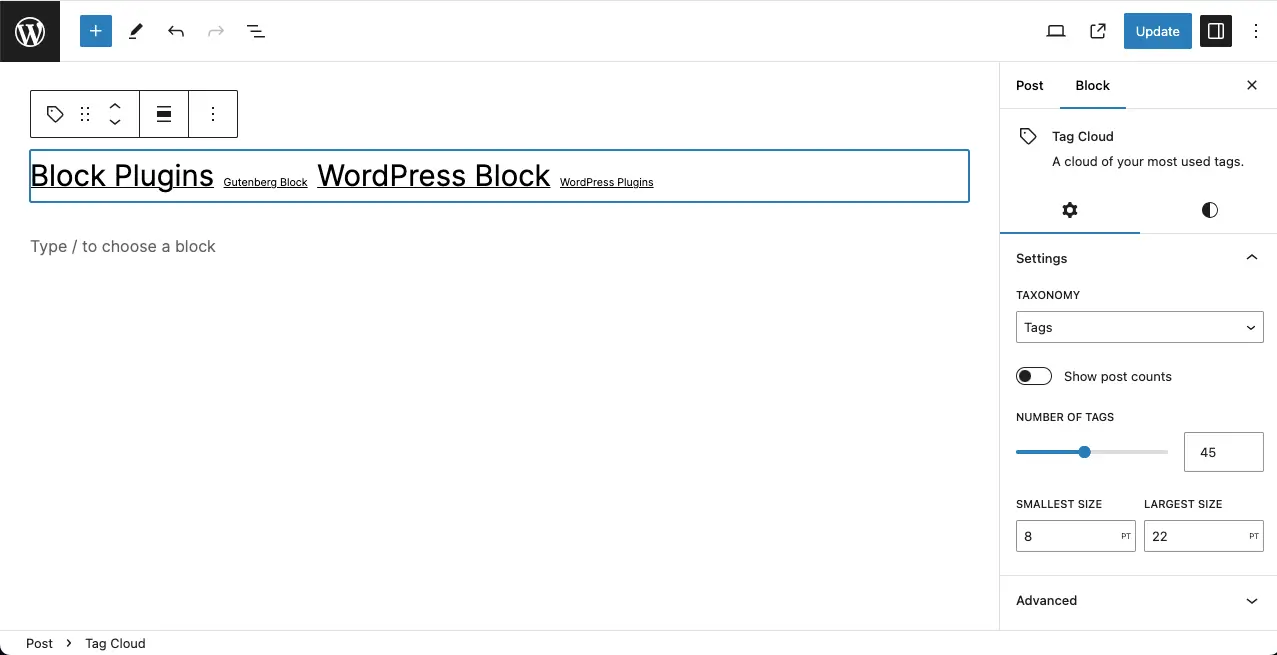
You’ll see the block is added to the editor in a second with all the tags you have created so far. You’ll see some tags’ texts are larger than the others. You’ll know the mystery in the next step.
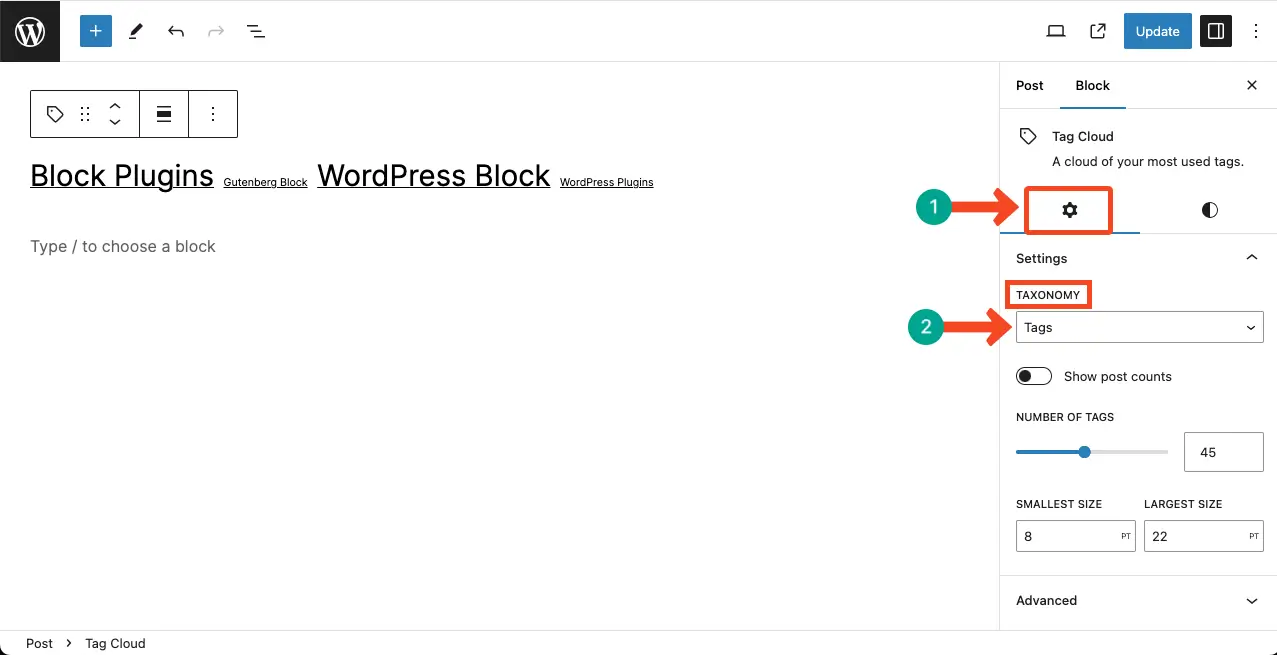
Step 02: Configure Settings of the WordPress Tag Cloud Block
By default, the Tag Cloud block shows tags as the taxonomy. But you may change it and choose the category as the taxonomy by clicking the option marked below.
For the tutorial, I’ve selected tags as the taxonomy.
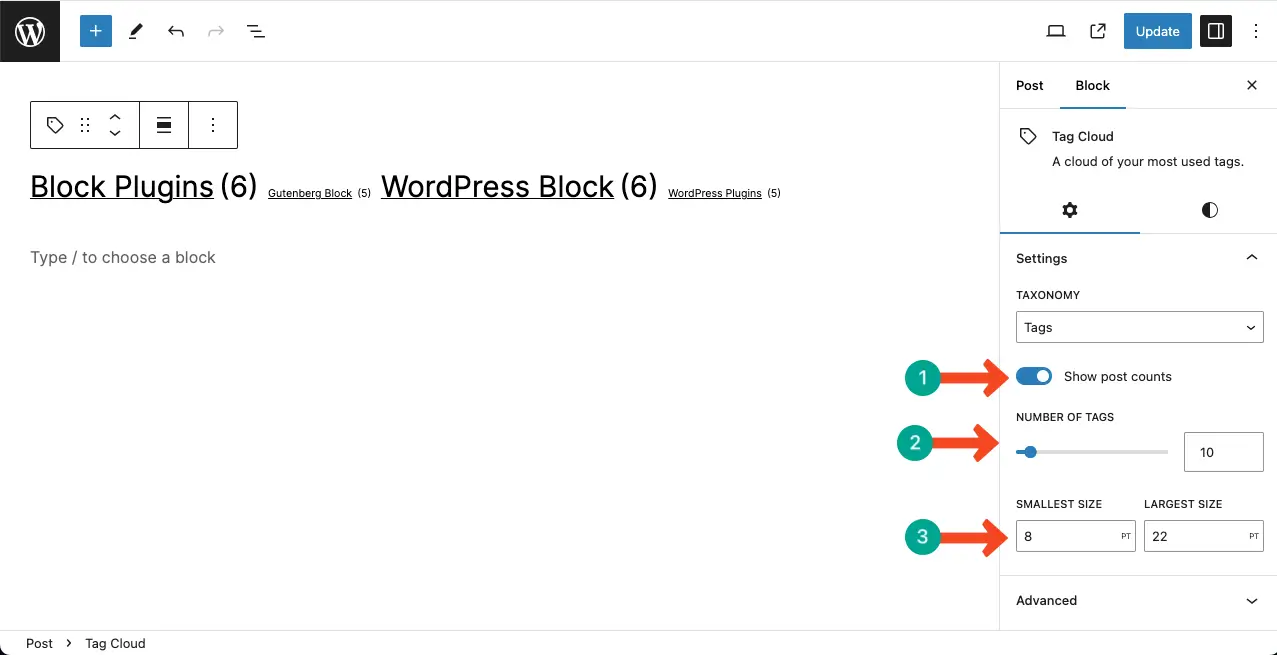
Toggle on the Show post counts option to display the total number of posts per tag. Once the number of posts per tag appears, you’ll see the large tags cover the maximum number of posts. The small tags cover relatively fewer posts.
Next, specify the number of tags you want to display with the block. Finally, put values for the smallest size and largest size.
Step 03: Stylize the Tag Cloud Block
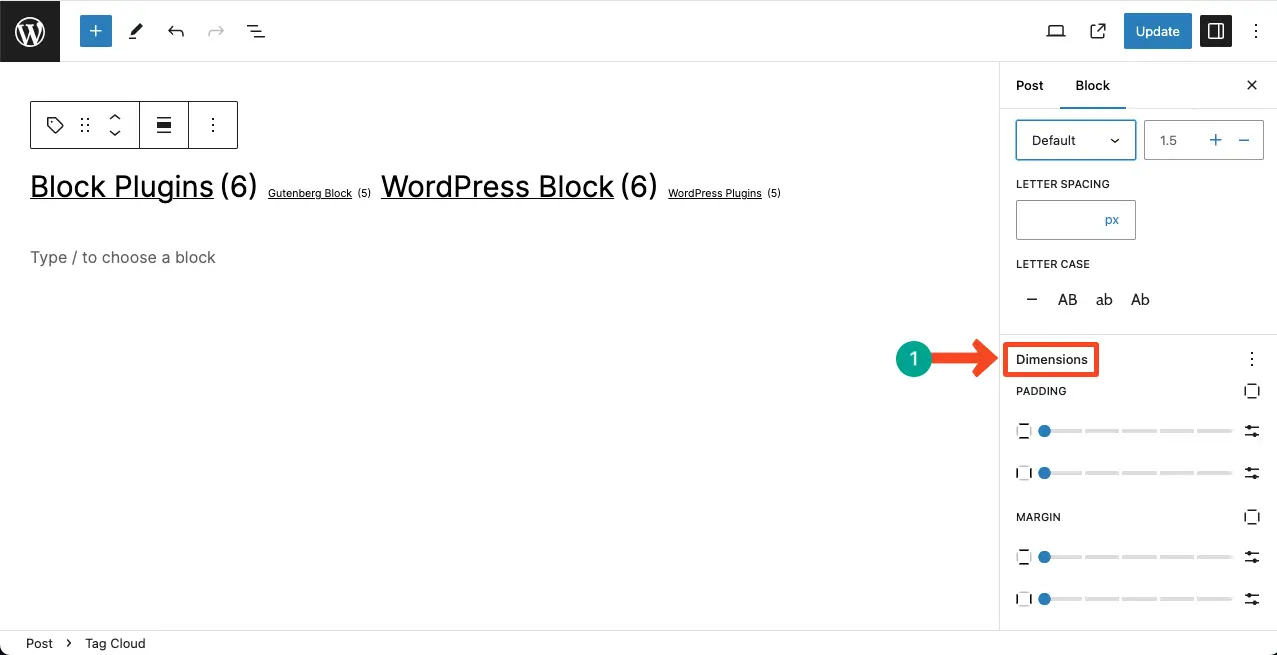
Come to the Stylize tab. You can customize the typography, font size, line height, letter spacing, and letter case.
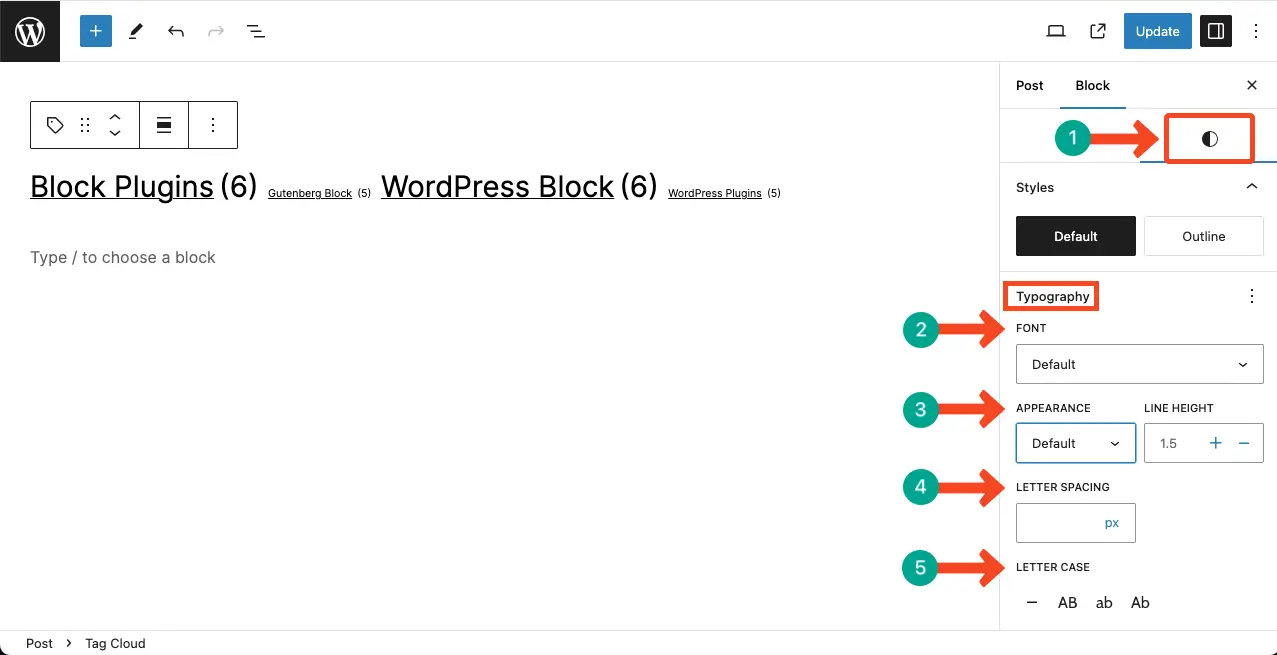
Scroll down the section a bit more. You’ll get the option to customize the padding and margin options of the block.
Once you are done, Publish/Update the post to save all the changes. Learn how to use the WordPress social icon block.
Conclusion
Indeed, the Tag Cloud block is one of the most useful WordPress blocks. It’s important to use tags strategically and consistently throughout your website. If you have a large number of tags, consider creating a hierarchical structure to organize them.
This can be done by assigning parent and child tags, allowing visitors to navigate through subcategories within the tag cloud. This can make it easier for users to find specific topics of interest.
Leave feedback below in the respective comment section below to let me know if you have benefitted from the post.