Hope you have used the Gutenberg column and row blocks on your WordPress site. The Stock block is kinda similar to these blocks or a combination of the two. You can use this block, whether as a row or column block.
Besides, you can switch the block from row to column or column to row anytime if you want. In this article, I will show you how to use the WordPress Stack block with a detailed user guide.
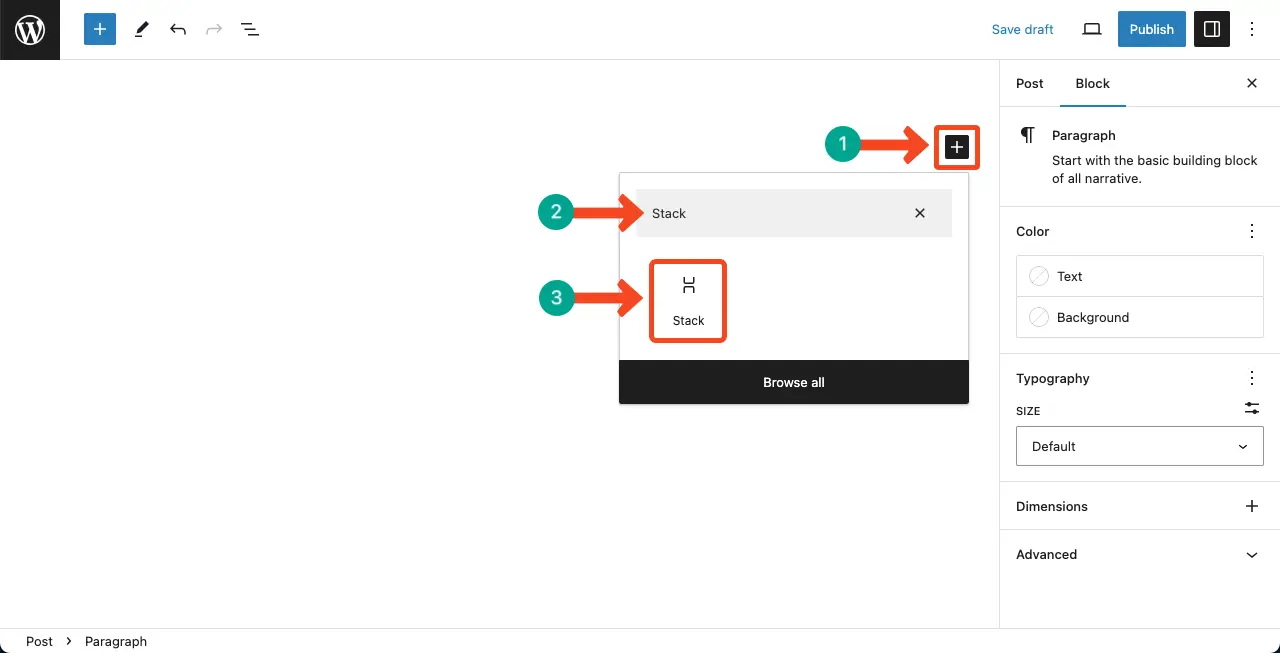
Step 01: Add the Stack Block to WordPress Post or Page
Log in to your WordPress dashboard and navigate to the post or page. Create a new post/page or open an existing one.
Click the (+) button to add a new block. Type Stack in the search box. Click to add the block to the editor once it appears below.
Step 02: Add Content to the Stack Block in WordPress
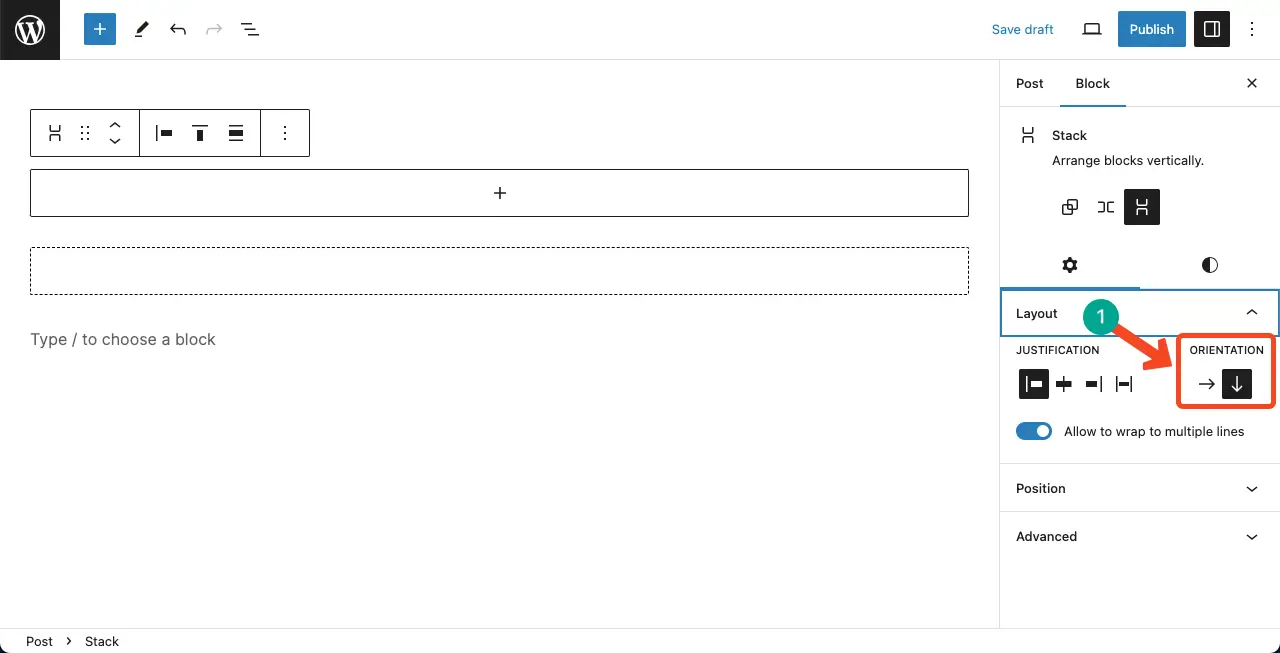
By default, the block comes with a row layout. To change it to the column layout, come to Settings tab > Layout > Orientation. You can change the block layout to a horizontal or vertical view.
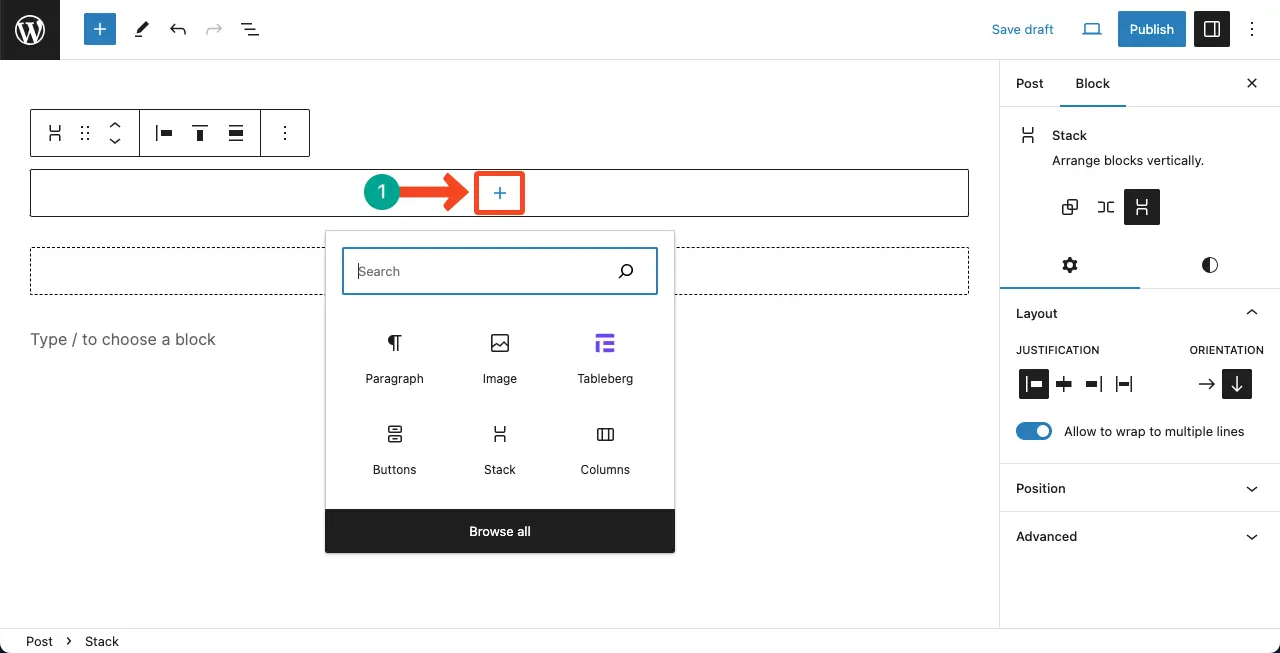
Let’s add content to the block now. Click the plus (+) button on the block. You’ll be allowed to choose blocks to add content. For the tutorial, we’ll select the image block.
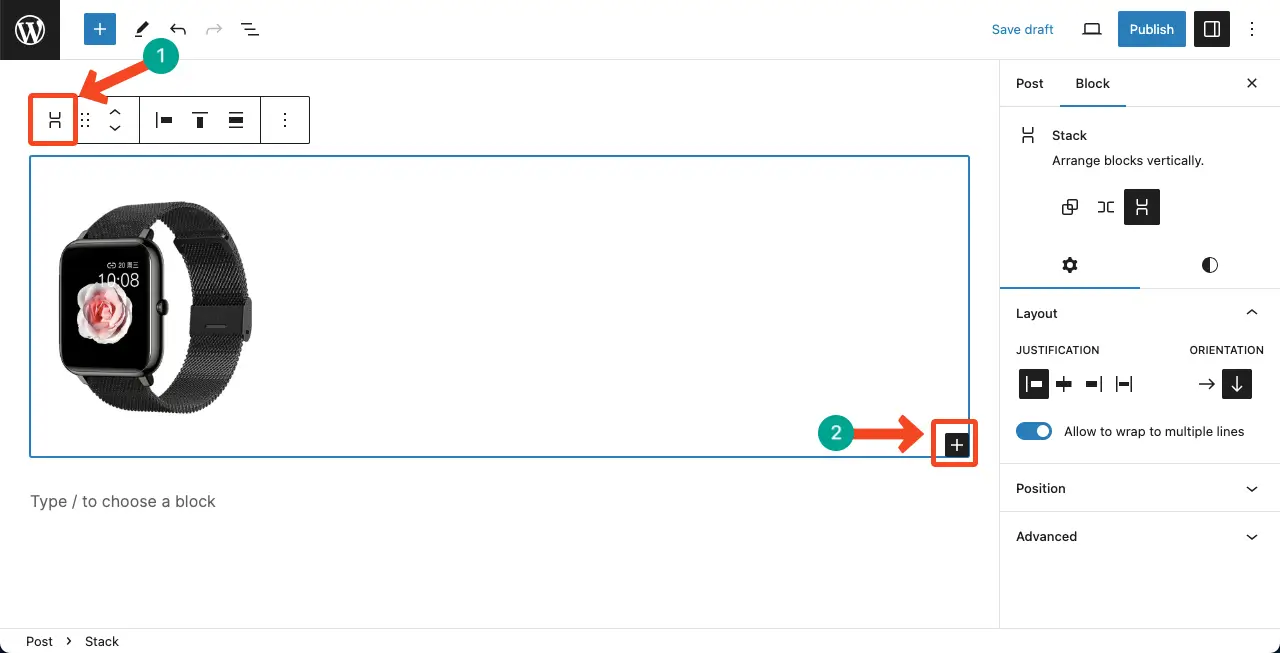
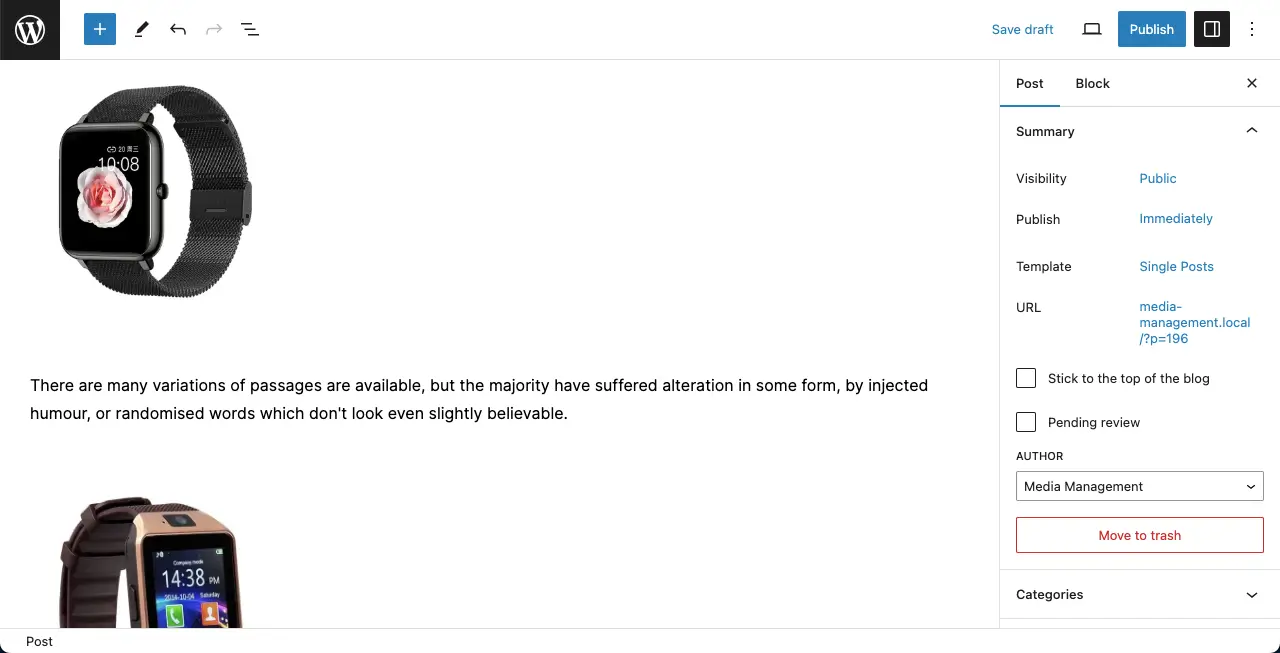
You can see that we have already added an image to the block. To add more, click the Stack icon on the Gutenberg toolbar. You’ll see the Gutenberg plus (+) button appear. By pressing the plus button, add more other blocks.
Step 03: Change the Orientation of the Gutenberg Stack Block
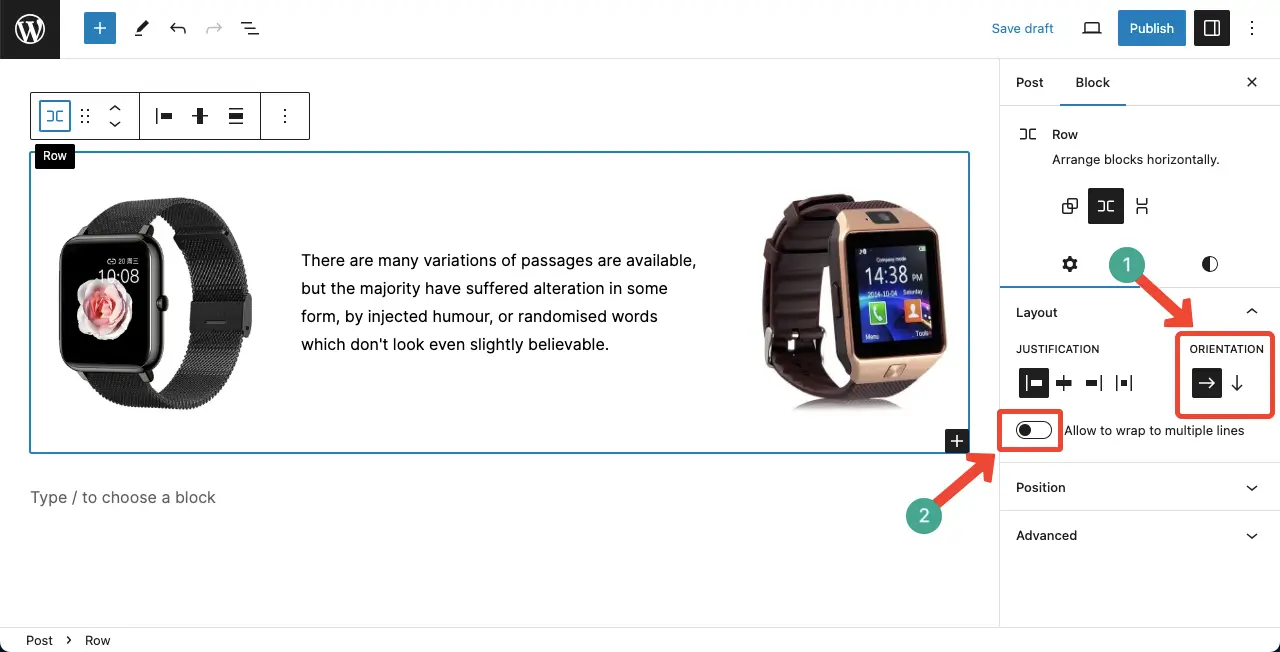
You can see that we have added two images and a paragraph of text to the editor. These contents are now shown vertically in row formats.
To change the orientation (make it horizontal), select the entire block by clicking the Stack icon on the toolbar. Go to the Orientation option on the right sidebar. Select the Horizontal arrow sign. Then, toggle off the option ‘Allow to wrap to multiple lines’.
You’ll see the content in the block is displayed horizontally.
Note: Don’t forget to toggle off the option ‘Allow to wrap to multiple lines‘.
Step 04: Stylize the WordPress Stack Block
Come to the Styles tab on the right sidebar. You’ll get options to adjust the text color, background color, typography, spacing, margin, and padding. Do the changes as you need.

Best Practices for Using the Stack Block
Keep the design clean and minimalistic to ensure a seamless user experience. Avoid cluttering the Stack block with too many elements. Use contrasting colors and typography to make your content stand out within the Stack block.
Optimize your content for mobile devices by previewing and testing the Stack block on different screen sizes. Regularly review and update your Stack block to ensure it remains relevant and engaging for your audience.
Conclusion
WordPress Stack block could be a good choice if you think of changing the content layout multiple times after publishing the post. Hope by following the steps outlined in this tutorial, you can easily add, customize, and optimize the Stack block to enhance your WordPress posts and pages.
Learn how to use the Gutenberg row block in WordPress. Also learn how to use the Gutenberg column block in WordPress.