The Gutenberg Site Logo block is an extremely helpful WordPress feature for those who want to establish a strong online presence. With just a few clicks, you can upload your logo and have it prominently displayed on your website.
So, you don’t have to depend on any third-party plugins to showcase your site logo. In this tutorial post, I will explain how to use the Gutenberg Site Logo block in WordPress websites.
What is the Gutenberg Site Logo Block?
The Gutenberg Site Logo is a default WordPress block. You can easily add any customizable logo to your website with the block. This block offers incredible flexibility and versatility, allowing you to place your logo in various locations on your site.
Whether it’s the header, footer, or sidebar, the Gutenberg Site Logo block seamlessly integrates with your chosen WordPress theme. However, this block is extremely useful with block-based themes. Other themes like Astra, OceanWP, GeneratePress, etc., already have a built-in logo option.
So, you don’t need to use the block with them. You can use this block in the header section only with the block-based themes.
How to Use the Gutenberg Site Logo Block in WordPress
Indeed, you can add the block anywhere on your website. I will show you how to add and use the block on your website using two methods: in the header and the editor. Follow the tutorial explained below.
Method One: How to Add the Gutenberg Site Logo to Your Website Header
Make sure you have a block theme like GroundWP installed and activated. All the default WordPress themes, like Twenty-Twenty One, Twenty-Twenty Two, Twenty-Twenty Three, and Twenty-Twenty Four are also blocked themes.
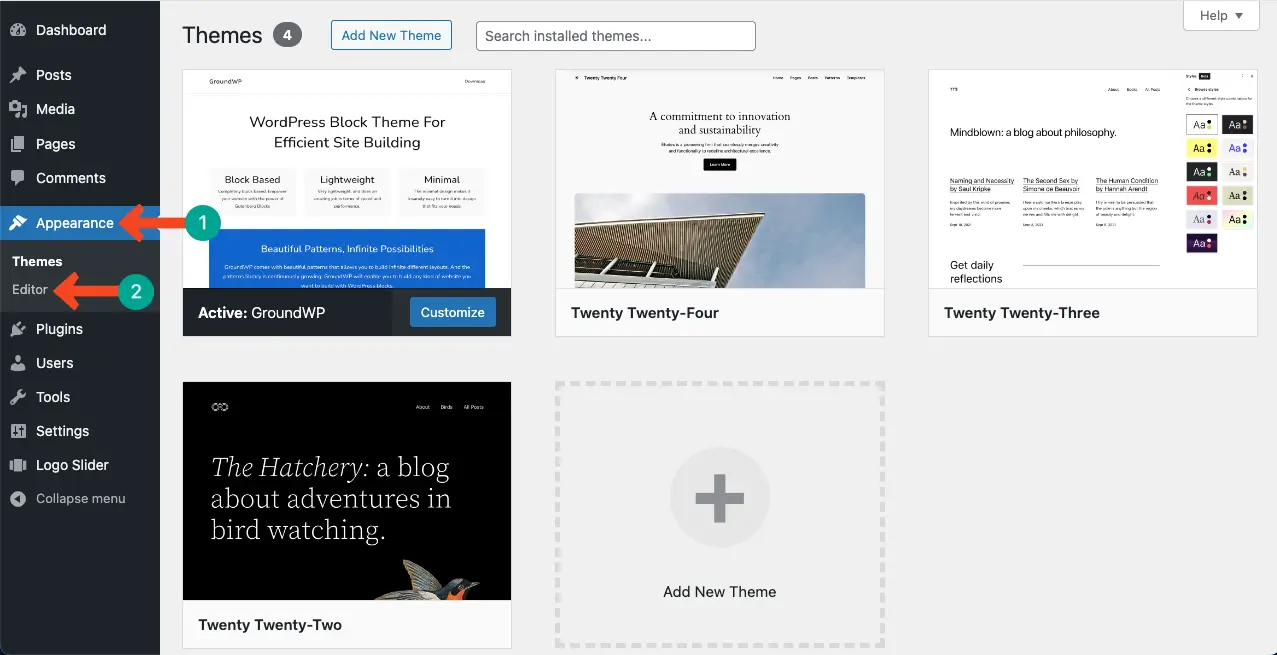
Step 01: Go to Your Theme Editor
Log into your WordPress Dashboard. Hope you have a block theme installed and activated. Then, go to Dashboard > Appearance > Editor.
Step 02: Select the Site Logo Section
The site logo usually comes in the top-left corner of any web page. You’ll see a default option for this on the theme editor as well.
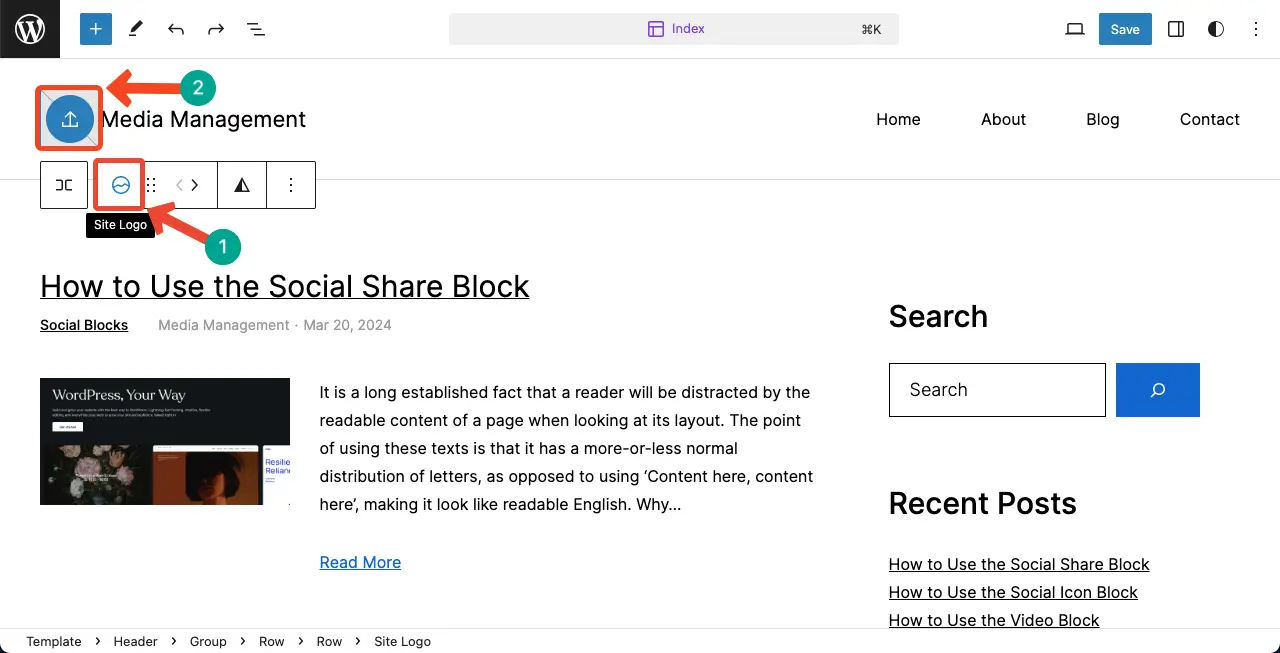
Step 03: Add the Site Logo Block to the Header Section
The last click will expand the theme editor. Now, click again on the same section. This will open a toolbar with the Site Logo block.
You can see the site logo block on the toolbar. This will allow you to add your desired image as a logo to the section. Click the upload icon on the respective logo section.
Now, select a logo. You may select it from the existing options on the media library or upload it from your local drive.
Step 04: Increase or Decrease the Logo Size
You can increase or decrease the logo size by dragging the logo while keeping any circular icon selected. By reducing or increasing its size, you can make the logo look perfect in the header.
Method Two: Add the Gutenberg Site Logo Block to the WordPress Editor
Not only in the header. You can add the block anywhere on your web posts and pages through the Gutenberg editor. I will show you how to add the site logo block to the Gutenberg editor.
Step 01: Find and Add the Logo Block to the Gutenberg Editor
Like any other block, find and add the Site Logo block to your Gutenberg Editor.
Step 02: Add a Logo to the Editor
By using the alignment option on the Gutenberg toolbar, you can adjust the alignment of the block on the editor. Then, you have to upload an image as a logo to the section, as shown in the above method. You can upload the image whether by clicking the icon or the Add media button on the right sidebar.
Take a look at how to use the Gutenberg Navigation block in WordPress.
Best Practices of Using the Gutenberg Site Logo Block
Although it’s a simple block, there are several best practices by which you can leverage the best from this block. Take a quick look at them from the discussion below.
1. Choose a High-Quality and Appropriately Sized Logo
Select a logo that is clear, crisp, and reflects your brand identity. Ensure that the logo dimensions are suitable for the specific location where you plan to display it on your website.
2. Maintain Consistency Across Devices
Test your website’s responsiveness and verify that your logo appears well on different devices, including desktop, mobile, and tablets.
3. Consider the Placement
Think strategically about where to position your logo within your website’s layout. Typically, the header is the most common location, but you can also explore placing it in the footer, sidebar, or other areas that align with your design and branding goals.
4. Optimize for Accessibility
Ensure that your logo meets accessibility standards by providing alternative text (ALT text) for screen readers. This allows visually impaired users to understand the logo’s purpose and content.
5. Regularly Update your Logo
Keep your logo up to date to reflect any changes in your branding or business identity. This helps maintain a fresh and current look for your website.
Final Thoughts!
A perfect logo can make your website stand out from the crowd because it can create a memorable impression among the people who once see or visit your site. This is why, without a site logo, your website is incomplete, no matter how much effort you put into it.
By utilizing the Site Logo block, you can establish a strong online presence and create a professional-looking website that leaves a lasting impression on your visitors. If you like my posts, please let me know through the comment box.
It’s my comment to cover tutorial posts on the Gutenberg editor to make my blog section a comprehensive knowledge base for Gutenberg users.