Image files are a type of digital file containing graphical data to represent any particular theme, idea, or information visually. Image files can be photographs, illustrations, logos, or any other type of graphic content that enhances the visual appeal of your website.
You might be wondering why images are so important for a website. The answer lies in the power of visual communication. Humans are highly visual creatures, and our brains process visual information much faster than text.
This means that incorporating compelling images into your website can instantly grab the attention of your visitors and convey your message more effectively. I will explain to you how to upload an image in WordPress and delete the unnecessary ones.
How to Upload an Image in WordPress
WordPress is one of the easiest content management systems (CMS) for managing websites. It provides a simple and straightforward way to upload images. Let’s explore the methods.
Method 01: How to Upload Images to WordPress Media Library
WordPress Media Library is a repository that lists all the media files you upload to your website, including image files. Here’s how to upload image files to the WordPress Media Library.
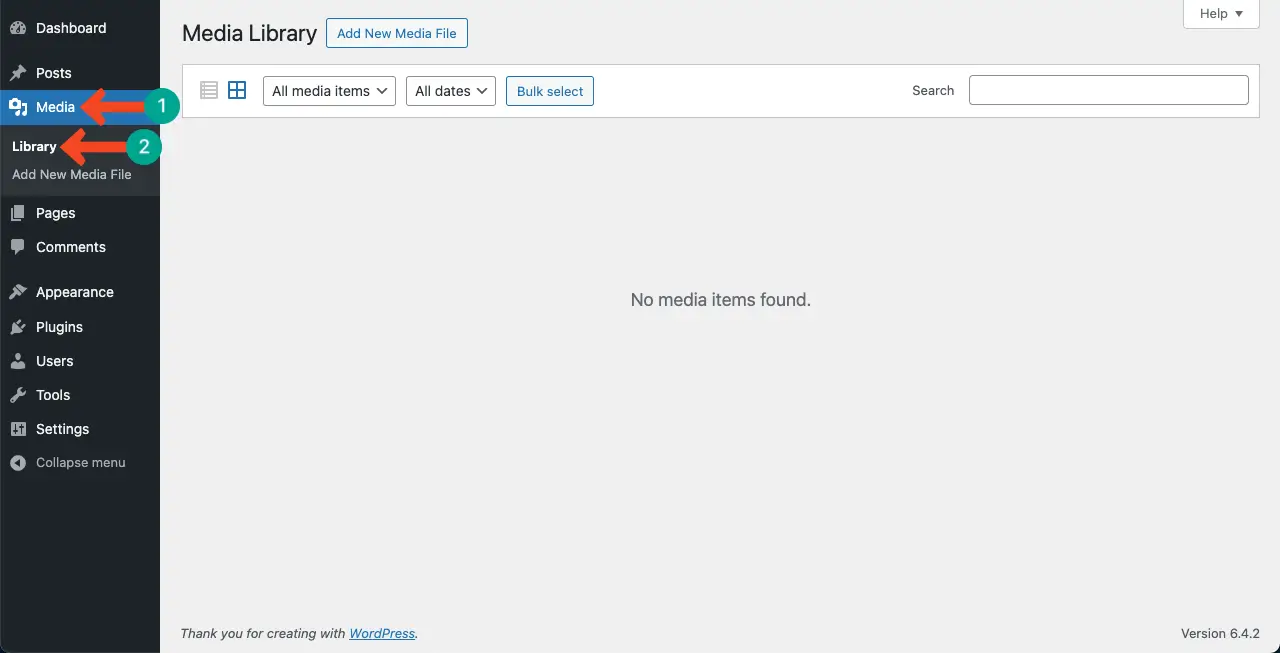
Step 01: Go to Your WordPress Media Library
Log in to your WordPress admin dashboard first. Click on Media in the left-hand admin menu bar.
This will take you to the WordPress Media Library page.
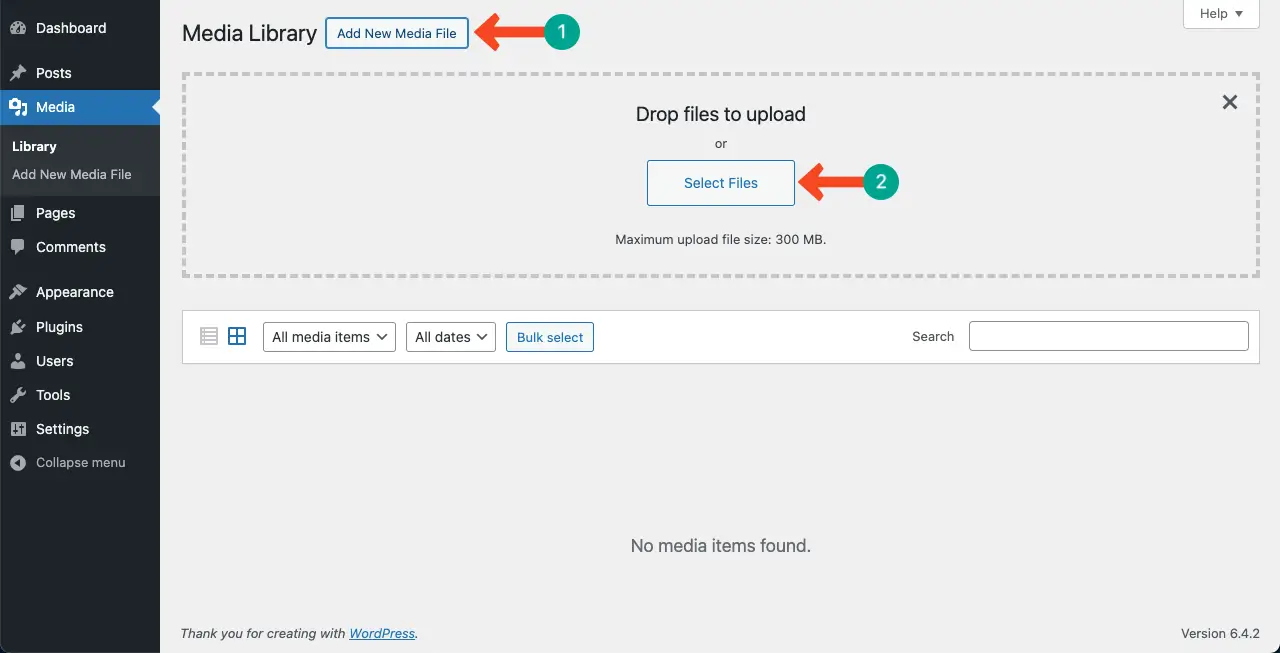
Step 02: Start Adding a New Media File
To upload a new image, click the Add New Media File button at the top of the page. A new section will appear named Drop files to upload.
Press the button Select Files.
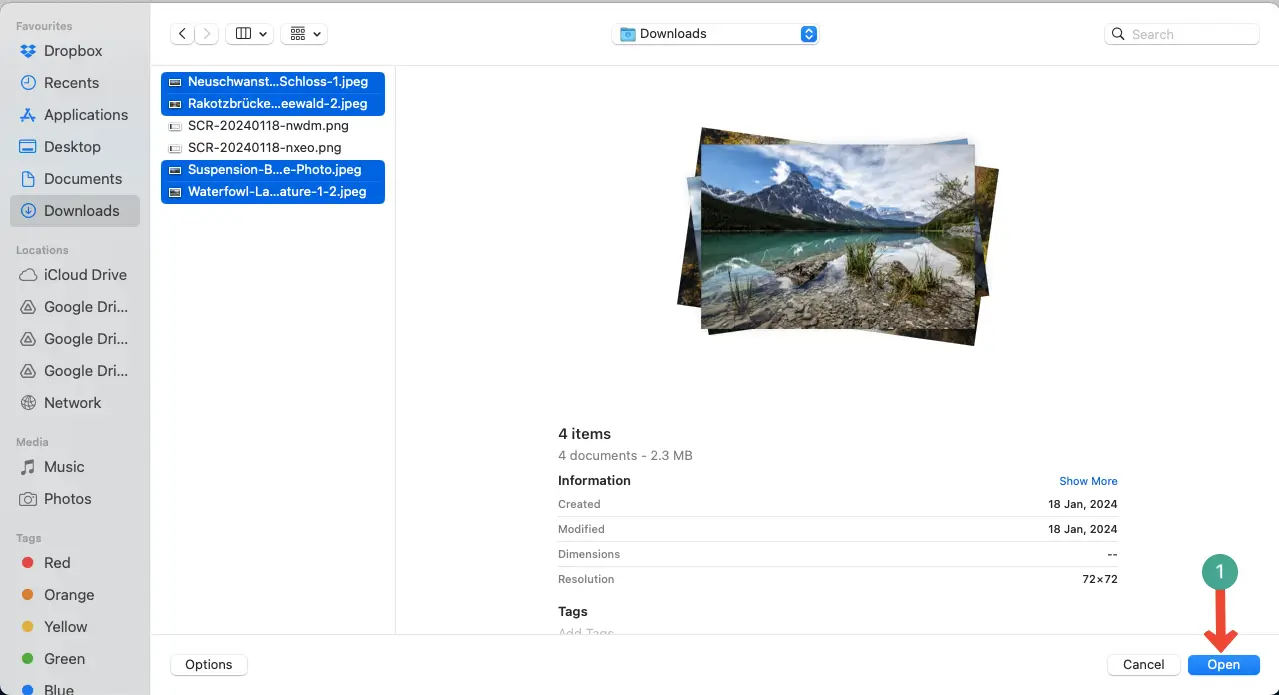
Step 03: Select the Image Files From Your Local Drive
Now, it’s time to select the image you want to upload from your cloud or local drives. You can see we’ve selected four images from one of our drives.
Press the Open button at the end.
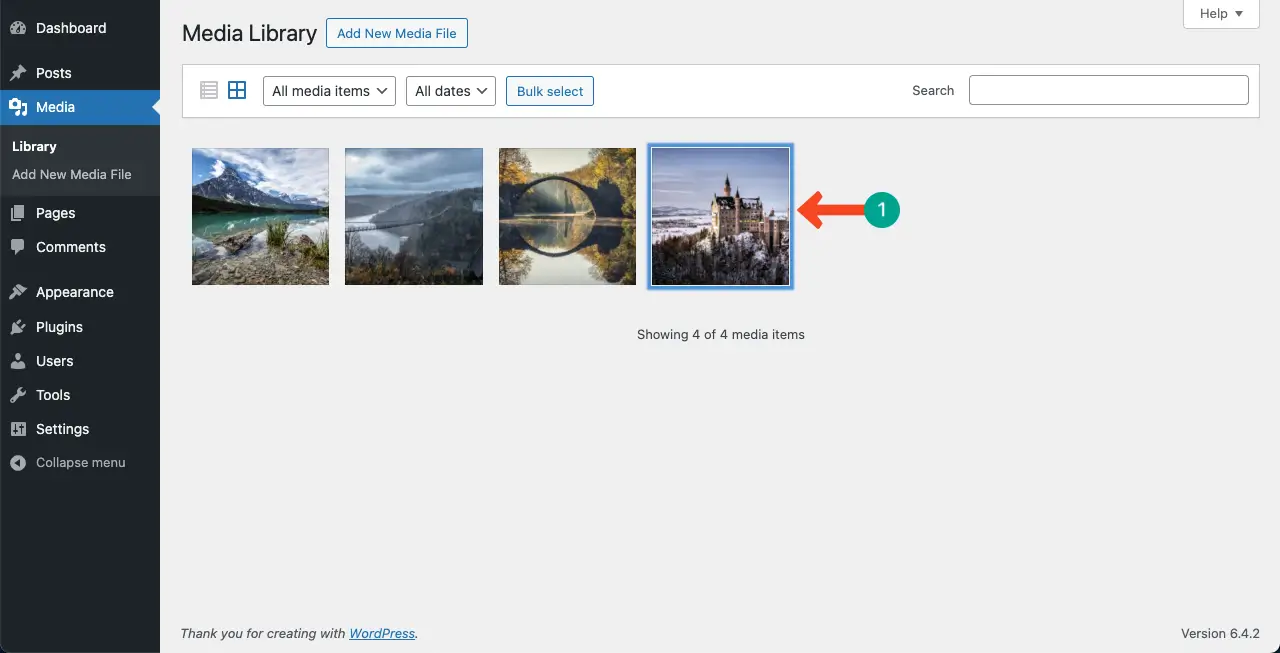
You can see images have been uploaded to the WordPress Media Library.
Learn how to add alt text to images in WordPress.
Method Two: How to Upload Images to the Gutenberg Editor
Gutenberg is a content creation tool/feature that allows you to curate your desired content with a mixture of text, graphics, and other elements and showcase them to the users. You can create posts and pages for your website with the Gutenberg editor.
Let’s explore how to upload images to the Gutenberg editor.
Step 01: Open a Post or Page
Log into your WordPress website. Navigate to Posts > Add New Post to open a new post.
Or, navigate to Pages > Add New Page to open a new page.
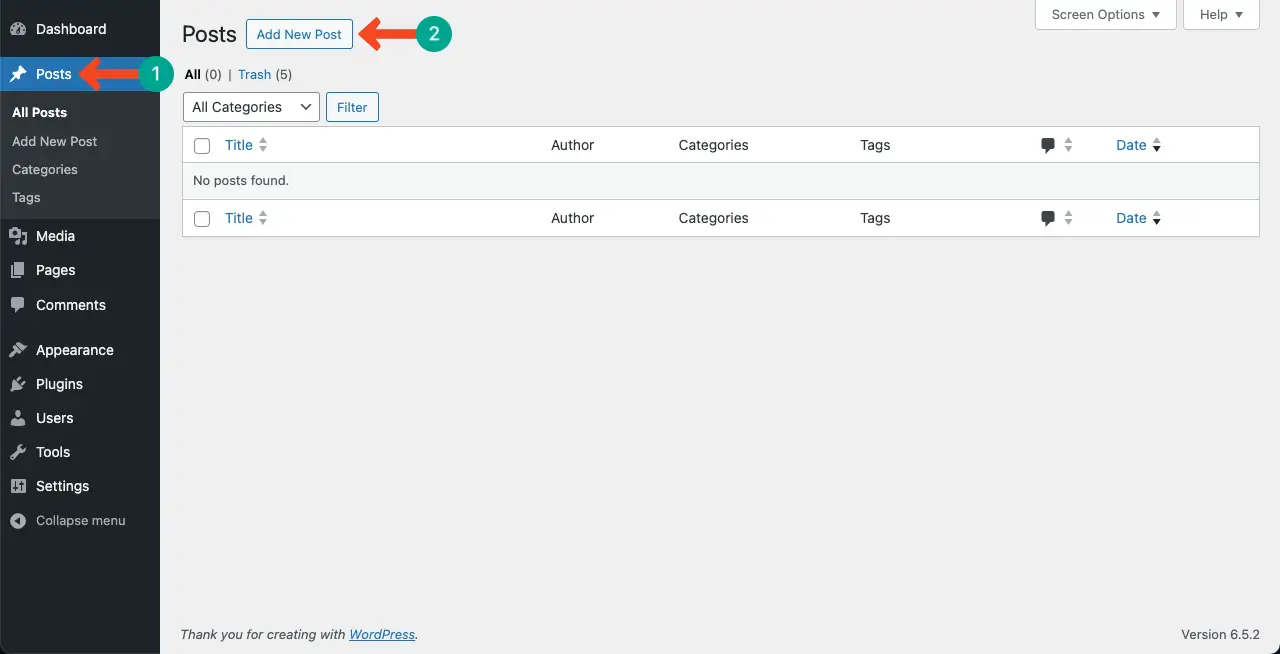
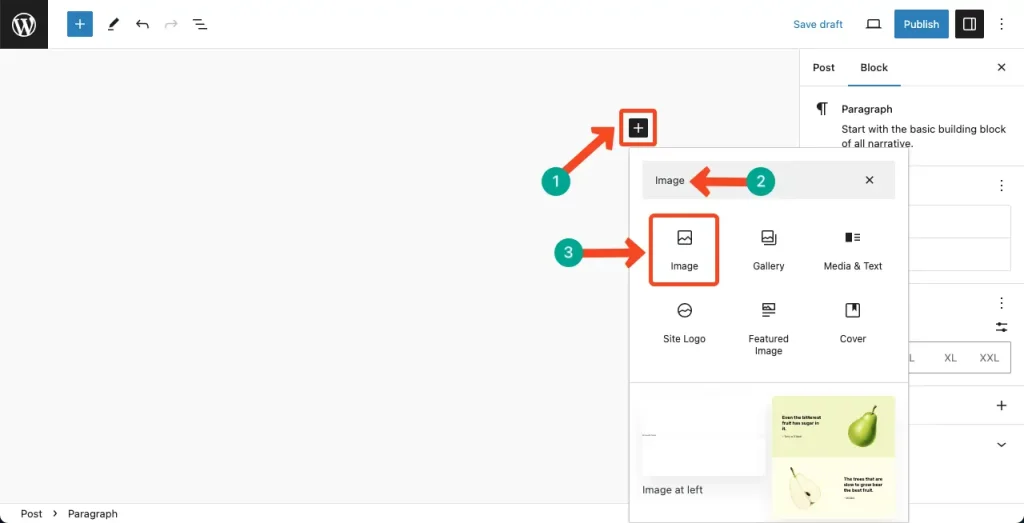
Step 02: Find and Add the Gutenberg Image Block
Click the plus (+) button on the editor. Find the Image Block from the library by typing its name in the search box. Add the block to the editor once you see it.
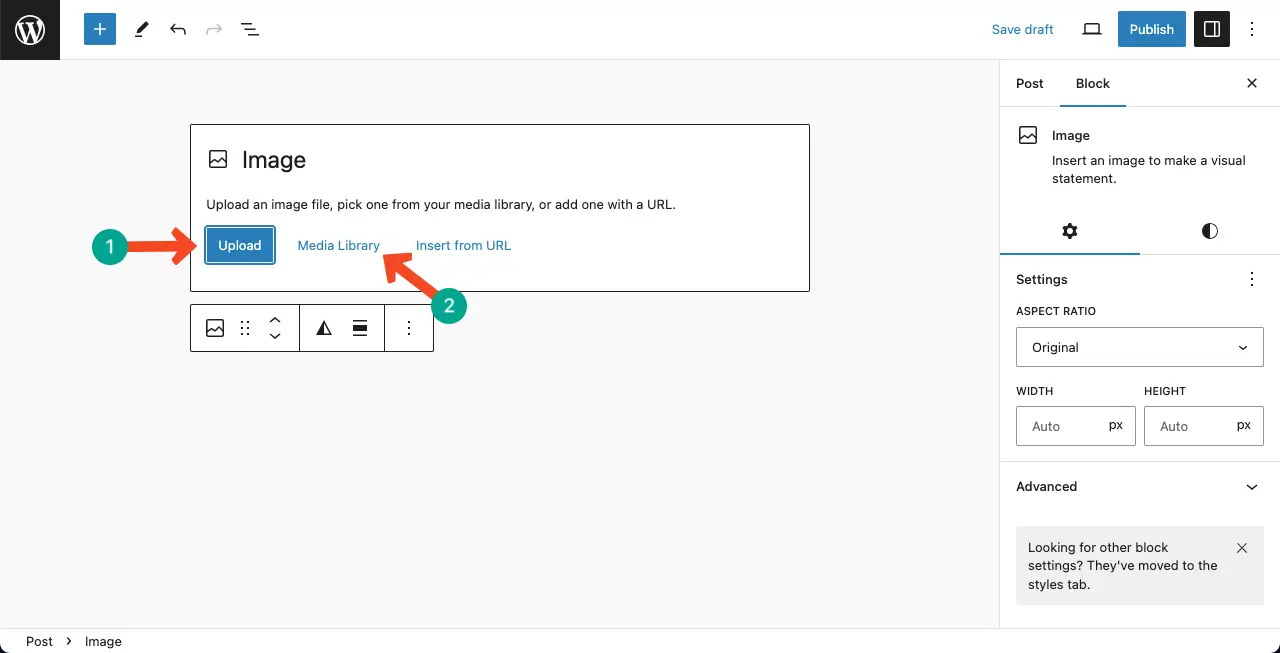
Step 03: Upload the Image From the Local Drive or the Media Library
Click the Upload button to upload images from the local drive. Or, click the Media Library option to add the image from your media library that we showed you in the above method.
I’m selecting the Upload option for this tutorial.
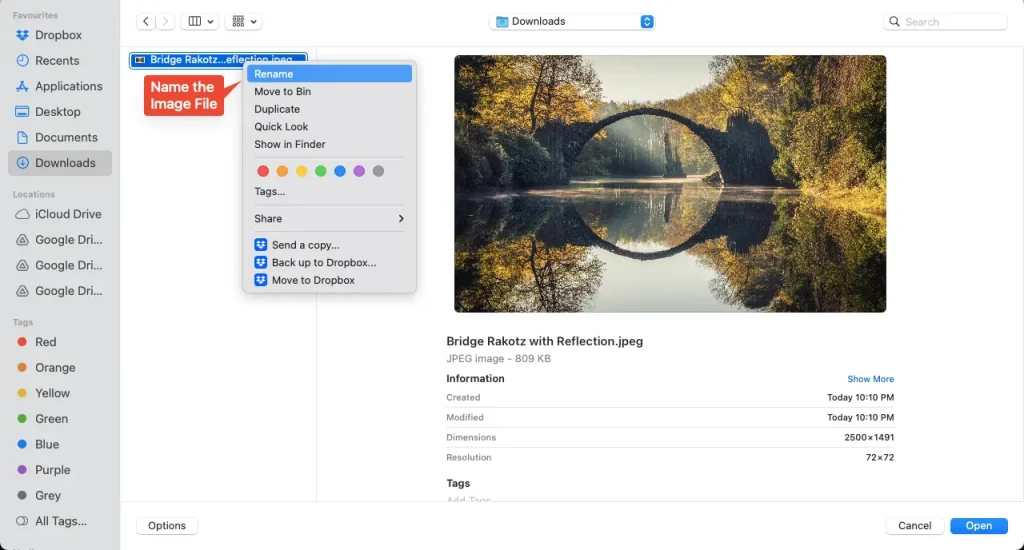
Step 04: Rename the Image Before Uploading It to the Website
You may upload it instantly. But it’s better if you rename the image file with meaningful words so the file is easily detectable in the Media Library. Then, upload it.
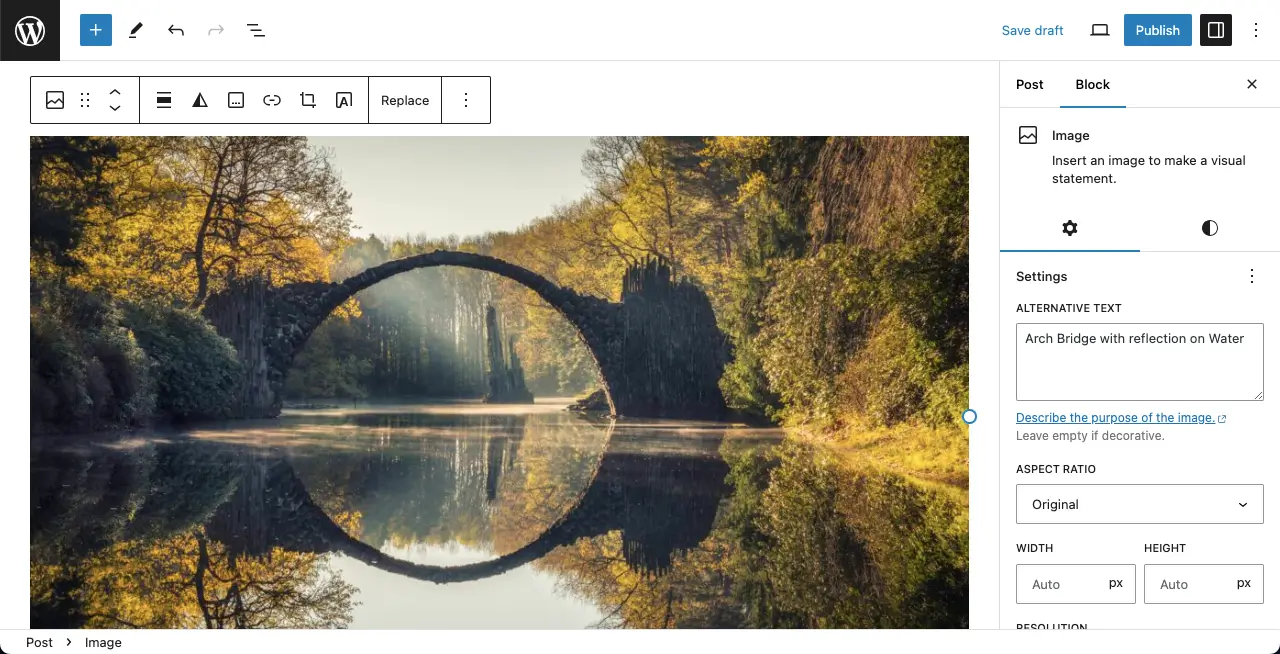
You can see the image is uploaded to the editor.
The Gutenberg Image Block allows you to customize the layout, height, and width of the image. You can also add an alt-tag and set border and radius, including the Duotone filters.
Explore this post on how to add images to WordPress using the Image Block.
How to Delete Images From WordPress
Although you can upload images using either the Media Library or Gutenberg editor, you have to delete them from the Media Library with assurance. Otherwise, no matter whether you remove it from the post/page, it will remain in the WordPress Media Library.
So, this type of deletion from the post/page will practically do no good to save your web space. You can delete images from the WordPress Media Library in two ways.
Method 01: Delete the Image Directly from the Media Library
Once you delete an image from the WordPress Media Library, it will automatically be deleted from all the posts and pages where it has already been used. Follow the steps shown below.
Step 01: Find the Image in the Media Library
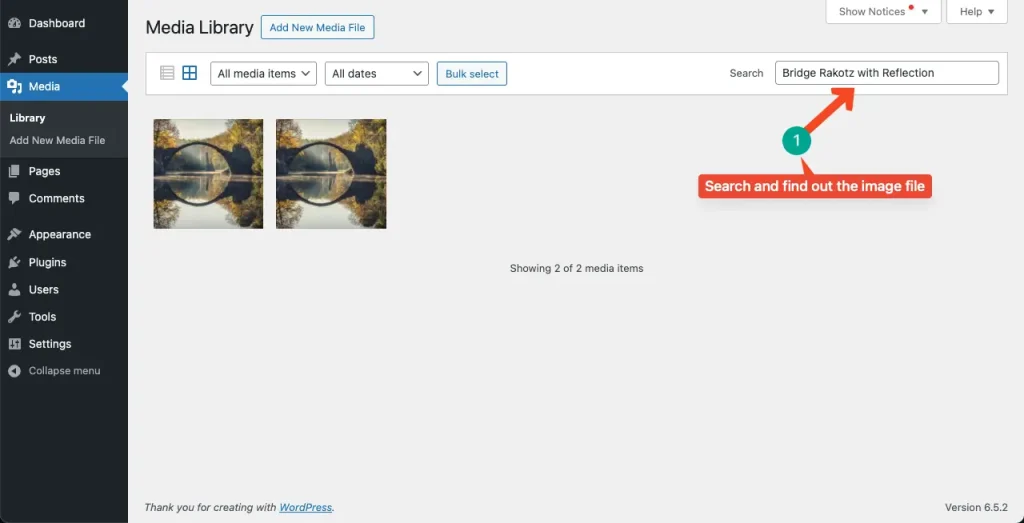
Your WordPress Media Library may have hundreds of thousands of images. How to find the one quickly you want to delete?
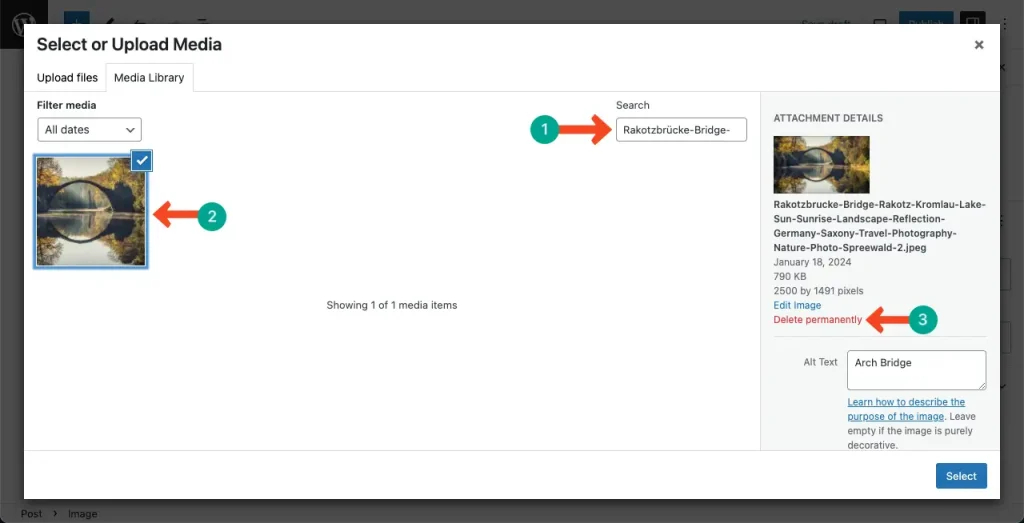
Type the image name in the search box in the top-right corner. If the image name is correct, it will instantly appear below.
Click the image you want to delete.
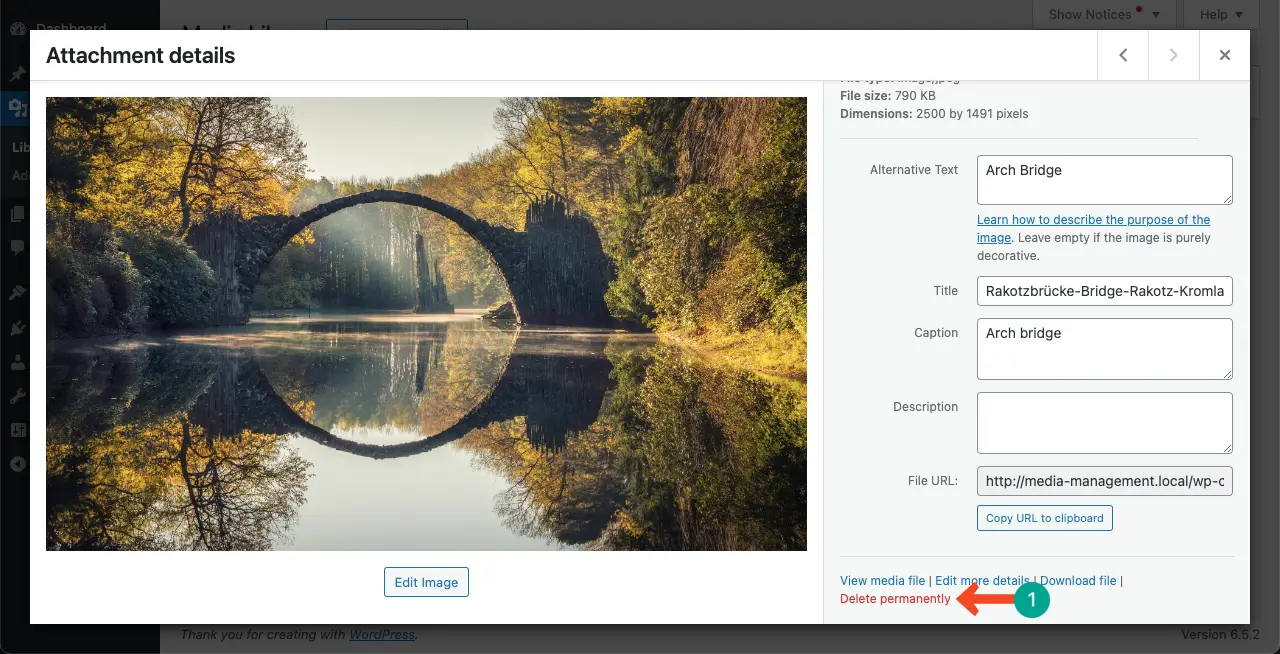
The image will open up with a new dialogue box. You will see the Delete permanently option at the bottom of the dialogue box.
Click the Delete permanently option. The image will be deleted in a second.
Method 02: How to Upload Image Files to WordPress Posts and Pages
You can delete your desired image files from the Media Library even from your posts and pages. Here’s how to do it.
Step 01: Add the Gutenberg Image Block to the Post/Page Editor
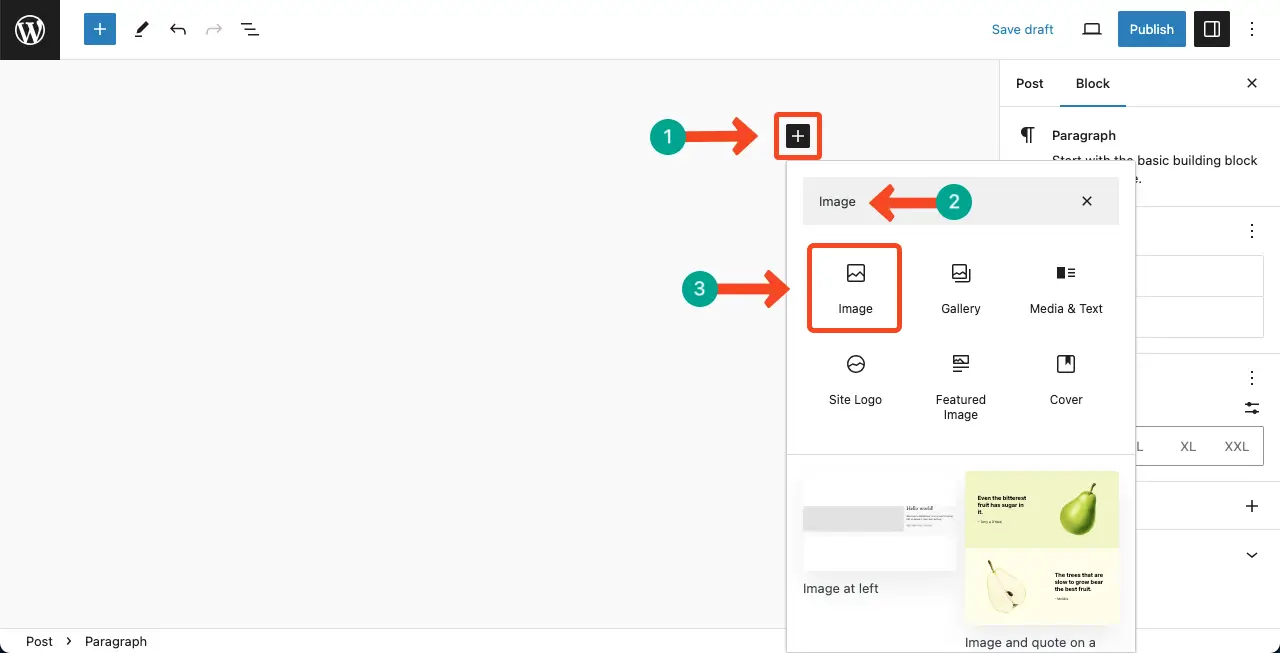
Open a post or page on WordPress. Hit the Plus (+) icon to open the Gutenberg editor. Type Image to find the Image block. Click the block after it appears below.
Step 02: Choose the Media Library Option
To upload a completely new image, hit the Upload button. To add an image already in the WordPress Media Library, hit the Media Library option. Suppose, we are choosing the Media Library option.
Step 03: Select the Image You Want to Delete
You’ll be taken to the Media Library. Search for the image file by typing its name into the search box.
Select the image by clicking on it. Click the Delete permanently option to delete it.
Thus, you can permanently delete images from the WordPress website.
FAQ on How to Upload an Image in WordPress and Delete It
How can I upload images to the FAQ section in WordPress?
You have to install and activate an FAQ plugin. For example, you can install the Ultimate Blocks plugin. It has an FAQ block named Content Toggle.
Add the Content Toggle block to your editor.
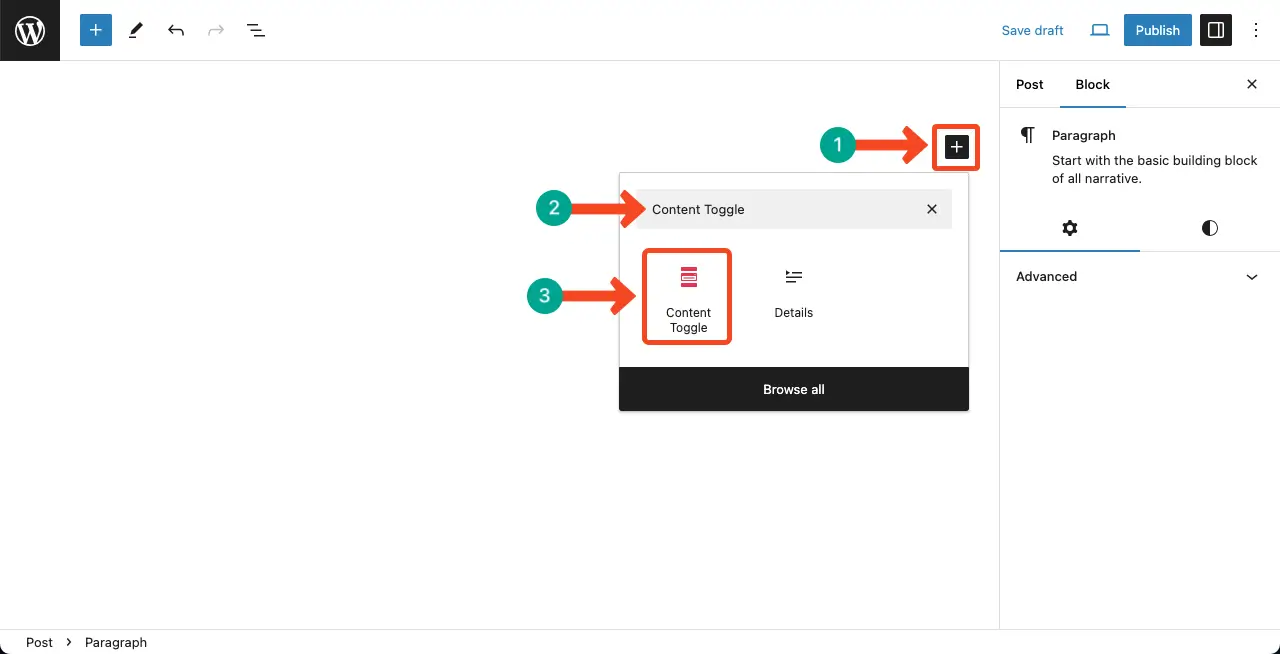
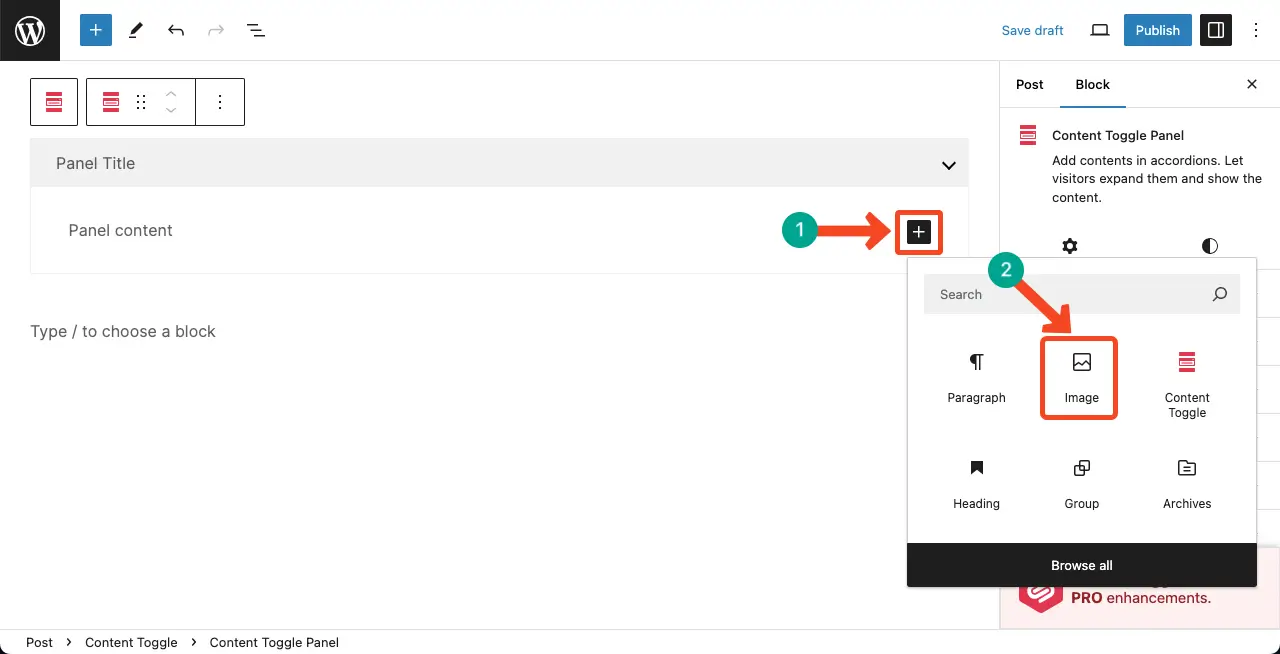
The plugin allows you to add all the WordPress blocks to the FAQ section as you want. You can now add the image block and upload/add your desired image to the FAQ section.
Does deleting an image from the post/page ensure it’s deleted from the Media Library?
No, deleting an image from the WordPress post/page doesn’t ensure it has been deleted from the Media Library.
How to add or upload GIFs to WordPress?
You can add or upload GIFs to WordPress using the Gutenberg Image Block.
Is it possible to bulk delete all the unused image files from WordPress?
By default, WordPress doesn’t allow you to find all the unnecessary images and delete them at once. You have to use an additional plugin like HappyMedia.
Can I replace an image in all the posts/pages at once where it has been used?
Yes, you can do it easily. Here is my other blog post, in which I have covered in detail how to replace an image in WordPress in all posts and pages.
Conclusion
Hope by following the tutorial post, you can now easily upload images to your WordPress websites. But it’s important to remember a few best practices to ensure a seamless image management experience.
Firstly, optimize your images for the web by compressing their size without compromising on quality. This will help in improving your website’s loading speed and overall performance.
Secondly, organize your image library by relevant and descriptive file names. This will make it easier to locate and manage your images in the future. Always remember to use alt text for your images.
Alt text not only helps visually impaired users understand the content of the image, but it also improves your website’s accessibility and search engine optimization.
Lastly, regularly review and delete unused images to declutter your media library. This will help in improving your website’s performance and ensure that you only showcase relevant and up-to-date content.