By locking a block in WordPress, you can prevent accidental changes or modifications. This helps you ensure that its content, styling, and structure remain intact, which adds an extra layer of security, giving you peace of mind.
In this post, I will show you how to lock and unlock blocks in WordPress using a step-by-step guide.
Step 01: How to Lock a Block in WordPress
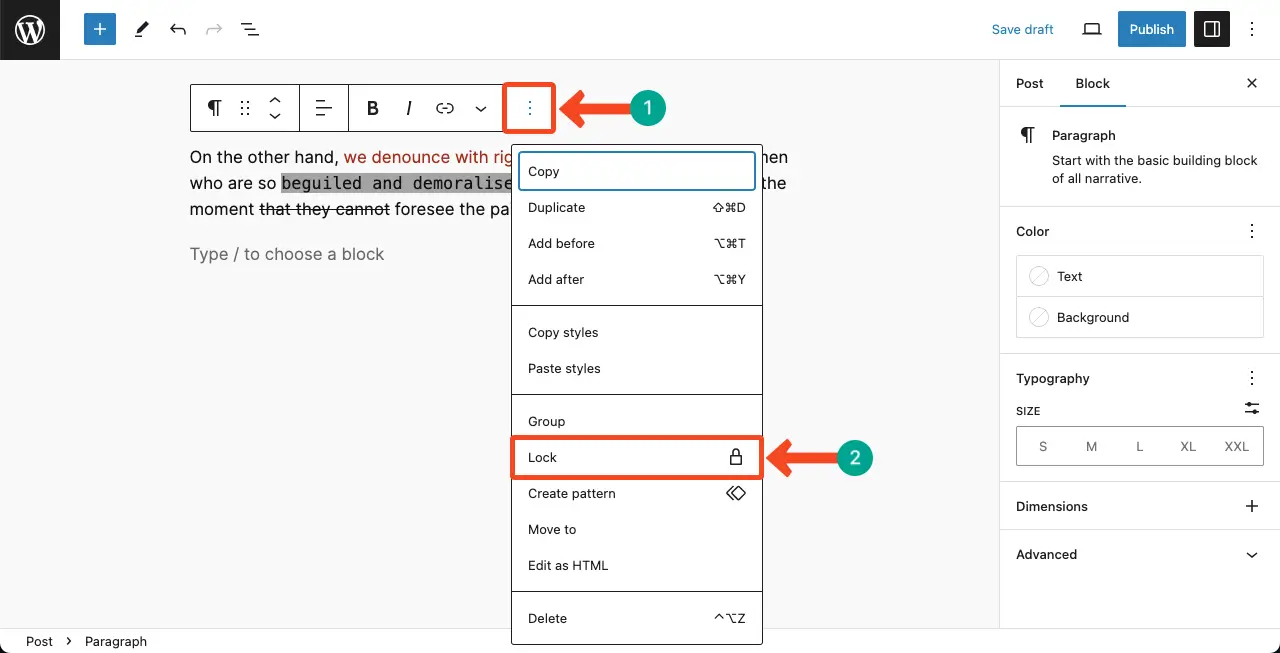
Place your cursor on the block you want to lock. Hit the three-dot icon on the Gutenberg toolbar. Click the Lock option on the dropdown list.
Tick mark the options that you want to be locked. No one can alter these options until this block is unlocked again. Click the Apply button at the end.
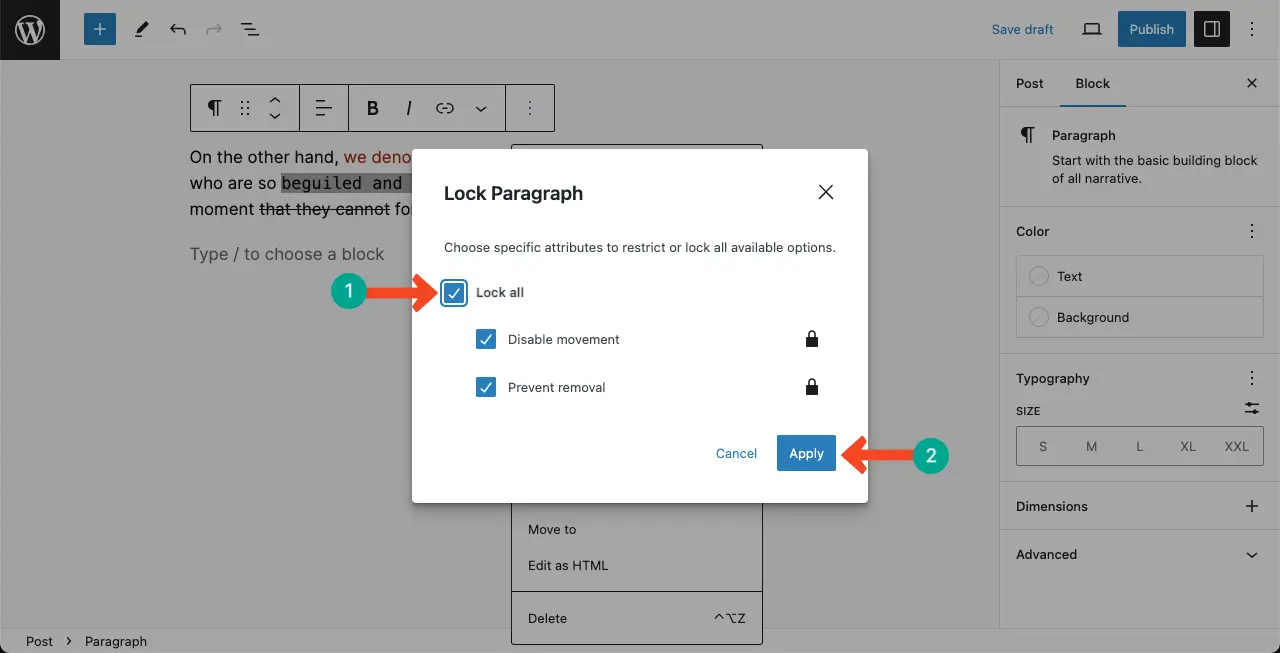
Thus, you can lock blocks in WordPress.
Step 02: How to Unlock a Block in WordPress
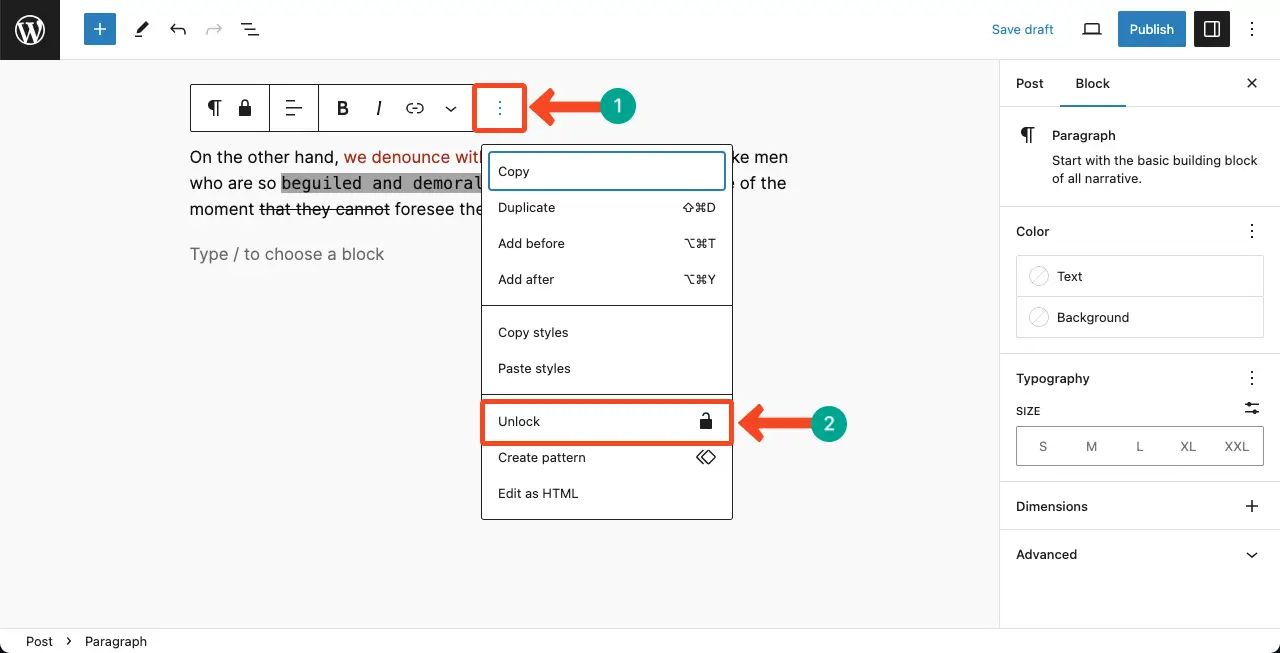
Select the locked block again the same way we showed you above. Hit the three-dot icon on the Gutenberg toolbar. Click the Unblock option on the list.
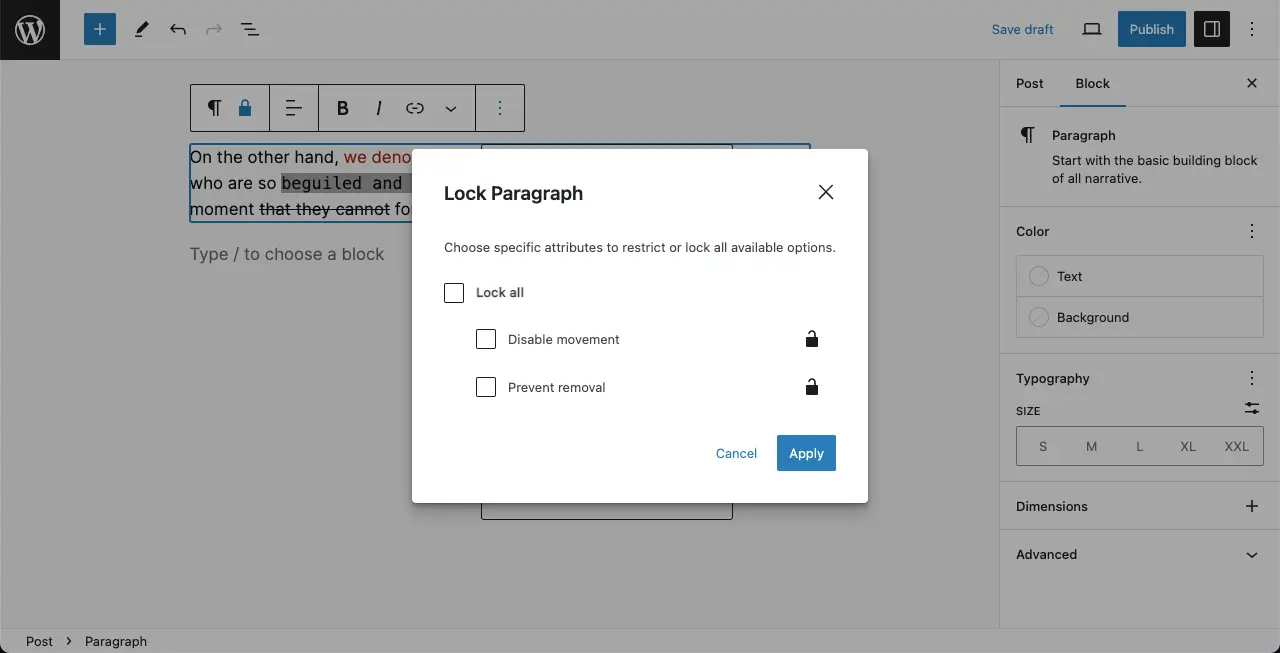
Remove tick marks of the things to be unlocked with the block. Hit the Apply button at the end. The block will be unlocked.
Best Practices to Consider When Locking and Unlocking a Block in WordPress
I have seen so many people interested in knowing how to lock and unlock a block in WordPress. Below, I have covered several best practices you must consider when locking and unlocking a block in WordPress.
1. Plan Your Content Structure
Before locking blocks, take the time to plan and establish a clear content structure. By organizing your content into logical blocks, you can ensure that locked blocks serve their purpose without disturbing the flexibility of your layout.
2. Lock Essential Content
Identify the blocks that contain critical or important information that should not be modified. These could include headers, footers, navigation menus, or any other vital components of your website. Locking these blocks prevents accidental changes.
3. Configure User Roles and Permissions
By configuring which users have permission to lock and unlock blocks, you can approve authorized users who have access to lock and unlock blocks.
4. Consider Collaboration
If multiple users are involved in content creation, discuss and establish a workflow for collaborating on locked blocks. Determine how to allow others to modify, review, and approve such lock modifications.
5. Understand the Purpose
This is a universal best practice for all blocks and features in WordPress. The primary purpose of block locking is to prevent the accidental removal of important blocks or to restrict specific users from modifying the layout. If you work as a team, ensure you have discussed the purpose well among your team members.
Conclusion
You can apply this lock feature on web elements like headers, footers, and crucial sections so accidental alternations cannot take place in any way. Hope you have enjoyed this post.
Visit this post to learn all the other options on the Gutenberg toolbar.