
Creating a memorable header for your WordPress site is one of the fastest ways to make a good first impression with your visitors. Because your site header is the first thing that users see when they arrive at your website.
It’s a core part of the overall web design and the user experience you provide. Whether you run a blog, an online store or a corporate website, a well-designed header can help you better represent your brand and navigational settings.
In this tutorial, I will show you how to create a header in WordPress with a step-by-step guide. Before that, I will cover a short theoretical part about headers in WordPress. Get started!
What Is a Header in WordPress?
A header is the top section of a website that typically includes the site logo, web title, and navigation menu. It also includes additional elements like a search bar and social media icons.
The WordPress header serves as a key visual and functional element to help users navigate your site. It provides a consistent branding experience across all pages. The header is usually customizable through your theme settings and plugins.
They allow you to tailor the website header to match your site’s design and functionality needs.
Must Have Elements in a WordPress Header
Below is a list of all the important elements that a well-designed website header must have. Take a quick look at them.
A well-designed WordPress header should include several essential elements to ensure functionality, aesthetics, and a positive user experience. Here are the must-have elements in a WordPress header:
- Logo
- Site Title
- Navigation Menu
- Search Bar
- Call-to-Action (CTA) Buttons
- Social Media Icons
- Contact Information
- Language Selector
- Login/Register Links
Things By Which You Can Create a Custom Header in WordPress
WordPress offers you various tools and solutions to build and customize your website. Based on the solutions, there are many ways you can create a header in your WordPress website. For example, you can create a header in WordPress using themes and page builder plugins.
There are two types of WordPress themes: Editor Themes and Full Site Editing Themes. Let’s now have a quick overview of these theme types.
Editor Themes are designed to work seamlessly with the WordPress block editor (Gutenberg). They often come with pre-designed blocks and styles that you can use to create and customize your website content.
Full Site Editing (FSE) Themes allow you to customize not just your content but also your site’s overall layout and design, including headers, footers, and other template parts, using the block editor. In this section, I will explain a few methods of how to create a header in WordPress.
Besides, there are many page builder plugins, like Divi, Elementor, and SeedProd. Using them also, you can create stunning headers for your site. Once you use a page builder, you don’t have to depend on any theme.
In the following parts of this post, I will show you how to create a header in WordPress with these themes first and then with a popular page builder plugin.
Method One: Create a Header in WordPress with an Editor Theme
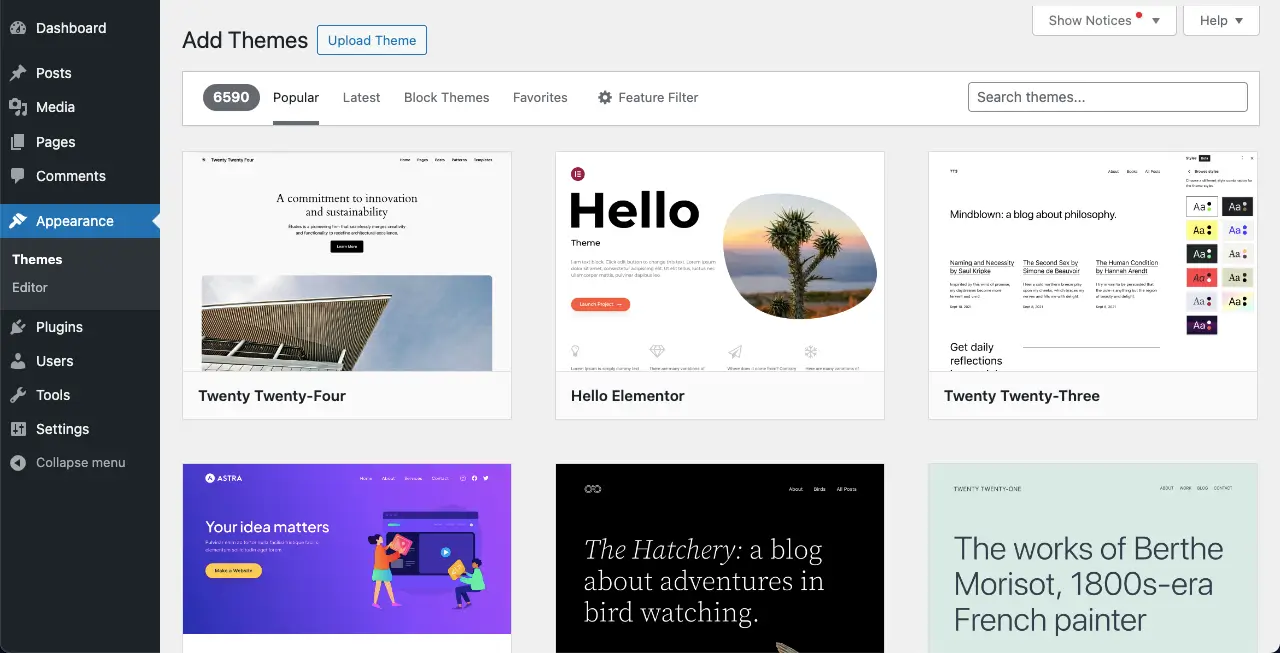
Some popular Editor Themes are GroundWP, Twenty Twenty Four, Twenty Twenty Three, etc. I’ll show you the tutorial using the GroundWP Theme.
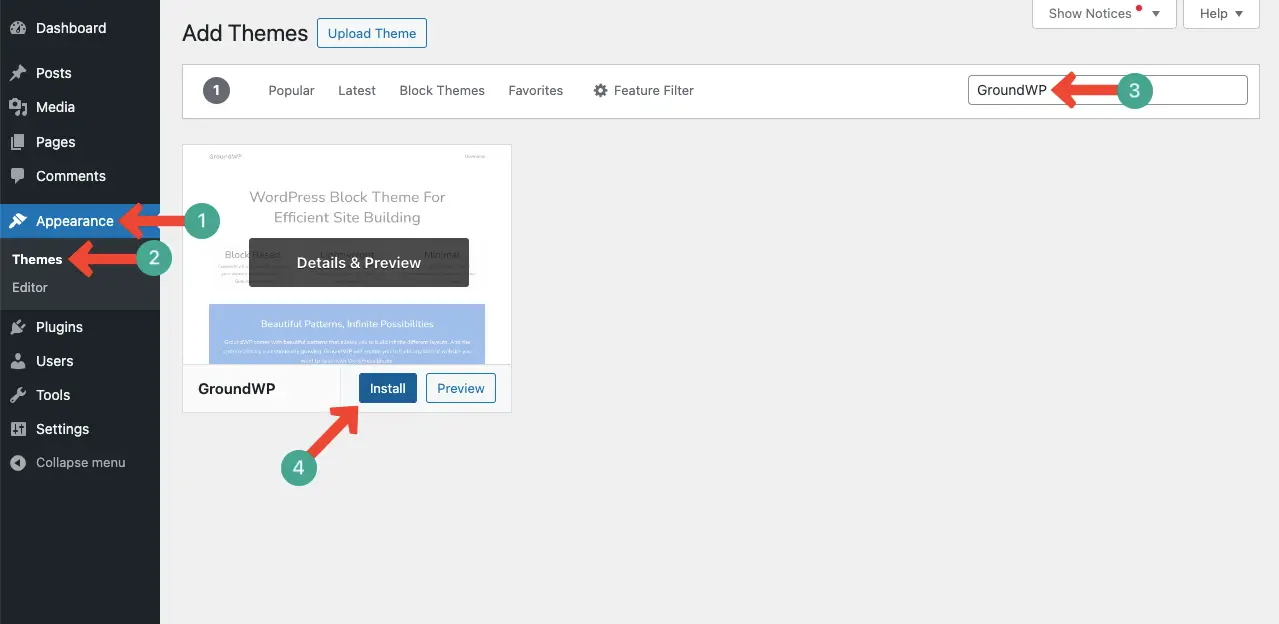
Step 01: Install and Activate the Editor Theme (GroundWP)
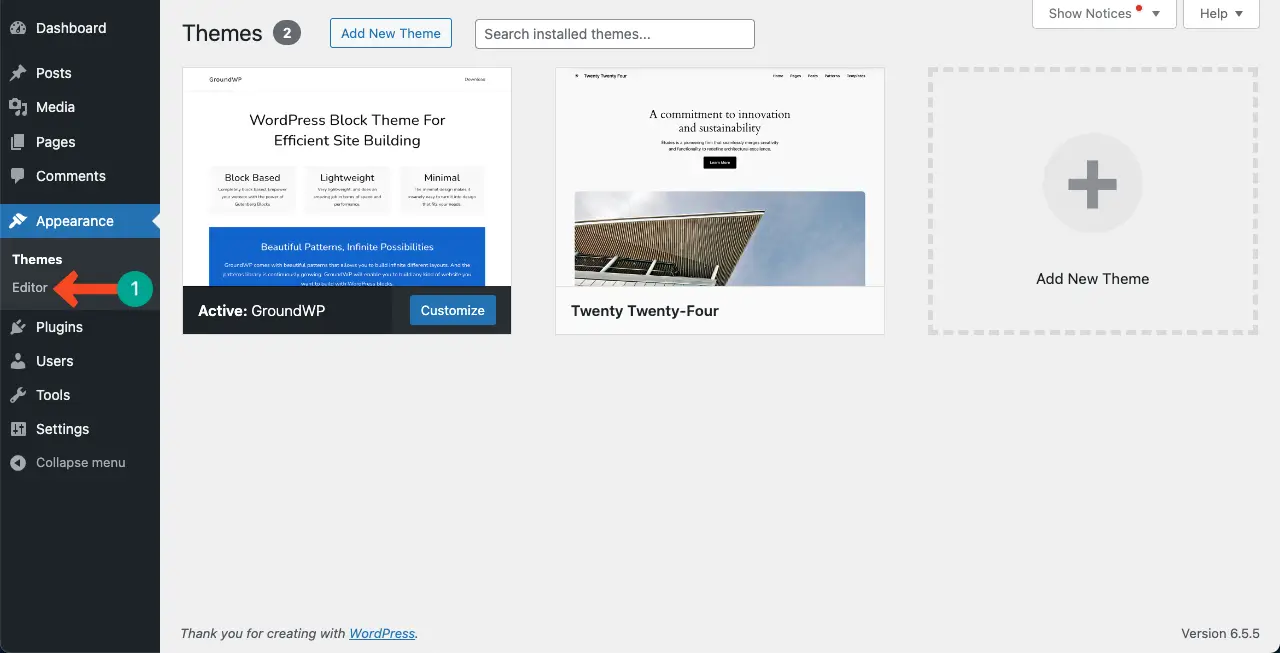
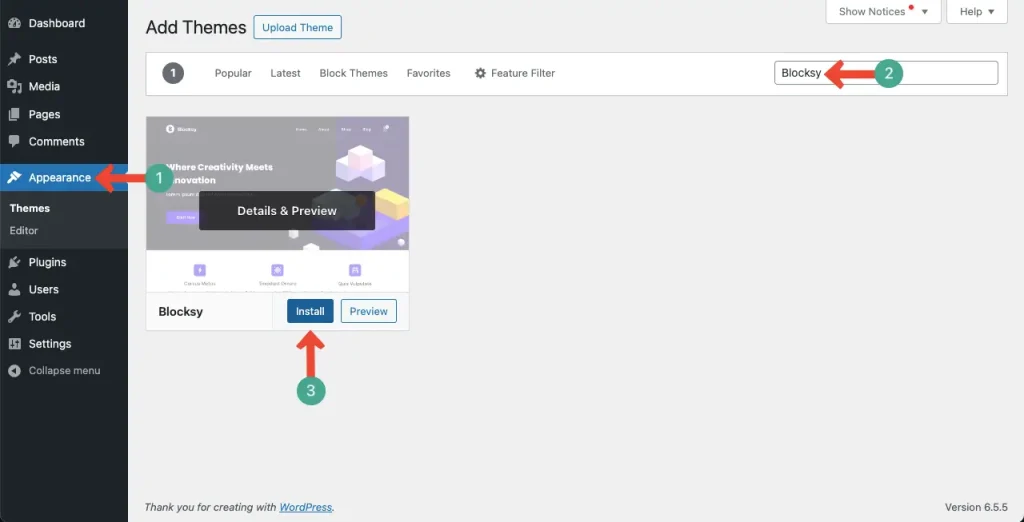
Go to Appearance > Themes. Type the theme name in the search box on the top-right corner. If you have any favourite theme, you can write its name there.
Once the theme appears below, Install and Activate it.
Once the theme is installed and activated, go to Appearance > Editor.
Step 02: Expand the Theme Editor
The theme editor will be opened in a second. Click anywhere on the editor to expand it.
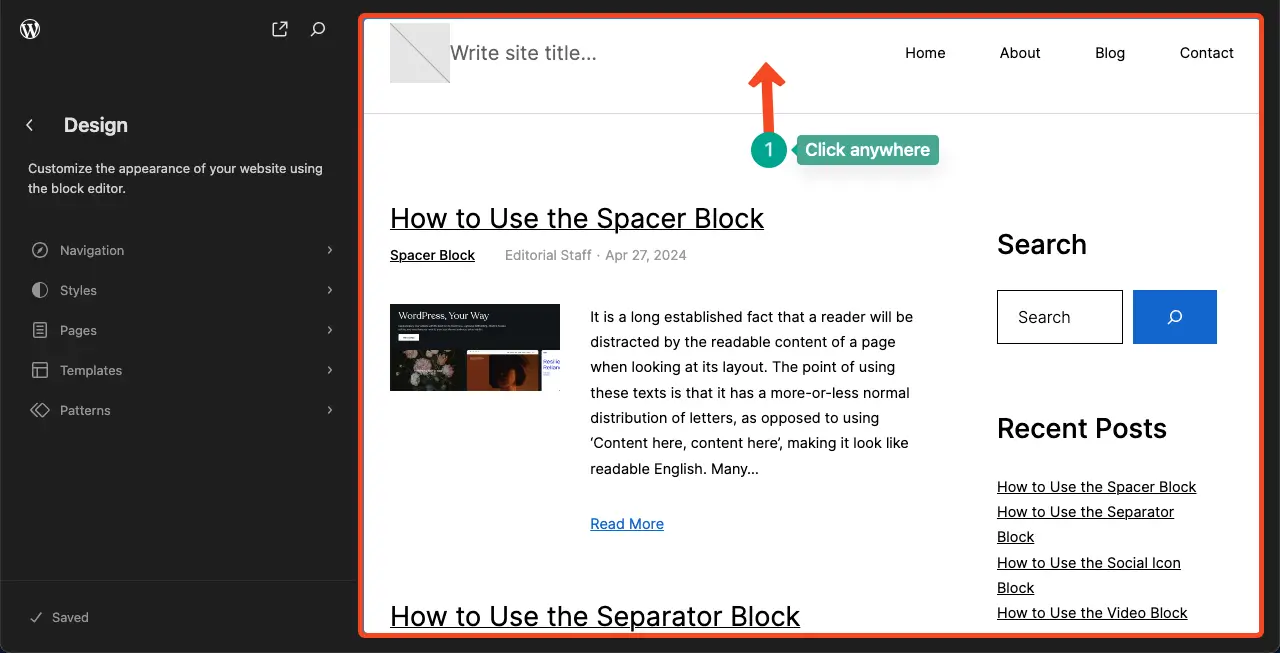
Now, click anywhere on the header section to expand it. You’ll be able to customize it.
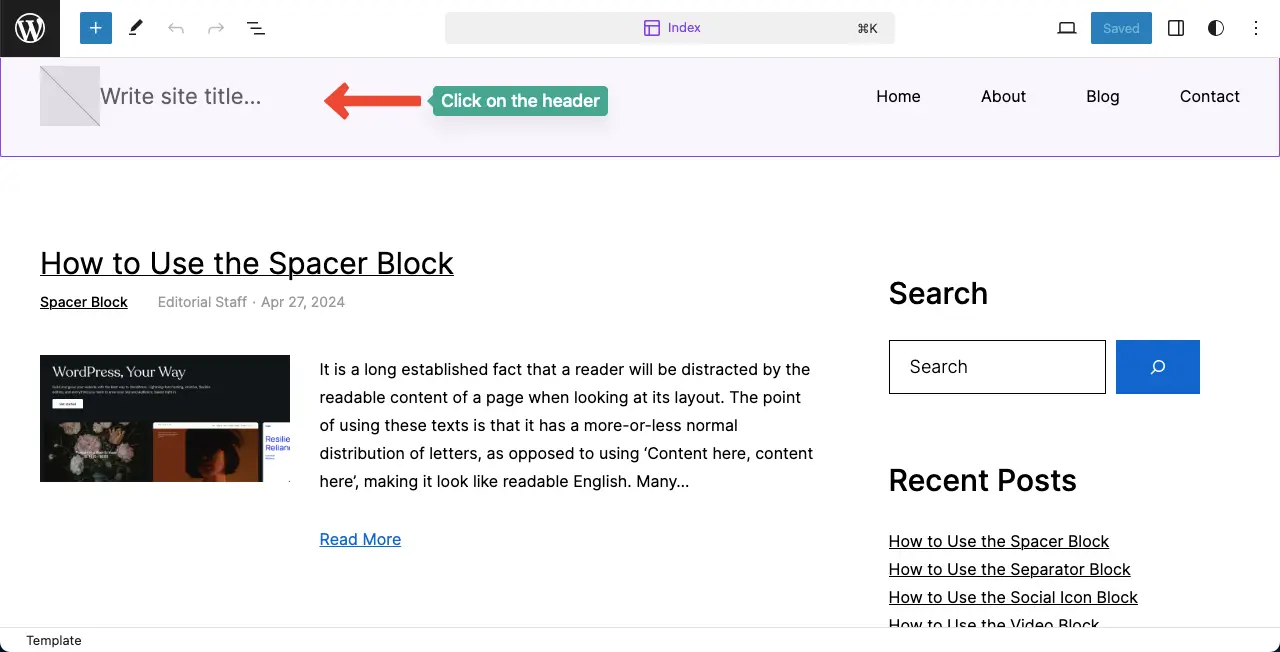
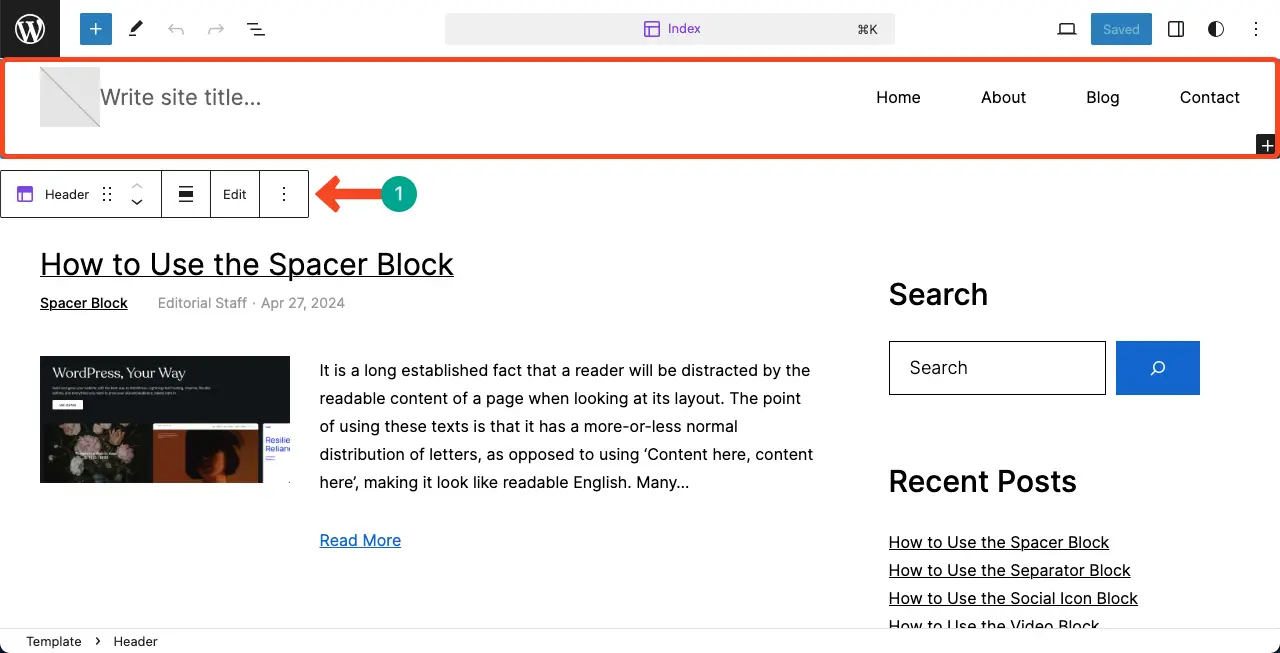
Step 03: Select the Header Area
You can see the header area is selected and the Gutenberg toolbar appears alongside. Now, place your cursor on different elements to customize them one by one.
Step 04: Add a Logo to the Header
First, click the logo section. It will allow you to upload and set a logo for the website. You can upload it from the media library or your local drive.
After the logo is added, it may be larger by default. You can resize it by holding its side edges.
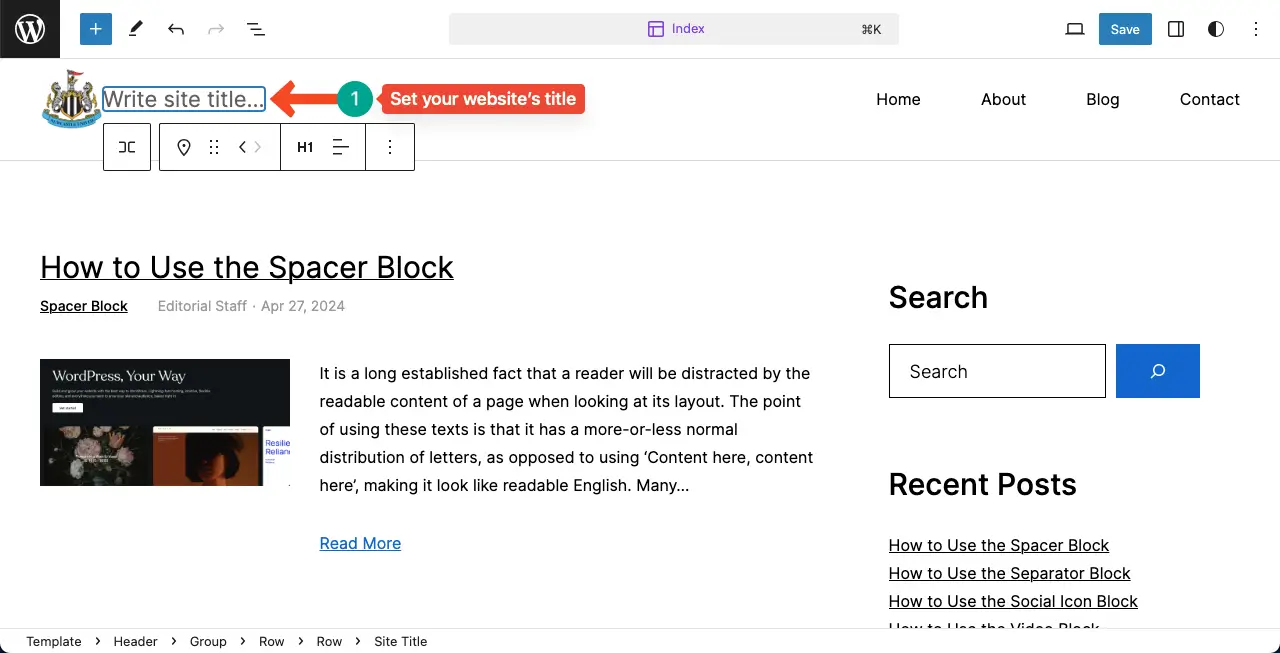
Step 05: Add a Site Title
Next, place your cursor on ‘Write site title…’. You’ll be able to write a text to set it as your site’s title. Do it yourself.
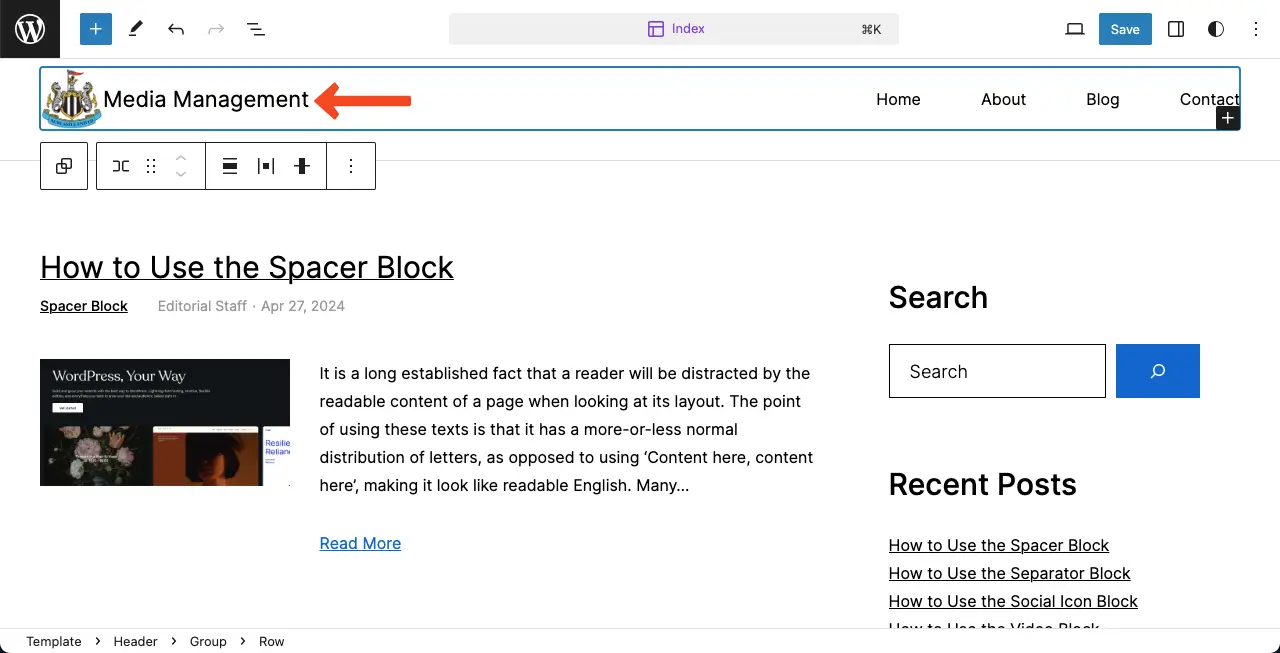
You can see our site title is added to the respective section.
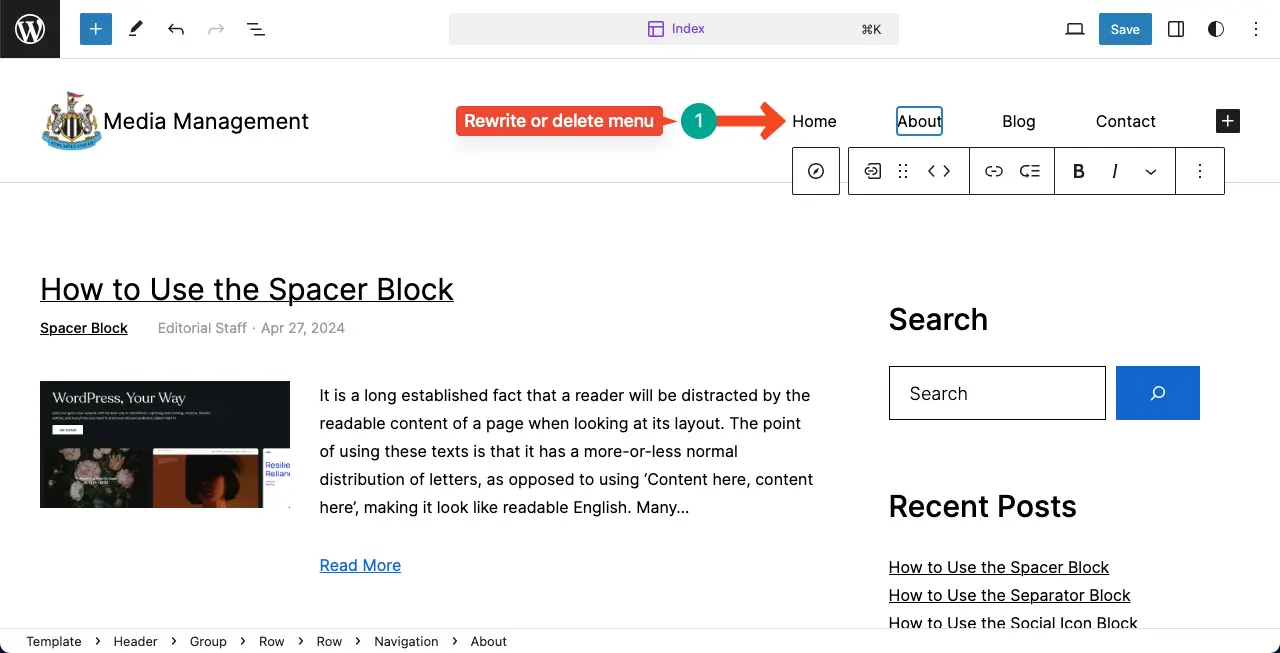
Step 06: Set the Header Menu
Select the menu section on the theme editor.

The theme editor automatically comes with some default menu items. You can rewrite them or delete the unnecessary ones.
It’s simple. Just place your cursor on the menu items one by one. You’ll be able to do this.
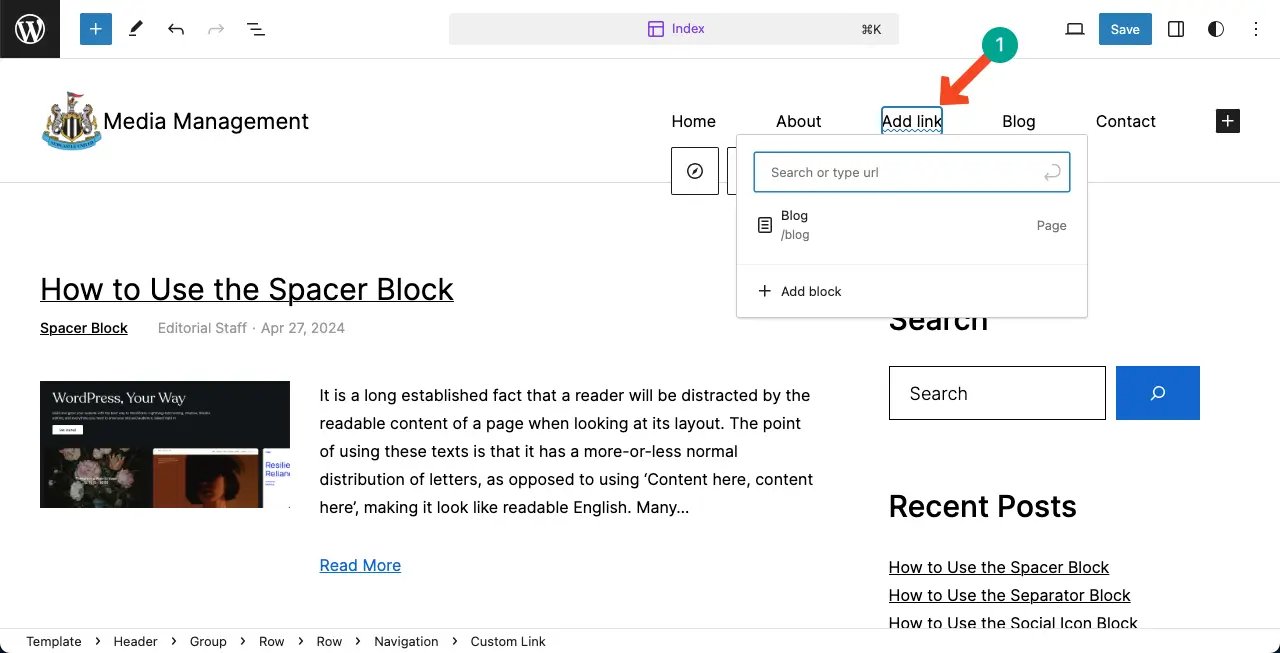
To add a new item to the header, hover your cursor over the space between two items. You’ll see the Gutenberg plus (+) icon appear. Click the plus (+) icon.
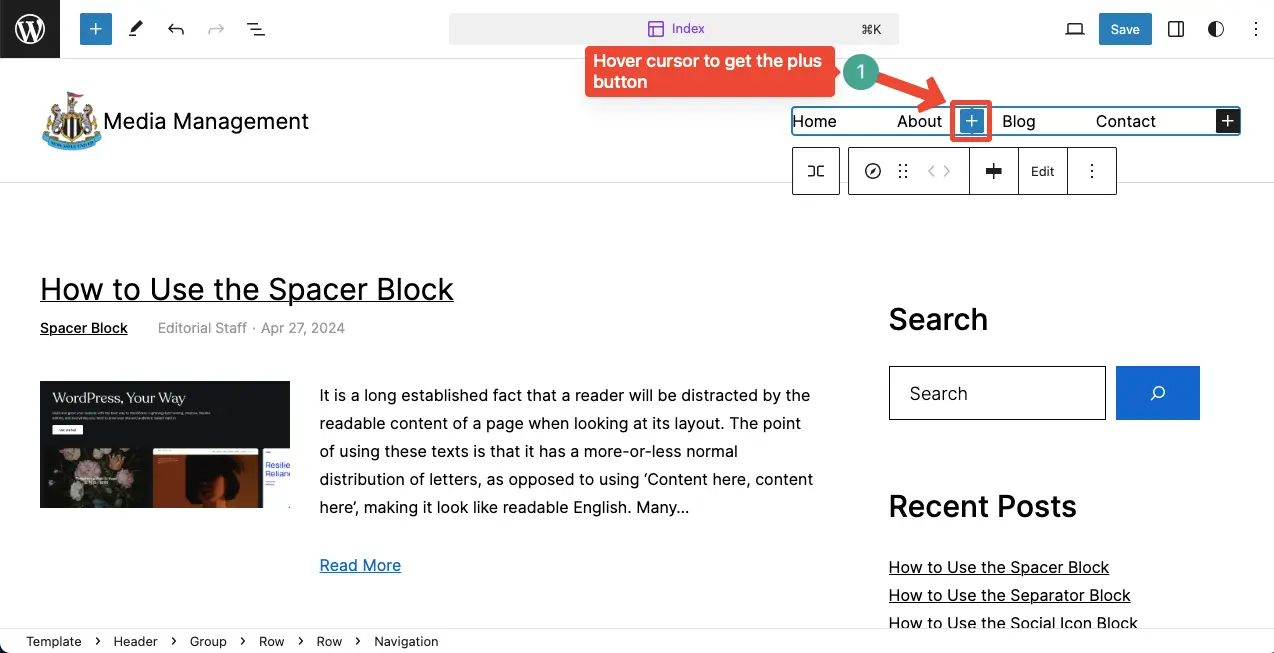
You can see a new menu option added. Now, you can rewrite it or link a page you want to display.
Step 07: Add New Elements to the Header
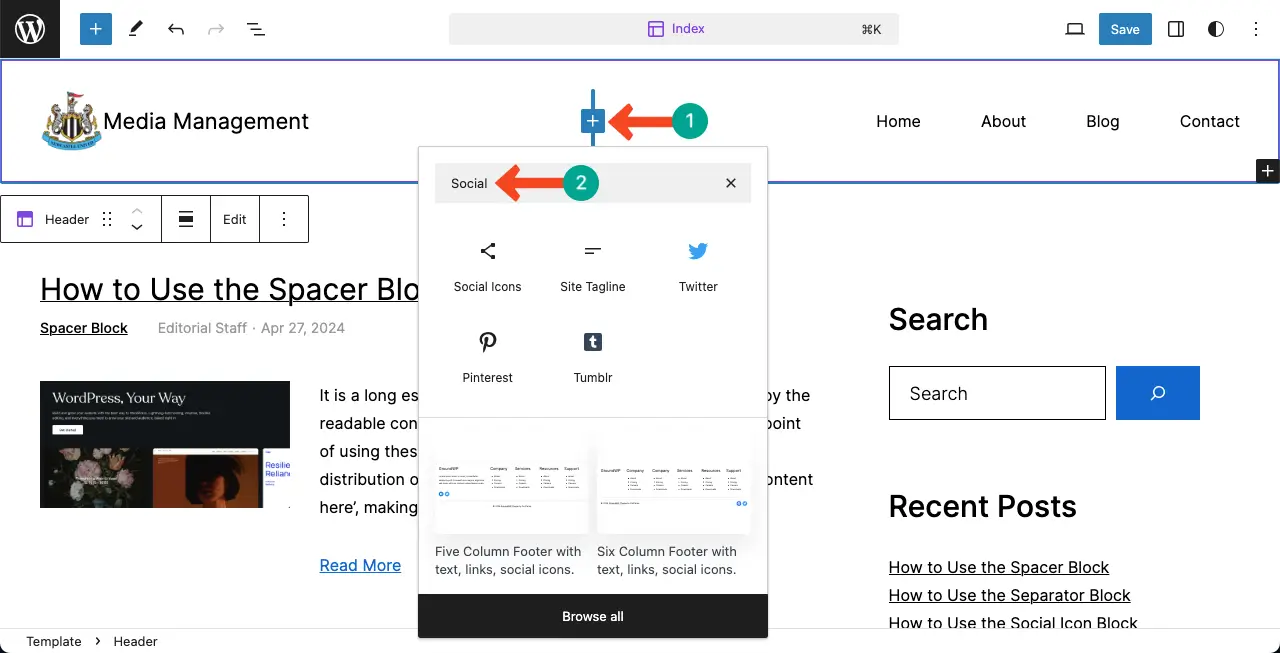
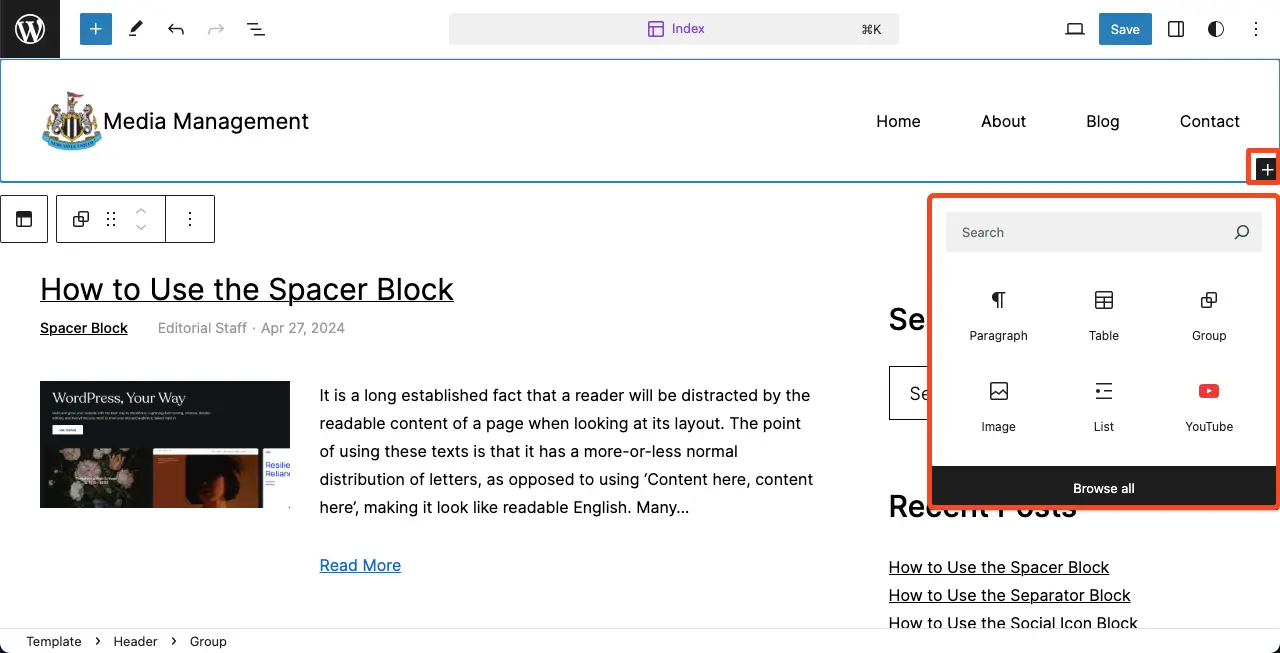
Now, to add a new element to the header, hover your cursor over the blank space on the header. You’ll get the Gutenberg plus (+) icon. Click the plus (+) icon.
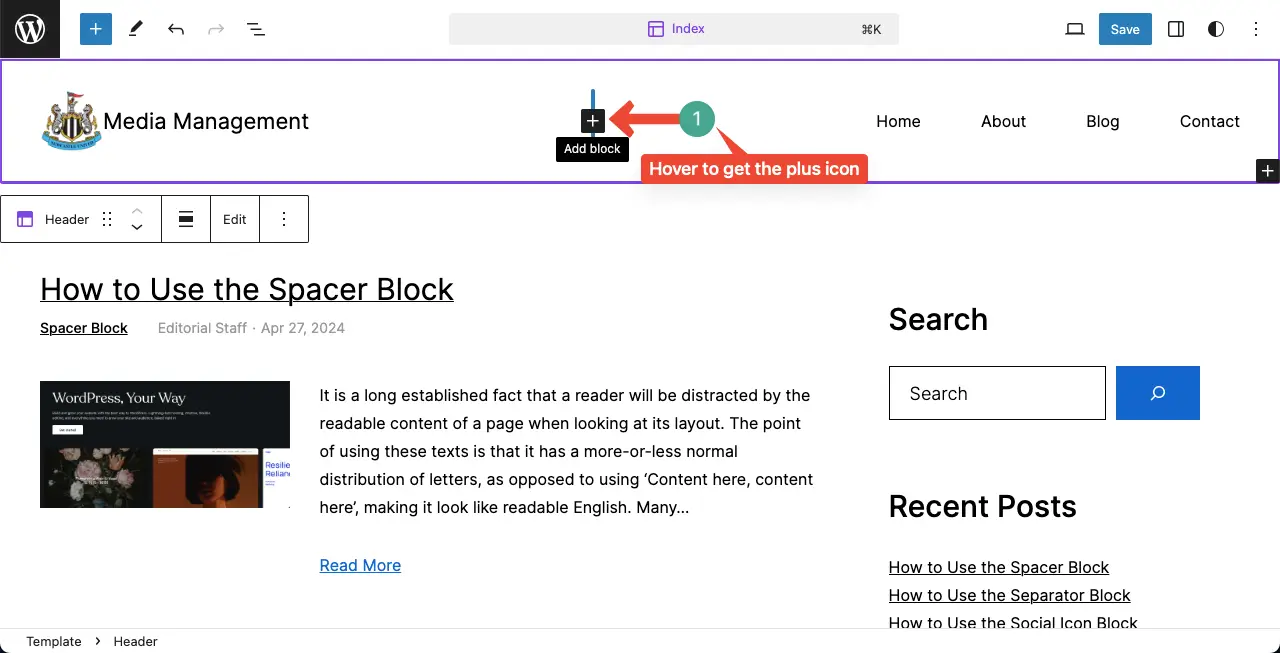
Search, find and add new elements to the header as you want. The process is similar to adding blocks in WordPress. Hope you can do it yourself.
Step 08: Add Multiple Lines/Rows to the Header
To create multiple lines/rows in the header, click the plus (+) icon on the bottom-right corner.
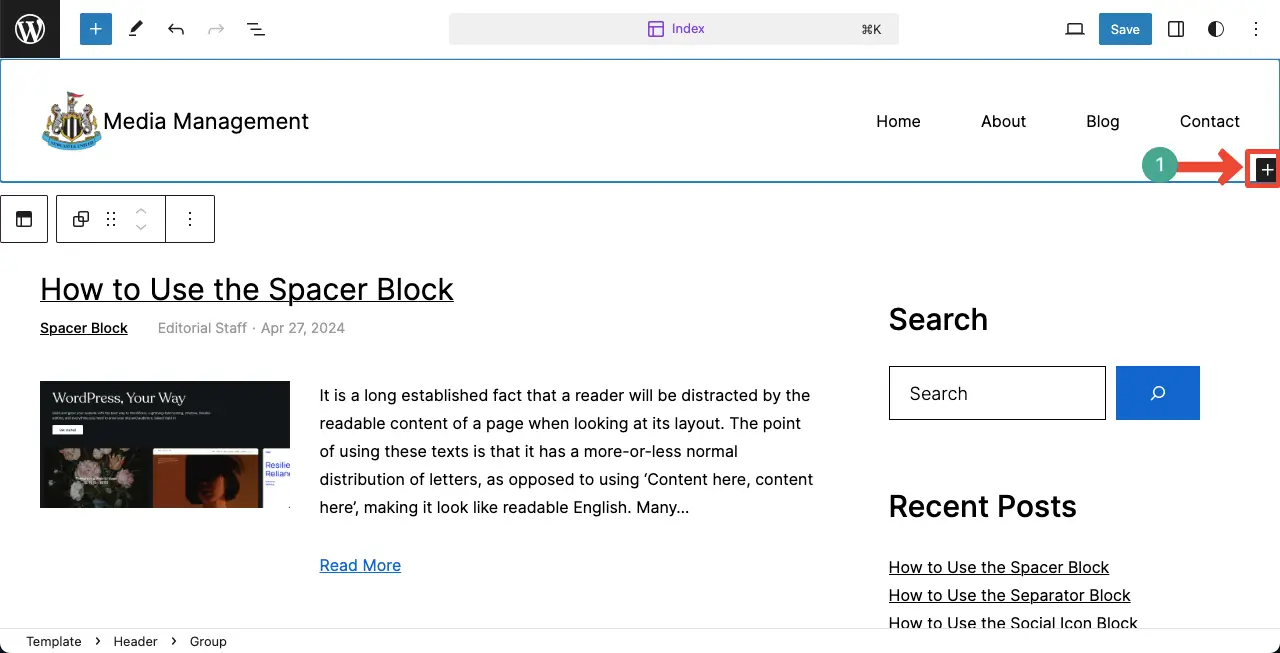
Here again, you can add elements to the new line/row you create. Just find the block you want to add.
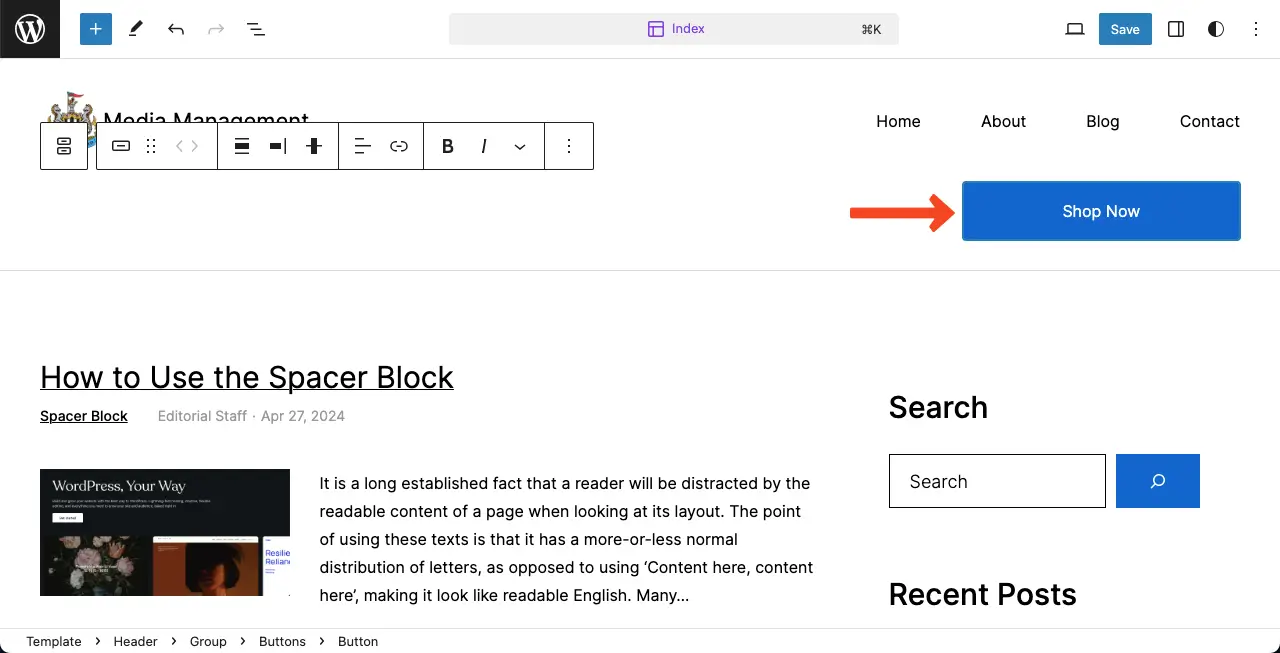
For example, I have added a CTA button to the second line/row. You can add anything you want.
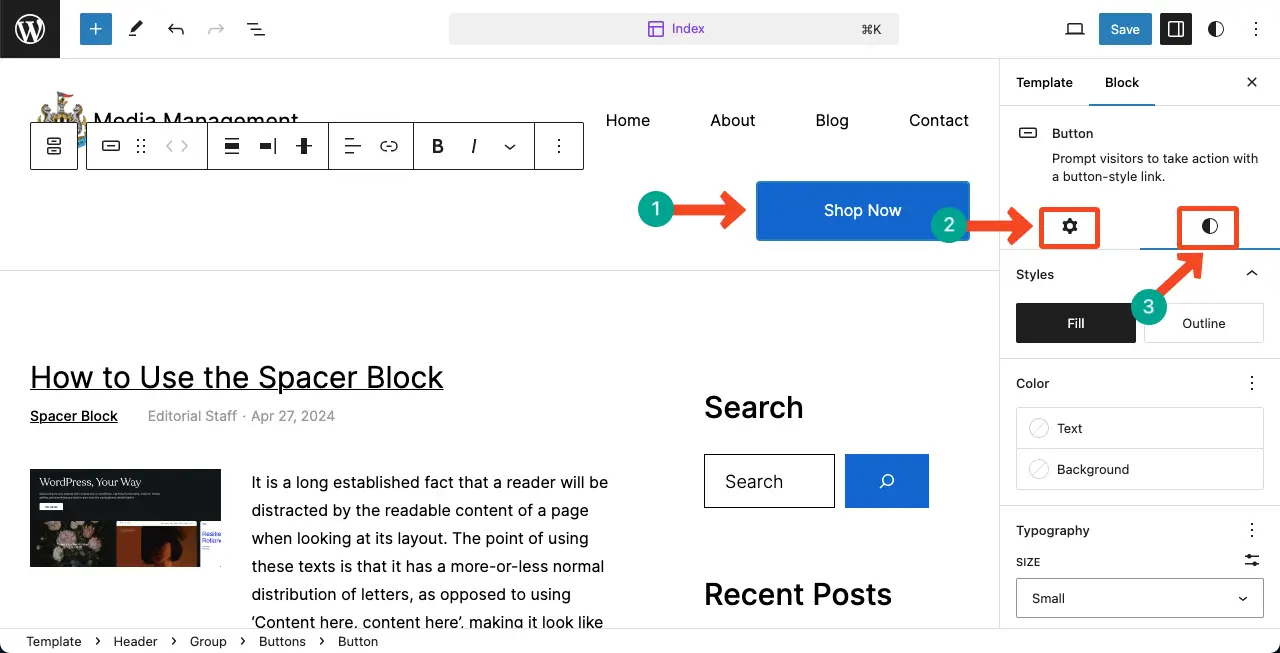
To customize the elements you added in the header, open the sidebar keeping the respected element selected. You’ll be able to configure the settings and stylization options of the block.
Thus, you can create a header in WordPress using the Editor themes.
Method Two: Create a Header in WordPress with a Full Site Editing Theme
Astra, GeneratePress, OceanWP, Hestia Pro, Blocksy, etc., are some most popular Full Site Editing themes. They offer comprehensive web layout customization options by which you can build various parts of a website, like the header, footer, sidebar, scroll-to-top, tooltips, and more.
I will now use the Blocksy theme in this section to explain how to create a header in WordPress.
Step 01: Install and Activate the Full Site Editing Theme (Blocksy)
Go to Appearance. Type your theme name (for example Blocksy) in the search box on the top-right corner. Once the theme appears, install and activate it.
Step 02: Go to Theme Customizer
Once the theme is activated, go to Appearance > Customize.
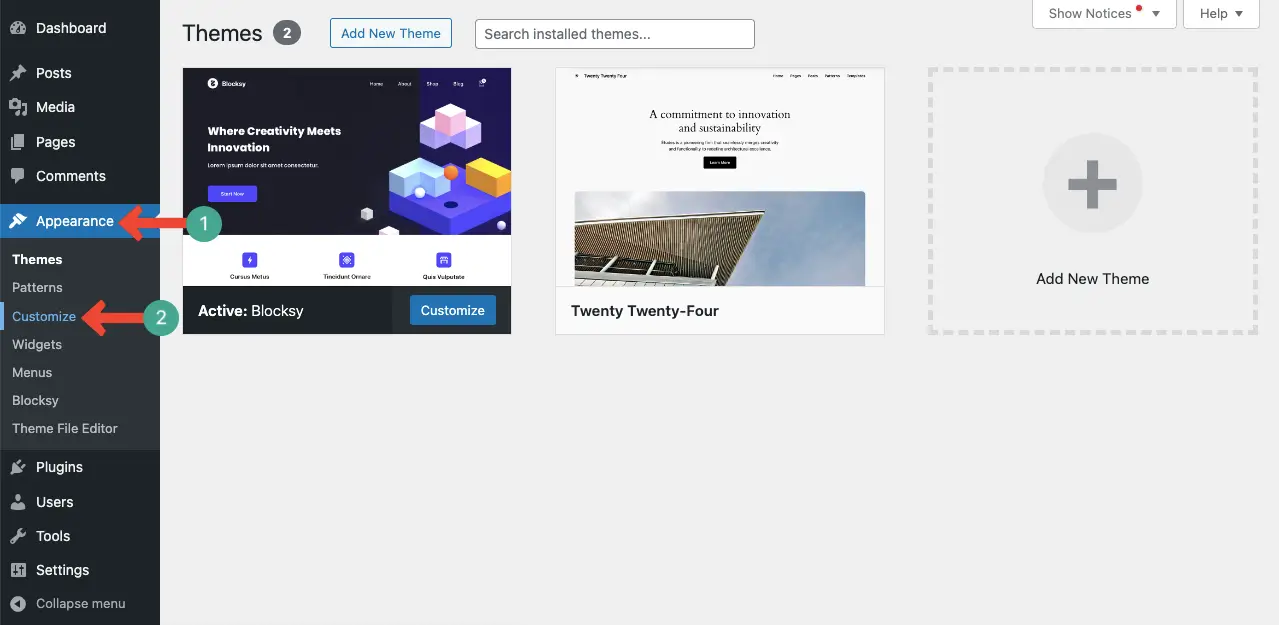
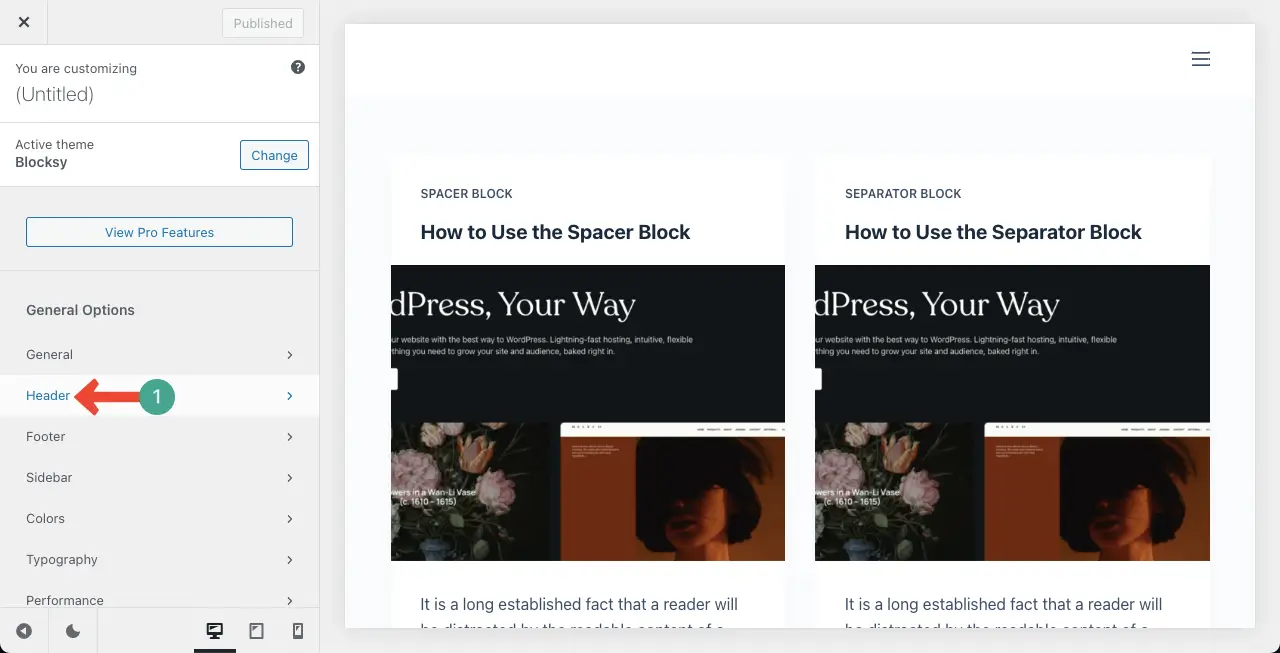
Step 03: Select Header in the Theme Customizer
You’ll get the Header option on the left sidebar. You may find it at the very beginning or you have to scroll down a bit to find it.
Click the Header once you get it.
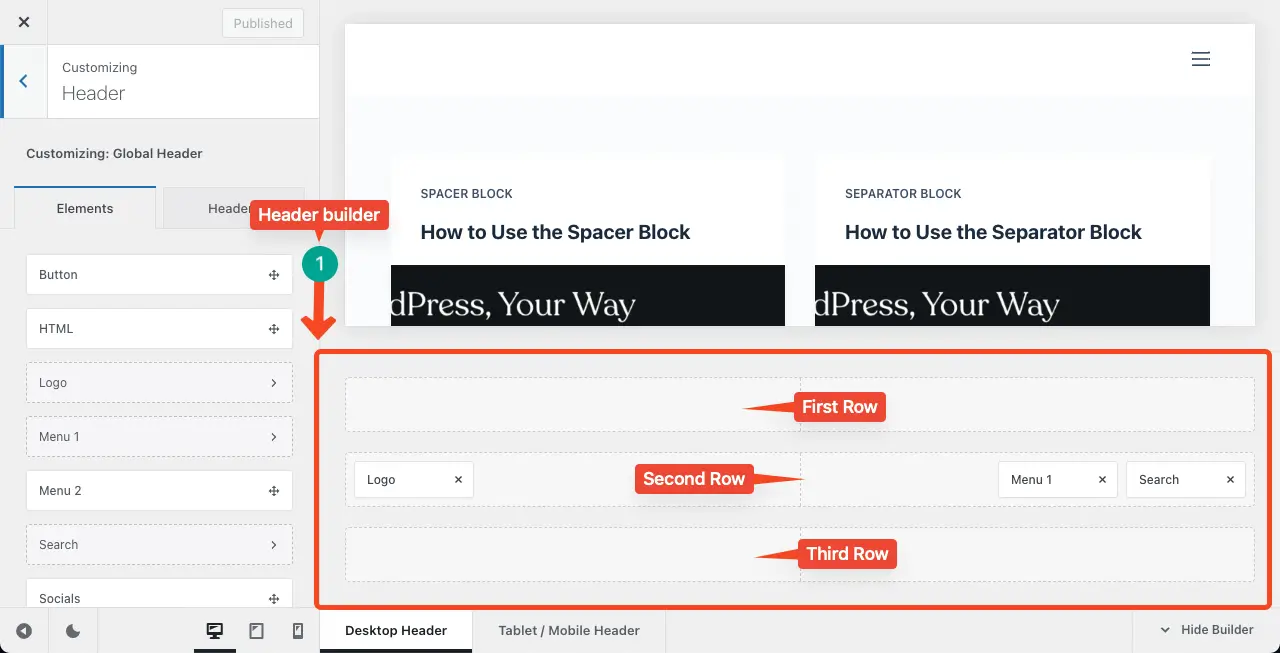
A header builder will open up instantly. As you can see three rows, means you can create a maximum of three-row header on your website with the theme. Click Logo.
Step 04: Add a Logo
Once you click Logo, a panel with logo-adding options will open on the left sidebar.
Click the Select logo option on the left sidebar.
Now, using the respective options on the right sidebar, upload a logo from your local drive or media library. Resize the logo height as you want by setting a suitable pixel.
Add a Site Title as you like (for example, I have added Media Management). You can preview the update on the right canvas/website.
Based on your theme, the logo may appear on top of the site title by default. But no worries, you can bring them in one line/row.
Scroll down the logo panel. You will get an option to add a site tagline. If you want to add it, toggle on the option first. Then, you can write your tagline as the site title I did a minute ago.
Next, you can change the image position. As I have selected the Left position, you can see the logo and the site title are on the same line in the preview section.
To stylize the Site Title, go to the Design tab. You’ll get options to customize the font family, font size, and color for the site title. After that, you can modify the margin for the title.
These are so easy that you can do them yourself.

Step 05: Design the Header Menu
Click the Menu 1 option to design your header menu. This option may have a different name based on your theme. A menu builder panel will open up on the left sidebar.
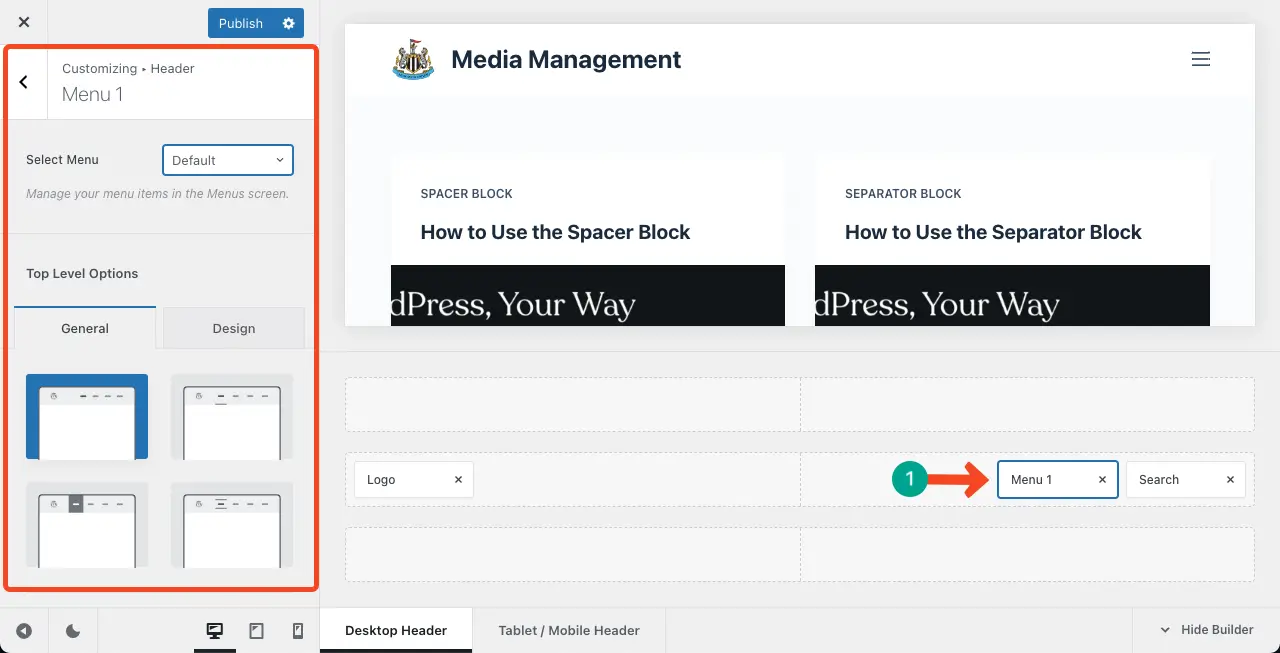
Under the General tab, you’ll get four readymade styles for the menu. Choose the one you like. You’ll get many more options on this sidebar which you can explore by scrolling.
Do the necessary customization for the header menu by using these options perfectly.
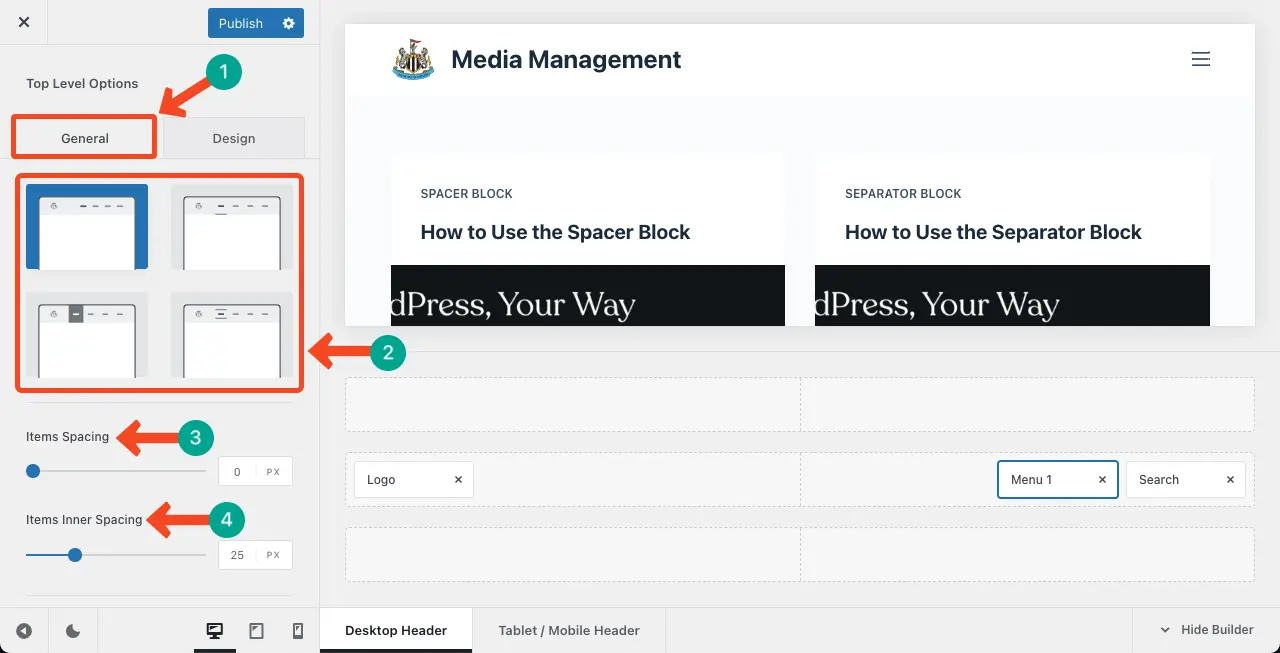
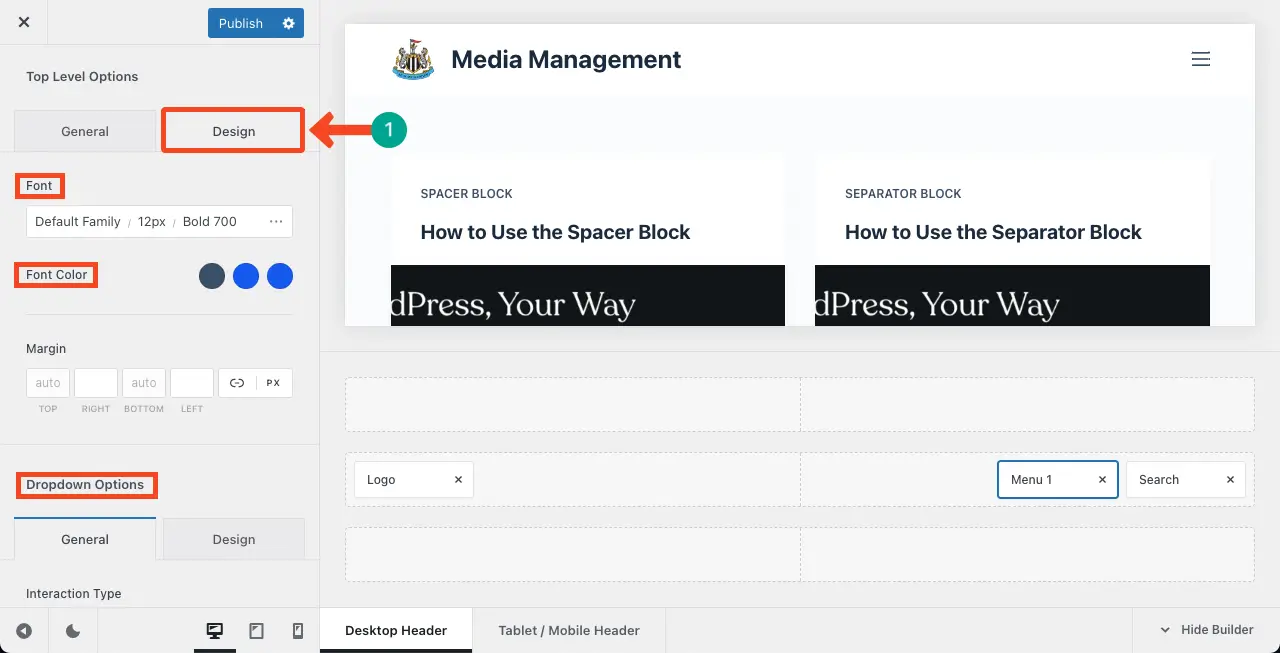
From the Design tab, you can customize the font family, font size, font color, margin, hover effect, item spacing, and more.
Thus, complete customizing your header menu.
Step 06: Add New Elements to the Header
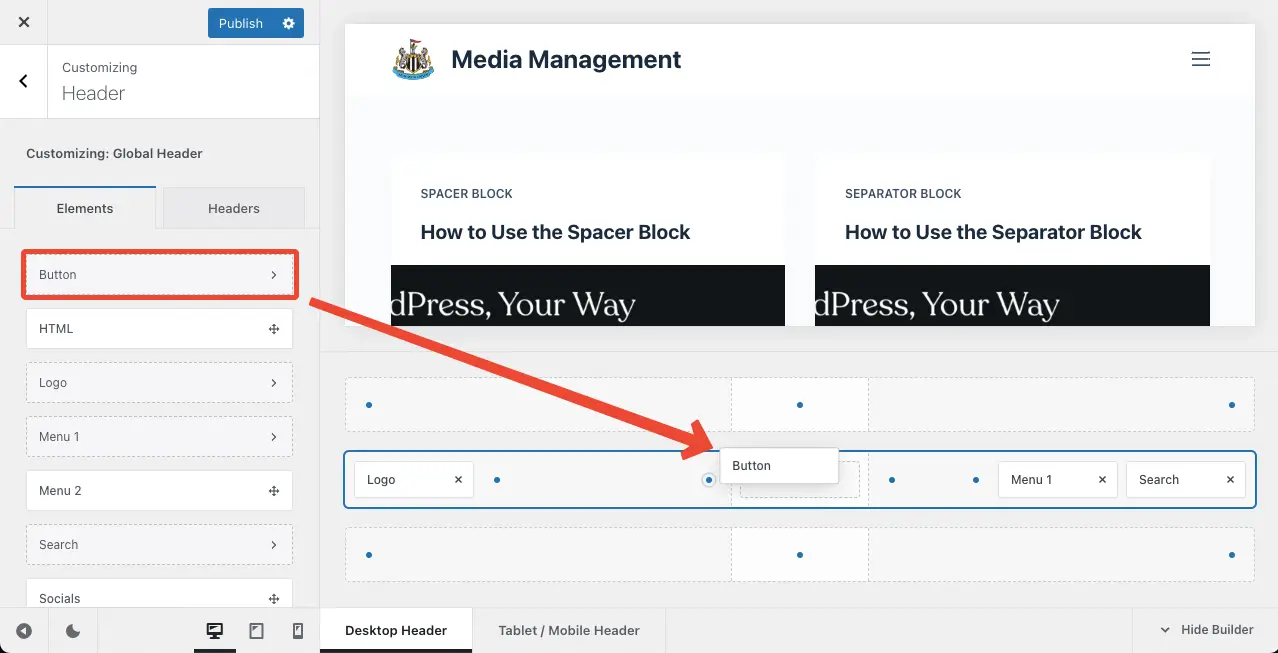
Here again, you may want to add more elements, like social icons, a CTA button, phone number, email address, local address, etc., to the header.
Go to the main state of the header builder. Depending on whether your theme is free or pro, you will get options to add elements. For example, the free version of the Blocksy theme offers a very limited number of options.
Blocksy allows you to drag and drop additional elements to the header.
Note: Not all Full Site Editing theme allows you to drag and drop. There are many themes that let you add blocks in the header like the Gutenberg editor.
Thus, you can build the header for your WordPress website using the Full Site Editing theme.
Method Three: Create a Header in WordPress with a Page Builder
Elementor, Divi, SeedProd, WP Beaver Builder, etc., are the most prominent page builders in the market. Among them, Elementor is comparatively the most popular one. I will show you how to build a header in WordPress using the Elementor plugin.
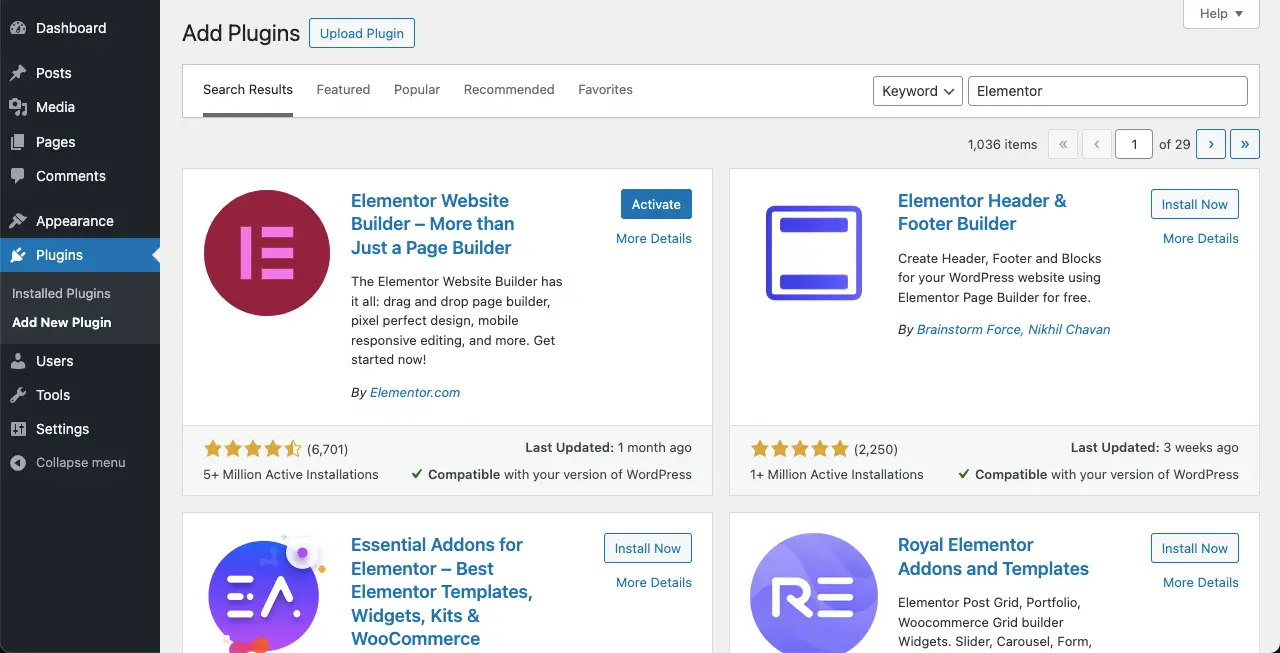
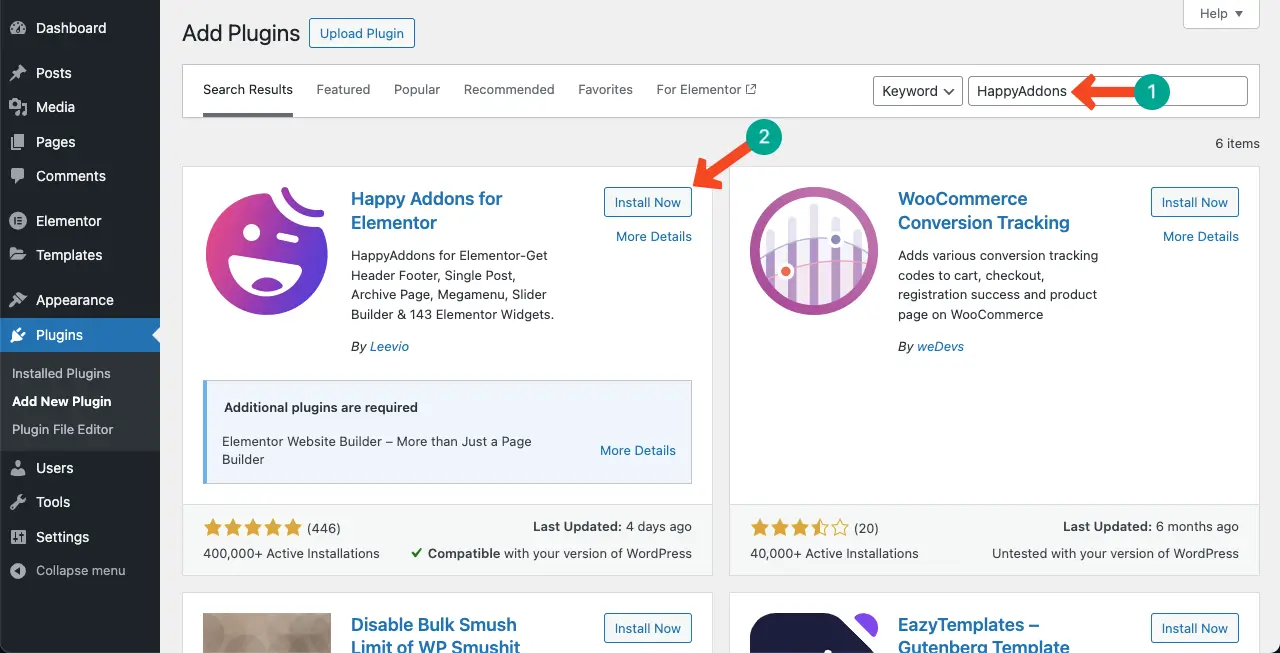
Step 01: Install and Activate the Elementor and HappyAddons
Go to Plugins > Add New Plugin. Type Elementor in the search box. Install and activate the plugin once it appears.
Why HappyAddons? You need the premium version of Elementor to create the header on your site. Actually, Elementor has a theme builder by which you can build a header, footer, blog post template, archive page, and more. But this theme builder is limited only to premium users.
So, if you want to build the header for free with Elementor, you must use an addon like the HappyAddons. Yes, HappyAddons also has a premium version but its theme builder is completely free. Hope you understand. Now, install and activate the HappyAddons plugin.
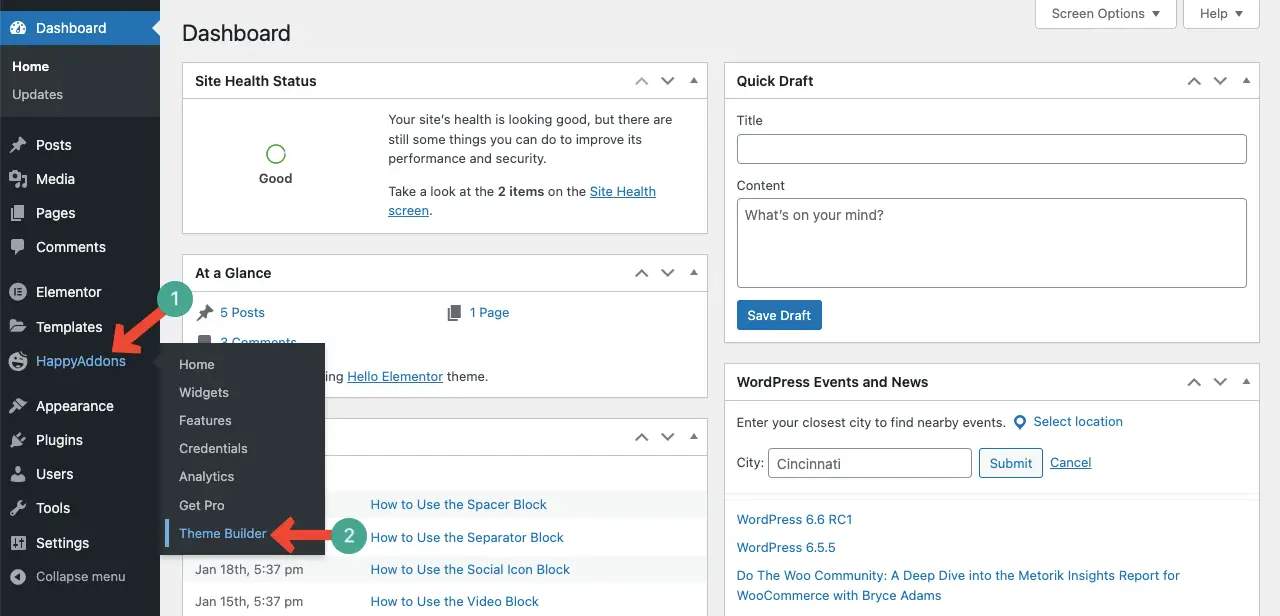
Step 02: Go to HappyAddons Theme Builder
Go to HappyAddons > Theme Builder.
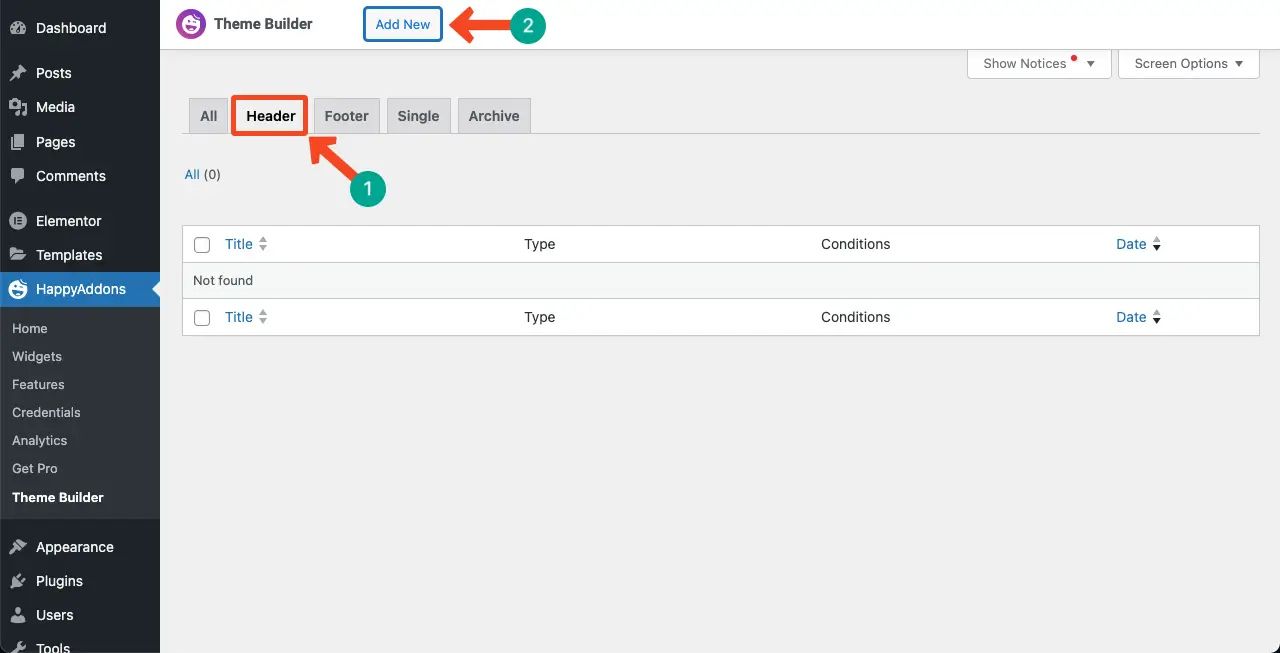
Go to Header. Click the Add New button.
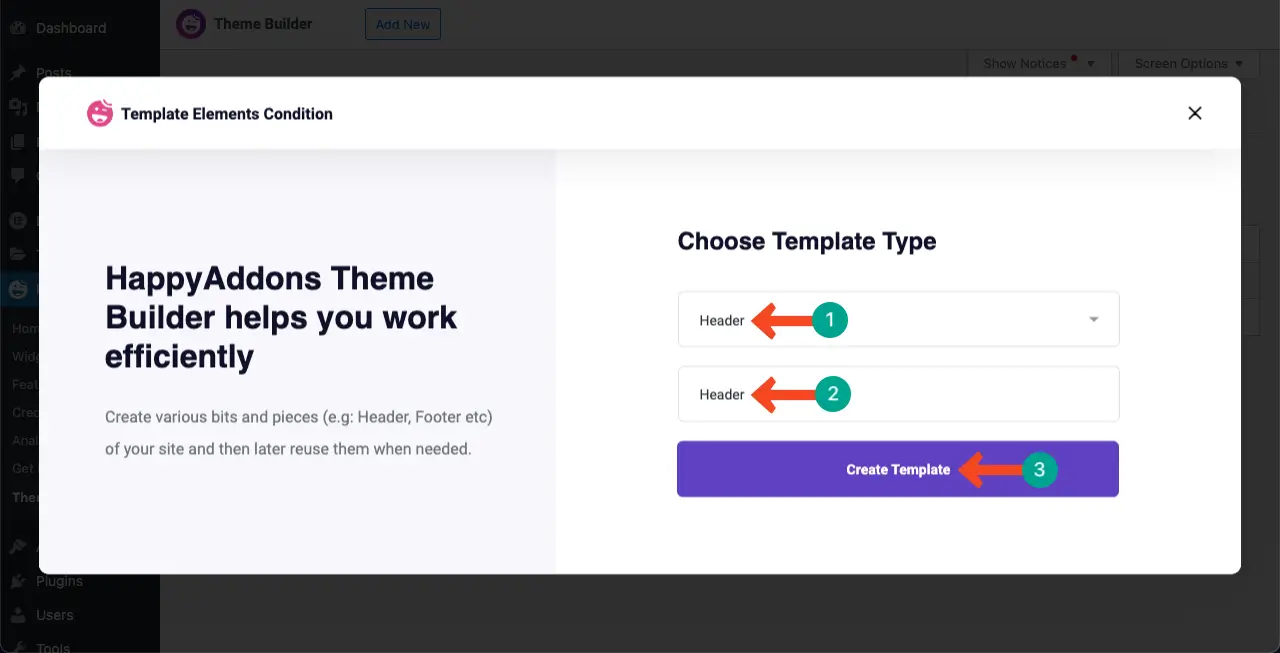
Give the header a name. Click the Create Template button.
Step 03: Create the Header in Elementor Canvas
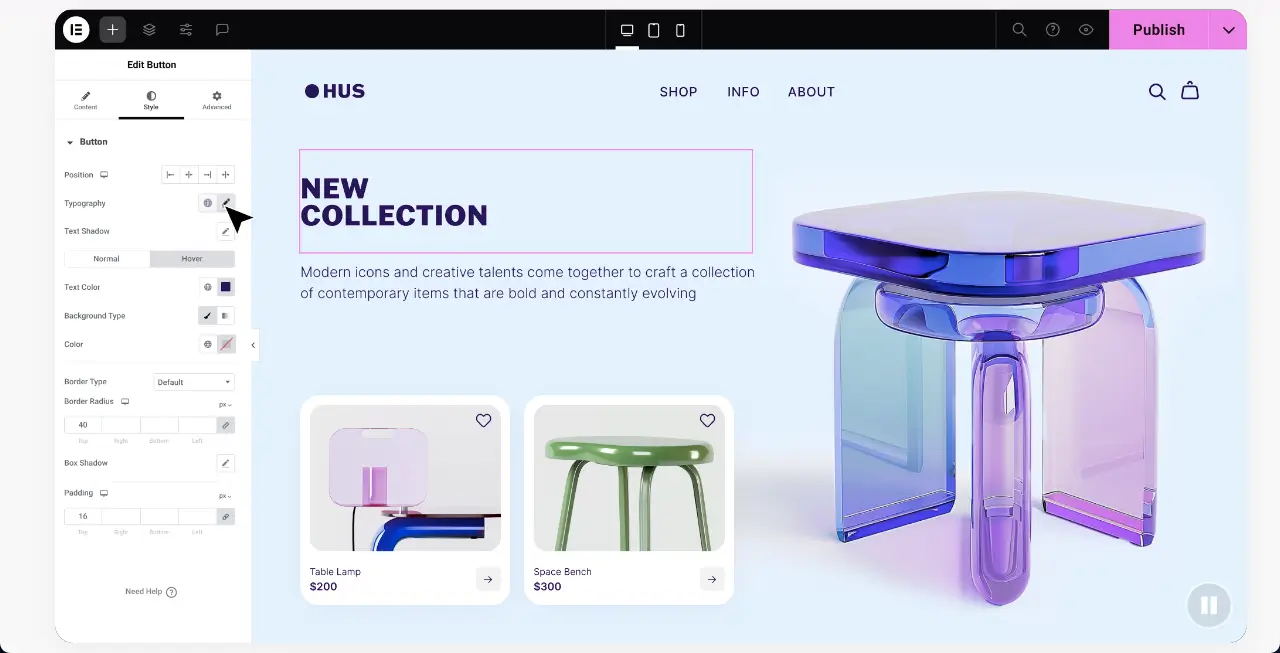
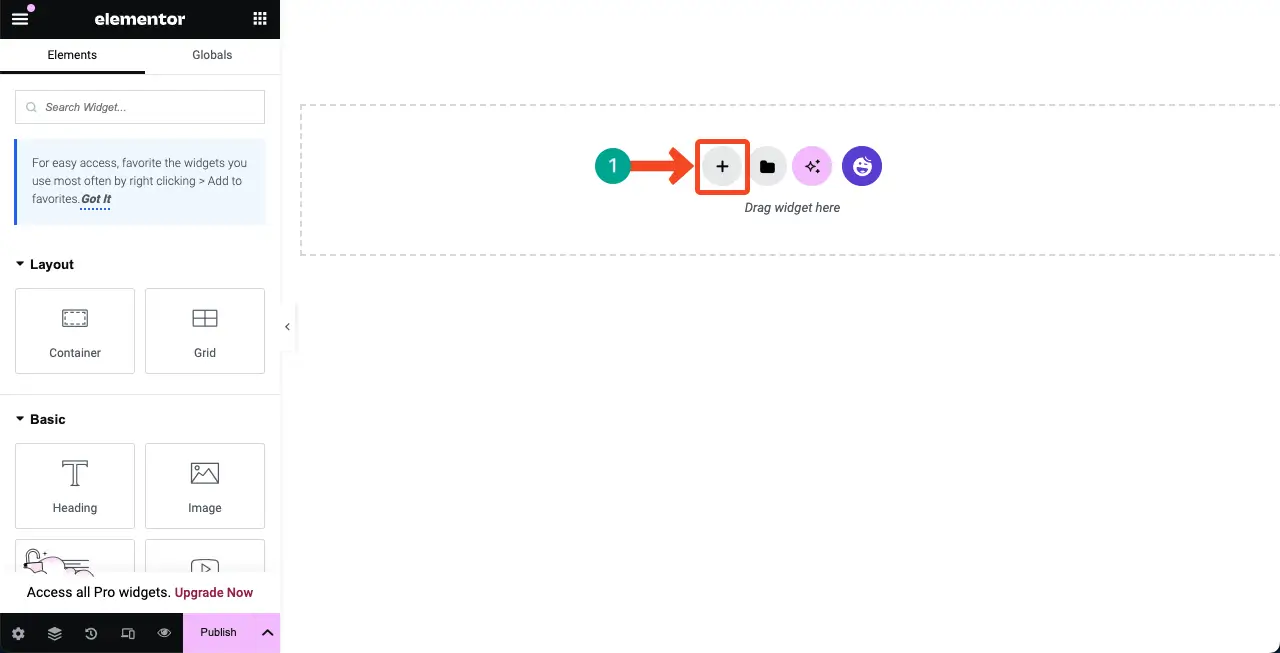
This is the Elementor canvas. On the left sidebar, you can see the Elementor panel with a collection of widgets. The Elementor canvas is on the right. You have to drag and drop widgets from the panel to the canvas and then customize them. Click the plus (+) icon on the canvas.
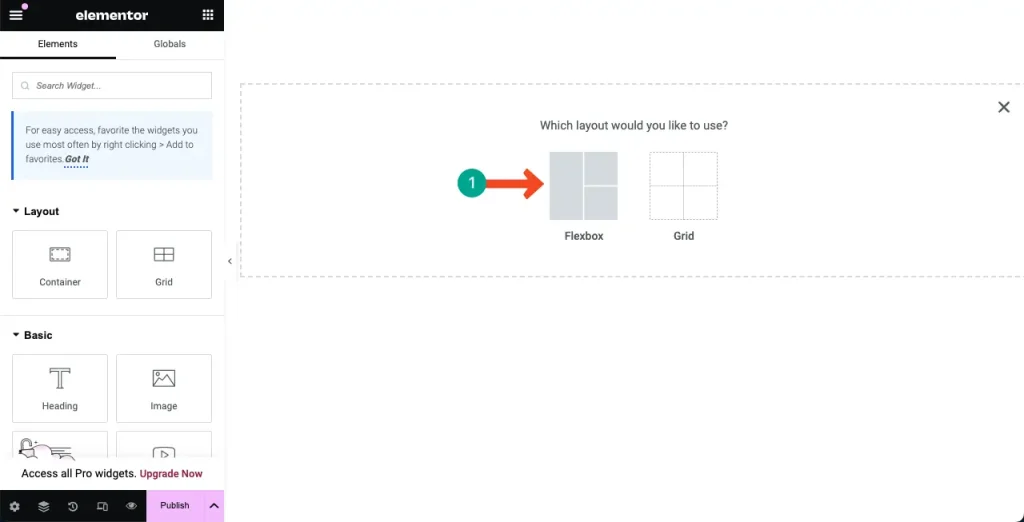
You’ll get two options: Flexbox and Grid. Among them, Flexbox is comparatively better, flexible, and easy to use. Click on Flexbox.
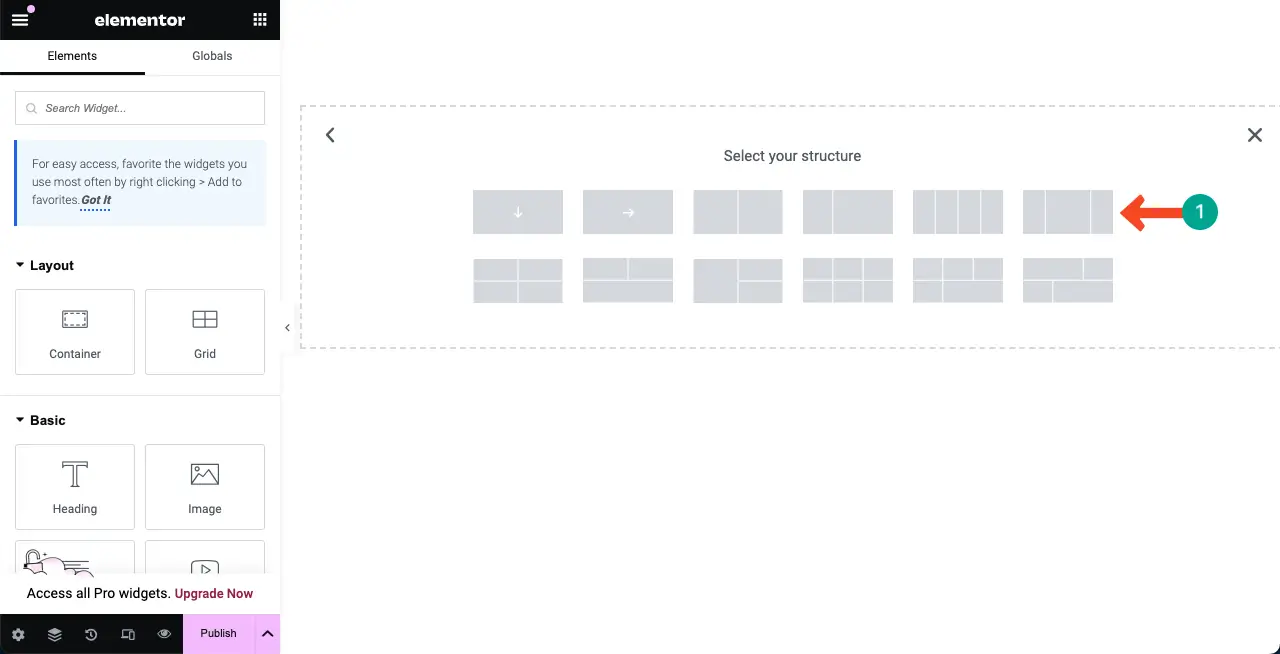
Select how many columns you want to have in your header. Accordingly, choose the suitable structure.
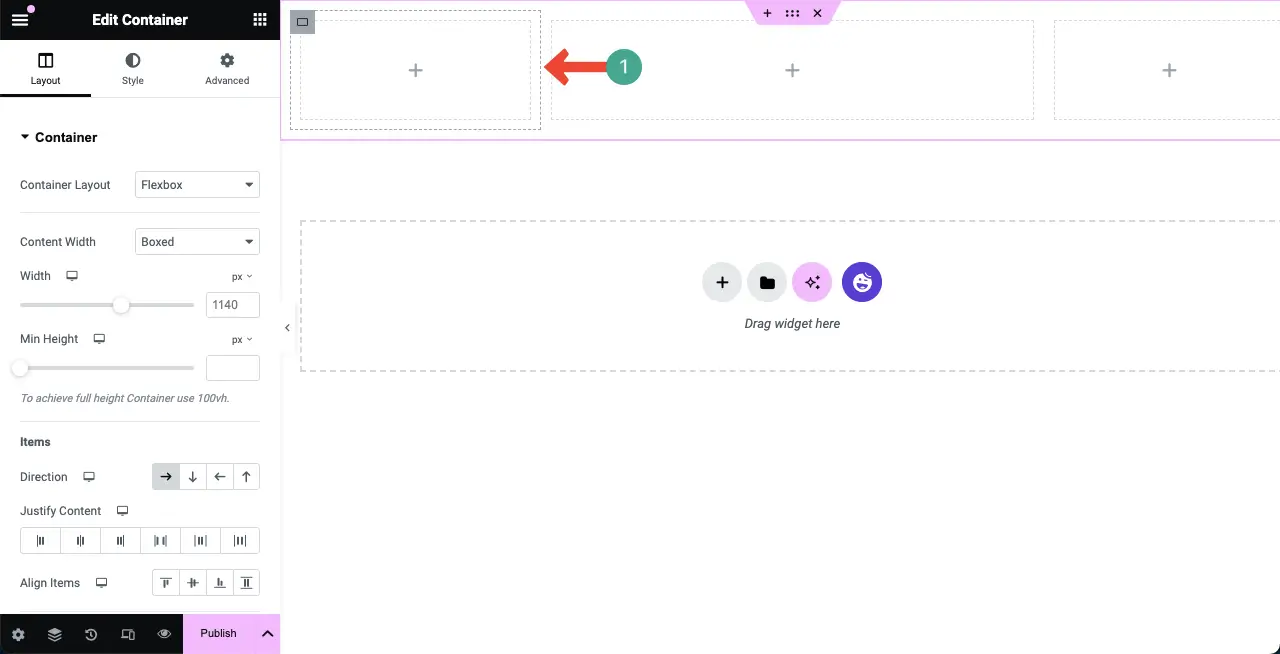
You can resize the columns by dragging their edges.
Step 04: Add a Logo to the Header
Go to Elementor Panel. Type Site Logo in the search box. You’ll get the Site Logo widget in a second.
Drag and drop the Site Logo widget to the column you want. I have decided to place the widget on the left column in this tutorial.
After the Site Logo widget is placed, come to the Elementor panel. Click the custom option next to the Logo. Below, you’ll get the option to add/upload an image as a logo. Do it yourself.
The logo will be added instantly. If the logo is big in size, you can resize it by moving its edge. It’s shown in the video below.
Step 05: Add a Site Title to the Header in Elementor
Suppose, you want to create a new column in the same section, meaning header. How to do it?
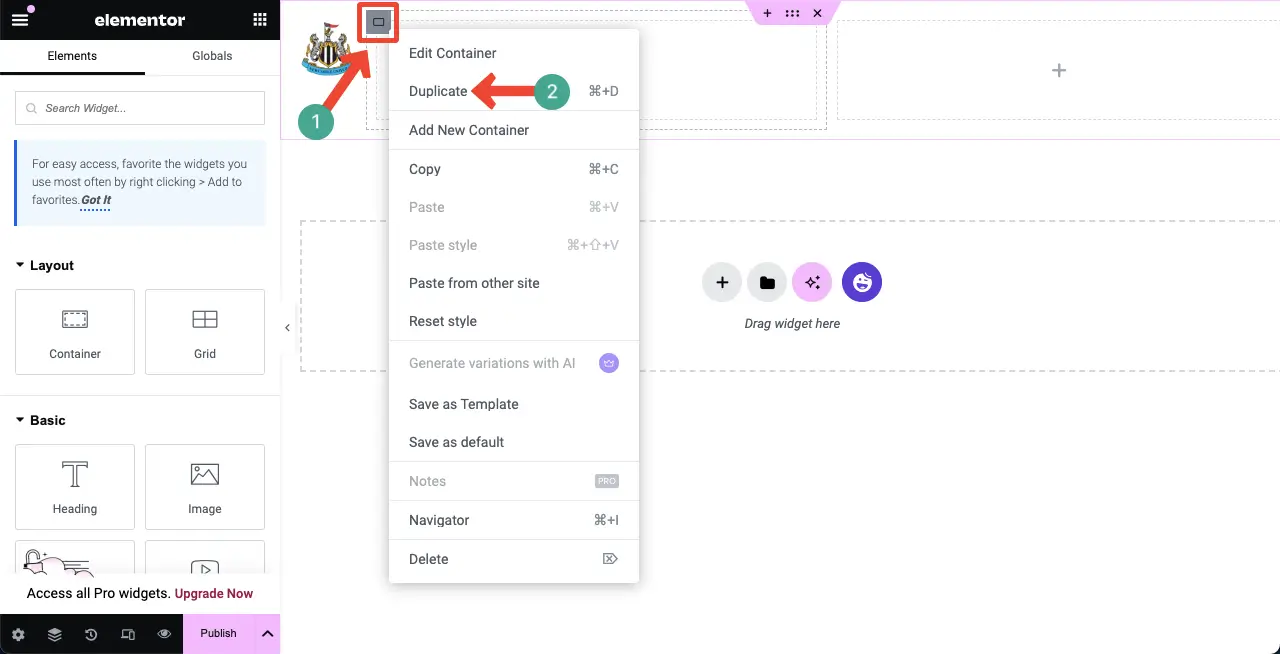
Taker your cursor on the section container icon and right click.
A list of options will appear. Choose Duplicate on the list.
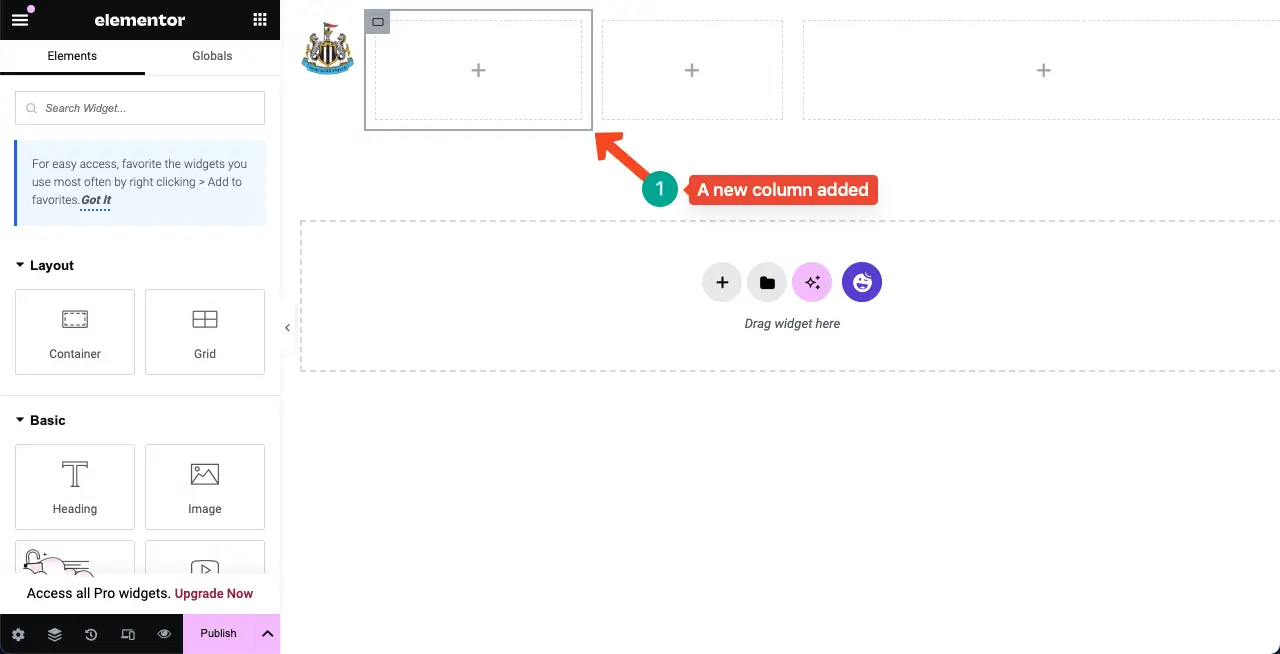
You’ll see a new column has been added to the Elementor section.
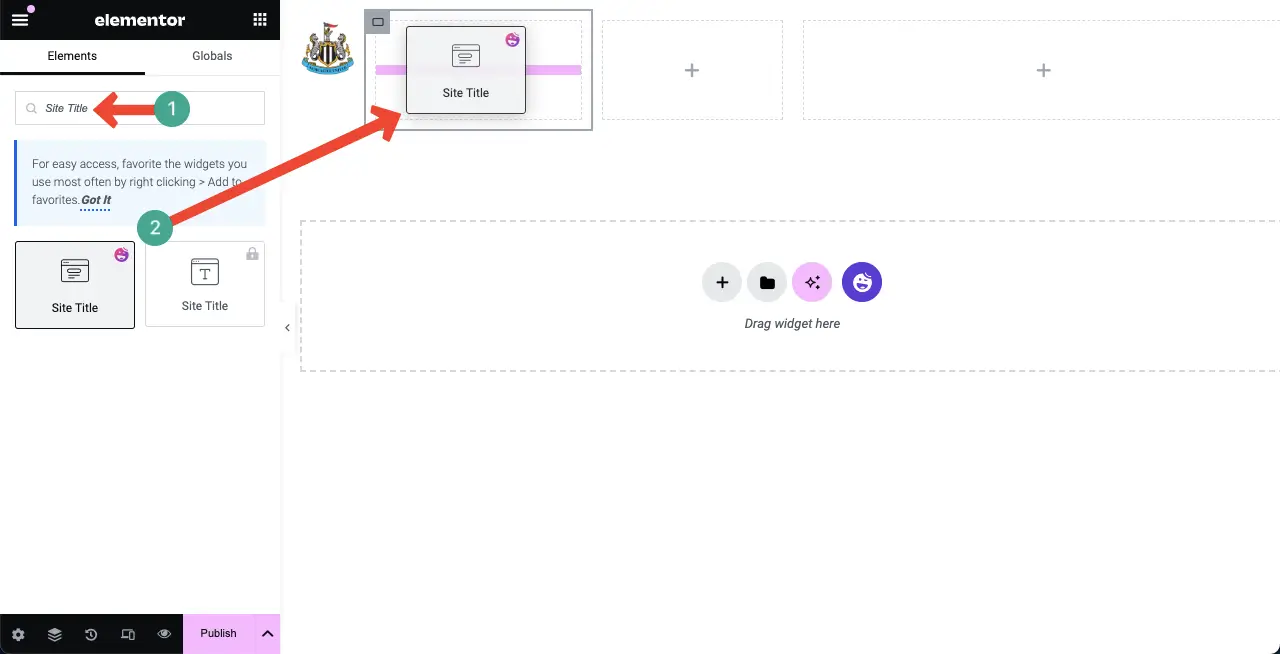
Find the Site Title widget. Drag and drop it to the new column or anywhere you like.
You will see the Site Title section is empty. How to Solve it? It’s simple.
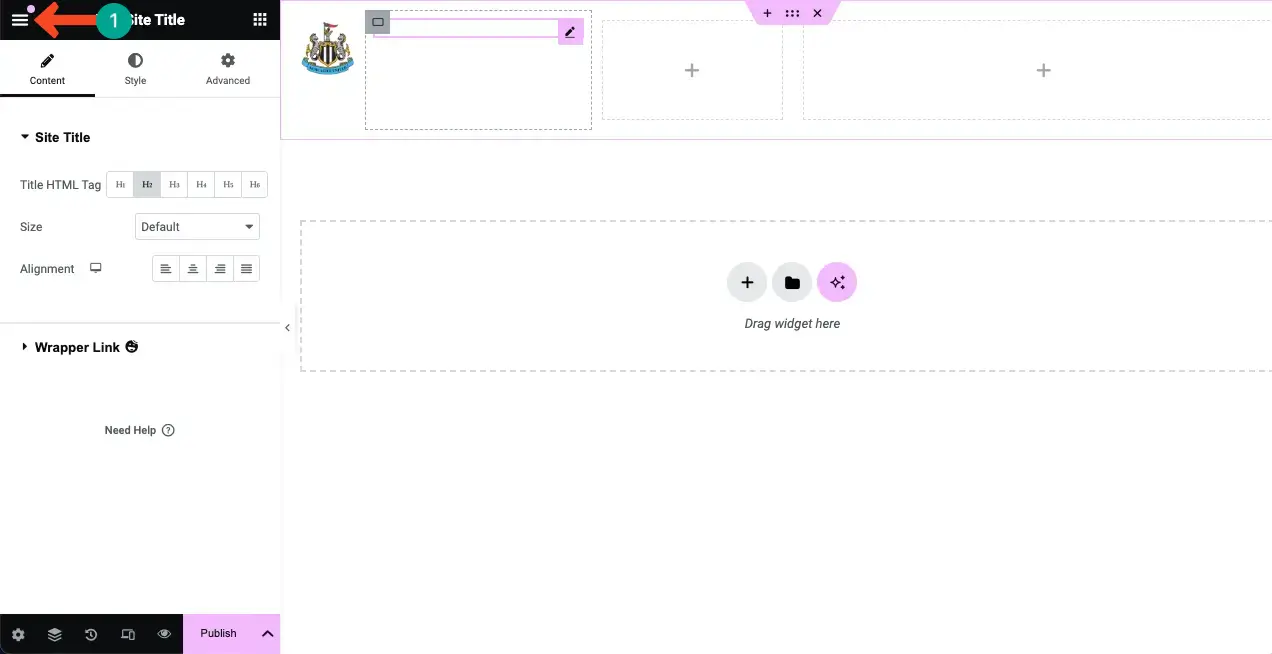
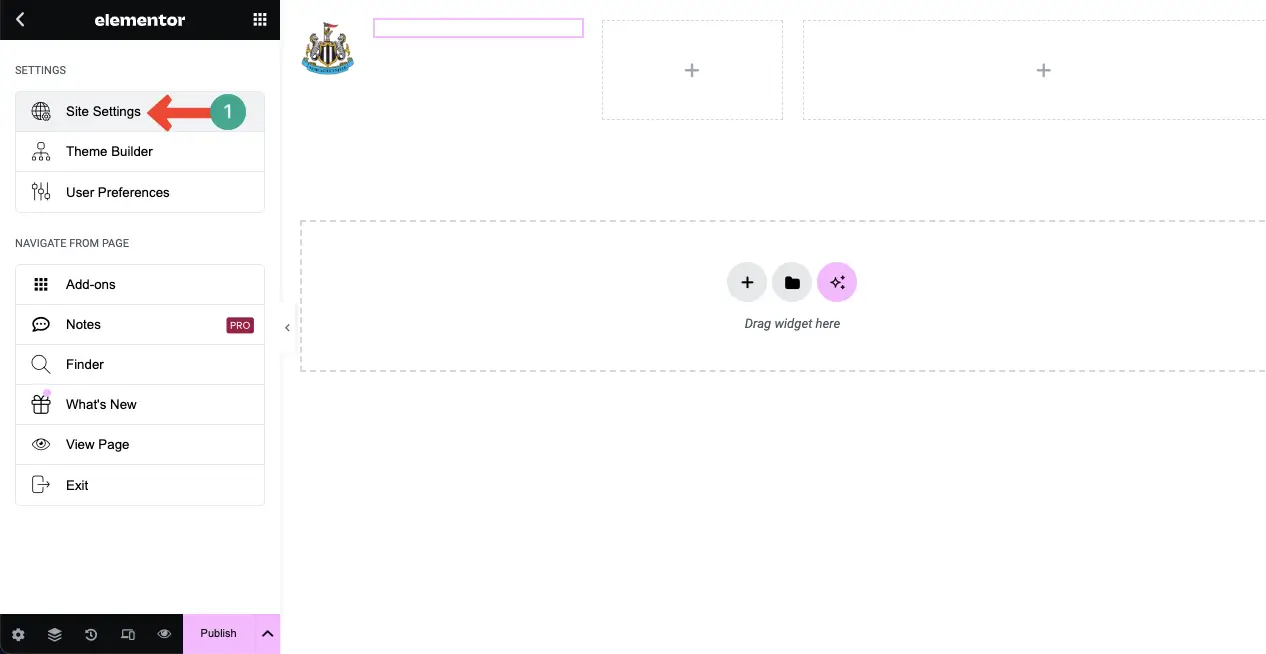
Go to Site Settings.
Select Site Identity.
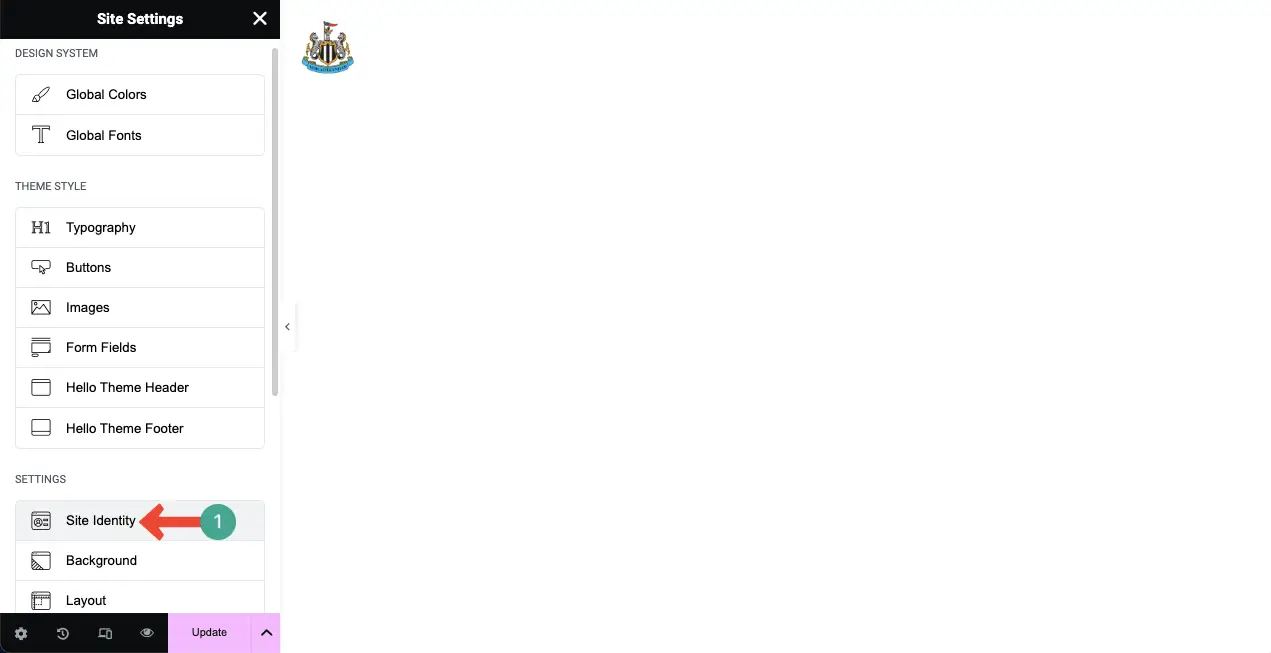
Add your site title, site description, logo, and favicon from here.
Site Title: The site title is the name of the website. It usually appears in the browser tab and is often displayed prominently on the homepage. It’s a key element in branding and helps users identify the site quickly.
Site Description: The site description is a short summary of what the website is about. This description often appears in search engine results below the site title and is crucial for SEO (Search Engine Optimization). It helps users understand the purpose and content of the site at a glance.
Logo: The logo is a graphic mark or symbol that represents the website or business. It’s a visual identifier that is often placed at the top of the website, on the header, and is used for branding purposes. A logo helps in creating a visual association with the site or business.
Favicon: A favicon (short for “favorite icon”) is a small, 16×16 pixel icon that appears next to the site title in the browser tab. It also shows up in bookmarks and history lists. Favicons help users quickly identify the website among multiple open tabs and in their bookmarks.
These elements are crucial for establishing a website’s identity and enhancing user experience. Add them yourself. Once you are done, Update the page.
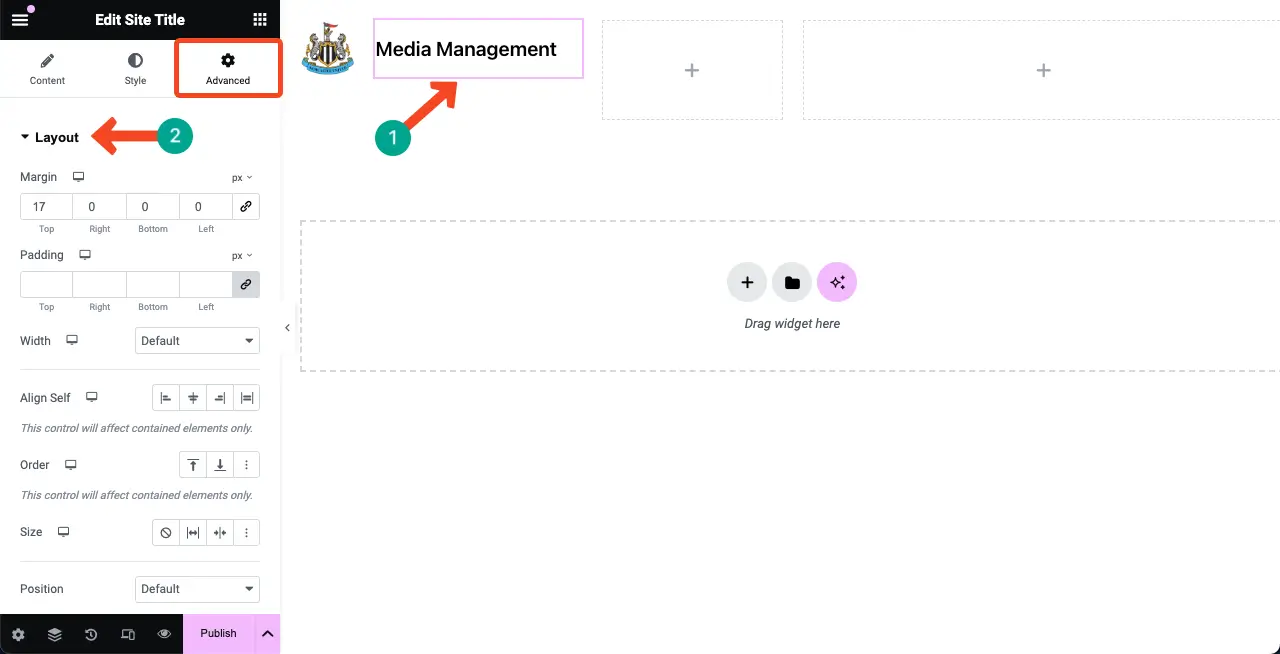
You see now the Site Title is displayed. You can then customize and stylize it from the Elementor Style tab. Give Elementor some time to explore it. All will be clear and easy.

From Advanced > Layout, you’ll get options to move the widget to right, left, top, and down. You’ll get many more options as well.
Step 06: Create a Header Menu
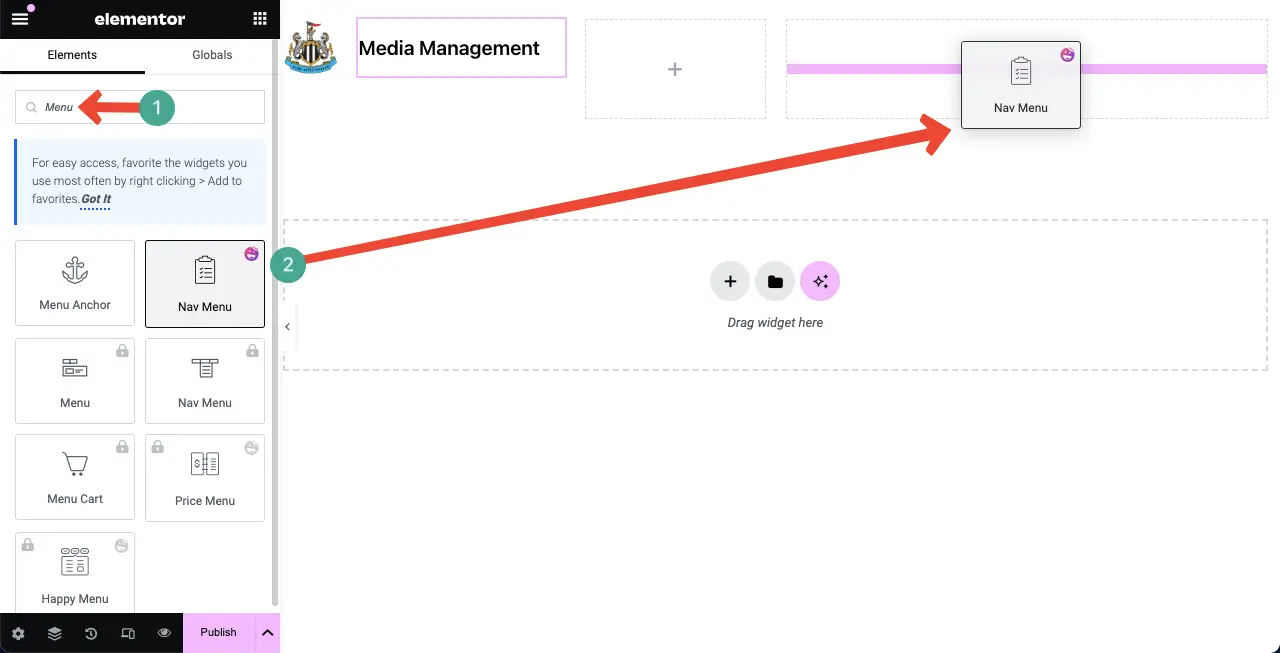
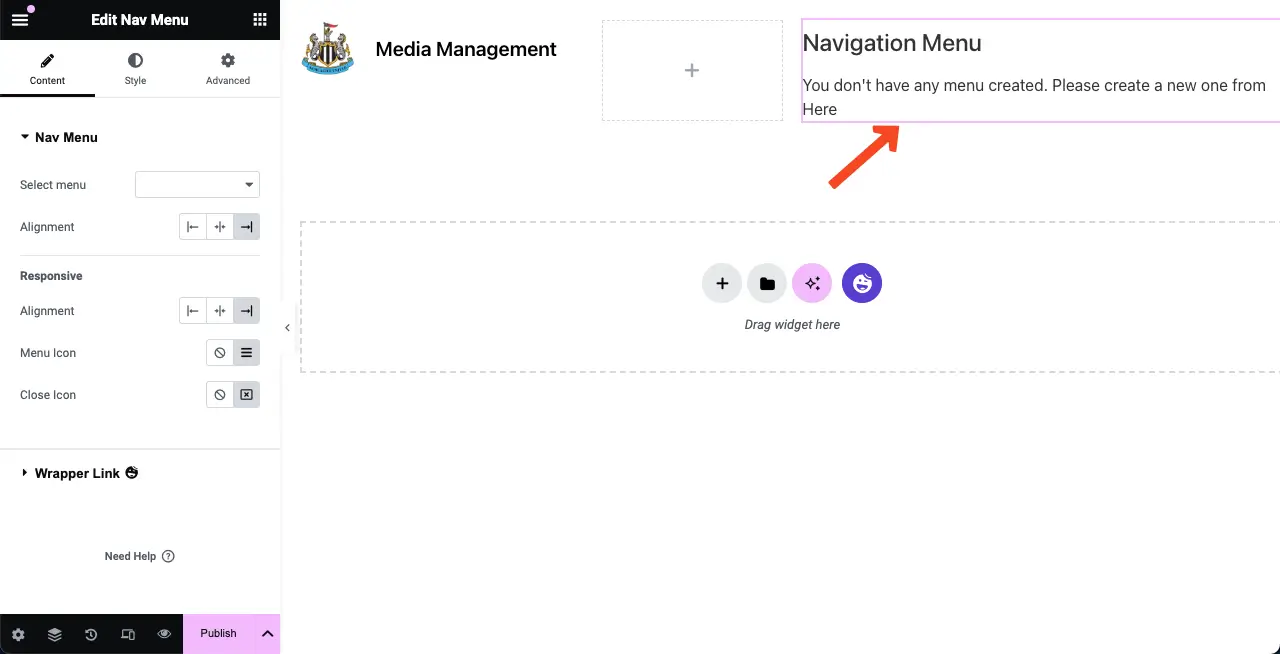
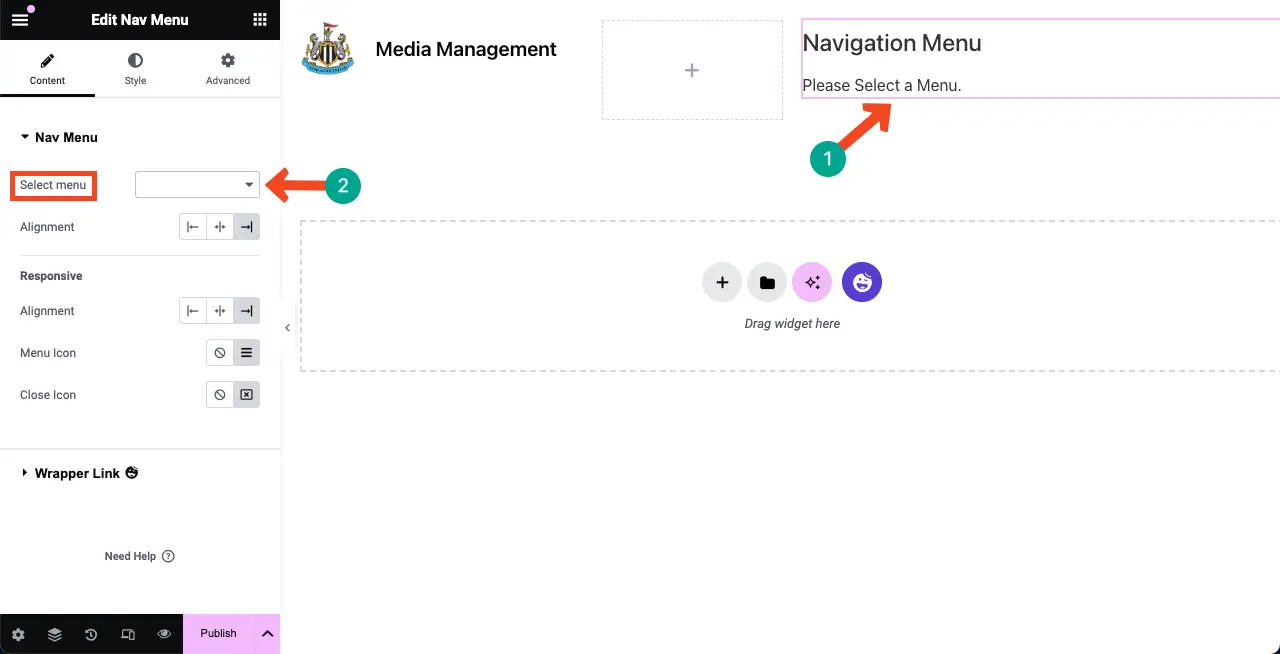
Find a menu widget that is free. HappyAddons offers the Nav Menu widget free. Drag and drop it to a suitable column. I am placing it in the right column.
You’ll see a message that your navigation menu is not created yet. No worries! I will show you how to create a menu.
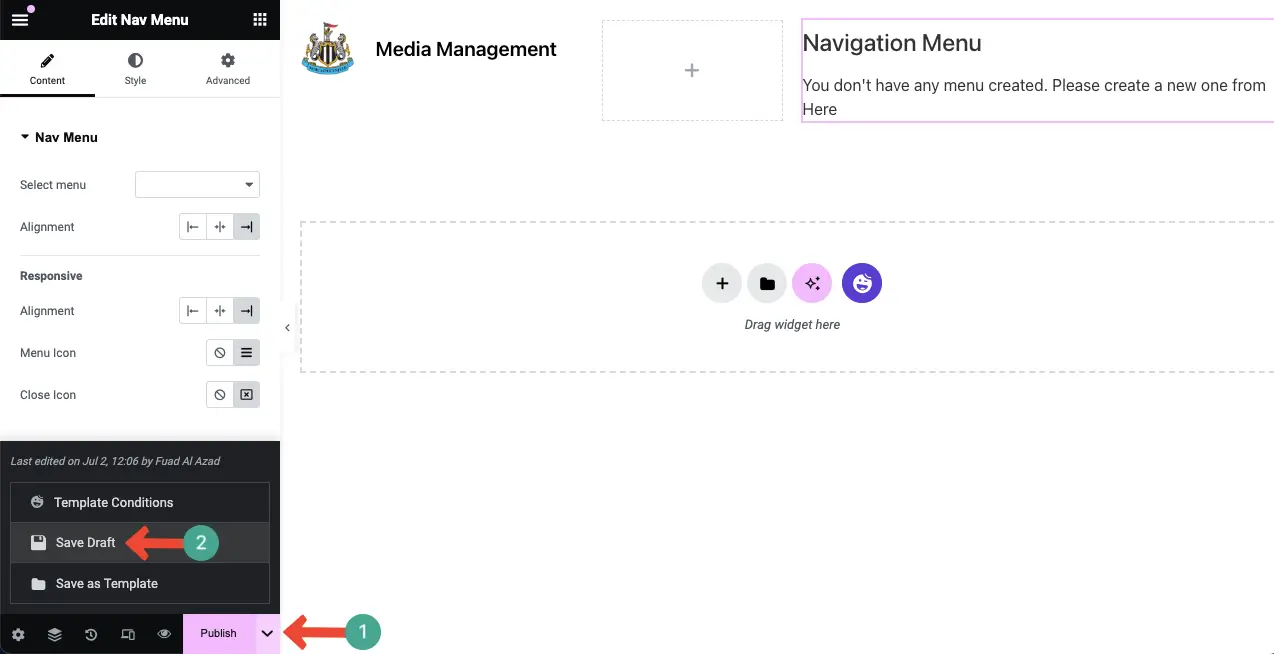
Leave the Elementor Canva as it is. But don’t forget to Update or Save Draft so that the changes you have added don’t get deleted.
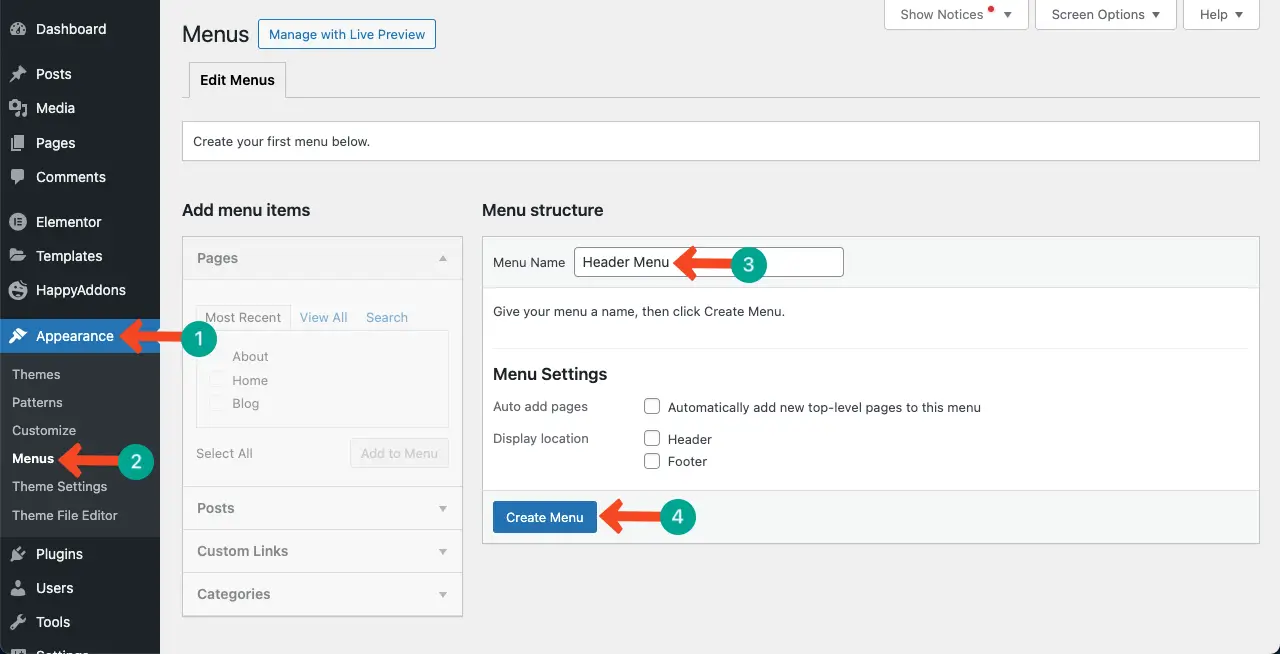
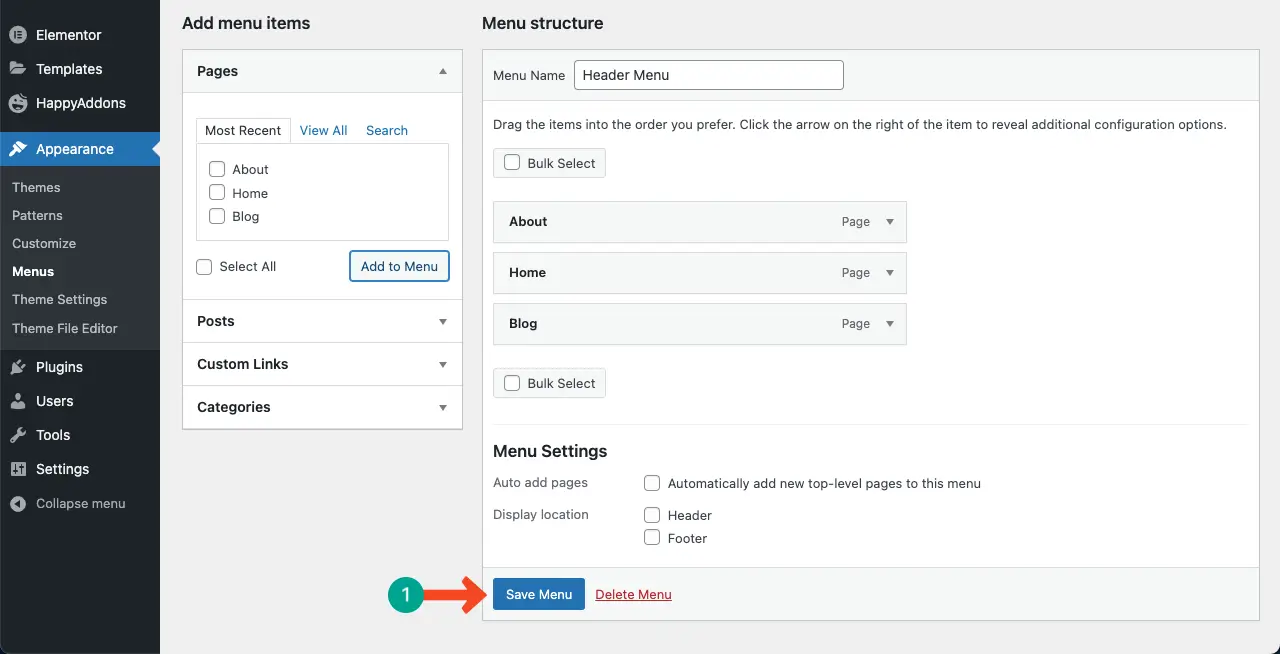
Go to your site’s backend. Navigate to Appearance > Menus. Give your menu a name. Once done, click the Create Menu button.
Select pages you want to add to the header menu.
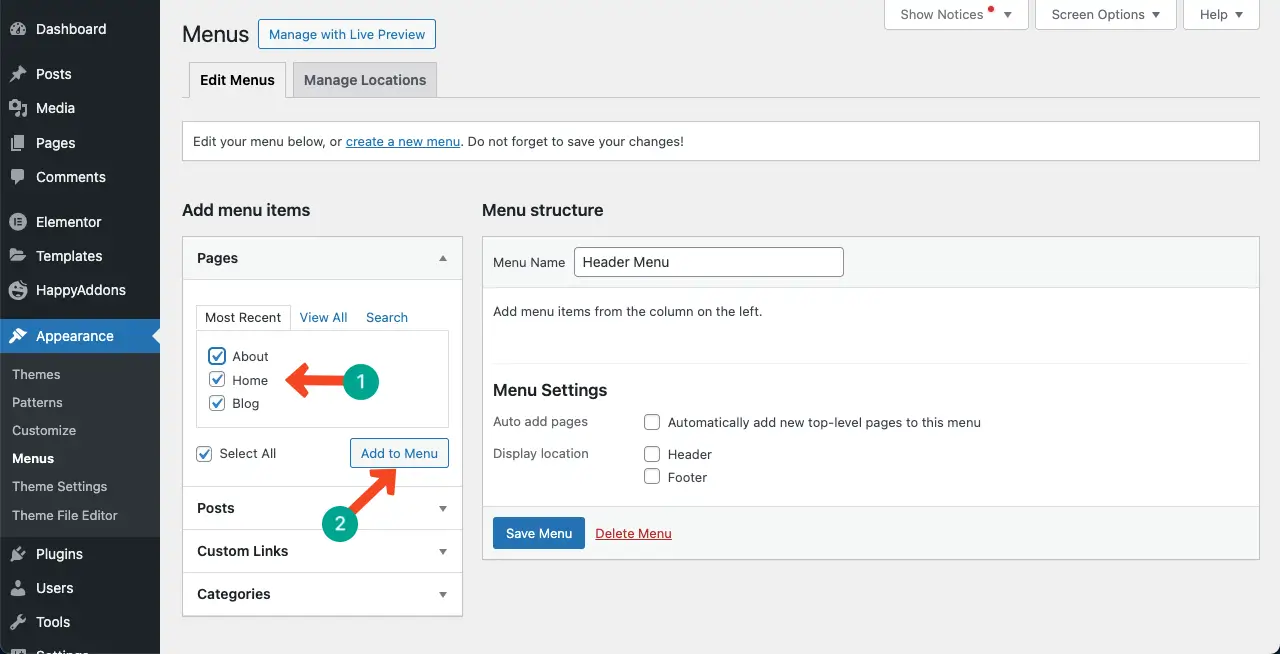
You can see the pages you have selected have appeared on the right side under the menu name. Click the Save Menu button at the end.
Go to your Elementor Canvas and reload it.
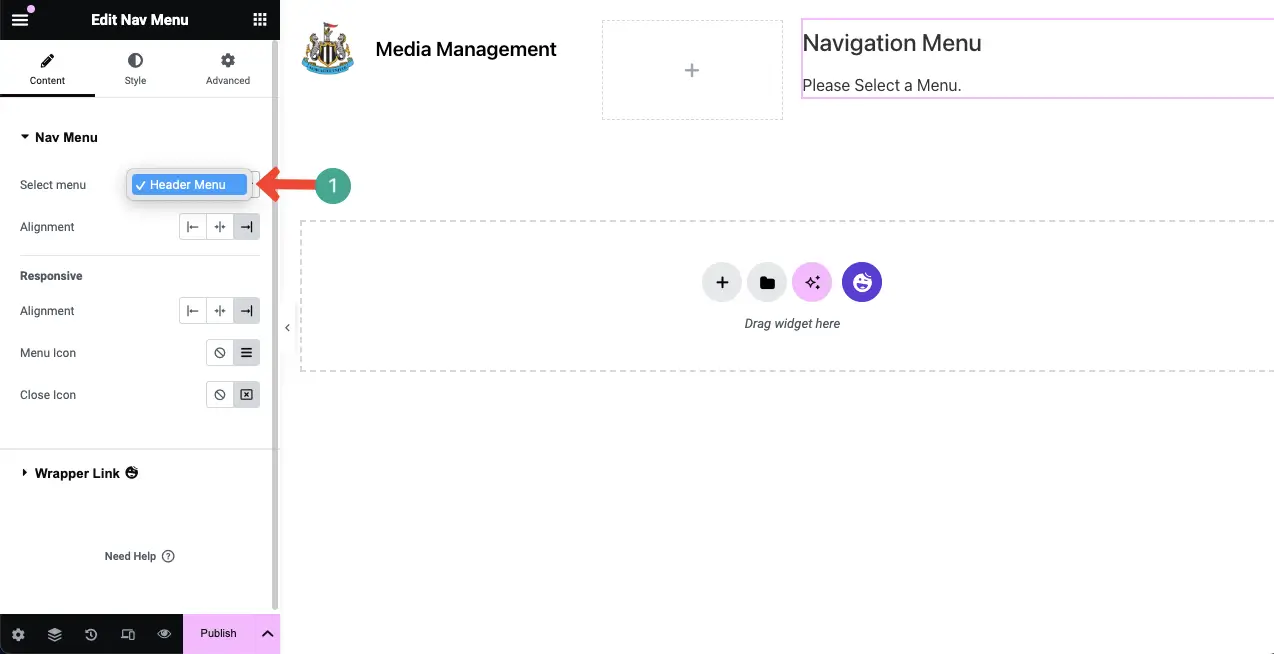
Select the menu widget section. Navigate to Content > Nav Menu. Next to the Select menu option, you’ll find a dropdown icon. Click the icon.
Select the menu name you created just a while ago.
You’ll see the header menu is displayed on the Elementor canvas.
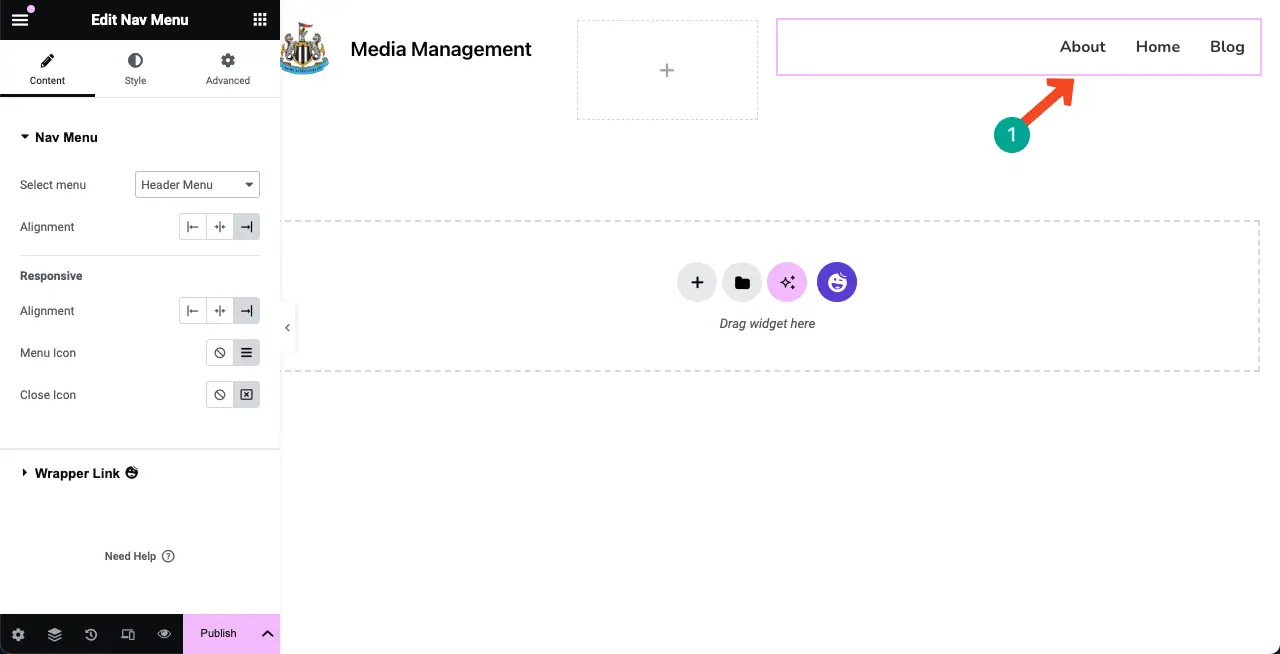
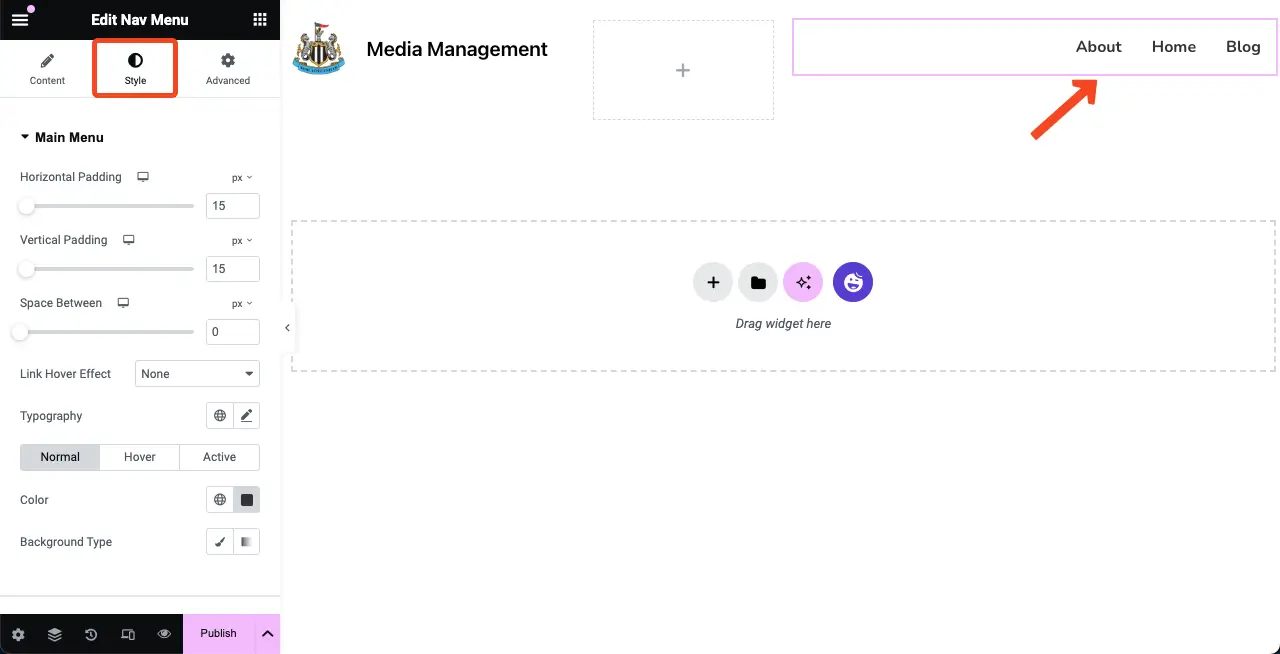
Next, you can customize the header menu from the Style tab on the Elementor panel, like any other widget. Hope you can do it yourself.
Thus, you can create a header with the Elementor and HappyAddons plugins.
Final Notes!
Indeed, there are many other ways to create a header in WordPress. Actually, it’s a blessing for us that we have WordPress, which is a comprehensive content management system and website builder. You can do the same things in it in various ways.
Creating the header is one of them. But as it’s not possible to cover all the ways in a single blog post, I have covered the best and most popular three methods in this article. Hope you like it. If you have any further questions regarding today’s topic, feel free to write it in the comment box.
