Ultimate Blocks is a feature-rich, powerful, and conversion-focused Gutenberg block WordPress plugin. Gutenberg blocks are a must-have now for most web owners to create content and design their pages. However, most default blocks are extremely frustrating as they are limited in features.
Ultimate Blocks will save you in this case. It comes with 25+ highly flexible custom Gutenberg blocks, which can help you in captivating web design and content creation. So, in this article, I’m going to cover a full overview of the Ultimate Block plugin.
I will briefly go through each of its blocks, describing their key features and what you can do with them. Hang in there till the end.
What is the Ultimate Blocks Plugin?

Ultimate Blocks is a powerful Gutenberg block plugin. It helps to skyrocket user engagement through simplified content creation and web design. Many people who love Gutenberg blocks have already started considering Ultimate Blocks a viable alternative to the page builder plugins.
After WordPress replaced the Classic Editor with Gutenberg, the Ultimate Blocks was one of the few plugins that made a strong impact on this ecosystem to make the platform significantly user-friendly.
Each block of the plugin is highly optimized for SEO, ensuring that your site performs well in search engine rankings. The plugin is also developed with speed in mind, delivering optimal performance and a smooth user experience.
Ultimate Blocks Plugin: Get Introduced to Its All Blocks and Things You Can Do with Them
Ultimate Blocks currently has 26 Custom Blocks. Also, many more blocks are in the development stage, which can be released at any moment. I’ll introduce you to each of these blocks, explaining what you can do with them.
1. Advanced Heading Block
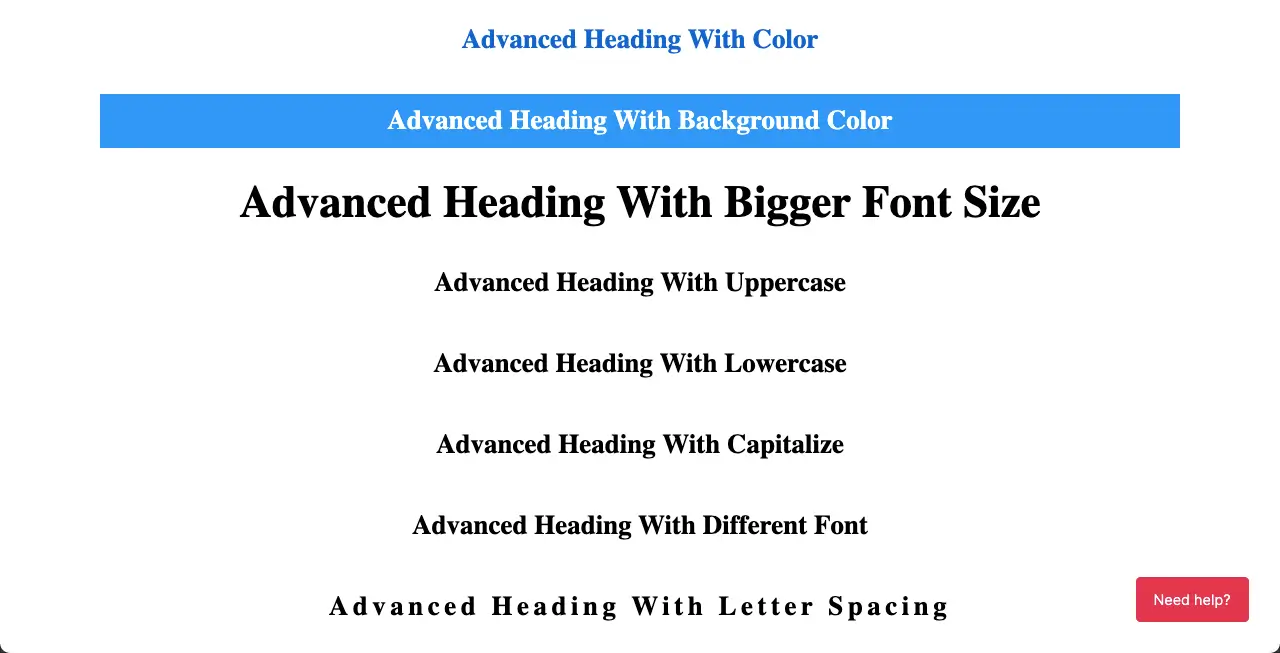
The Advanced Heading block includes six heading levels, from H1 to H6. This lets you choose the appropriate heading tag for your content. This helps you ensure proper hierarchy and structure for your content, which is a must for good SEO.
The typography section lets you customize the font size, text transform, font family, letter spacing, font weight, and line height. You can also align your headings according to your design preferences.
In addition to these, you can customize the heading text color, background color, and dimensions settings. With the Responsive Control option, you can choose to display or hide the Advanced Heading block on specific device modes.
The Advanced Heading Block is best for page titles, post titles, section headings, subheadings, subsections, and call-to-action headings.
Quick Recap of the Advanced Heading Block’s Features
- Heading level (H1 to H6)
- Heading alignment
- Responsive control
- Heading colors
- Typography
- Dimension Settings
2. Advanced Video Block
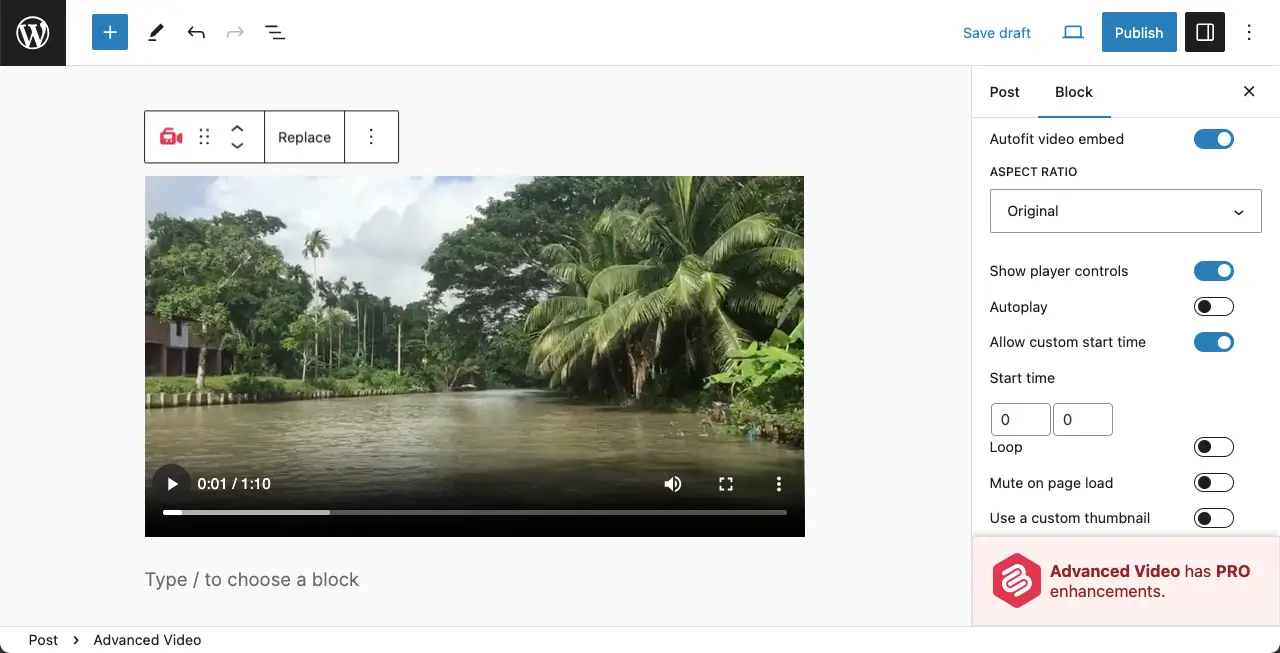
The autofit video embed feature automatically adjusts the video’s display size to fit within a specific area on your page. This ensures that the video scales up or down as needed, considering the video’s aspect ratio and avoiding letterboxing.
The show player control option enables or disables the display of player controls for the embedded video. You can choose whether to show or hide controls such as play, pause, volume, and fullscreen.
You can set a custom start time so that instead of starting from zero seconds, the video begins from a specific point. The custom thumbnail option allows you to use a custom image as the thumbnail for the video.
Finally, you can add a shadow effectively to enhance the video’s visual presentation. The responsiveness guarantees the embedded video perfectly adapts to different screen sizes and devices.
Quick Recap of the Advanced Video Block’s Features
- Autofit video embed
- Aspect ratio
- Show player controls
- Allow custom start time
- Use a custom thumbnail
- Responsive control
- Add a shadow
3. Button (Improved) Block
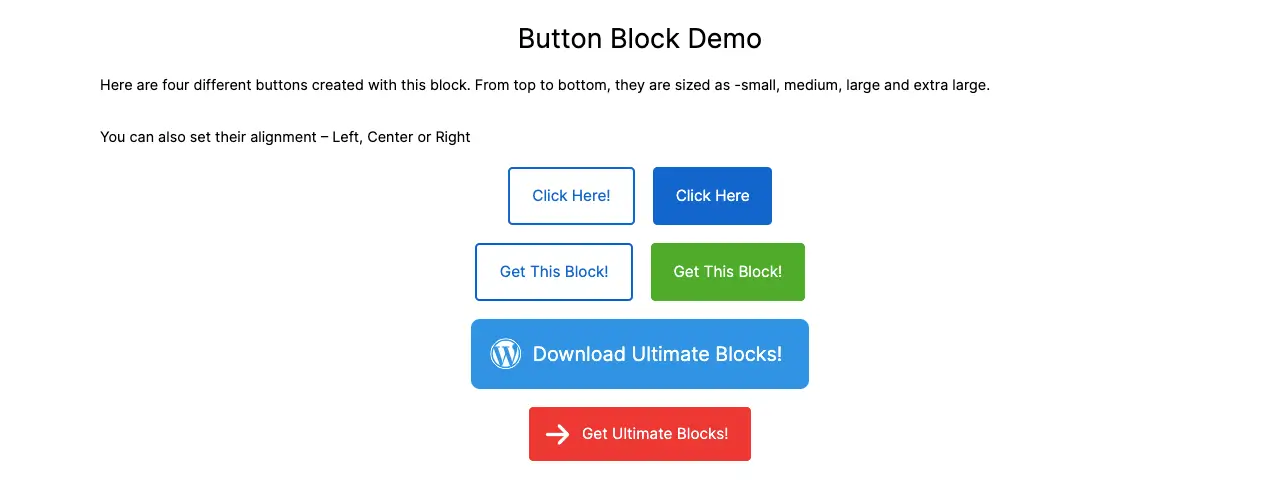
The Button (Improved) block includes many additional features than the default button block. For alignment justification, the Button (Improved) block lets you choose options like left, center, right, or justified to place the button within their container.
You can display buttons either horizontally or vertically. If necessary, you can allow wrap to multiple lines if the container is limited in width. This will enable your button copy to not compromise with readability.
You have the flexibility to set a custom size for the buttons, adjusting their width and height to align with your design preferences. To add visual interest and context, you can include icons alongside the button text, with the ability to customize the icon position.
You can set both the hover and normal button colors to match your website’s color scheme and visual contrast. The radius feature allows you to adjust the corners of the buttons, making them more rounded or sharper according to your design style.
If you prefer, you can create buttons with a transparent background, which can be helpful for overlaying buttons on top of other elements. Lastly, the transition animation enables you to apply animations to the buttons.
Quick Recap of the Button (Improved) Block’s Features
- Alignment justification
- Orientation
- Size & width
- Icon
- Responsive control
- Button and hover color
- Button radius
- Transparent color and animation
4. Call to Action Block

You can start the block by adding a title and a header tag for the title copy. After that, you can write a description for the CTA section, providing more details or context about the action you want your visitors to take.
Next comes the CTA button. You can add a customized copy over the button to prompt users to take the desired actions. Once the layout is done, you can individually change the title color, content color, and button copy color.
This level of customization allows you to create a visually cohesive and attention-grabbing CTA section that aligns with your overall website design.
Quick Recap of the Call to Action Block’s Features
- Add a title and description for the section
- Set a heading tag for the title
- Configure the link settings
- Add a CTA button
- Change color individually for the title, description, and button
5. Click to Tweet Block

The Click to Tweet block allows you to create tweetable content within your blog posts or pages, making it easy for users to share your content on their Twitter account with just a few clicks.
The block creates tweetable content by selecting a specific portion of text that you want users to share. This can be a catchy quote, a key insight, or any other content that you believe will resonate with your audience.
You can add a Twitter username to the tweet, which can help increase the visibility of the mentioned account. Next, you can modify the styling, such as the font size, color, and background, to match your website’s design.
Quick Recap of the Click to Tweet Block’s Features
- Add the Twitter Username
- Change font size
- Customize the Tweet and border color
- Configure dimension settings
6. Content Filter

With the Content Filter block, you can set up different filters based on categories, tags, or any other criteria that you define. These filters act as navigation options for your visitors, allowing them to select specific criteria and filter the content accordingly.
This is particularly useful for websites with a large amount of content or for organizing content into different sections. You can choose the filter criteria, design the filter buttons, and determine how the content is displayed/hidden based on the selected filters.
This Content Filter block is also useful to display a huge amount of information within the limited space on any post or page.
Quick Recap of the Content Filter Block’s Features
- Easy to use on any post or page
- Allows visitors to explore information by selecting specific criteria
- Set up filters based on categories, tags, or other criteria
- Useful for websites with a large amount of content
- Change filter tag and tag text colors
7. Content Toggle Block
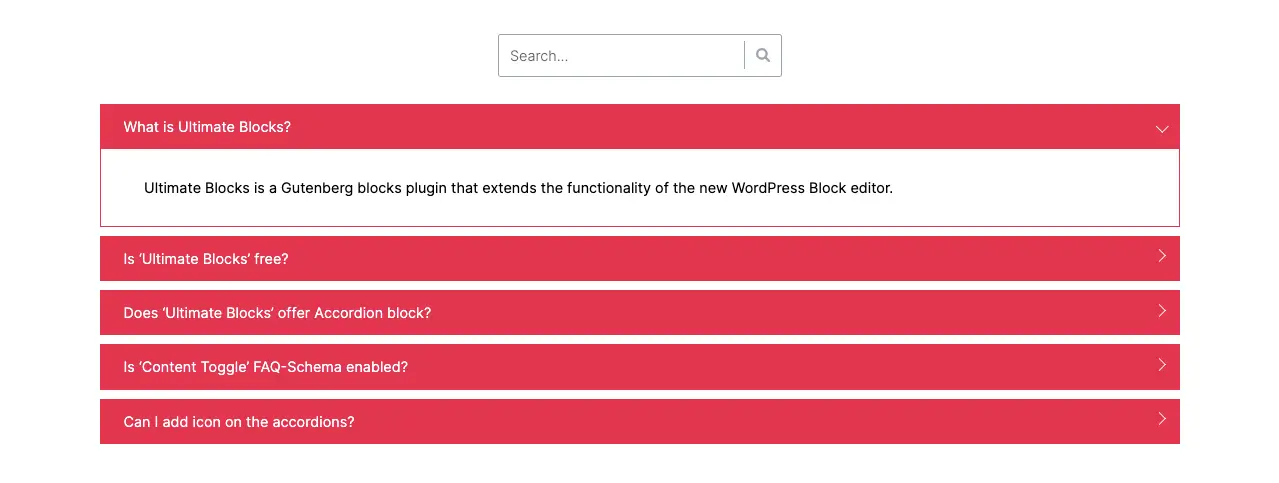
The Content Toggle block is commonly used for FAQs (Frequently Asked Questions). Each question section is also termed a panel. You can add a title to each toggle panel, using different heading tags to structure the content and improve SEO.
The block includes an FAQ schema. You can optimize your content for search engines like Google, which may showcase FAQs in search results, increasing visibility and click-through rates.
It includes a search box so users can quickly find answers to their desired questions. You can customize the toggle icon, choosing from a range of available icons or using your own custom icon to match the design and style of your website.
Quick Recap of the Content Toggle Block’s Features
- Panel title and heading tags
- Configure toggle statuses
- Enable/disable the FAQ schema
- Add a search option
- Change the toggle icon
- Customize the container, title, and link colors
- Enable/disable the block border
8. Countdown Block

You can set up a countdown timer to display the remaining time until a specific event, deadline, or any other time-sensitive occasion. The timer can be configured to count down in weeks, days, hours, minutes, and seconds.
You can change these units, specifying the largest and smallest units based on your needs. The block offers different countdown styles: Regular, Odometer, and Circular. Whatever style you choose, you can customize the countdown and unit colors.
Quick Recap of the Countdown Block’s Features
- Five countdown units (weeks, days, hours, minutes, and seconds)
- Three styles: Regular, Odometer, and Circular
- Displaying units are changeable
- Easy to change the countdown and unit colors
9. Counter Block

With this block, you can display a counting animation that starts from a specified starting number and ends at a target number. Additionally, you can add a prefix and suffix to the counter, providing more context or formatting to the displayed numbers.
One of the notable features of this Counter block is the ability to set the animation duration in seconds. This means you can control the speed at which the numbers transition from the starting value to the target value.
After that, you can add a label to the counter block. This label can be positioned either on top or bottom of the counter, allowing you to provide additional information or context for the displayed numbers.
Quick Recap of the Counter Block’s Features
- Add a starting and ending number
- Add a prefix and suffix
- Add animation duration
- Add a label on the top or bottom
- Customize label color and typography
10. Coupon Block
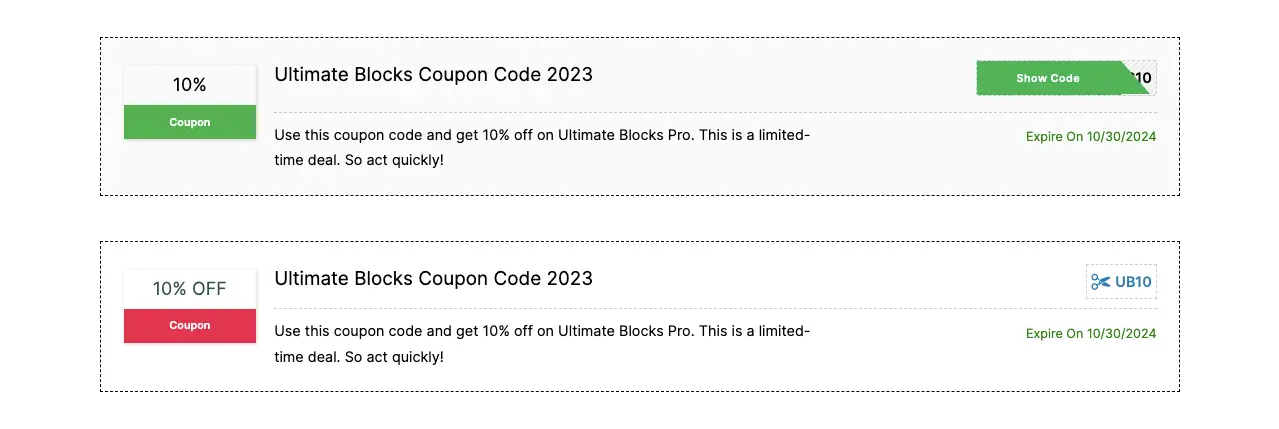
This block allows you to easily add, manage, and customize coupons and deals within the block. You can set expiry dates for your coupons, ensuring that they are only valid for a specific period.
This helps create a sense of urgency and encourages users to take advantage of the deals. You can add labels and descriptions to your coupons and deals, providing additional information and context for the users.
Once the coupon is no longer needed, you can toggle it off to hide it. The block provides humongous coloring and stylization options. You can change the color of the description, title, discount, coupon, code, expiration date, font size, and more individually.
Finally, the coupon block is a complete copy of the WP Coupons and Deals plugin. Once the Ultimate Blocks plugin is installed, you no longer have to install the WP Coupons and Deals plugin on your WooCommerce site.
Quick Recap of the Coupon Block’s Features
- Two coupon types: Coupon and Deal
- Add an expiration date
- Display/hide coupon
- Customize the typography of each text element
- Change normal and hover color
11. Divider Block

The Divider block is useful for adding horizontal lines or dividers between different sections of your content in the Gutenberg editor. This block helps break up the content visually and create a clear separation between different parts of your page or post.
You can adjust the thickness and color of the line, as well as choose whether it appears as a solid line or a dashed line. This block is particularly useful in long-form articles, landing pages, or any content that requires clear visual organization.
Quick Recap of the Divider Block’s Features
- Adjust thickness
- Adjust height
- Adjust width
- Set orientation (horizontal and vertical)
- Insert an icon in between the divider line
- Align the icon on the divider line
- Change the icon size
12. Expand Block

You can create collapsible and expandable content sections using the Expan block. With this block, you can hide a portion of your content under a ‘show more’ or ‘show less’ text, providing a more compact and organized layout for your readers.
This Expand block could be a viable alternative to FAQ block plugins. Using this block multiple times, you can cover lots of information on a single post or page.
Quick Recap of the Expand Block’s Features
- Allow scrolling
- Fade when minimized
- Two styles: underlined-text and button
- Customize the button color and its background
13. How To
The How-To block is a comprehensive block with tons of options by which you can create step-by-step instructions or tutorials on your website. This block is particularly useful for bloggers, educators, and anyone who wants to provide clear and structured guidance to their audience.
With the How-To block, you can add a title to your tutorial and include multiple steps with corresponding descriptions. Each step can be numbered or bulleted, providing a clear sequence for your instructions.
You also have the option to add images or videos to each step, enhancing the visual aspect of your tutorial. You can choose different layouts, such as a single-column or multi-column design, to suit your preferences and the complexity of your instructions.
Quick Recap of the How-To Block’s Key Features
- How to title tag (H1 to H6)
- Section title tag (H1 to H6)
- Step title tag (H1 to H6)
- Upload image
- Insert video URL
- Allows to create tool lists
- Enable adding an image for each tool
- Show time during like the countdown timer
14. Icon
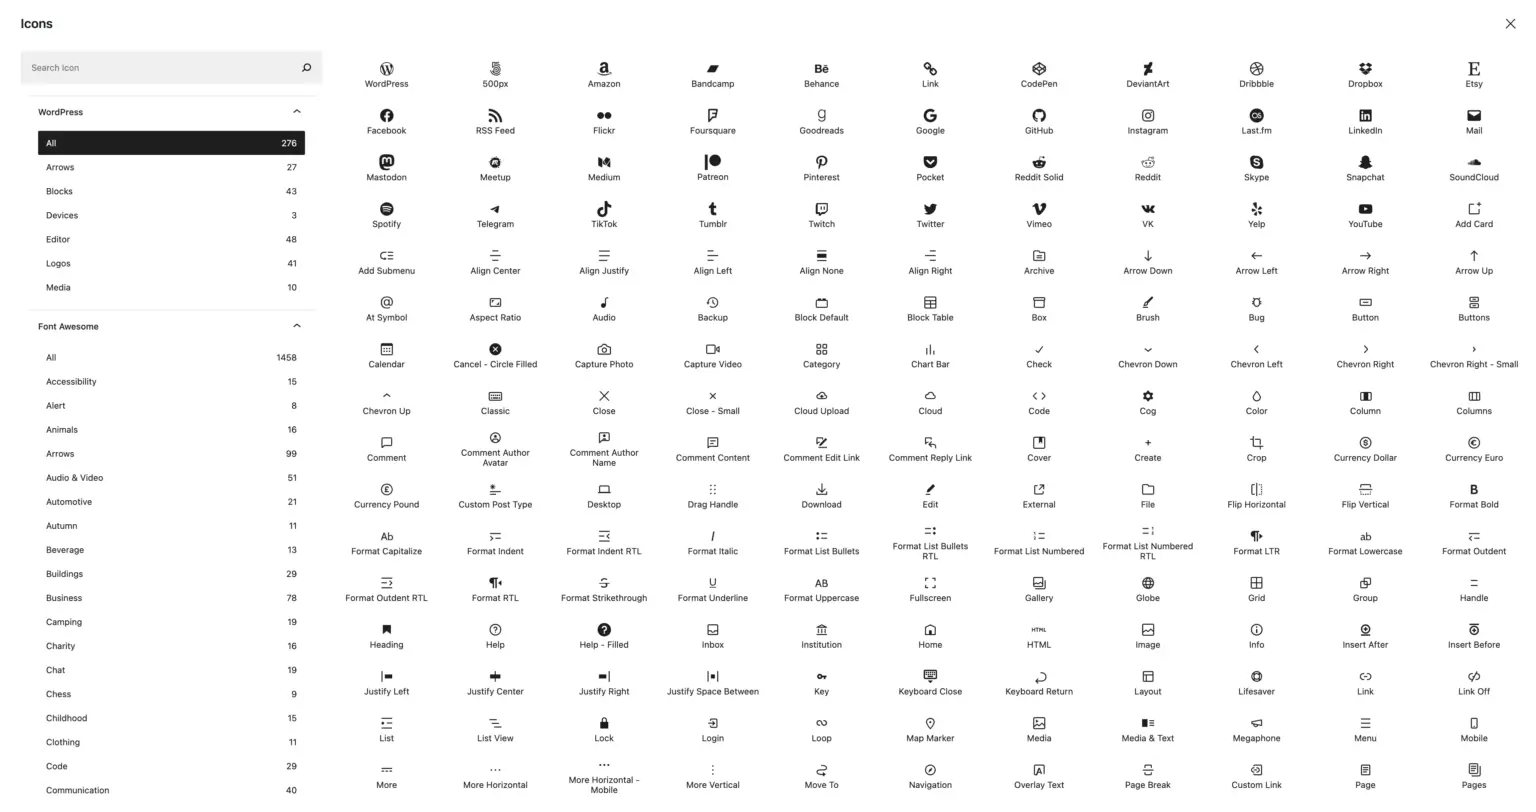
Just by hearing the name, I hope you can understand what this block does. The Icon block allows you to add visually appealing icons to enhance the design and user experience of your content on web posts and pages.
These icons can be customized in terms of size, color, and alignment to match your website’s design and branding. You can also add a link to the icon, making it clickable and directing users to a specific page or external URL.
Quick Recap of the Icon Block’s Key Features
- Rotate the icon
- Resize the icon
- Upload SVG icon
- Change the icon color
- Update the icon hover color
15. Image Slider Block

The Image Slider block helps you to create appealing image sliders or carousels on your WordPress website. This block enables you to display multiple images in a dynamic and interactive format, reducing the need for excessive scrolling on your page.
Each image can be customized with captions, links, and alt text for accessibility. You also have the option to configure settings such as autoplay, navigation arrows, pagination controls, and slide transition effects.
The block offers a lightweight and optimized code, ensuring that your website remains fast and responsive even with the addition of an image slider. By block, you can showcase your portfolio, highlight product images, or display testimonials.
Quick Recap of the Image Slider Block’s Key Features
- Set slides per view
- Define space between slides
- Allow enabling dragging, arrow, navigation icon, and pagination
- Three pagination types: bullet, fraction, and progress bar
- Enable/disable autoplay
- Enable/disable image thumbnails
- Easy to customize the block height
- Allows to add a transition effect during sliding
16. Post Grid
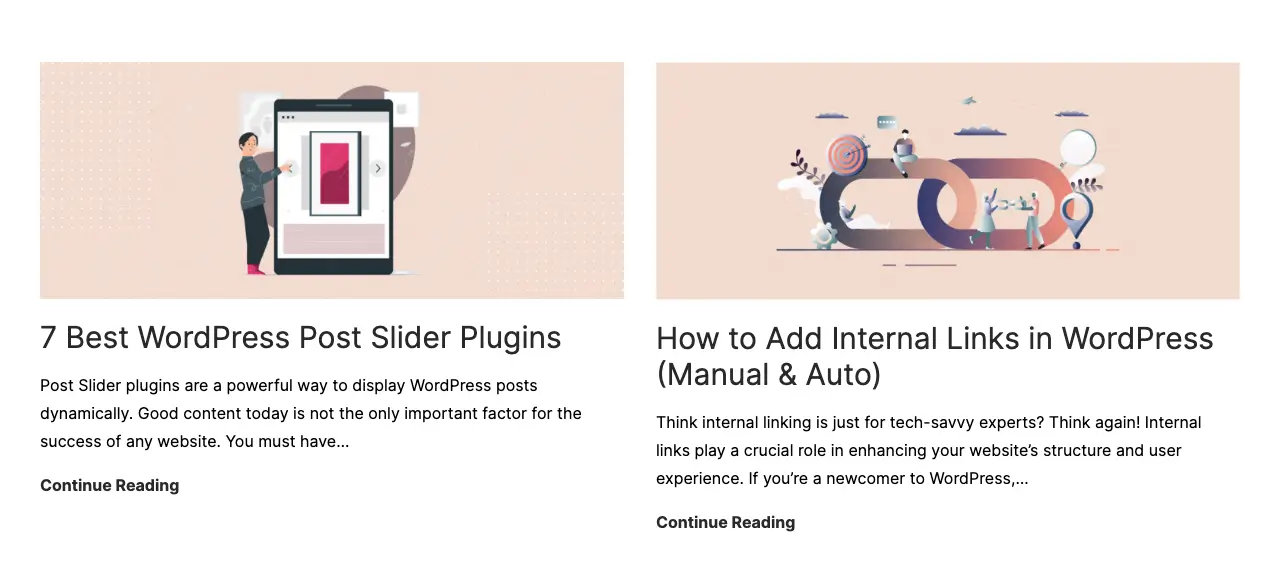
This block enables you to showcase your posts or pages in a grid or list layout. You have the ability to choose the number of columns, adjust the spacing between posts, and customize the layout to suit your design preferences.
Additionally, you can display posts from specific categories, tags, or custom post types, allowing you to curate the content that appears in the grid or list. The block offers options to control the pagination, enable or disable post excerpts, display featured images, and customize the read more button.
You can also configure the sorting order of the posts based on criteria such as date, title, or custom fields. By utilizing the Post Grid block, you can display blog archives, portfolios, product listings, or any other type of content you want.
Quick Recap of the Post Grid Block’s Key Features
- Display either posts or pages in the grid or list view
- Set queries by authors, tags, and categories
- Define the number of items to be shown per block
- Enable/disable pagination
- Display/hide the featured image
- Set excerpt length
- Set title tag
17. Progress Bar Block
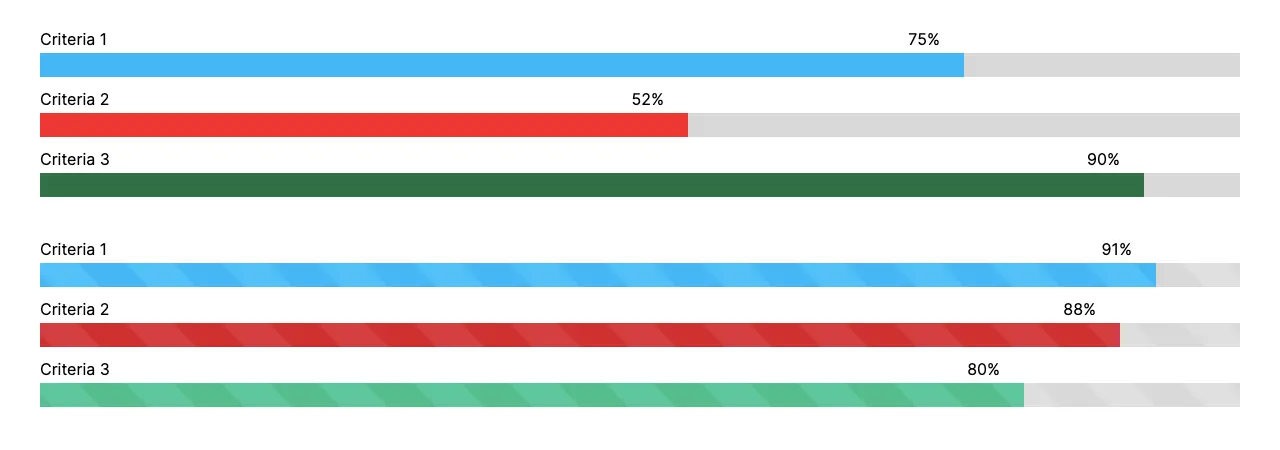
The Progress Bar blocks help you visually represent the progression of how much of a task has been completed and how much is left to be done. You have the option to choose between horizontal or circular progress bars, depending on your design preferences.
The bars can be styled with different colors, thicknesses, and animation effects. This block is particularly useful when you want to showcase progress, achievements, skill levels, or any other type of data that can be represented using a bar format.
By utilizing the Progress Bar block, you can visually communicate information and engage your visitors in a more interactive manner.
Quick Recap of the Progress Bar Block’s Key Features
- Position the percentage either on top, bottom, or inside
- Enable/disable the stripe animation over the bar
- Set value for the progress bar
- Three progress bar styles: line, circle, and half circle
- Customize the progress bar thickness
- Customize the bar and its background color
18. Review Block
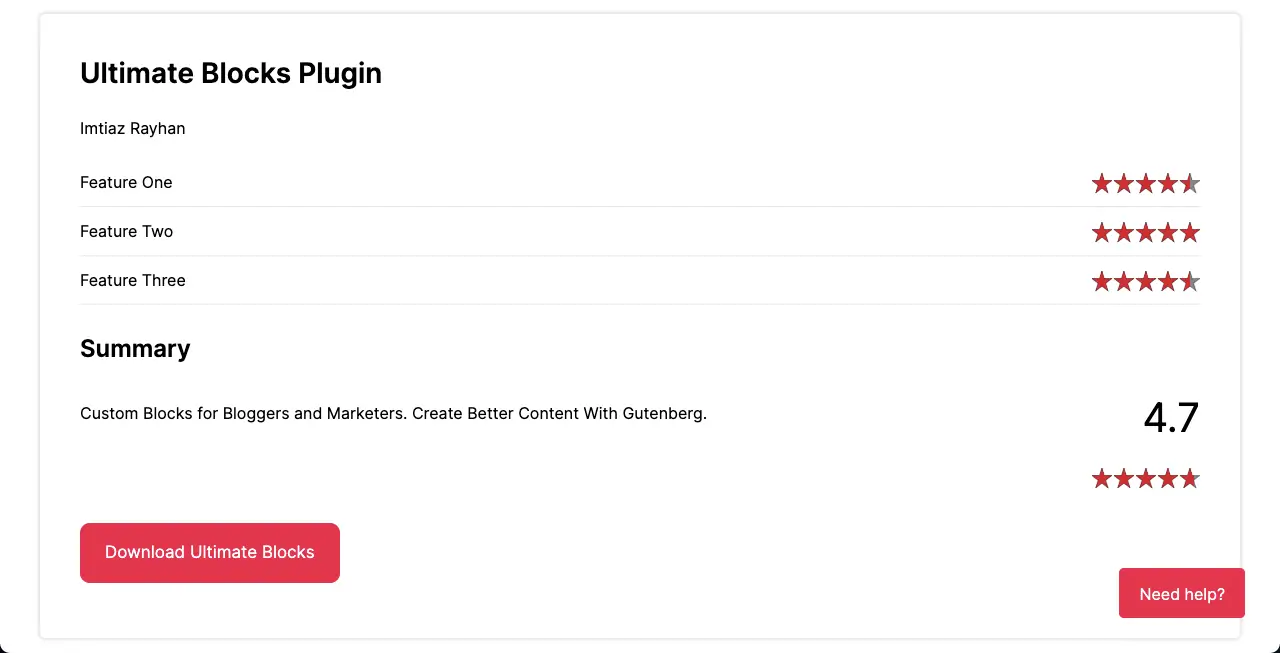
The Review block allows you to showcase or highlight product reviews, feedback, and testimonials to create a sense of reliability among customers. You can add review boxes or sections to your content, providing valuable social proof to enhance credibility.
You have the ability to add the product name, features, summary, and star rating. The block is schema-enabled, which means it can generate structured data markup that search engines can understand.
This block is extremely useful for bloggers, marketers, and affiliate marketers who want to showcase positive reviews and ratings for their products or services.
Quick Recap of the Review Block’s Key Features
- Enable/disable the review schema
- Write the review title and the author’s name
- List feature names along with a star rating individually for each
- Write a summary of the review
- Add a call-to-action button for conversion
- Display the ratings either in stars or a percentage
- Include the Pros-&-Cons extension into the block
19. Social Share Block

The Social Share block allows you to add social sharing buttons to your website. These buttons enable visitors to easily share your content on various social media platforms, such as Facebook, Twitter, LinkedIn, Pinterest, and more.
The block currently has integrations with six popular social platforms. You have the ability to choose from these social platforms and customize the design, including the size, colors, and visibility of the buttons.
By using this block, you can encourage your website visitors to share your content with their friends, followers, and connections on social media. This can increase the reach and visibility of your website, attract more traffic, and potentially gain new followers.
Quick Recap of the Social Share Block’s Key Features
- Integrated with six social platforms
- Set orientation (horizontally or vertically)
- Allows to customize the social share captions
- Easy to disable any particular social platform
- Intuitive to customize social share button size, shape, and color
20. Star Rating Block

The Star block empowers you to incorporate star ratings into your WordPress posts and pages. This block is a simple solution to showcase product reviews, aggregated customer feedback, skill levels, earned testimonials, and more.
The block offers customization options, such as choosing the number of stars, selecting the star & text colors, and adjusting the size and alignment of the rating display. Star ratings can improve conversion rates, credibility, and user experience.
Additionally, incorporating star ratings can potentially provide SEO benefits, as they have the power to appear in search engine snippets.
Quick Recap of the Star Rating Block’s Key Features
- Display up to ten stars
- Easy to set star values by dragging
- Add a review text below the star rating
- Increase the star icon size
- Simple to change the star color
21. Styled Box Block

The Styled Boxes can be used to present information in an engaging and captivating manner. Each box comes with an individual set of styles, colors, and layouts. You have the flexibility to add text, images, buttons, or other content within the box.
This block allows you to highlight important information, create call-to-action sections, or simply add visual interest to your content. Furthermore, you can present key features or benefits of a product or service.
You can also showcase testimonials, customer reviews, and important announcements in an attractive format.
Quick Recap of the Styled Box Block’s Key Features
- Four styled boxes: notification box, feature box, number box, and bordered box
- Easy to switch to another styled box even after you select one
- Respective features are enabled based on the box you select
22. Styled List

WordPress has a default list block. But you cannot display the list items in multiple columns. So when you add too much information, the post and page horizontally get so long. Plus, you cannot change the list icons.
The Styled List block in the Ultimate Blocks can save you from these problems. With this block, you can create both numbered/bulleted lists and show them in multiple columns. So your posts and pages won’t get excessively long.
This block is perfect for presenting key points or features. You can create step-by-step guides or tutorials with numbered lists. You can highlight important information or tips in a bulleted list format.
Quick Recap of the Styled List Block’s Key Features
- Change icon type
- Customize the icon size
- Set the number of columns
- Define the item spacing
- Customize the font size
- Change the icon color, text color, and background color
23. Tabbed Content

The Tabbed Content block makes it easy for you to organize and display content in multiple tabs within your WordPress posts and pages. You can create as many tabs as you want, each containing different content.
This can include text, images, videos, or any other type of content you want to show. Users can easily switch between tabs to access the specific information they are interested in without cluttering the page with excessive content.
Quick Recap of the Tabbed Content Block’s Key Features
- Three tab styles: tabs, pills, and underline
- Convert any tab into a clickable call-to-action section
- Add tab anchors
- Add a secondary tab title
- Add tab icon/image
- Change orientation (vertically or horizontally)
24. Table of Contents
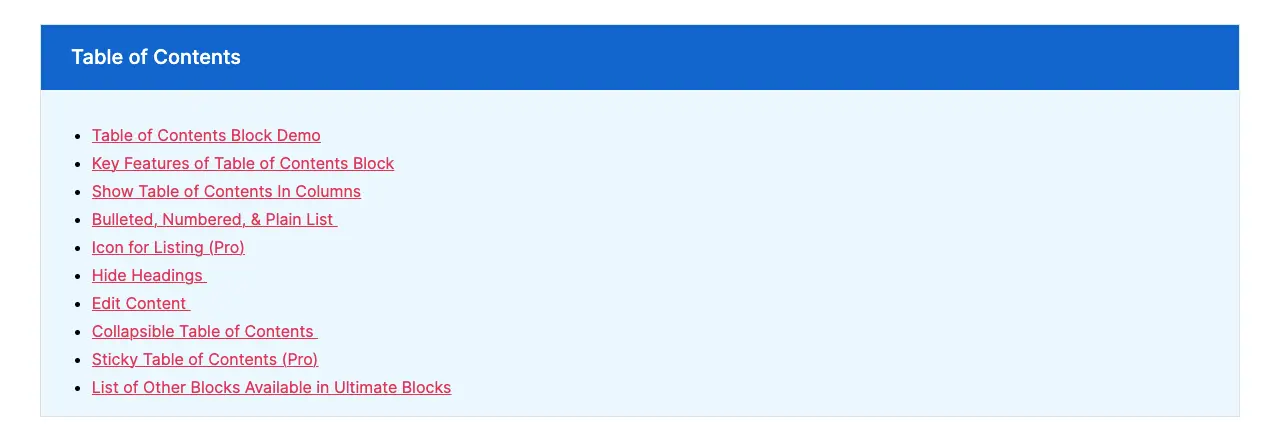
The Table of Contents block automatically generates a table covering all the headings you have used throughout your post/page. The list makes it easier for readers to navigate and find specific sections of your articles quickly.
This block scans your content and includes all the headings, such as H2, H3, and so on, in the table of contents. You may remove particular headings from the table as well if you want. You can also make the table sticky, collapsible, or scrollable.
Quick Recap of the Table of Contents Block’s Key Features
- Show all the headings or hide particular ones
- Show the table of contents in a single or multiple columns
- Easy to change the list style and the list icon
- Make the table collapsible, sticky, or scrollable
- Romanize the anchor texts
25. Testimonial Block

The Testimonial block allows you to showcase testimonials or customer reviews on your web page. These testimonials could be an effective way to build trust, credibility, and social proof for your products or services.
You have the flexibility to display the testimonial text, along with the name, photo, and other relevant details of the person providing the testimonial. You can customize the colors, fonts, and other elements to match the overall look of your website.
Quick Recap of the Table of Contents Block’s Key Features
- Add an image of the testimonial’s author
- Write the testimonial
- Write the author’s name and his working designation
- Change the font style
26. Timeline Block
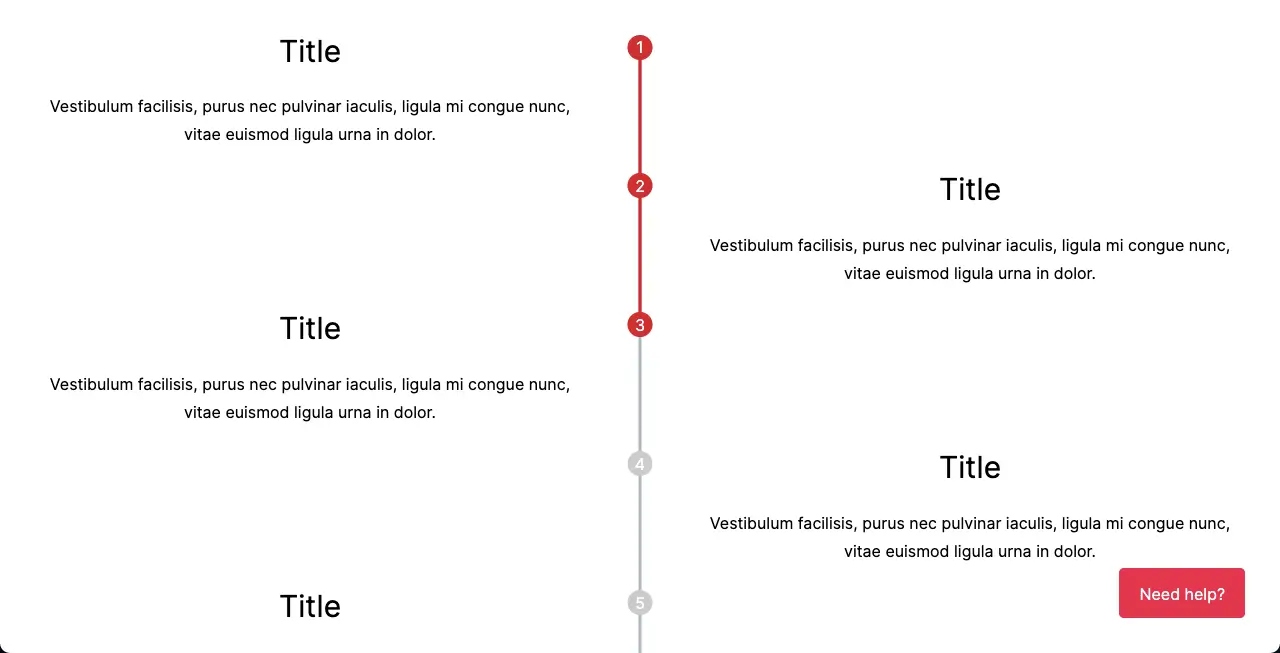
With the block, you can create interactive timelines on your web page to chronologically show the achievements you have made or achieved over the period of time. You can also use it to show past historical events.
Most people love to use this block to showcase their working experiences and projects handled by different companies. Furthermore, business organizations also love to use this block to describe how they have grown and come so far year by year.
Quick Recap of the Table of Contents Block’s Key Features
- Change the item starting position (right, center, or left)
- Show timeline progress and connectors
- Use icons or numbers in the connectors
- Customize the connector size
- Update colors of each element
Price of the Ultimate Blocks WordPress Plugin
Ultimate Blocks has a free and premium version. If you have just created a new website where there is no need to use advanced features, then using the free plugin is sufficient. Honestly, Ultimate Blocks is one of the best free Gutenberg block plugins.
Its premium version has multiple pricing plans. We have listed the pricing below.
- 1 website – $39.2/year
- 10 websites – $70.2/year
- 100 websites – $119.2/year
The TableBerg Pro is included in all the plans.
- 1 website – $159.2/year
- 10 websites – $239.2/year
- 100 websites – $439.2/year
The TableBerg Pro is included in all the plans.
The Ultimate Blocks WordPress plugin offers a 14-day money-back guarantee.
Finishing Notes!
Ultimate Gutenberg Blocks plugin is one of the top pioneers that led many others to develop newer Gutenberg block WordPress plugins. Although we have applauded the plugin above a lot, it’s still not an all-in-one plugin for website design.
But for content creation and marketing, Ultimate Blocks is really one of the best. If your site is already designed with any page builder or a theme, using the Ultimate Blocks alongside can do magic.
Hope you’ll at least try the free version and let us know your feedback in the comment box. Wishing you a nice day ahead. You may any of the following posts before closing your window.
