

A site without a footer looks unfinished and amateurish. A well-designed footer not only adds a professional touch to your website but also enhances its usability and functionality. Yet, most users show less seriousness when creating footer.
But it plays a crucial role in providing important information, improving navigation, and promoting engagement. From displaying contact details and social media links to showcasing copyright information, the footer can act as a virtual lighthouse for a site.
There are various ways you can create a footer in WordPress. In this article, I will explain several popular and easiest ways how to create a footer in WordPress. Before that, I’ll cover some theoretical parts about the website footer.
What Is a WordPress Footer?
A WordPress footer is the bottom section of a WordPress website. It typically contains information like copyright notices, links to privacy policies, contact information, social media links, and other site-related details. The footer can be customized through the WordPress theme settings or by using widgets and custom code.
Must-Have Elements in WordPress Footer
Below is a list of things people commonly place and display on WordPress footers. You may consider them in your footer as well.
- Copyright Information
- Privacy Policy and Terms of Service Links
- Contact Information
- Social Media Links
- Navigation Links
- Newsletter Signup
- Back to Top Button
- Site Credits
How to Create a Footer in WordPress: 3 Methods
There are numerous ways you can create a footer in WordPress. In this blog post, I will show you how to create a footer in WordPress using three methods. They are using a block theme, a full site editing theme, and Elementor.
Method One: Create a Footer Using an Editor Theme
The WordPress Editor themes are designed to work seamlessly with the Gutenberg block editor. They typically include elements like font styles, colors, layout, and sometimes customizable options for the editing interface.
They often come with pre-designed blocks so you can get your site ready very soon. You’ll find hundreds of editor themes in WordPress. Some most fascinating of them to me are GroundWP, Twenty Twenty Four, Blogza, Newshike, Newsbreeze, etc.
I will use the GroundWP theme in this section. Let’s begin.
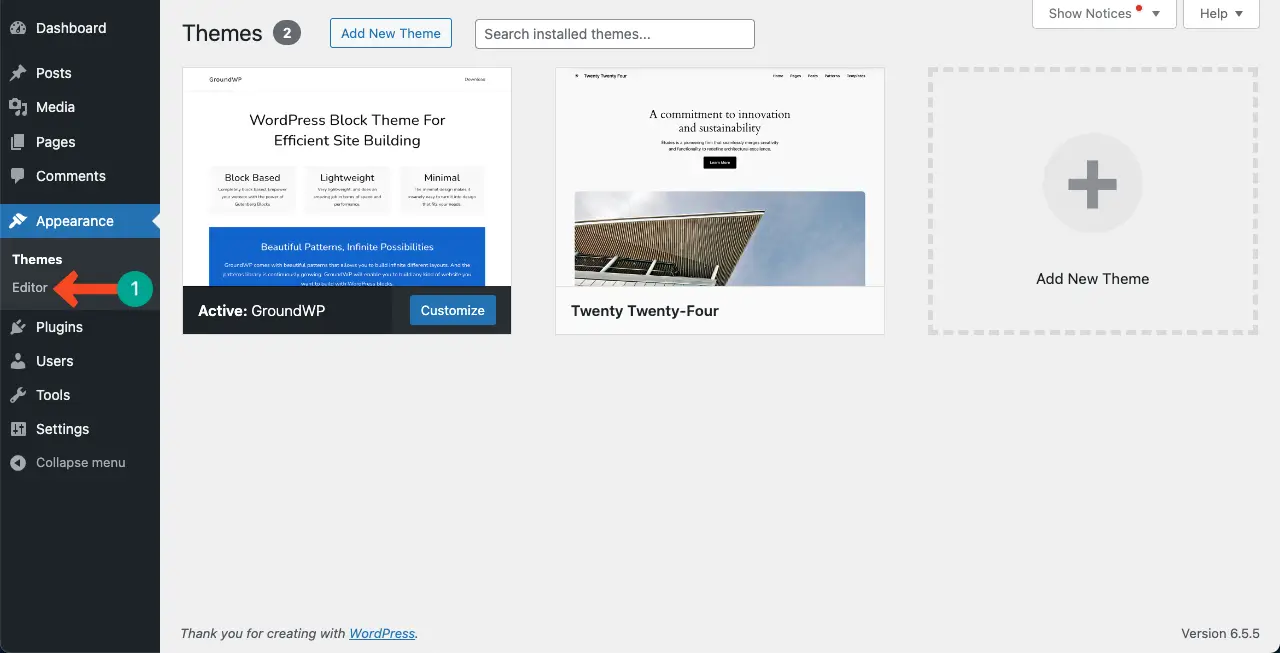
Step 01: Go to Theme Editor
Navigate to Appearance > Editor. It will take you to the theme editor.
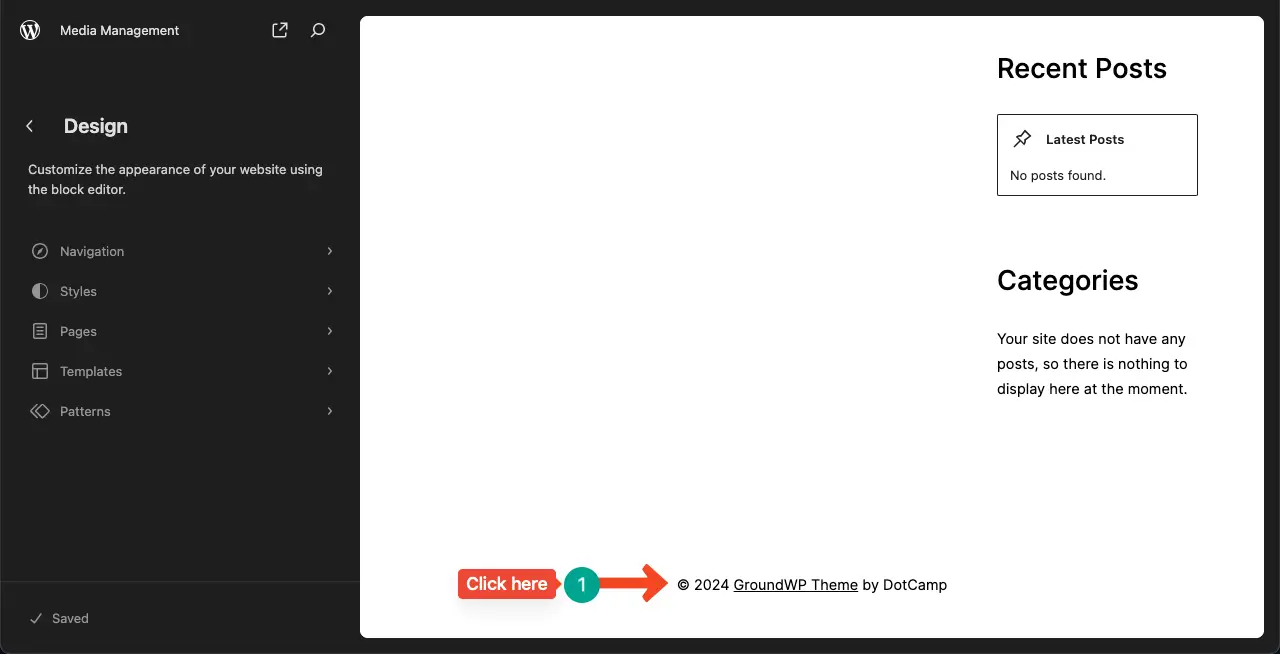
Step 02: Open the Footer Section on the Editor Theme
You’ll get a white canvas on the right side. By scrolling down the canvas, come to the footer section. Click on the footer section with your cursor.
This will open up the footer section and allow you to customize it.
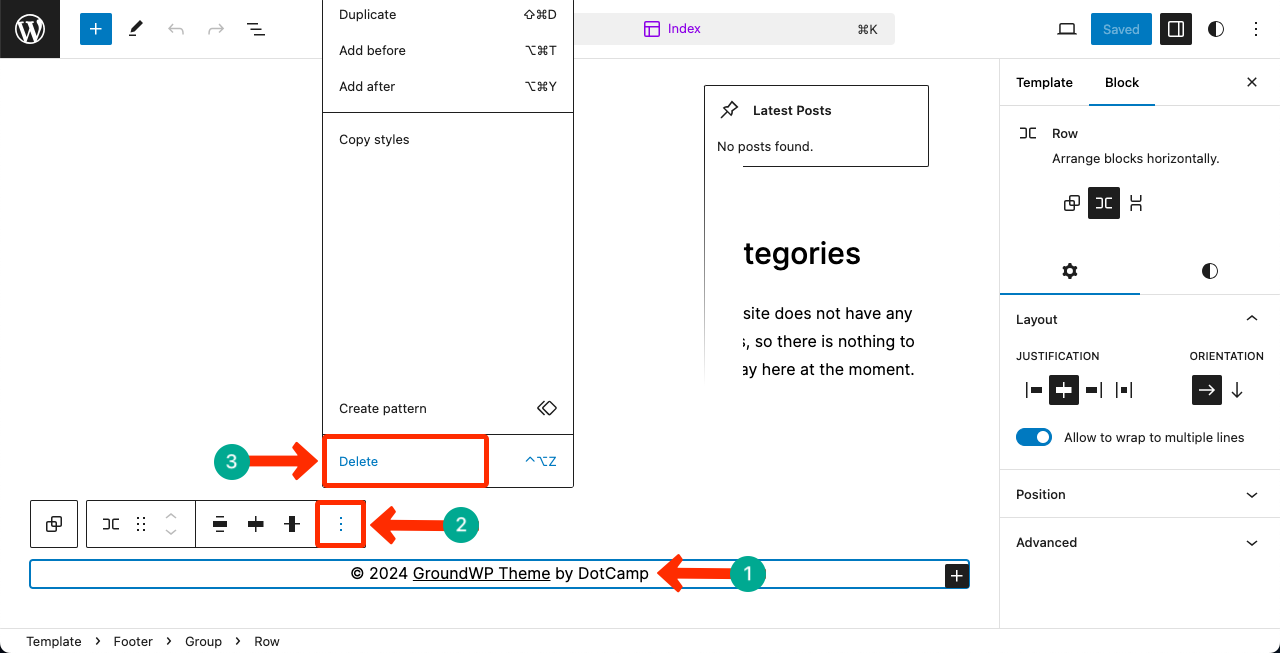
Step 03: Delete the Default Text from the Footer Section
You’ll always find a default text in the footer. It’s better to delete the default text from the footer. Otherwise, it may affect your brand value.
Select the text. Click the horizontal three-dot line. Select the delete option. This will remove the default text from the footer.
Step 04: Create a Layout for the Footer Using an Editor Theme
It’s better to create a layout first to add elements to the footer. You may design the layout in your desired ways. But in this tutorial, I’ll do it using the column block.
Find and add the Column block to the footer by clicking the plus (+) icon.
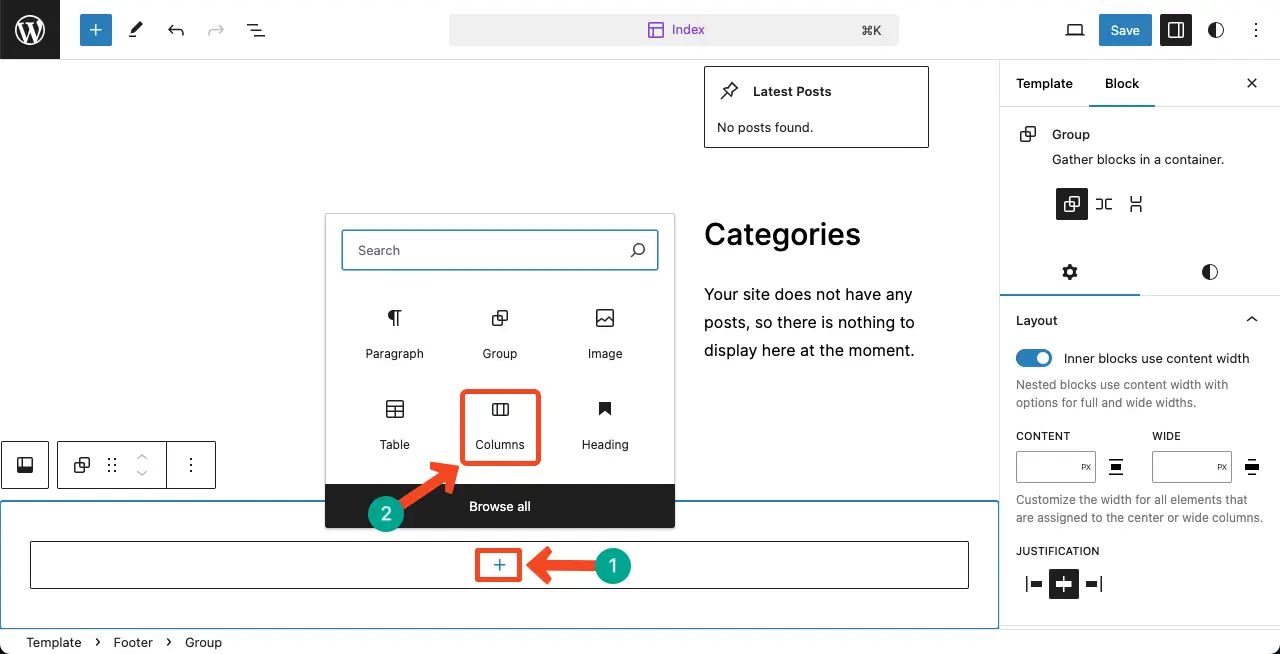
Select the number of columns you want to add to the section. I will select the three-column option for designing my layout.

Step 05: Add Content to the Footer Layout
** Add a logo to the footer **
Displaying your site on the footer is a standard best practice followed in many established websites. Add the Site Logo block to the first column.
Hope you can do the rest alone and add a logo.

** Add the Copyright Text **
Click the plus (+) icon. Find and add the Paragraph block to write the Copyright text
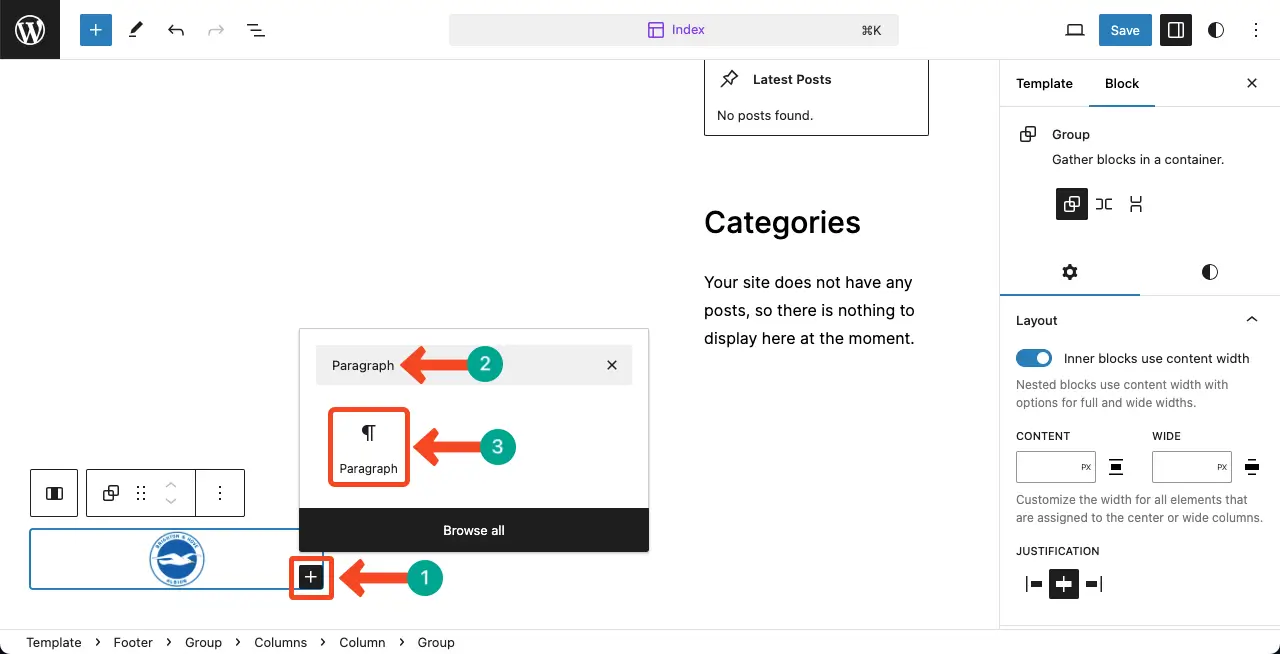
Writing the copyright text in the web footer legally protects your content by asserting ownership and the rights reserved. You can see that I have added copyright text under the site logo.
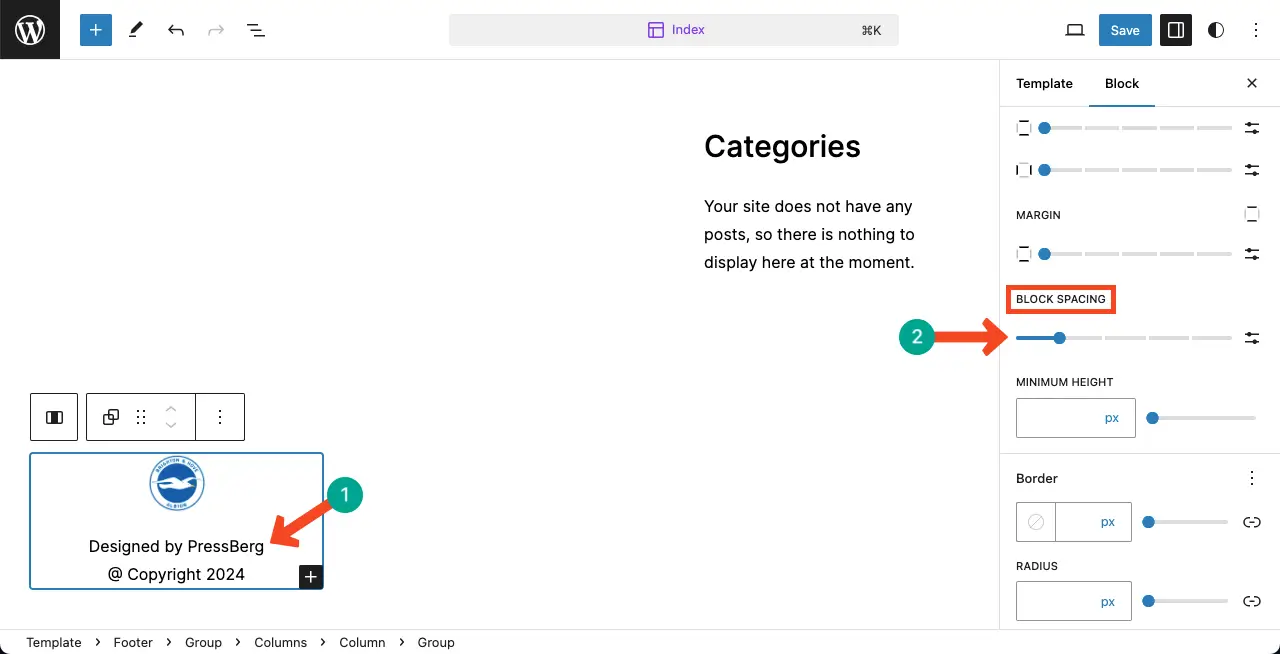
Write your text as you want. After that, go to the Styles tab. By scrolling down the tab, come to the Block Spacing option. Customize the space between the site logo and the copyright text.
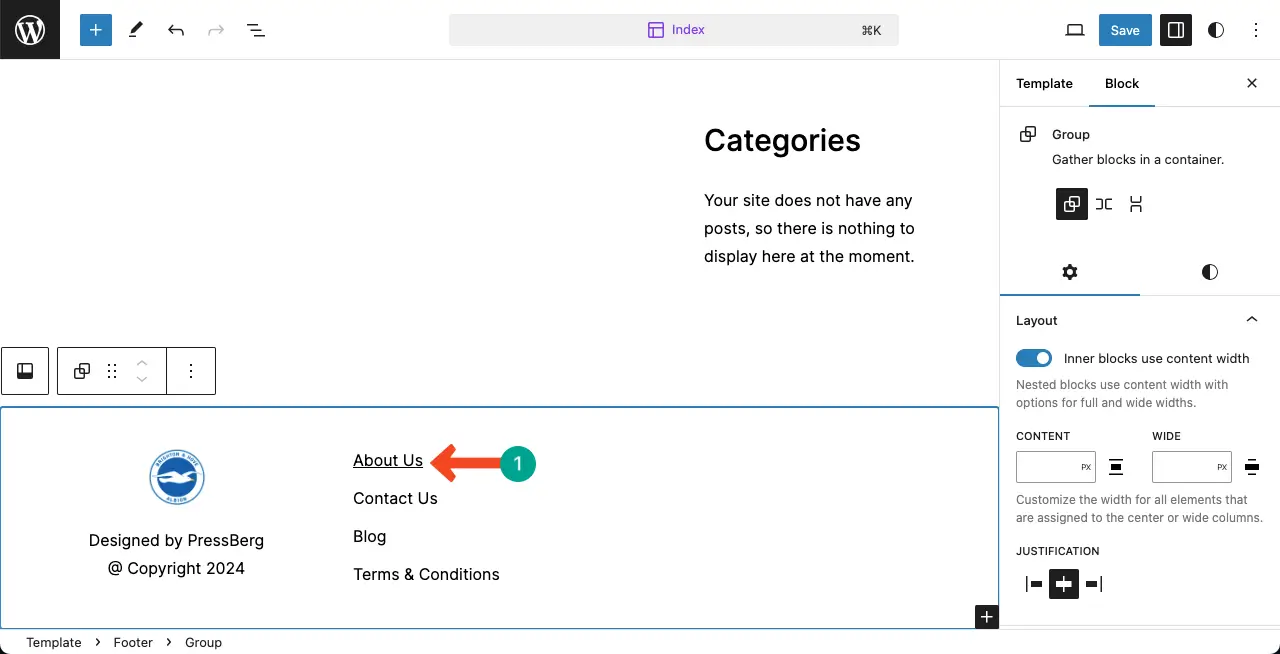
** Add Page Links **
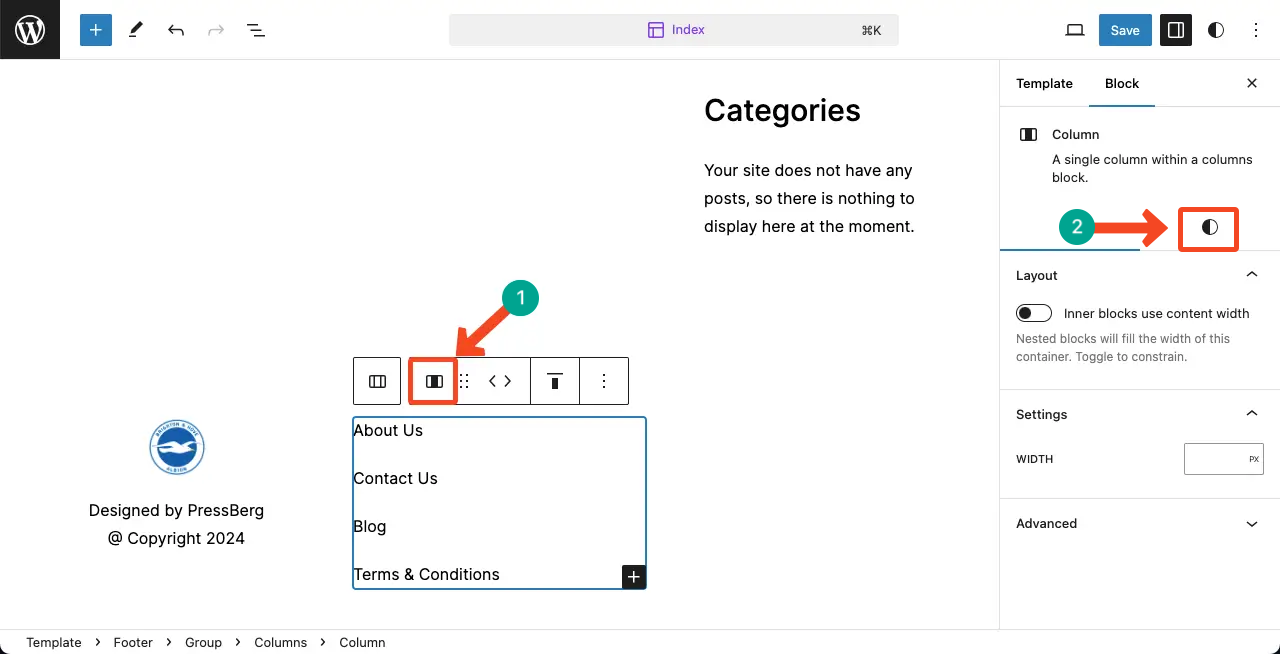
Come to the second tab. Add the page names you want to display on the footer. Add them to the second column using the Paragraph block.
Select the entire second column by clicking the column icon on the toolbar. Then, go to the Styles tab.
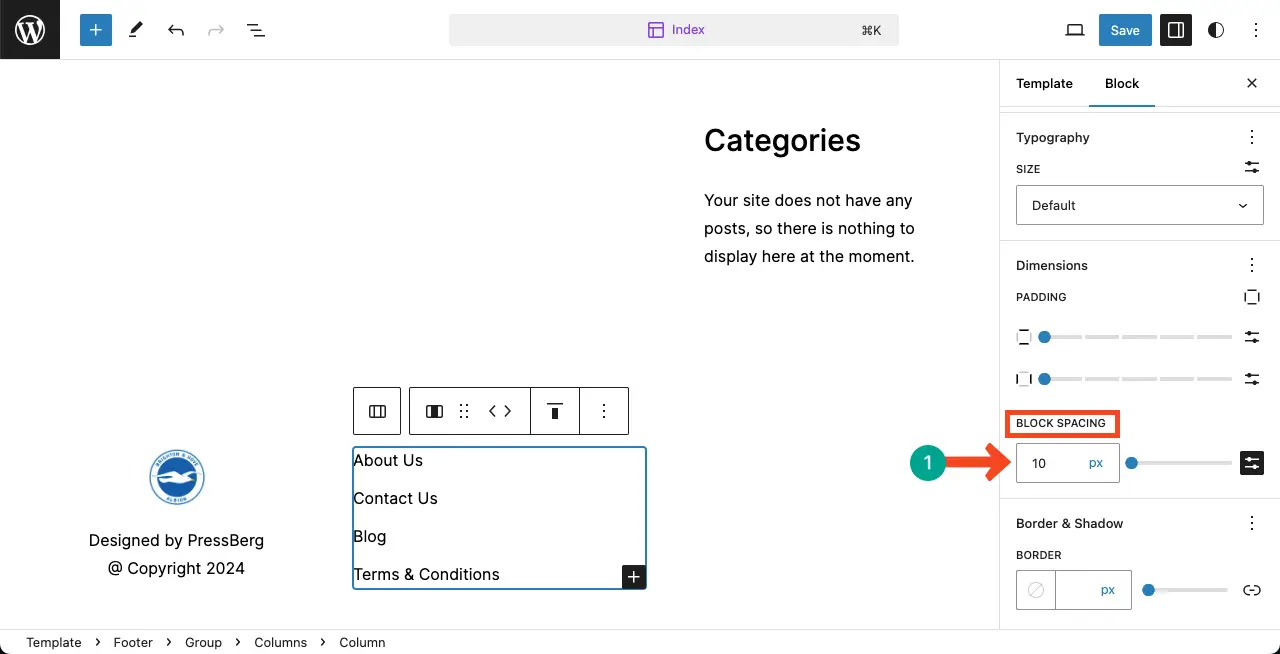
Come to the Block Spacing again by scrolling down the tab. Adjust the space you want to set between the page names on the second column.
Now, it’s time to link the page names to their respective pages. Select the page name.
Click the Link option on the toolbar. Paste the original page link to the box. Hit the Entire button.
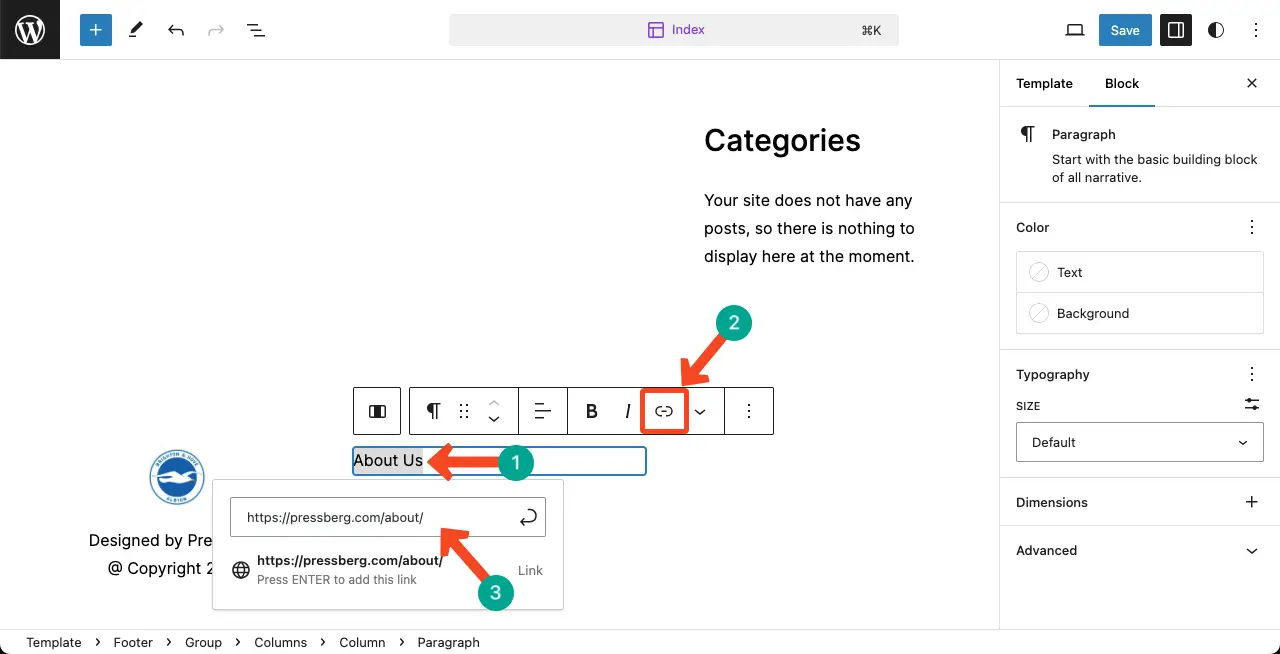
You can see the page is linked to the footer. Similarly, link the other pages to the respective page names.
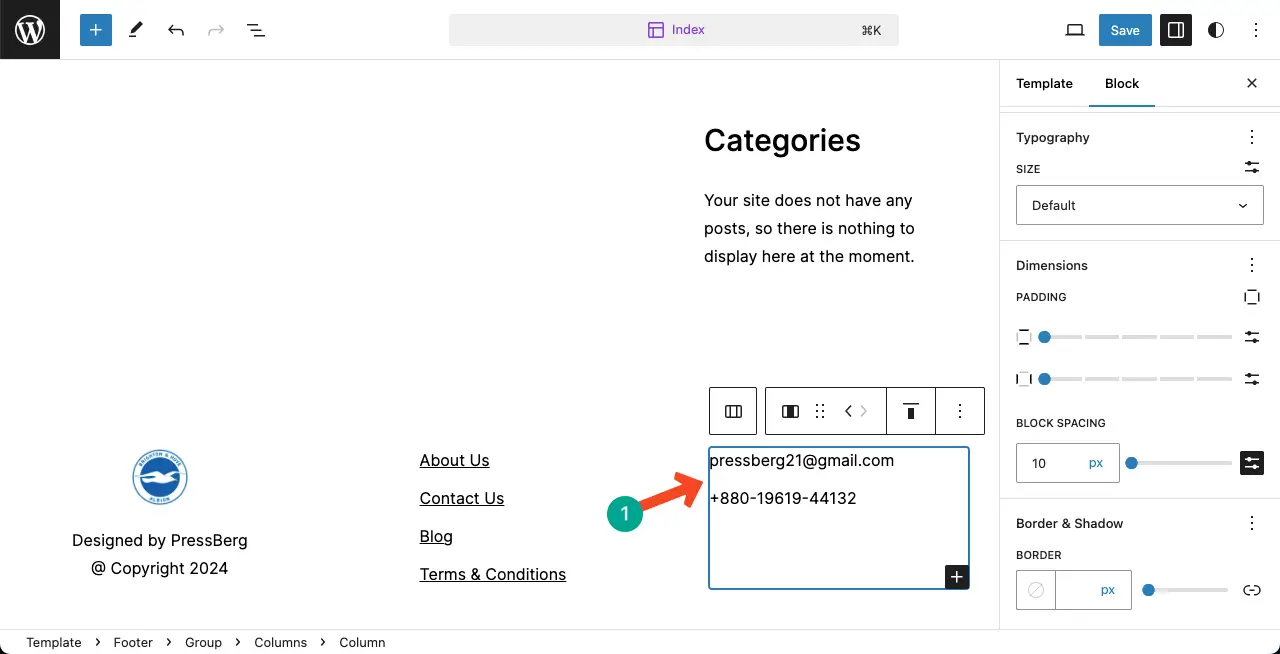
** Add Email and Phone Number **
Like the above approaches, you can add your email address and phone number to the footer using the Paragraph block. Do it yourself.
Finally, it’s time to add your website’s social profiles and page links to the footer. Find and add the Social Icons block to the footer.
Once the block is added, you have to choose and add your preferred social icons to the block. It’s simple.
Just click the plus (+) icon. You’ll see the social icons. Add the social icons one by one as you like. See the video below to learn the process.
Once the social icons are added, you have to link your social pages and profiles to the respective icons.
Just click on the icons one by one. You’ll get the option to add links.
Step 06: Stylize the Footer with the Editor Theme
Select the entire footer section. Then, go to the Styles tab. Do the necessary customizations you want to make. I have just changed the background and text color so they are properly visible and readable.
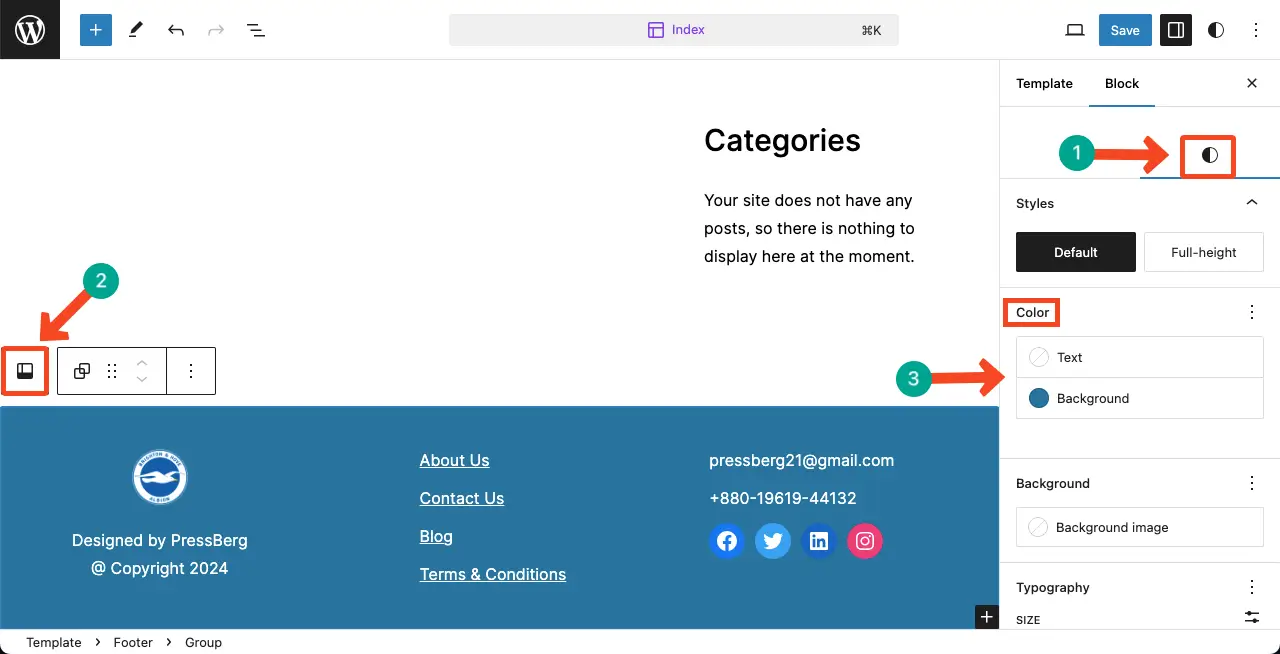
Thus, you can create a footer section for your website with the editor theme.
Explore the post on how to create a header in WordPress.
Method Two: Create a Footer Using a Full Site Editing Theme
Full Site editing themes offer comprehensive customization options to redefine the web layout. Using them, you can create and customize your website header, footer, sidebar, blog post template, and many more options. You’ll find numerous full site editing themes in WordPress.
Some most popular of them are Astra, GeneratePress, OceanWP, Hestia Pro, and Blocksy. I will explain the second method of creating a footer in WordPress using the Blocksy theme.
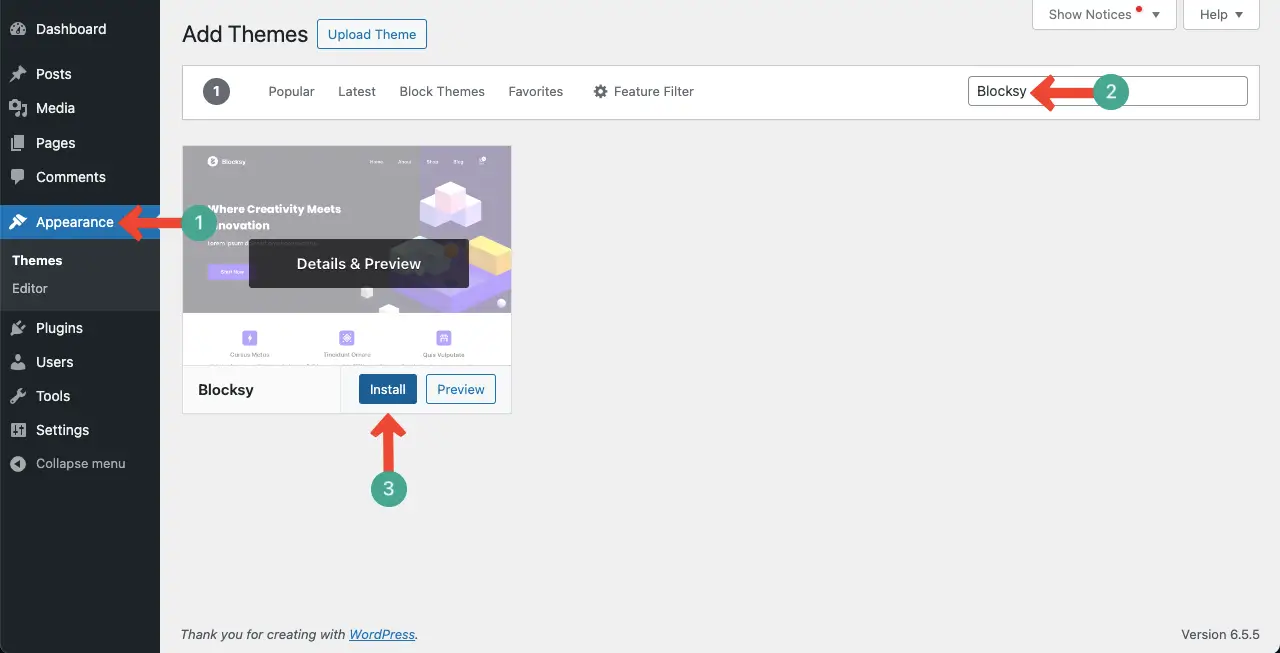
Step 01: Install and Activate the Blocksy Theme
Go to Appearance. Type Blocksy in the search box. Once the theme appears, install and activate it.
Step 02: Go to the Customize Option
Go to Appearance > Customize. This will take you to a new page where you can customize various elements of the theme.
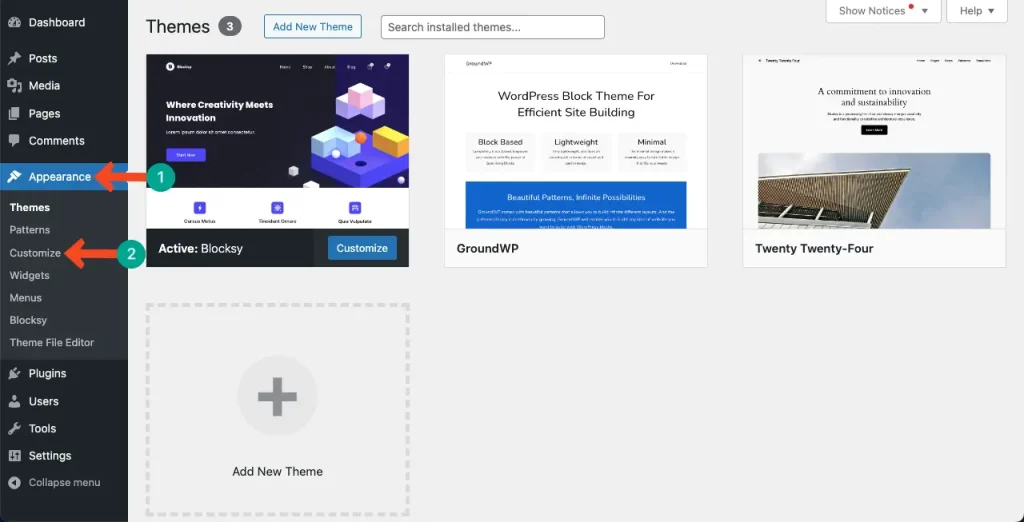
You can see the theme customizing page has been opened.
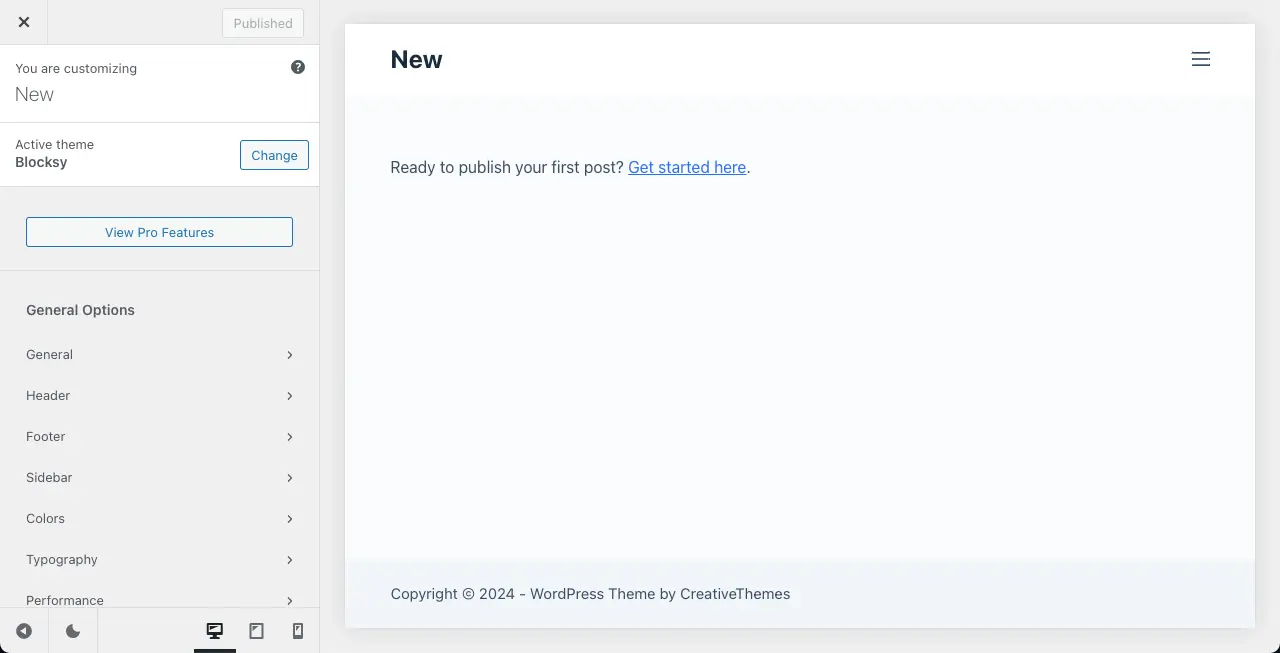
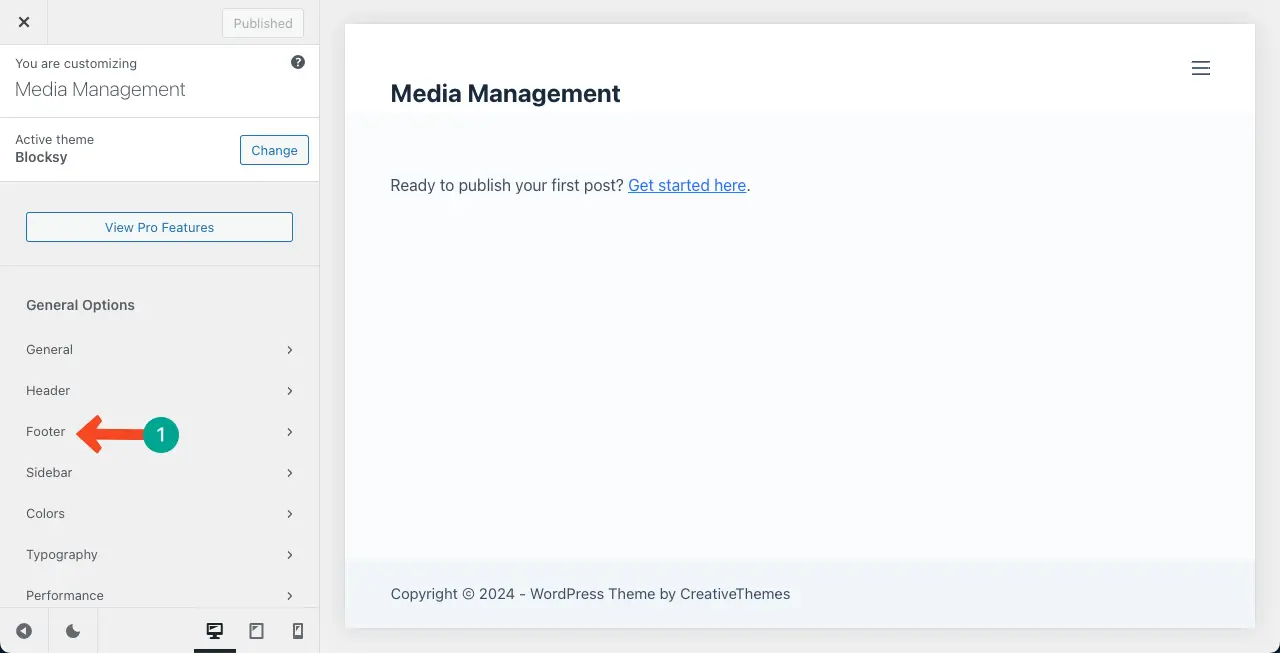
Step 03: Select the Footer Option
You’ll find various customizing options on the left sidebar. Using them, you can customize respective parts of your website’s layout. You’ll get the Footer option on the sidebar.
Find and click the Footer option.
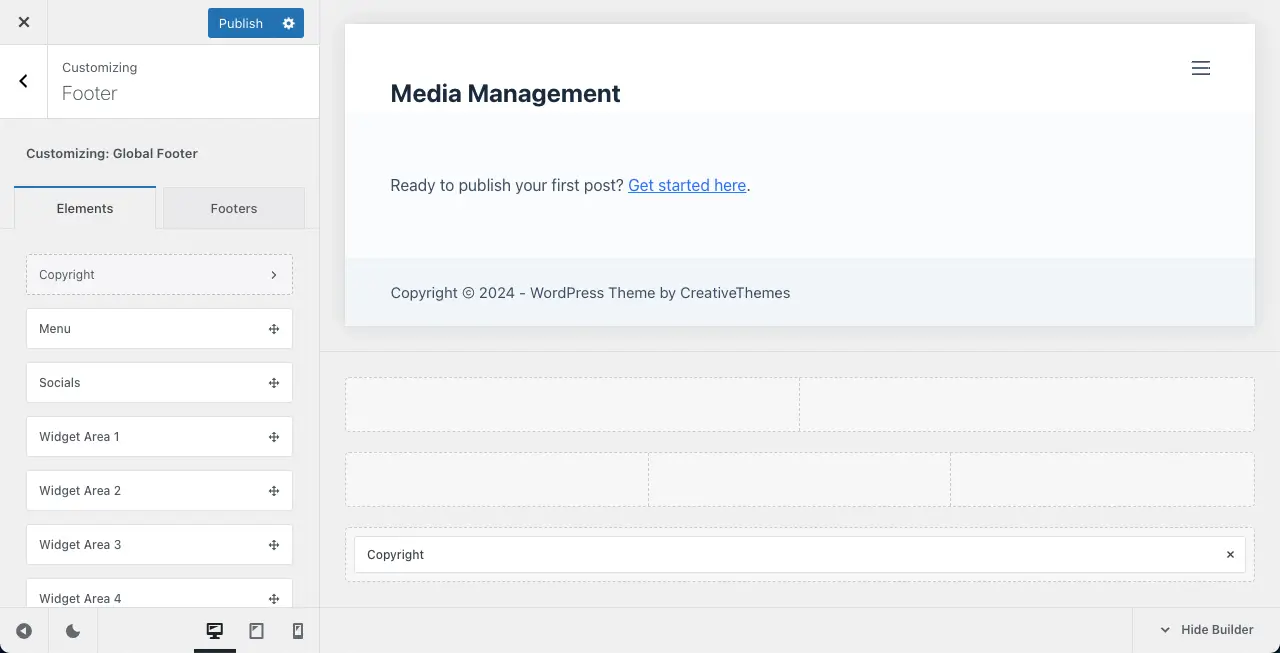
The Footer option is opened. You will see numerous footer elements on the right side. You have to drag and drop them on the footer section and customize your information.
Note: By default, most full site editing themes come with three rows in the footer section. You have to add your desired elements within these three rows.
Step 04: Edit the Copyright Text
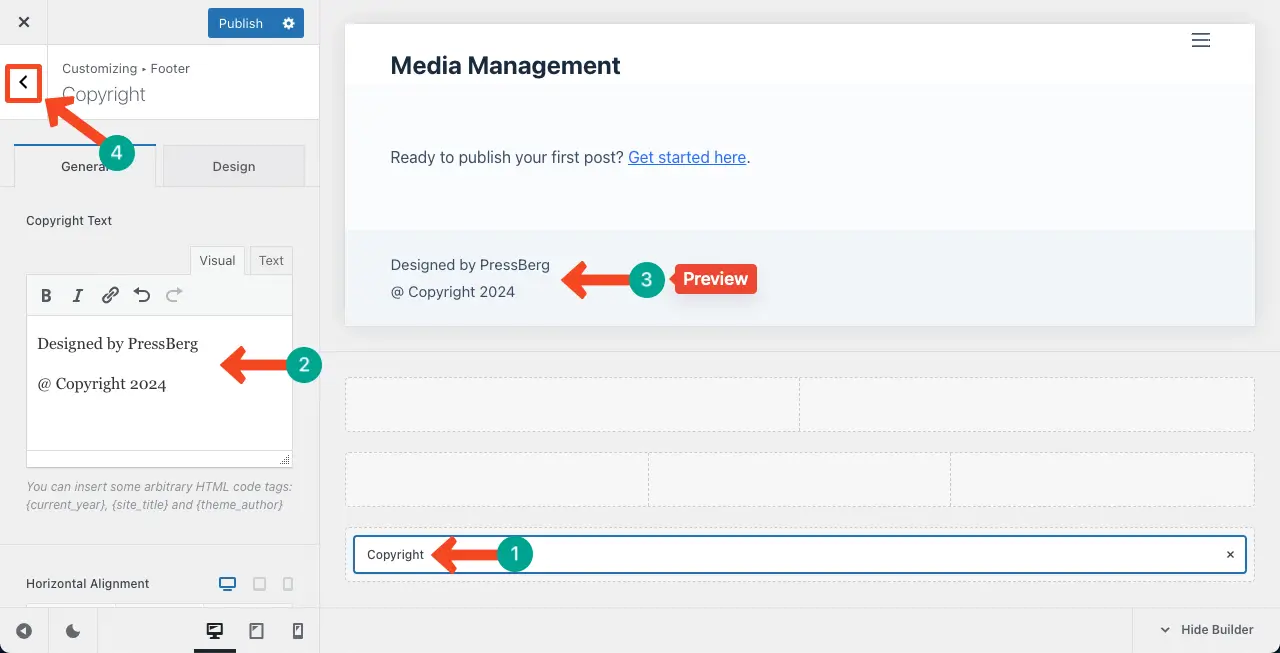
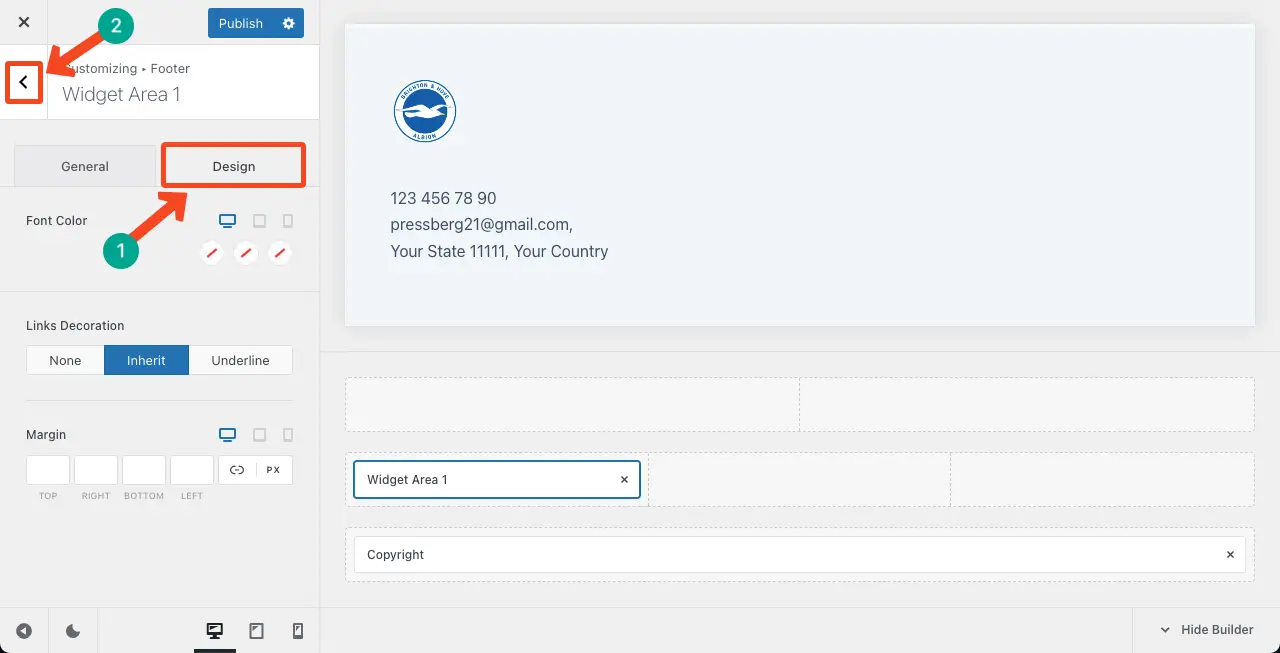
The default copyright text usually comes on the last or third footer. Double-click the Copyright widget on the footer. A text adding/editing box will open up on the left sidebar.
Type your copyright text in the box. Whatever you write will be previewed in the immediate right section.
Once done, click the backward arrow sign on the top-left corner of the left sidebar.
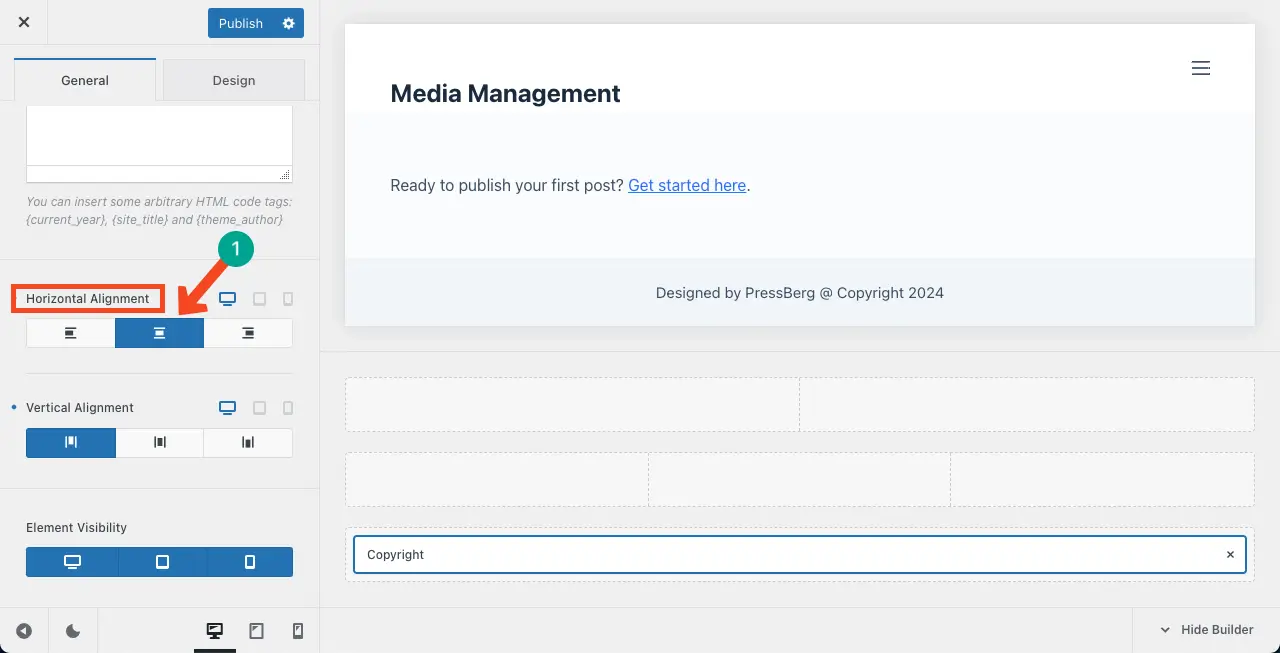
But if you want to customize the copyright text, don’t click the backward arrow sign. Instead, scroll down the sidebar.
You can centrally align the copyright text on the footer using the respective option.
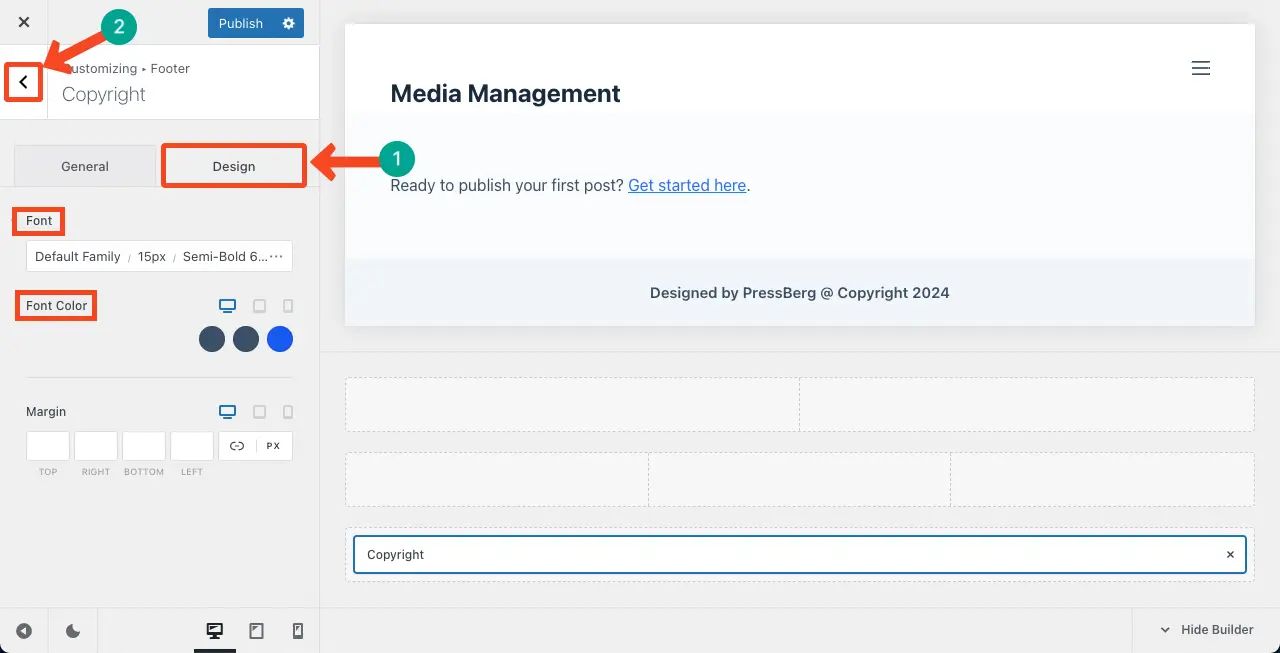
Come to the Design tab. Under this tab, you’ll get options to change the font size, font family, font color, and margin of the copyright text. Do it yourself.
Once done, click the backward arrow sign to come to the main footer page.
Step 05: Add a Site Logo to the Footer
It’s better to add the Site Logo and main elements to the second row of the footer. But before that, you have to define a column layout for the row. This means defining within how many columns you want to display your footer content.
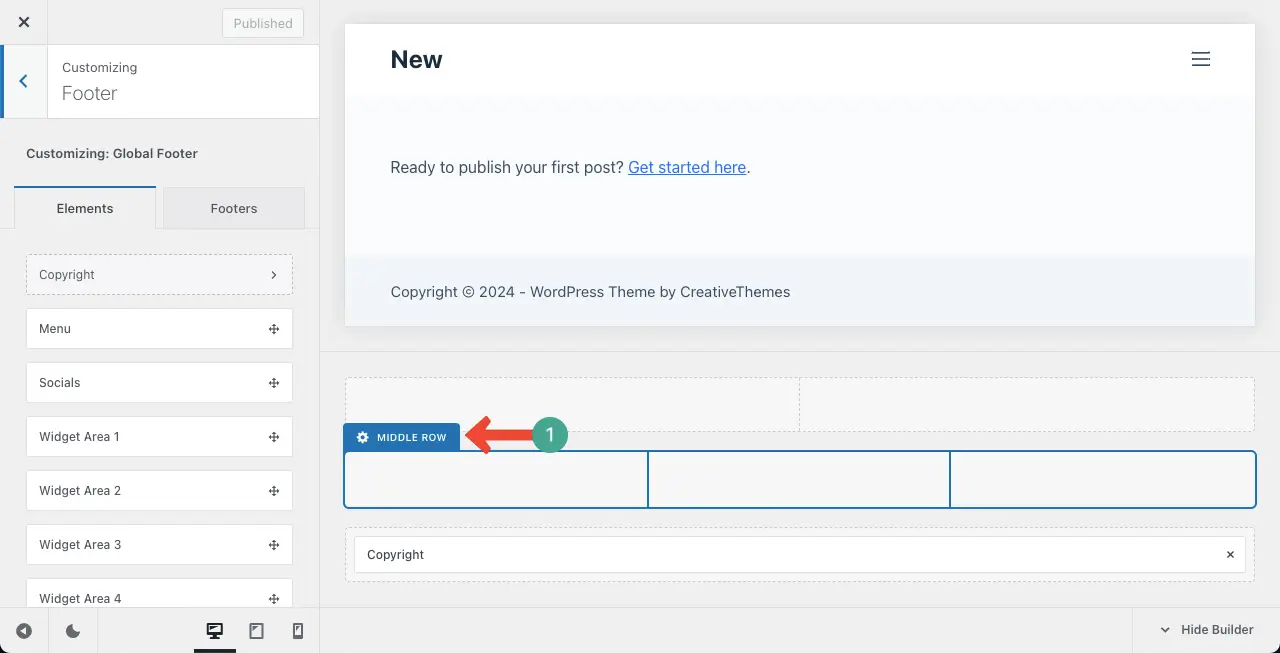
Hover on the second row. You will see the Middle Row text appearing like the image below. Click on Middle Row.
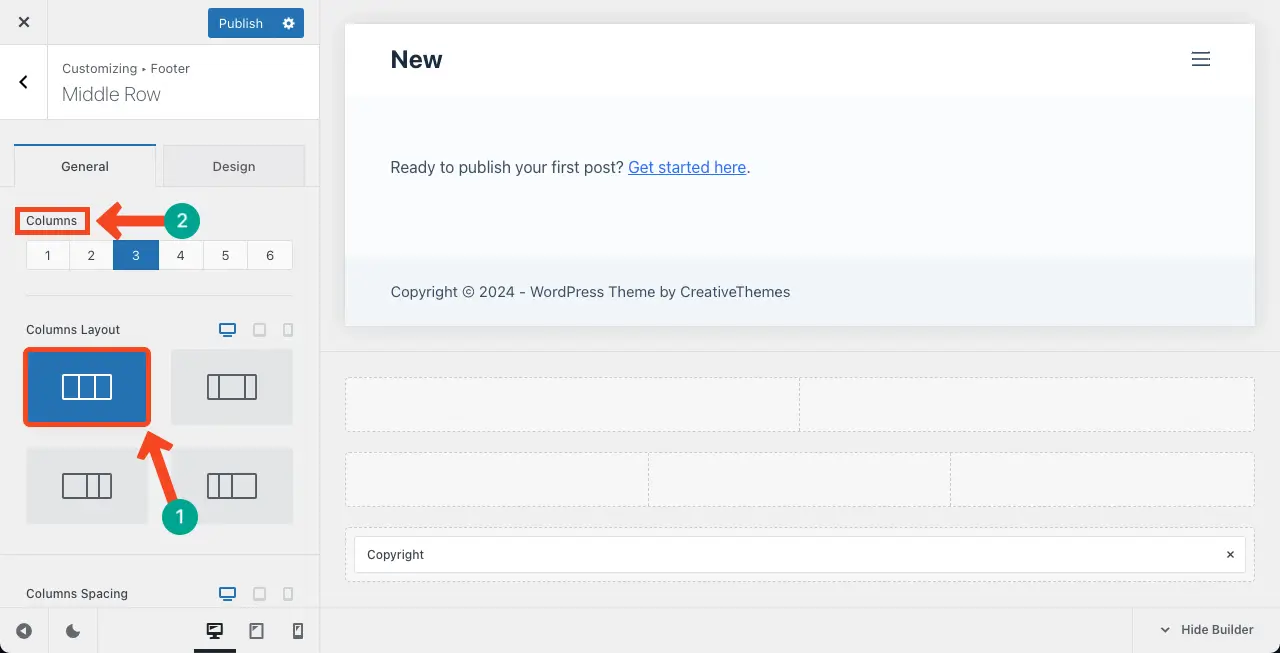
Select the column layout you like. Then, set the column number.
Come back to the main footer customizing page.
Select any widget from the left sidebar. Drag and drop it on a suitable section on the second row of the footer.

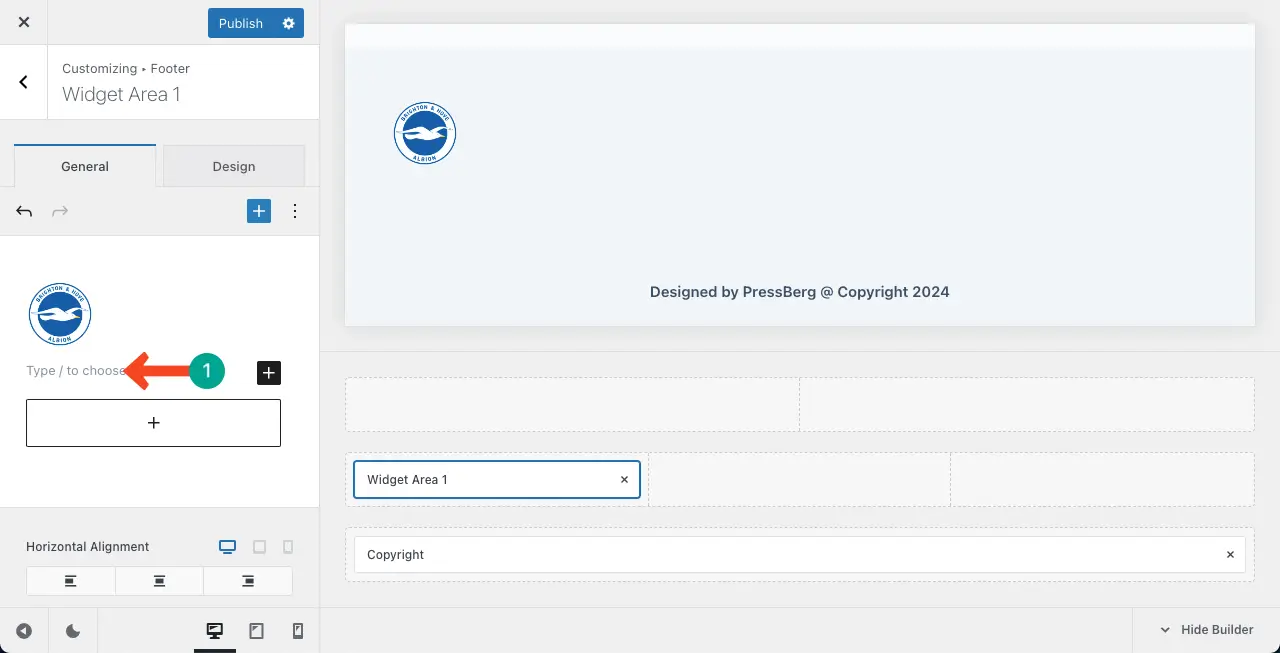
Hope you already know how to add blocks. Double-click the widget you added to the footer. You’ll get the option to add block(s) to the widget. Do it and add the Image block to the widget.
Upload your logo to the Image block. Increase/decrease its size by holding its right-edge circle to fit it perfectly on the footer.
Step 06: Add Your Contact Address
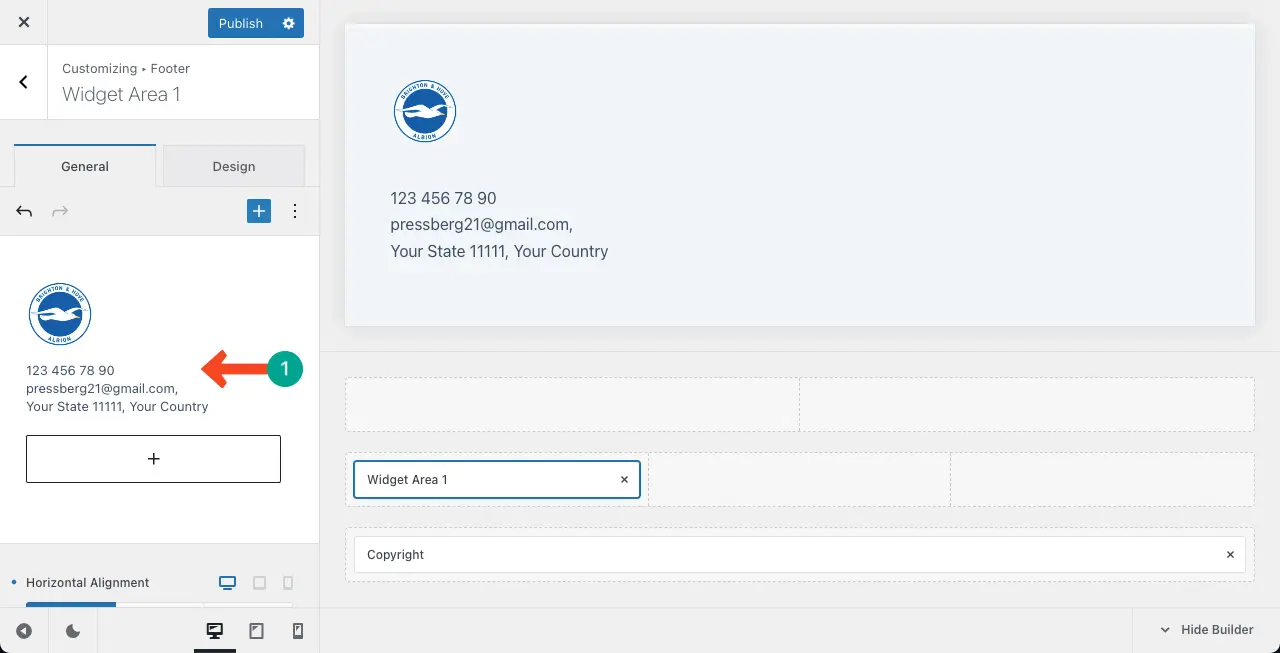
Add a Paragraph block under the logo to display your contact address.
Now, type your contact address over the Paragraph block.
Next, come to the Design tab. Customize your contact address text as you want.
Once done, come to the main footer page by clicking the backward arrow sign.
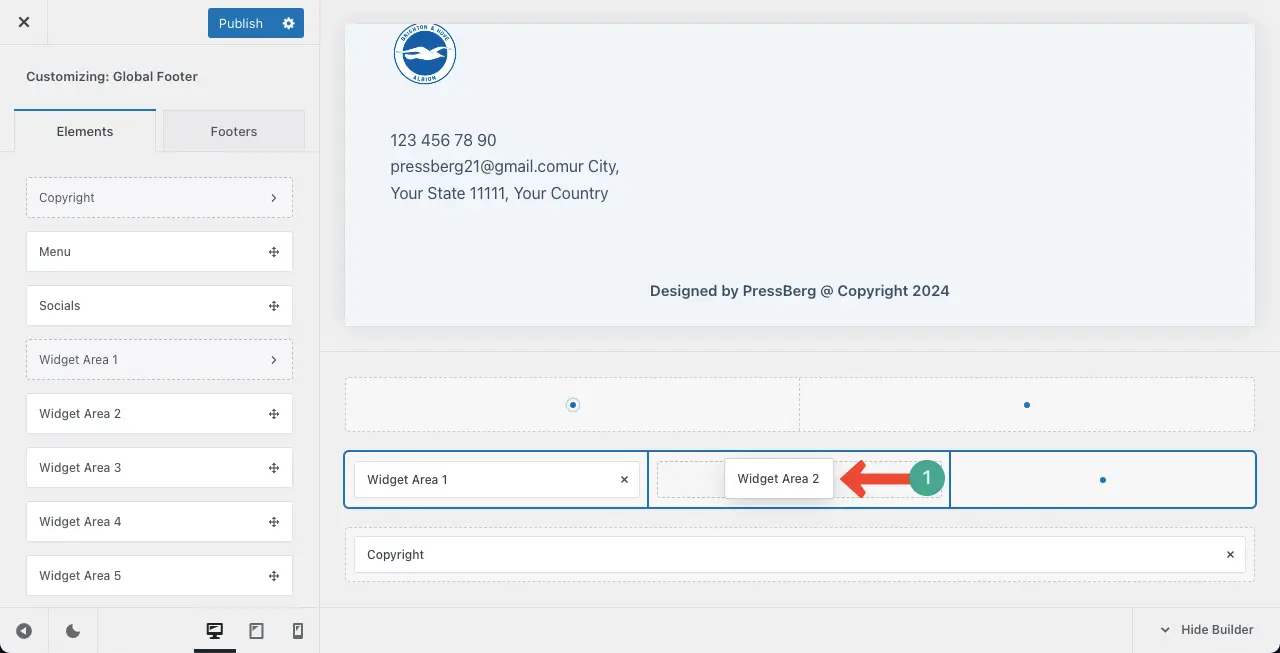
Step 07: Show Important Page Links to the Footer
We’ll now link some important pages to the footer, in the second column of the second row. Drag and drop another widget to the place.
Double-click the widget area 2 like the above method. You’ll get the option to add and list your page names. You can see in the below image, we’ve listed our page name under the second widget area.
You can do it using the Paragraph block.
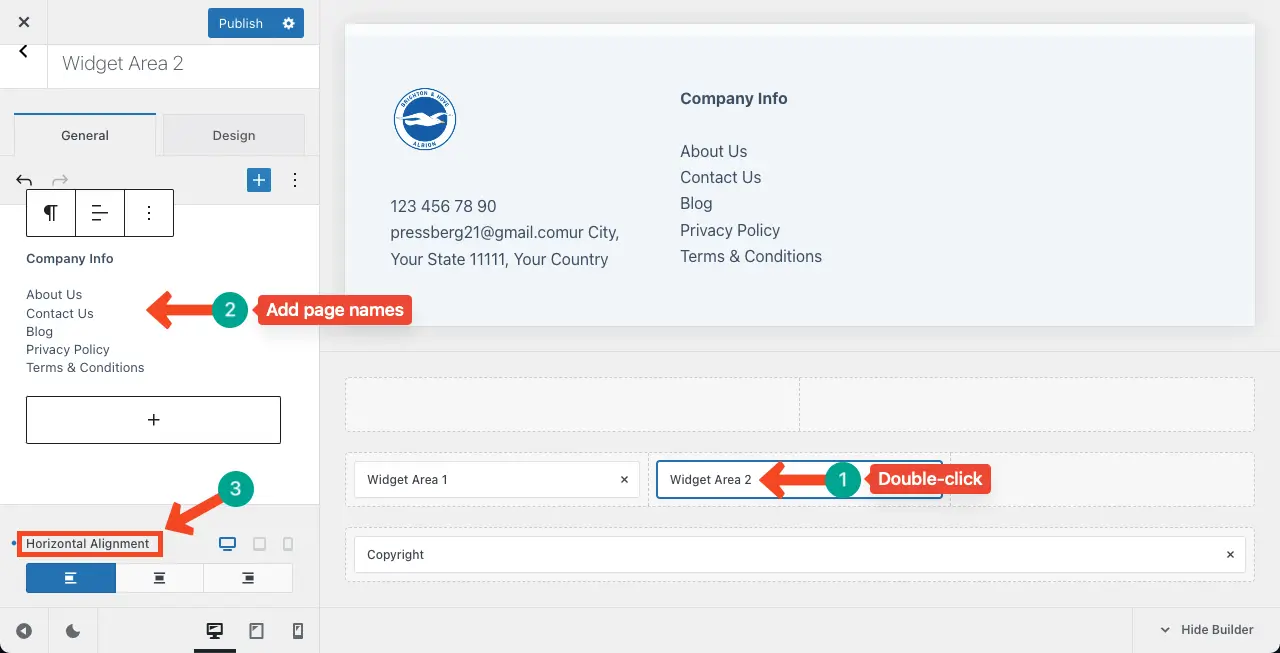
Hope you already know how to link a page.
Select a page from the list. Click the Link option on the toolbar. Paste the respected page link to the box. Press the Enter button.
Thus, link all the other page names to their respective pages.

Step 08: Add Social Channels to the Footer
Like the above steps, add a new widget to the last column of the second row.
Add your social channel names to the row. Link your social profiles to the respective channel names.

Thus, you can create a footer with the full site editing WordPress theme.
Method Three: Create a Footer Using Elementor
Elementor is one of the most popular page builder plugins for WordPress. You will hardly find someone never heard of Elementor but using WordPress for at least five-six months. With the Elementor plugin, you can design web pages from scratch adding numerous features.
Elementor offers a theme builder by which you can design the header, footer, single blog post template, archive page, and more for your site. In this method, we’ll show you how to create a footer in WordPress using the Elementor plugin.
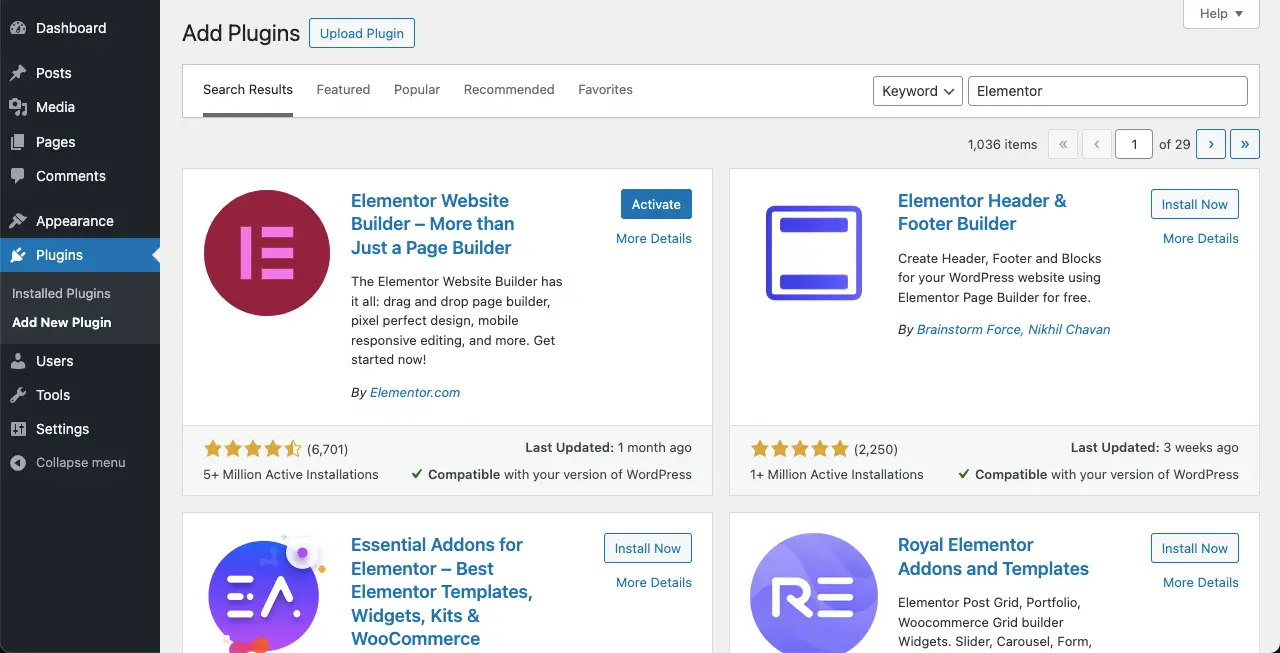
Step 01: Install and Activate the Elementor Plugin
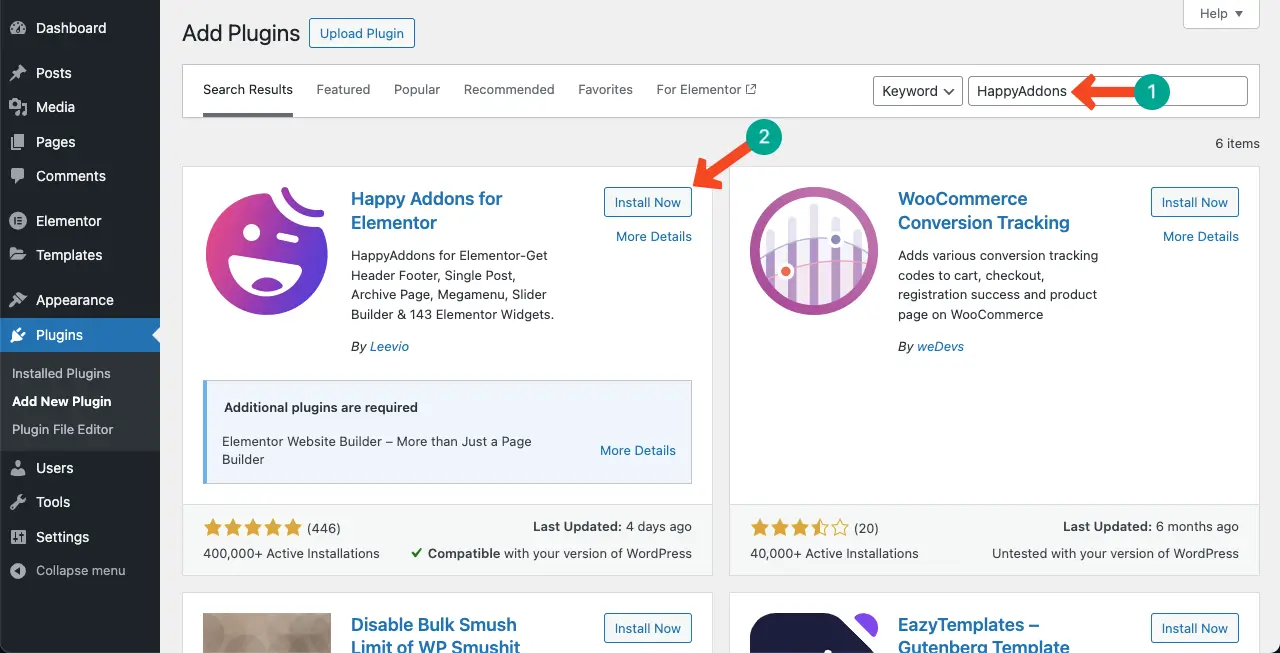
Elementor has a free version available. Go to Plugins > Add New Plugin. Find the plugin by typing Elementor in the search box on the top-right corner. Install and activate the plugin once it appears on your screen.
Step 02: Install and Activate the HappyAddons Plugin
Yes, Elementor has a theme builder. But it’s limited only for premium users. This means that you can’t create a footer for your website using the Elementor free version.
But don’t worry! HappyAddons is a feature-rich addon of the Elementor plugin. It also has a theme builder which is completely free to use. So, install and activate the HappyAddons plugin.
Note: HappyAddons also has a premium version. But you can use its theme builder to create header and footer for free of cost.
Step 03: Open HappyAddons Theme Builder
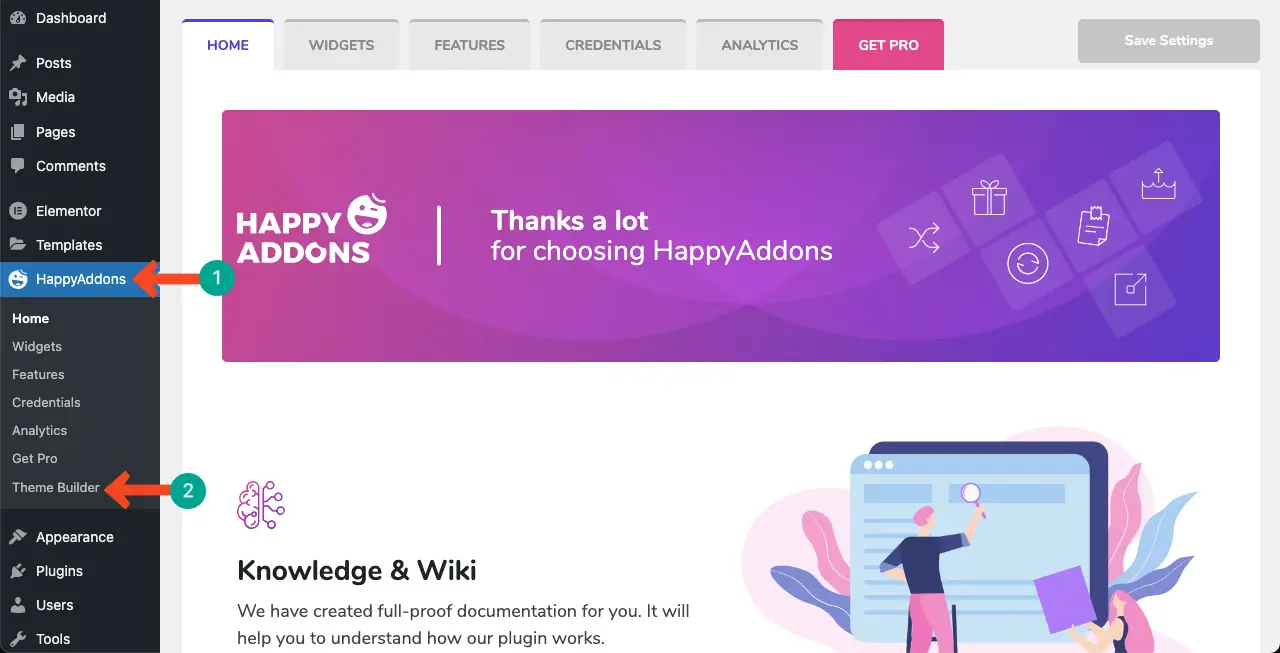
Navigate to HappyAddons > Theme Builder.
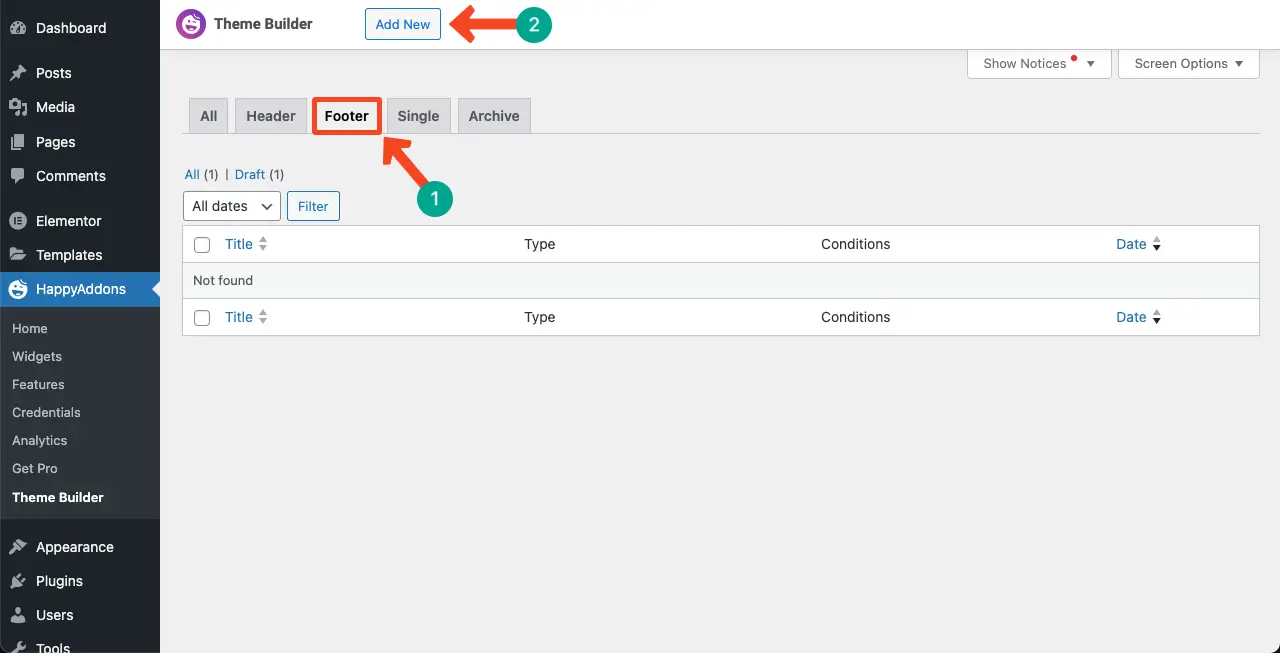
Select the Footer option. Then, click Add new.
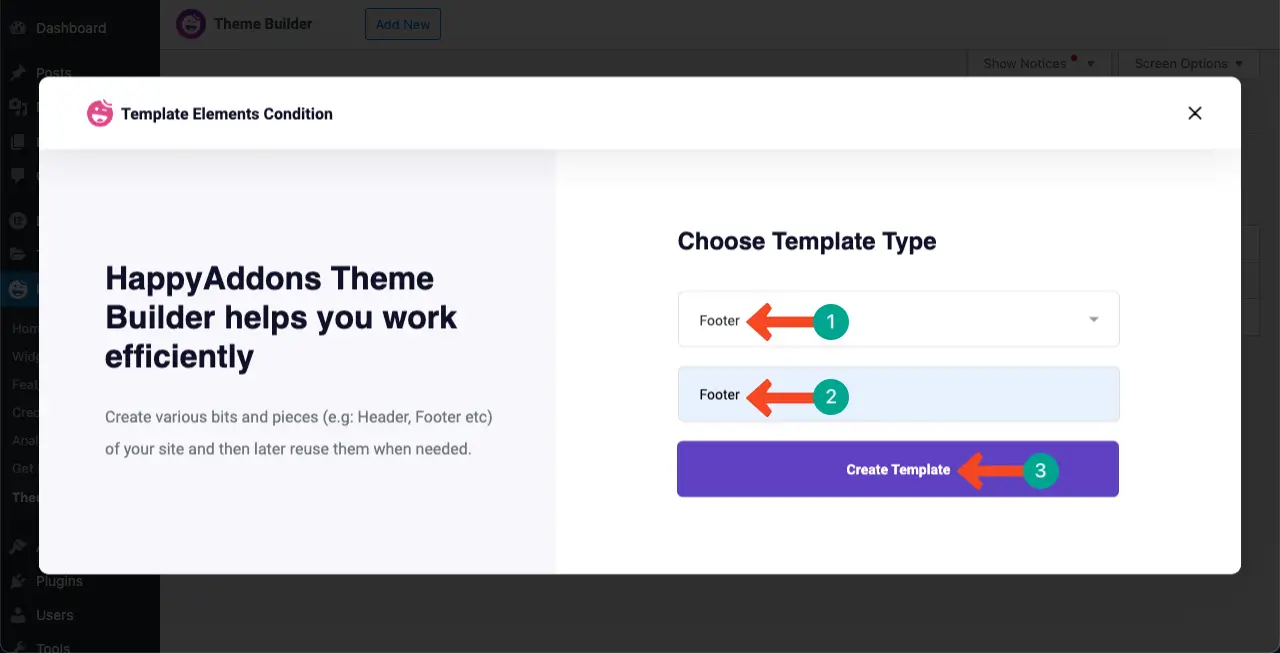
A pop-up will open up. Select the Footer template option. Next, give it a name.
Hit the Create Template button at the end.
Step 04: Import a Footer Template
You can create your footer from scratch. But to save time, you can use the readymade footer templates offered by HappyAddons.
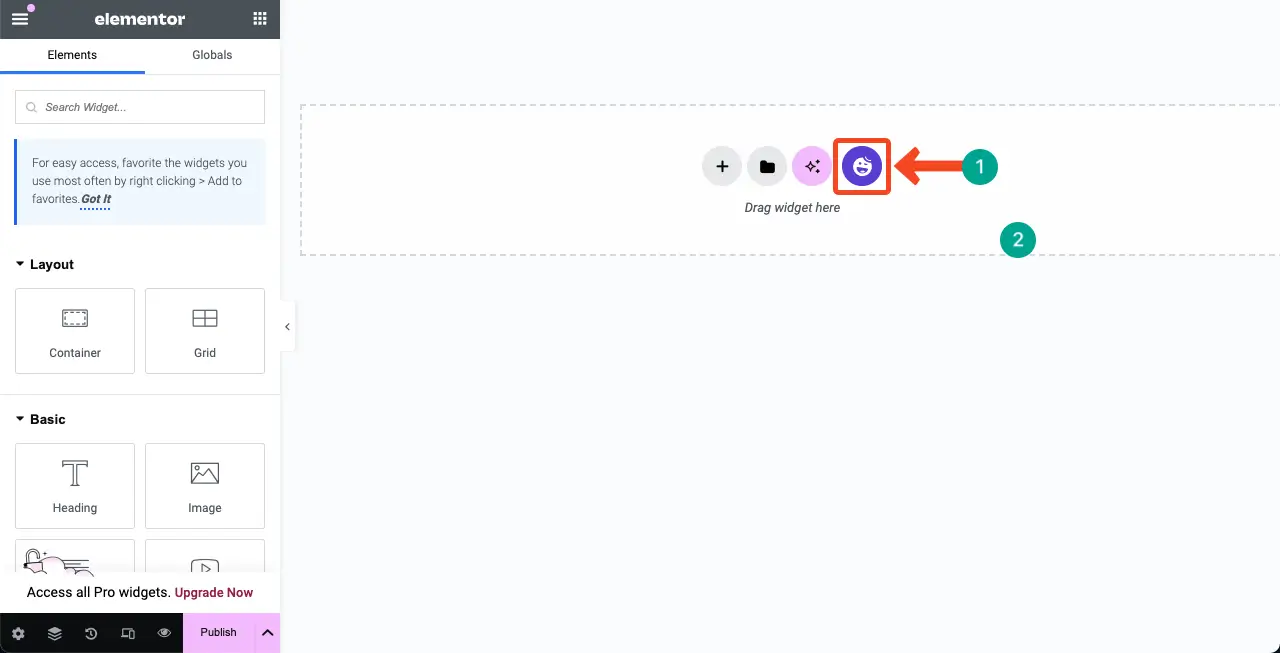
Click the HappyAddons icon on the canvas. It will open up the HappyAddons library where you’ll find all the readymade templates.
You’ll get different types of readymade templates in HappyAddons library. Manually finding footer templates from among them is quite time-consuming.
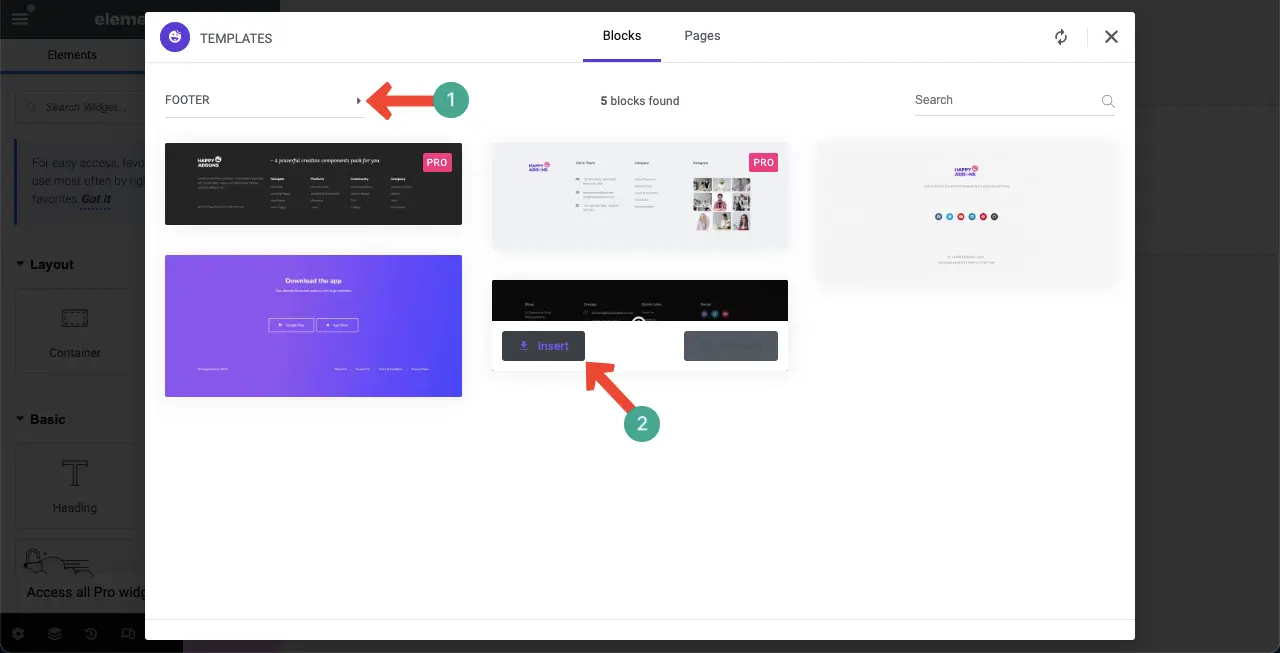
So, on the left-right corner of the pop-up, you will get a filter. Select Footer on the filter. It will only show footer templates in the pop-up.
You’ll find both free and premium footer templates on the pop-up. Choose the template that is free. Hovering over the template will show up the Insert button.
Click the Insert button on the template to import it on the canvas.
The footer template will be imported to the canvas in a few seconds.
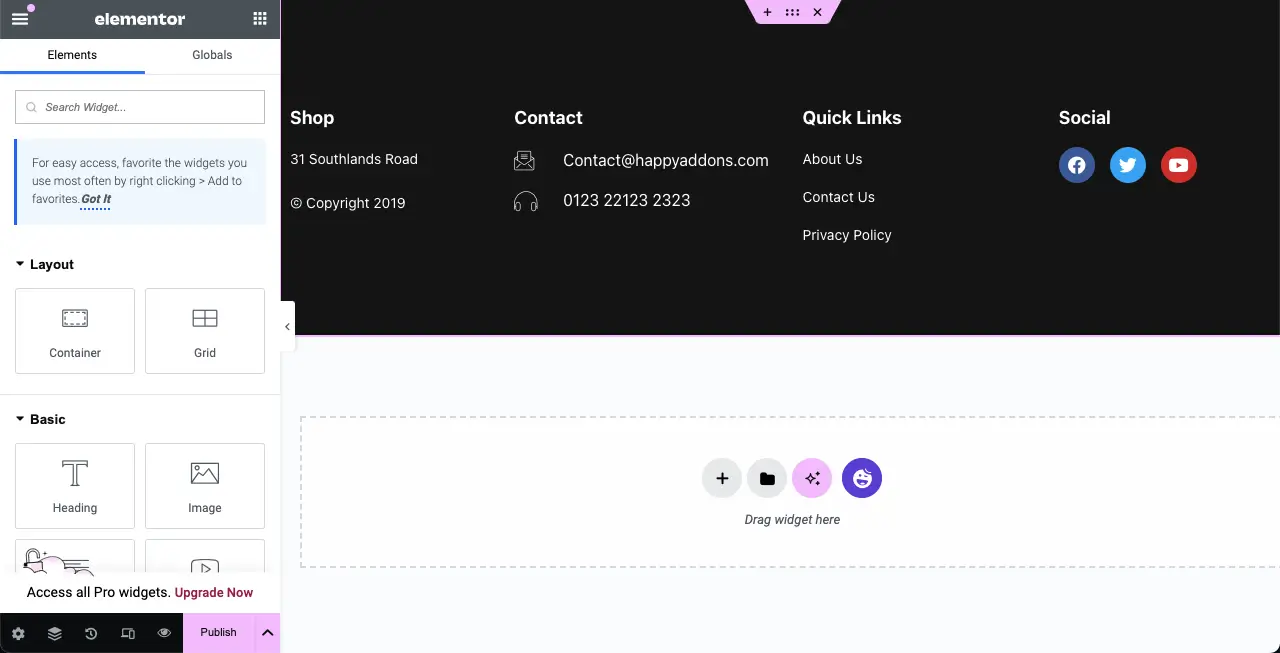
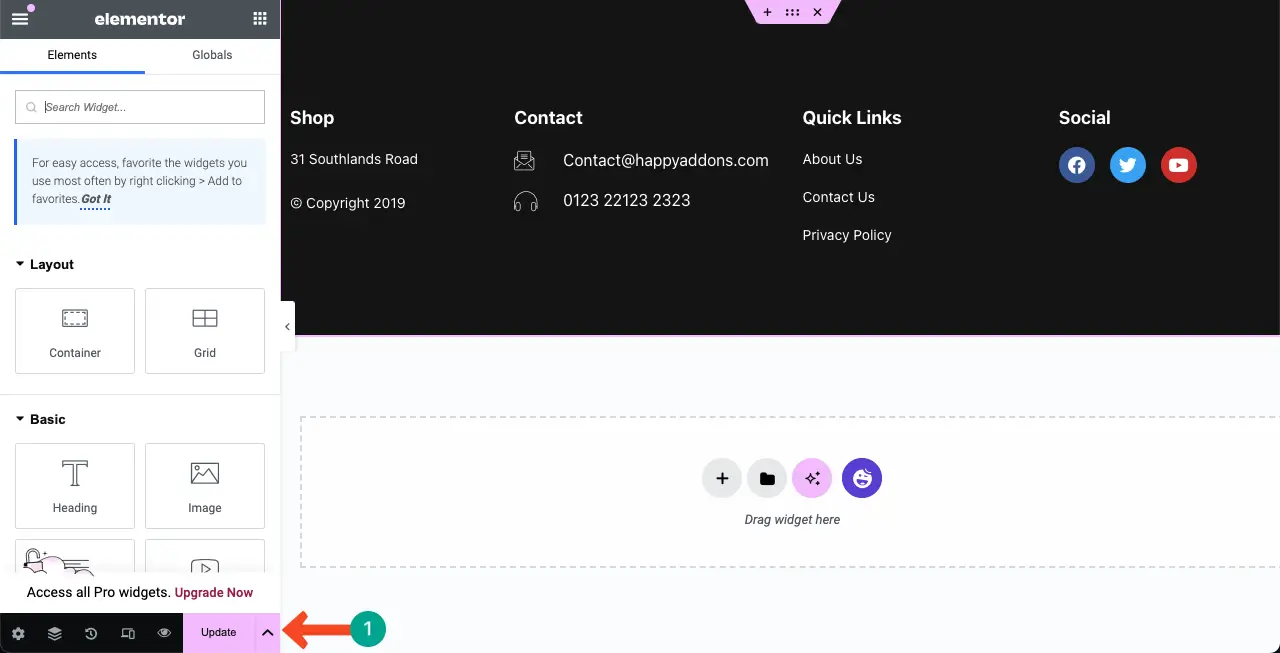
Step 05: Edit the Footer Template and Add Information to It
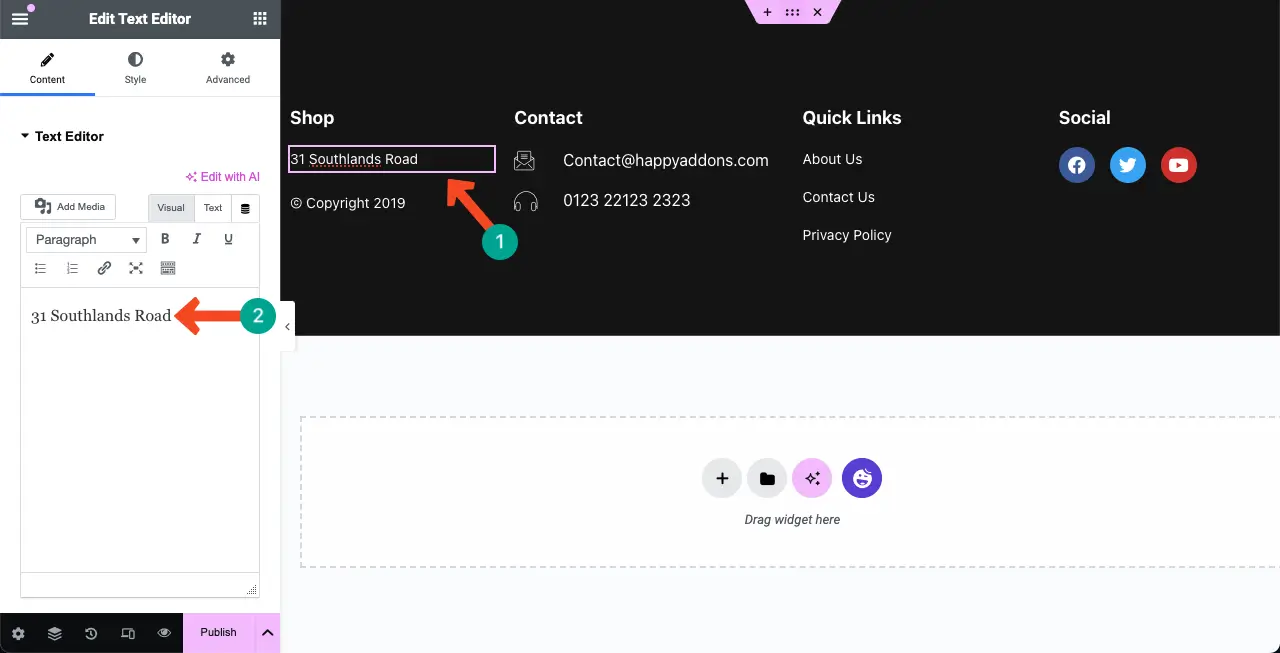
It’s easy to edit and customize the footer template. Click any widget on the template. An editing option will open up on the left-sided Elementor panel.
Edit your information on the Elementor panel, you can preview the changes on the template. Thus, you can customize the entire footer template and fit it for your website.
We will not explain more. Because hopefully, you can do the rest yourself.
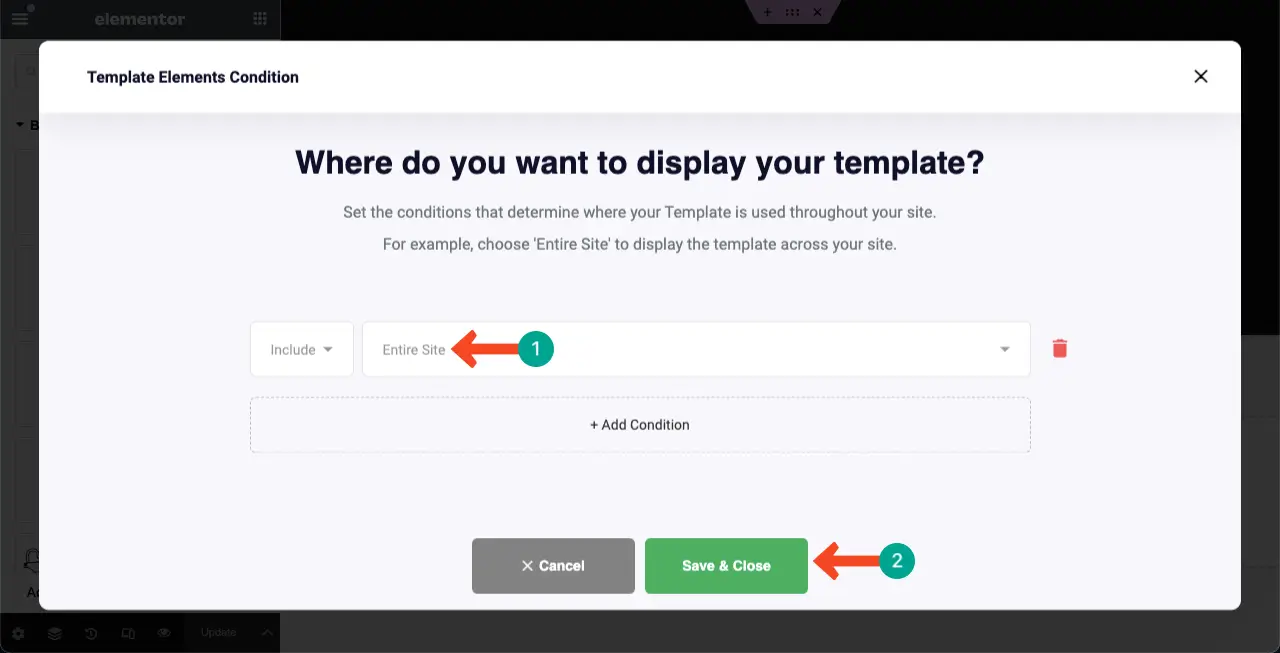
Step 06: Publish the Footer
Once your all customizations are done, click the Publish/Update button from the bottom of the Elementor panel.
Set condition ‘Entire Site’. Then, click the Save & Close button. Your footer will be displayed on your all web pages.
Final Notes!
Creating a footer in WordPress is an essential step in designing a professional and user-friendly website. But it is crucial to keep the footer design simple and clutter-free. Avoid overcrowding it with excessive information or unnecessary links.
Instead, focus on including key elements such as copyright information, contact details, and social media icons. This will provide visitors with easy access to important information while maintaining a clean and organized layout.
Another important aspect to consider is the use of relevant and meaningful content in the footer. Utilize this space to showcase important links, such as navigation menus or quick links to popular pages.
