Visual content and images have the power to convey emotions, express narratives, and engage visitors, which isn’t always possible with plain texts. By strategically placing images within your content, you can break up texts, emphasize important points, and guide readers’ attention to key elements.
Throughout this tutorial, I will cover everything you need to know about the Gutenberg Inline Image feature. I will discuss techniques for optimizing the inline image placement, handling its alignment, adjusting its sizes, and ensuring optimal website performance.
By the end of this tutorial, you will have the skills and confidence how to use the Gutenberg Inline Image features in WordPress. Get started!
What Is the Gutenberg Inline Image Feature in WordPress?
The Gutenberg Inline Image feature allows you to place an image directly within the main body of a text, aligning it with the surrounding words and paragraphs. Unlike traditional image placement, which positions images separately from the text, inline images are placed within the flow of a text.
Inline images help emphasize key points, illustrate concepts, and add aesthetic appeal. This feature is useful mainly for bloggers, photographers, creative professionals, and business owners who want to enhance their storytelling and showcase their products or services.
Note: The Gutenberg Inline Image feature does not provide options for linking the image or adding specific image sizes like the image block does.
How to Use the Gutenberg Inline Image Feature in WordPress
By leveraging the Gutenberg Inline Image feature, you can remarkably improve the visual of you blog posts to effectively communicate your ideas with the target audience and create a long-lasting impression.
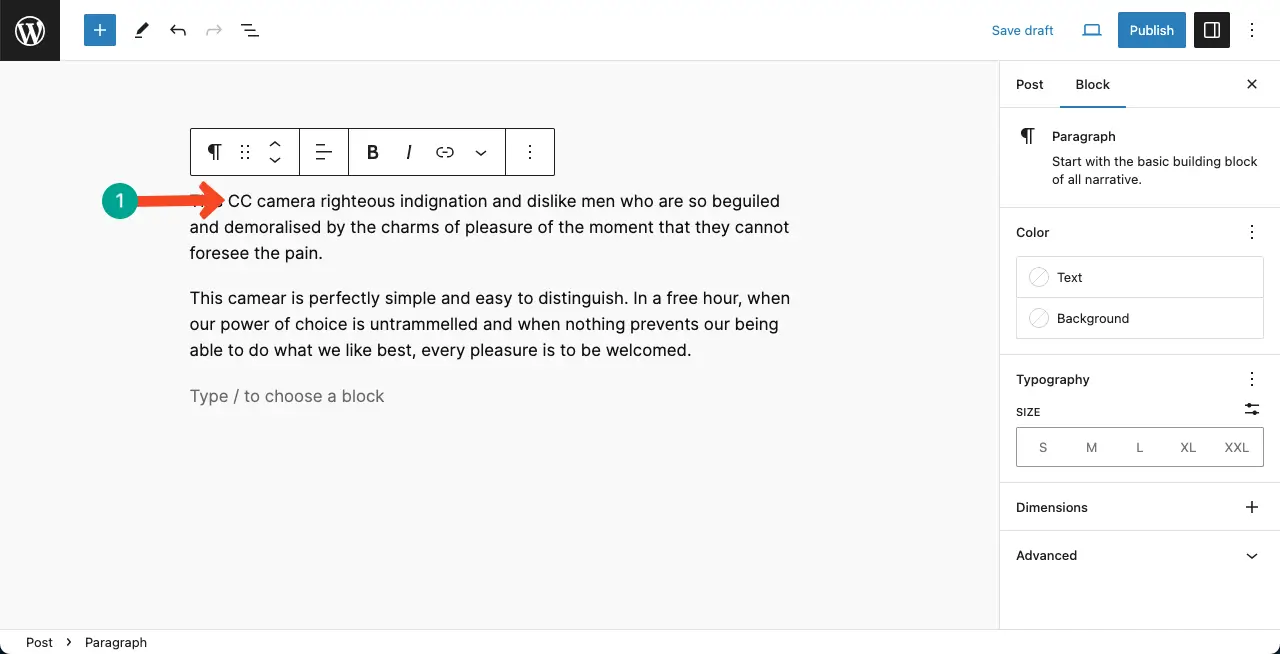
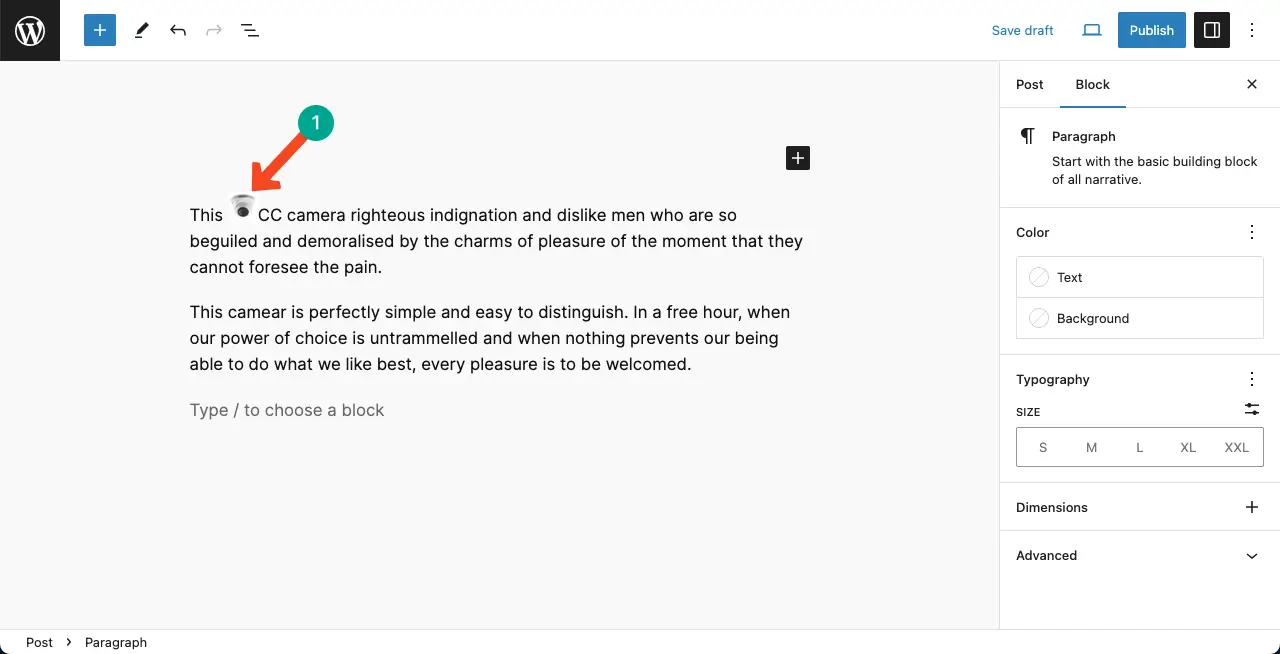
Step 01: Define Where You Want to Place an Inline Image
Place your cursor within the text where you want to place an inline image. You can see in the image below that I have decided to add our inline image before the CC camera text.
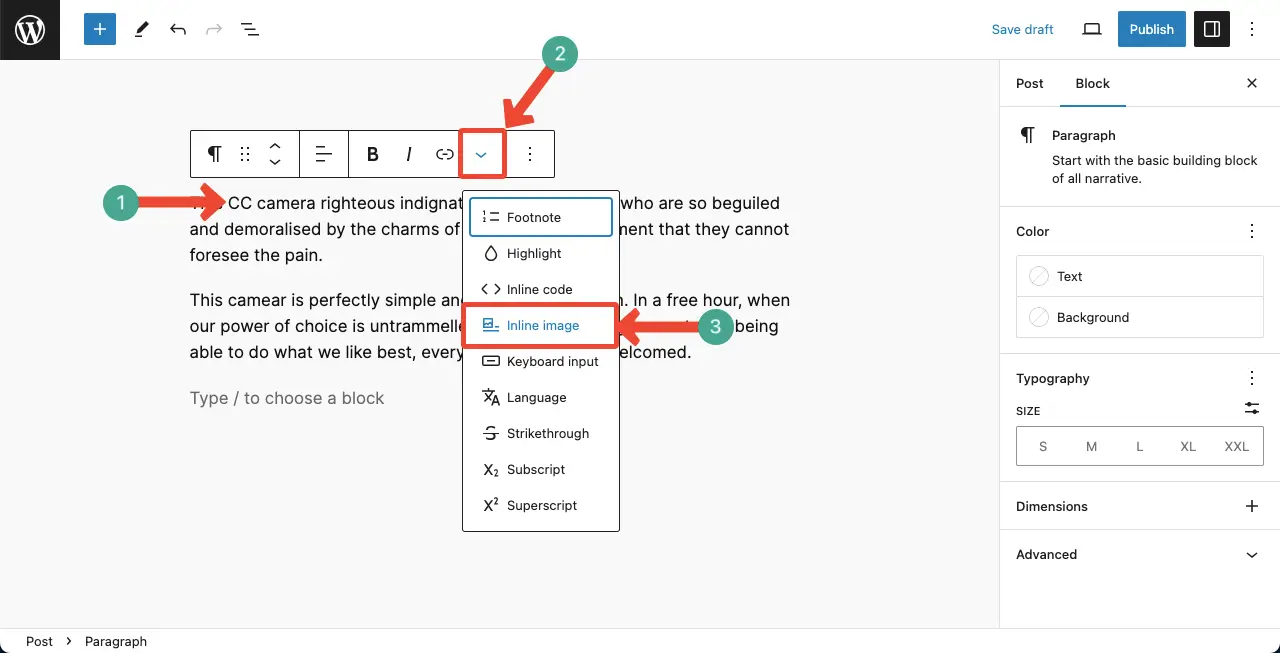
Step 02: Choose the Inline Image Option from the Gutenberg Toolbar
Hit the More option on the Gutenberg toolbar. Select the Inline Image option on the dropdown list.
Visit this post on how to add alt tags to images in WordPress.
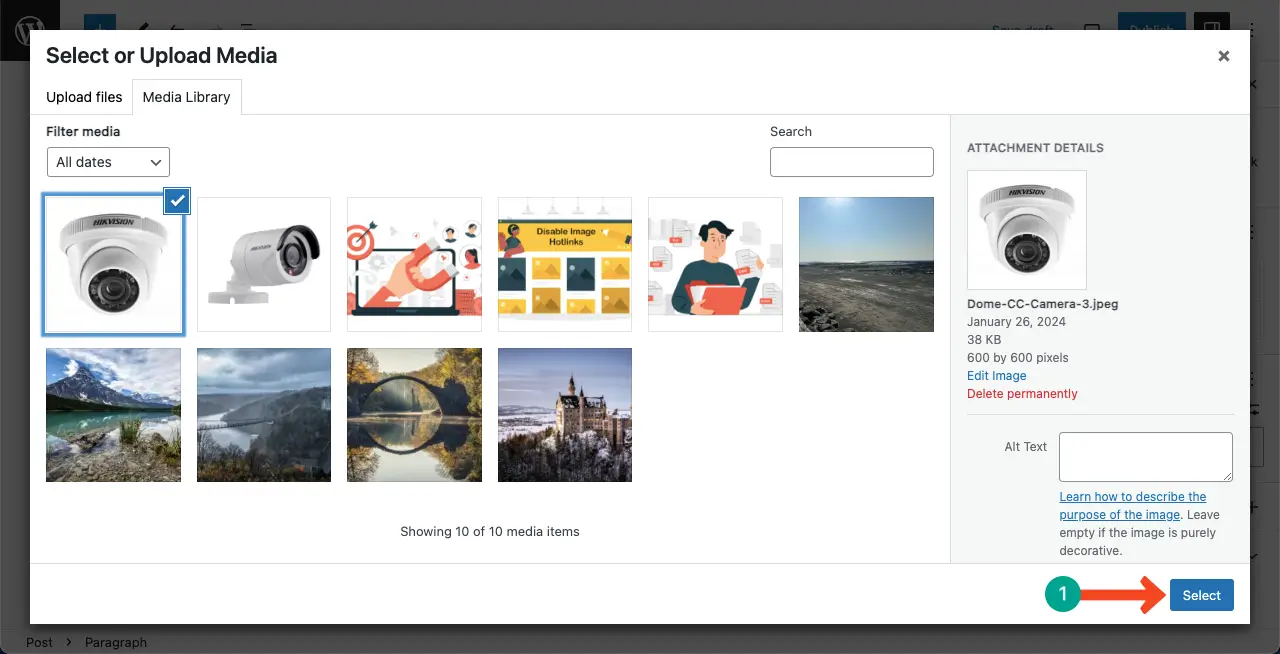
Step 03: Select an Image from the Media Library or Upload a New One
It’s time to select an image. You may select it from your media library if it’s already there or you can upload it from your local drive. For this tutorial, I’ve selected an image from the media library. Press the Select button at the end.
Step 04: Set a Width Size
By default, the added image will be larger than the text size. To resize it, select the image by clicking it. Set a suitable width value and hit the enter button.
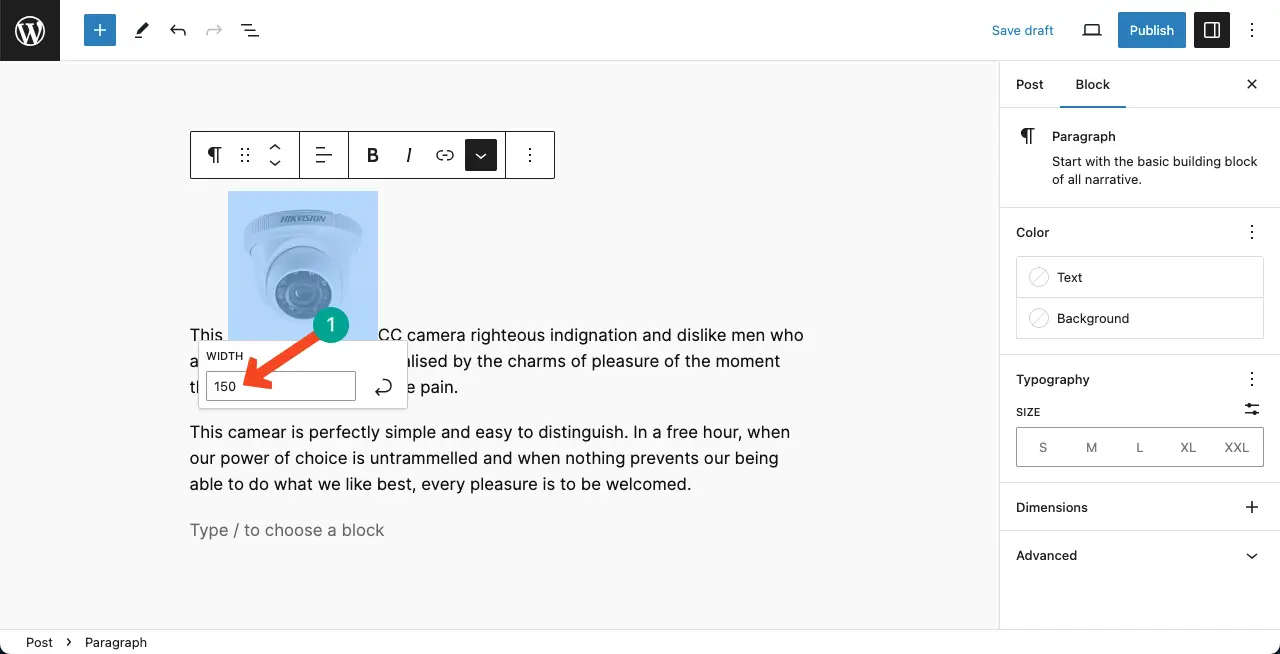
You’ll see the image has been smaller. Thus, you can add inline images to your WordPress posts and pages.
Best Practices for How to Use the Gutenberg Inline Image Feature in WordPress
The WordPress Inline Image feature provides you with a great opportunity to take your content creation and stylization status to the next level. Hope you now know how to use this feature for adding inline images to your content. Now, take a look at the points you must consider when using this feature.
1. Balance the Image Size and Placement
Before adding an inline image, think about its size and placement within your content. Large images may disrupt the flow of your text, while small images may not have the desired impact. So, you must experiment with different sizes and placements to find the right balance.
2. Use Relevant and High-Quality Images
Choose images that are relevant to your content and enhance its message and meaning. High-quality images can significantly improve the visual appeal of your website. If you don’t have suitable images, consider using stock photo websites or creating your own visuals.
3. Use Lightweight Images
Large image file sizes can slow down your website’s loading speed. So, use image optimization techniques, like compression, to reduce file sizes without compromising image quality.
4. Ensure Proper Image Alignment
The Gutenberg Inline Image feature allows you to align images to the left, right, or center. Choose the alignment that best suits your content and enhances readability. Aligning images with adjacent text can create a visually pleasing layout.
5. Add Descriptive Alt Text
Alt text provides alternative information for visually impaired users and search engines. When adding an inline image, include descriptive alt text that accurately describes the image’s content and purpose so search engines can understand it. This can boost your SEO score.
6. Preview and Test
Preview your content before publishing it to see how the inline images appear in context. Preview your website on different devices and screen sizes to ensure that the images are displayed correctly and do not negatively impact the overall user experience.
FAQ on How to Use the Gutenberg Inline Image Feature in WordPress

The Gutenberg Inline Image is nothing more than a feature. But using it to improve the quality of your content depends on your skill and creativity. Let’s now take a look at some frequently asked questions and answers related to the topic.
Can I link an Inline Image?
Unlike traditional images, you cannot link your inline image in WordPress.
Is the Inline Image a Gutenberg feature or a block?
Inline image is actually a feature of the Gutenberg block editor. The Gutenberg block editor comes with a toolbar, where you will find the Inline Image option.
What are the differences between the Inline Image and the background image?
The Gutenberg Inline Image Feature is used to directly insert images within the content, while the background image is used to set an image as the background of an element for design purposes.
What image formats does the Inline Image use?
The Gutenberg Inline Image Feature in WordPress supports various image formats, including GIF, JPEG, and PNG.
What is the tag for Inline Images in WordPress?
The tag used for Inline Images in WordPress is <img>.
Conclusion
Interesting, isn’t it? I have seen that not more than ten out of every one hundred people don’t know about the Inline Image feature in WordPress. But had they known about this feature, they could have curated their content more interestingly to engage users.
Hope you can easily add Inline Images to your blog posts and pages to your content from onward after reading this post. If you are still confused about this feature, I request that you place your query in the comment section below. I will try to reply with a viable answer that satisfies.
Visit this post to learn more about the Gutenberg toolbar.