The Query Loop is a dynamic WordPress block that allows you to fetch and display specific content from your WordPress database. Gone are the days of writing complex queries or relying on third-party plugins to fetch your desired content and showcase them on the frontend.
With the block now, you can execute the task very simply just like magic. In this post today, I will show you how to use the WordPress Query Loop block in the Gutenberg editor. Before that, I will discuss a bit about the terms ‘Query’ and ‘Loop.
What Are Query and Loop?
A Query refers to a request for specific information from a database. It is a way to retrieve, filter, and sort data based on certain criteria. In WordPress, queries are commonly used to fetch content such as blog posts, pages, custom post types, or any other data stored in the WordPress database.
The Loop is a PHP code structure that retrieves and displays content from the database based on the query. The loop is responsible for fetching each item. For example, the post’s title, content, author, date, and other relevant information and displayed in the desired format.
What Is the WordPress Query Loop Block?
With the Query Loop block, you can fetch various types of content from your database, such as blog posts, pages, custom post types, or any other data stored in WordPress.
It provides a user-friendly interface, making it easy for you to customize the display and layout of your content, including the number of items to show, sorting criteria, and even applying filters.
How to Use the WordPress Query Loop Block in the Gutenberg Editor
The process of using the WordPress Query Loop block is very similar to the post and numerous other default Gutenberg blocks. Let’s now explore how to use the WordPress Query Loop block.
Step 01: Find and Add the WordPress Query Loop Block
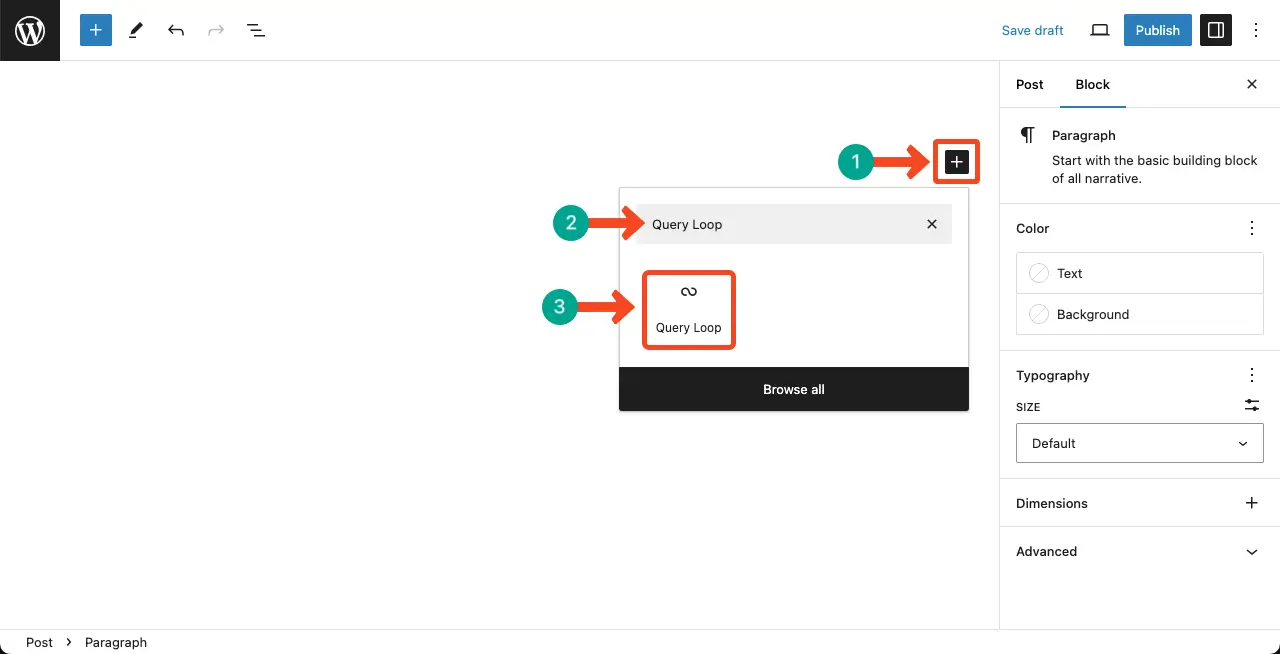
Find and add the WordPress Query Loop block to the editor the same way you add other blocks. Hit the plus (+) button on the editor. Type the block name. Add it to the editor once it appears on the block library.
Step 02: Select a Pattern for the Query Loop Block
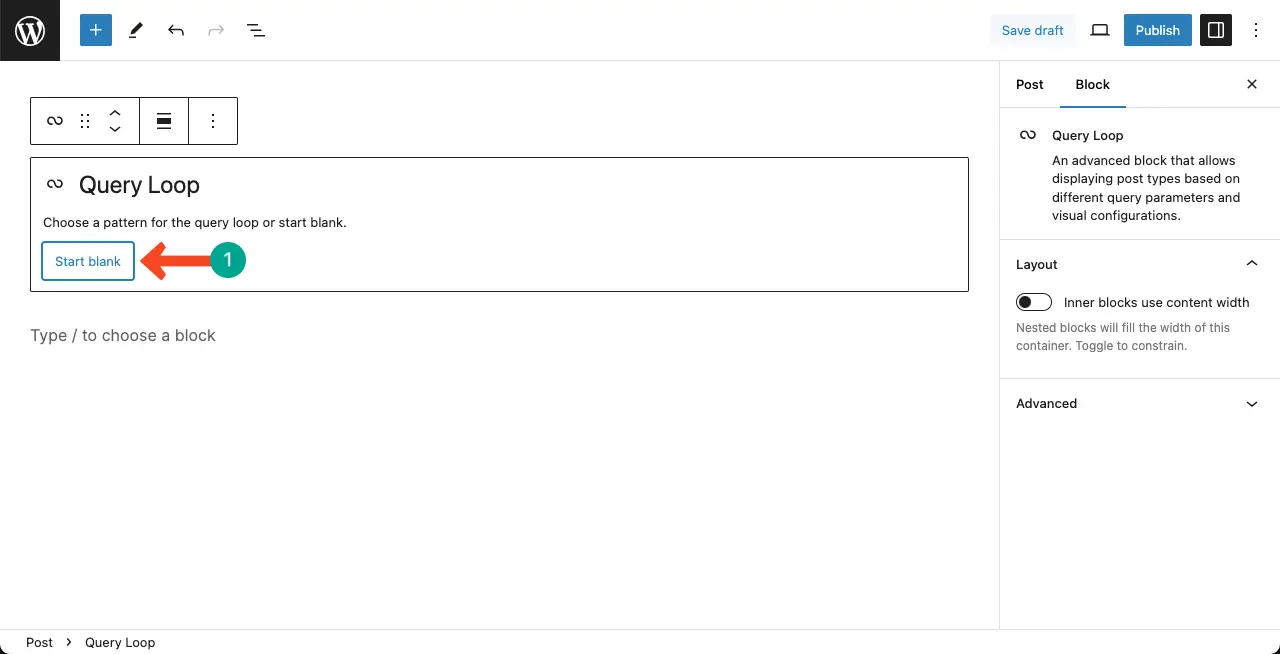
You have to select a pattern from the Query Loop block. Click the Start blank option.
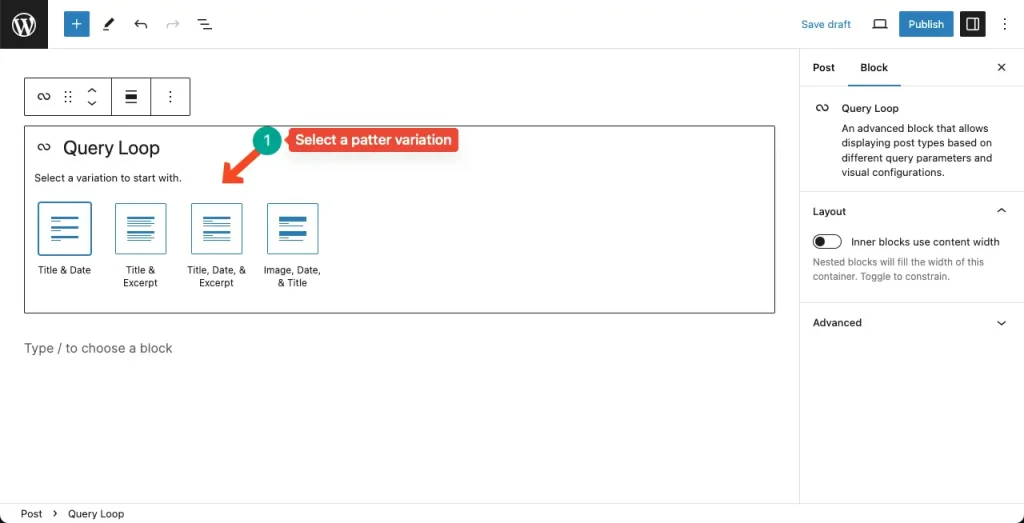
You’ll see four pattern variations in the block. Select the pattern variation you like. For the tutorial, I’m selecting the third option – Title, Date, & Excerpt.
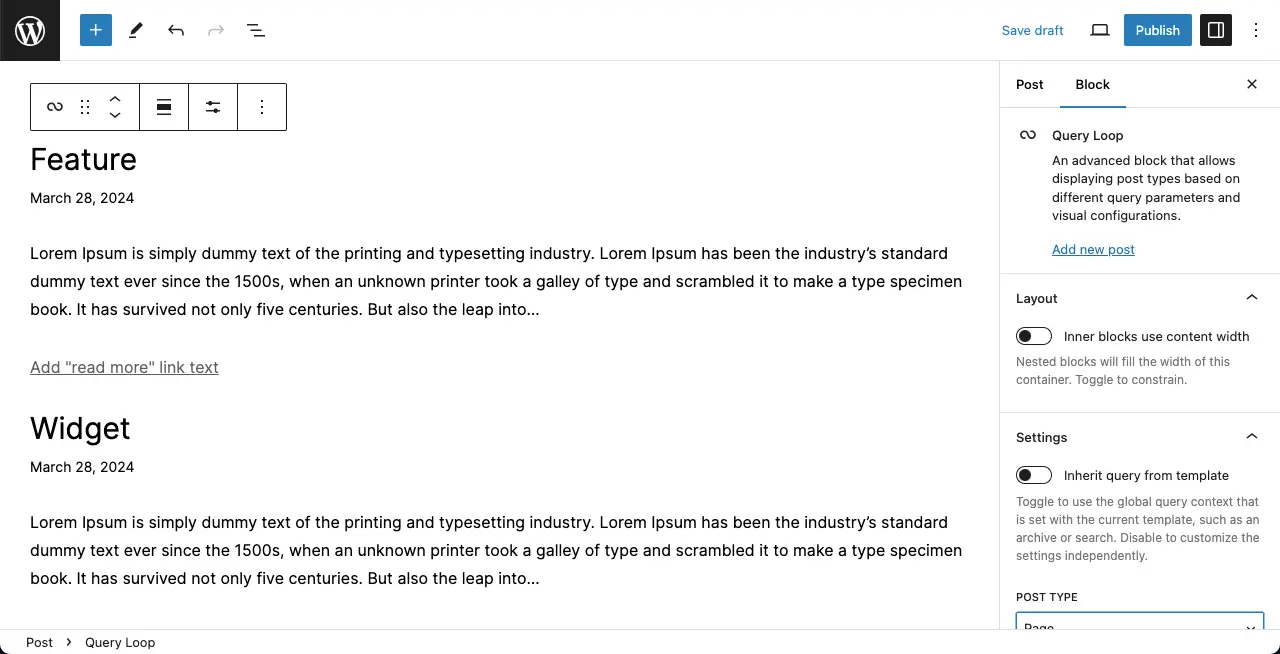
The Query Loop block will be added in a second. It will fetch and display some default content. But no worries! You can change the content type easily.
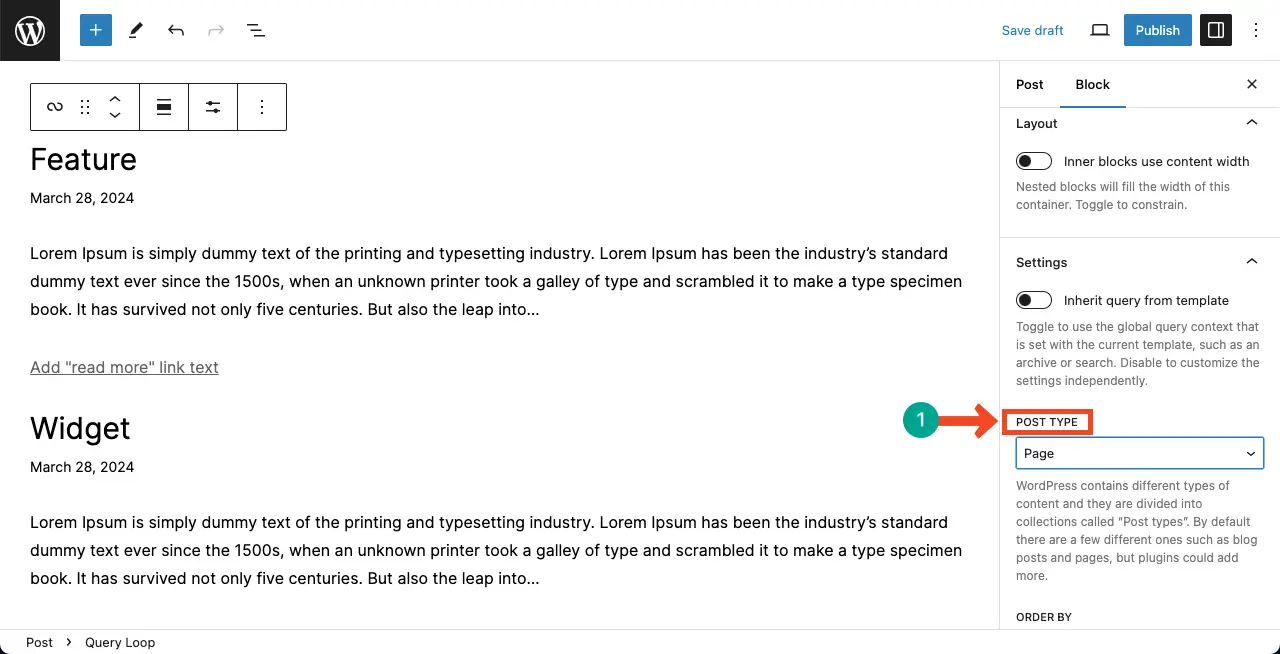
Step 03: Change the Content Type for the WordPress Query Loop Block
Scroll down the right sidebar for the block. Come to the option Post Type. You’ll get the option to choose whether to post or page type for the block.
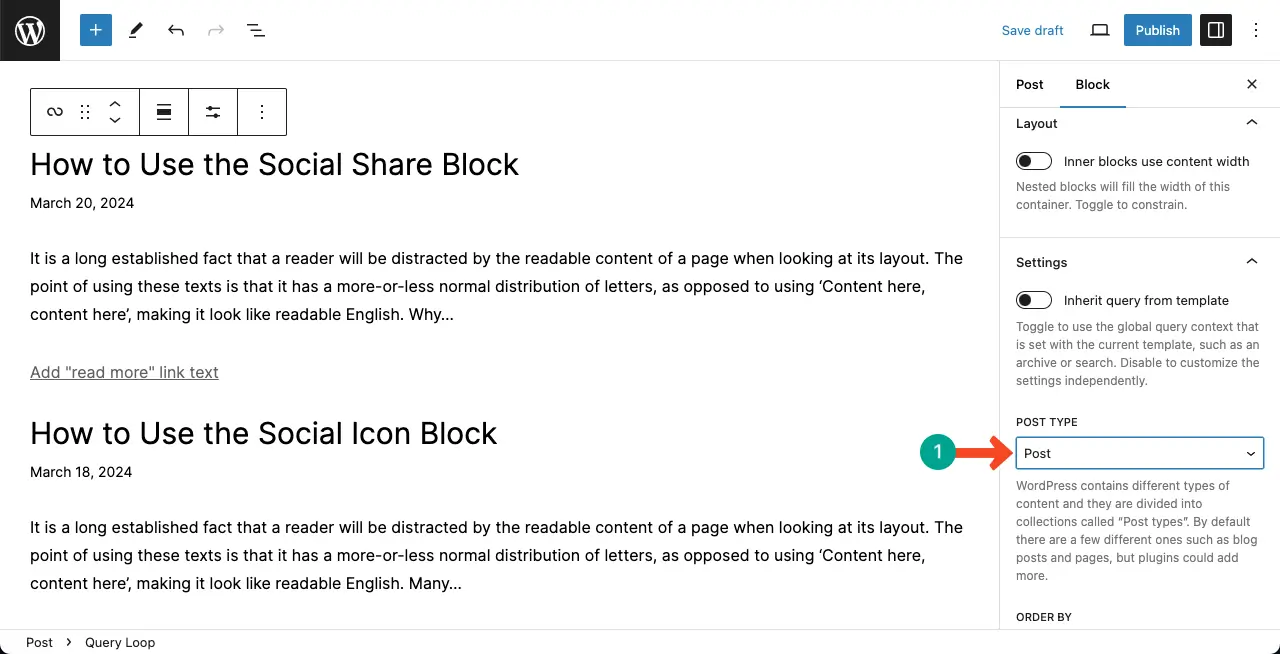
By default, it’s the page. We’ll change it to post.
You can see the post option has been selected for the WordPress Query Loop block.
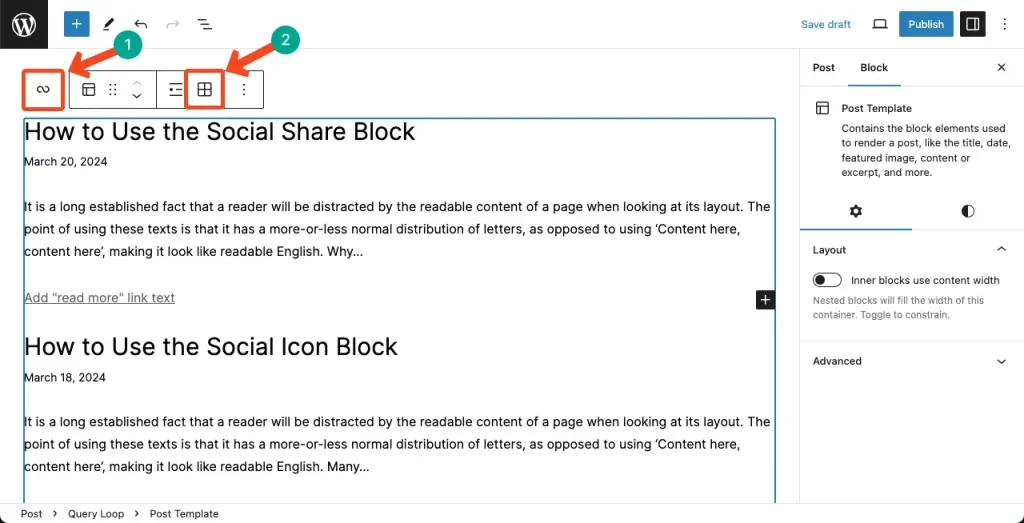
Step 04: Change the Layout of the WordPress Query Loop
By default, the block shows up the content in the list format. You can show them in the grid format.
To do this, select the entire section by clicking the WordPress Query Loop icon. Click the grid option on the toolbar.
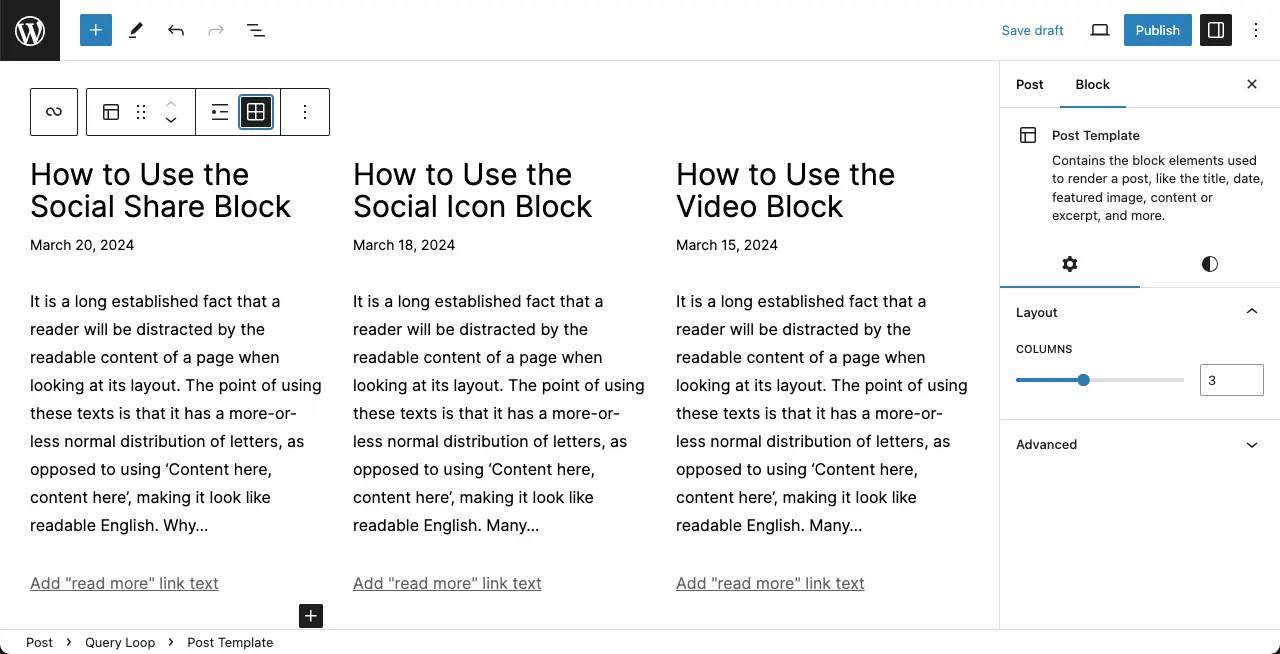
You can see the content is displayed in the grid format. You can now select the number of columns you want for the block from the right sidebar.
Step 05: Customize Settings for the WordPress Query Loop Block
Note: The grid view doesn’t offer many customization options. You’ll get the following customization options only in the list view of the block.
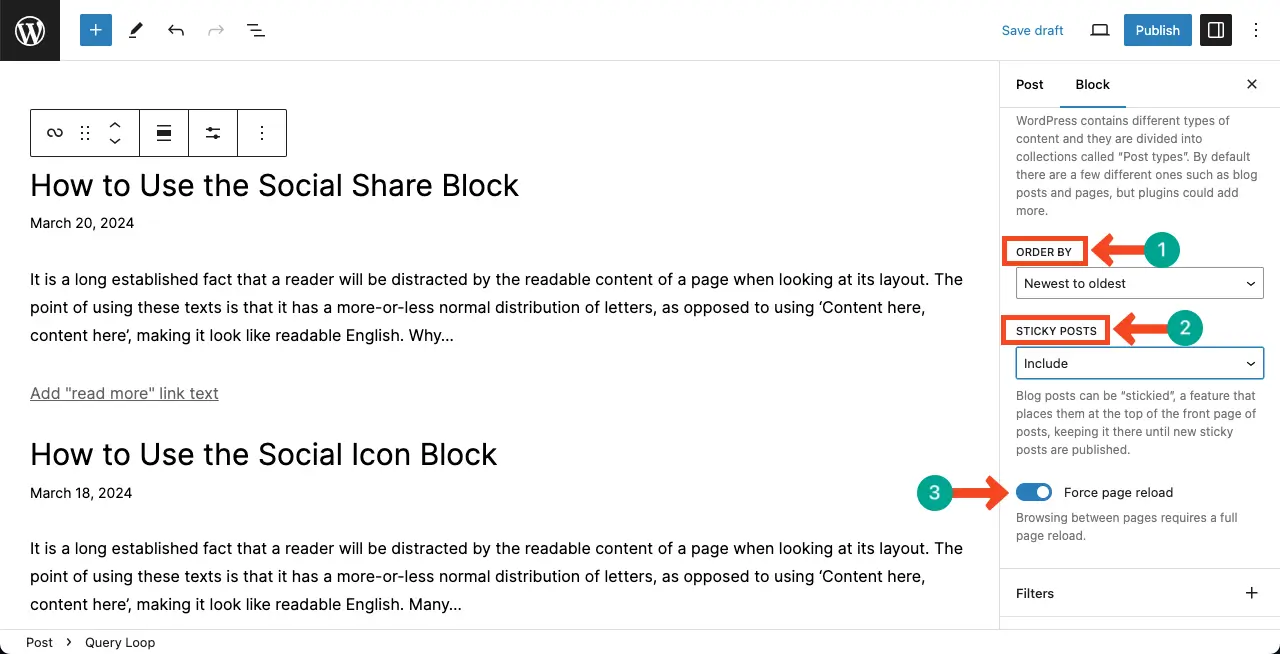
# Set Order for the Content
Order By – The option lets you show the content from the newest to oldest, oldest to newest, A to Z, and Z to A.
Sticky Posts – If there is sticky content in your database, it will always be on top when users scroll the page once you enable this option. You may include the sticky or exclude sticky posts for this option.
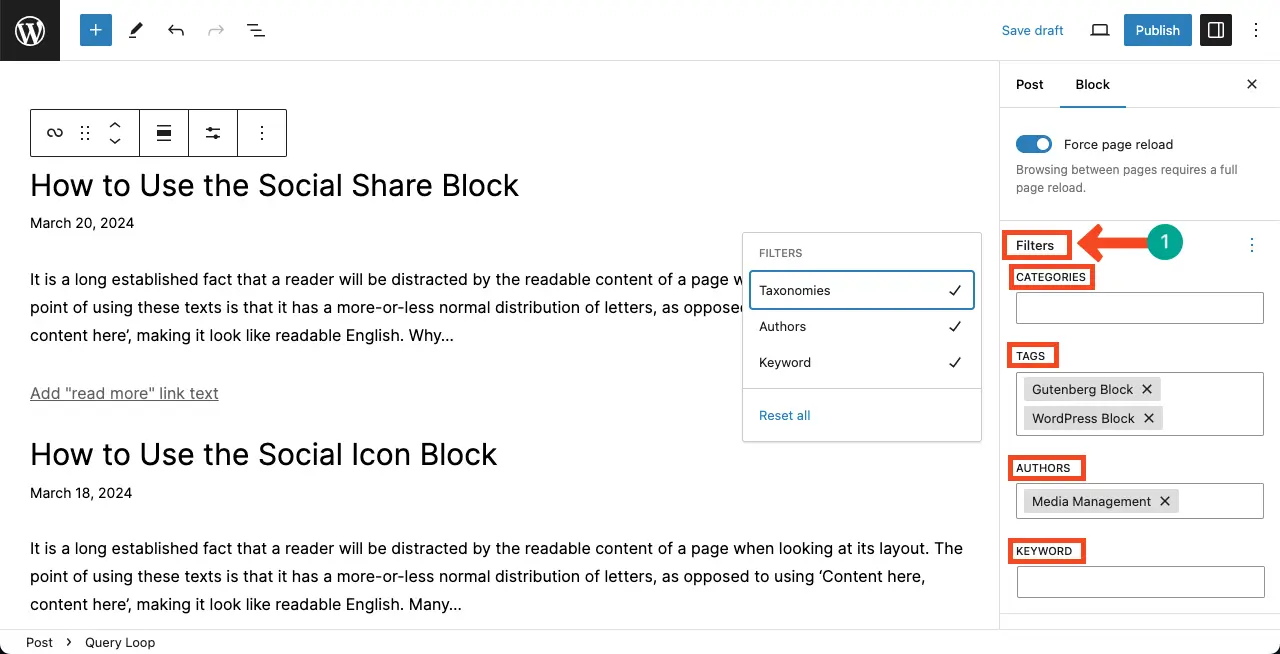
# Choose Filters
By selecting filters, you can display only specific content on the page. Hit the Filter option. Then, Tick Mark the filtering options you want to enable.
Each Tick Mark will open a filter-searching option. Add your desired filtering option in the boxes. Accordingly, the content will be changed in real-time on the page.
Thus, you can use this block so perfectly. Learn how to use the Gutenberg Site Tagline block in WordPress.
Best Practices of the WordPress Query Loop Block
Although this block looks simple, you can do magic with it as you can display your content dynamically on your posts and pages with it. This is why, I have covered some best practices for the block below which you can consider while using it.
1. Plan Your Content
Before diving into using the Query Loop Block, take some time to plan out the content you want to display. Consider what type of content you want to fetch, how you want to sort and filter it, and the overall layout and design of your page.
2. Use Appropriate Filters
The Query Loop Block allows you to filter and sort your content based on specific criteria. Make sure to use these options wisely to ensure that the fetched content aligns with your intended display. Choose the appropriate filters and sorting options based on the type of content you are working with and the desired user experience.
3. Limit the Number of Items
Be mindful of the number of items you fetch with the Query Loop Block, especially if you are displaying a large amount of content. Fetching a large number of items can impact the page load time and overall performance. Consider using pagination or limiting the number of items displayed to enhance the user experience.
4. Optimize Your Queries
While the Query Loop Block simplifies the process of fetching content, it’s still important to optimize your queries for efficiency. Avoid using overly complex queries that may impact performance. Ensure that your queries are structured to fetch only the necessary data and avoid unnecessary database calls.
5. Test and Preview Your Content
Before publishing your page or post, make use of the preview functionality in WordPress to test how your Query Loop Block is working. Check if the fetched content is displayed correctly and that any filters or sorting options are functioning as expected. Previewing your content allows you to catch any errors or issues before making it live.
6. Keep Your Content Organized
Using the Order option, you can organize your content. You can display alphabetically or based on the publishing time. This can create a smooth content exploration experience for your users.
Final Notes!
Throughout this blog post, I have explored the concept of the Query Loop Block and its various use cases. I have discussed how it eliminates the need for complex queries and third-party plugins, allowing you to showcase blog posts, custom portfolios, products, and more.
To make the most out of the Query Loop Block, I have provided some best practices to follow. By planning your content, using appropriate filters and sorting options, limiting the number of items, optimizing queries, testing and previewing your content, and keeping your content organized, you can ensure a seamless content creation experience and optimize the performance of your website.
Thanks for today! Inviting you to explore my other blog posts that are already published and the ones that will be published in the near future. So, stay tuned and keep exploring WordPress.