The Wolfram Cloud is a powerful platform that integrates computation, knowledge, and deployment capabilities. It is built upon the extensive knowledge base and computational methods developed by Wolfram.
It provides users with access to the Wolfram Language, which is a revolutionary knowledge-based programming language that emphasizes symbolic computation, functional programming, and rule-based programming.
Today, you can integrate and display the Wolframe notebook content to your WordPress site using the Wolfram block. In this post, I will show you how to use the Gutenberg Wolfram block in WordPress.
What Is Gutenberg Wolfram Block in WordPress?
The WordPress Wolfram block allows users to embed Wolfram Notebook content into their WordPress posts and pages, leveraging the computational power of the Wolfram Cloud. By deploying content through the Wolfram Cloud, users can seamlessly integrate dynamic mathematical computations, visualizations, and data analysis into their WordPress websites.
The block toolbar provides options to transform the Wolfram embed into a paragraph, columns, or a group, offering flexibility in organizing and presenting the content. You can find the URL of the embedded Notebook in the Wolfram Cloud for further customization.
How to Use the Gutenberg Wolfram Block in WordPress
The process of using this block is as easy as drinking water. Hope you already know how to use the Wolfram Cloud platform. Once your documentation is published on the platform, you can integrate and display it in WordPress using the respective block.
Step 01: Find and Add the Gutenberg Wolfram Block to WordPress
Find the Wolfram block in the Gutenberg block library by clicking the plus (+) button on the editor.
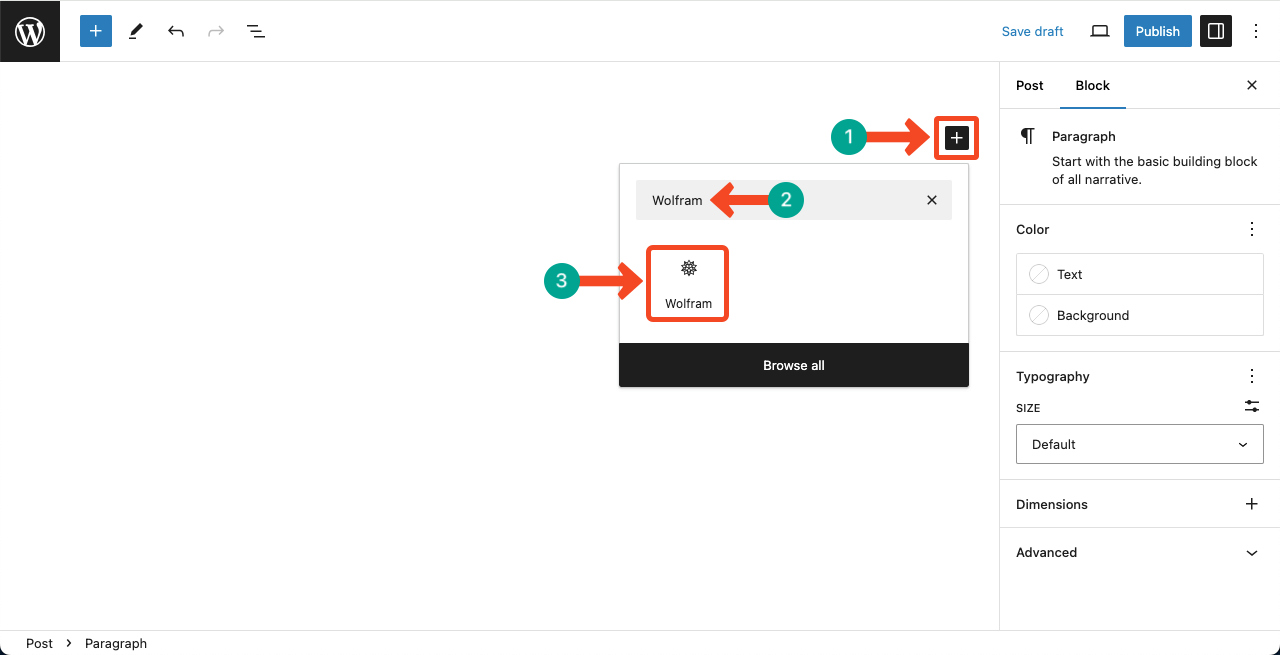
You can see the Wolfram block has been added to the editor.
Step 02: Create and Publish a Document in the Wolfram Cloud
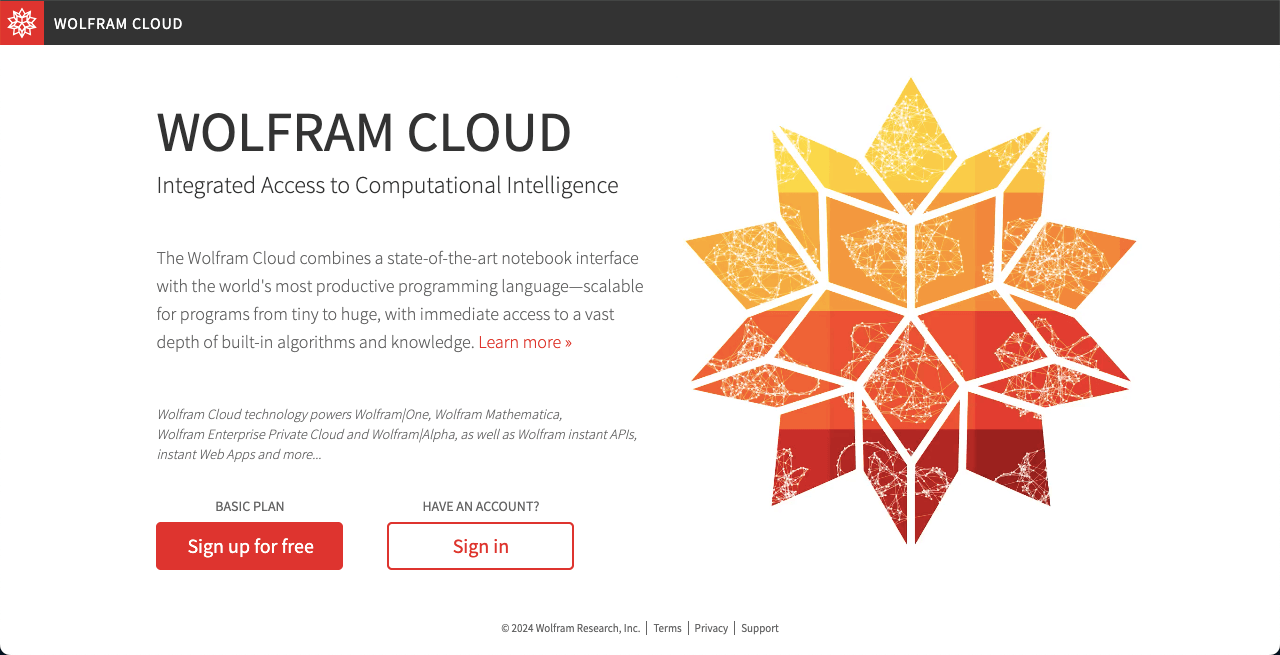
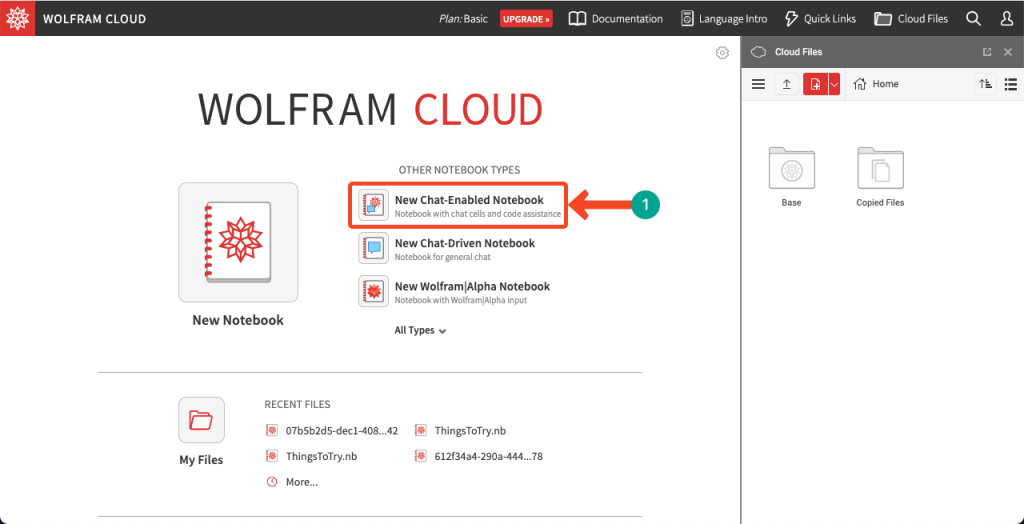
Hope you know how to create files in Wolfram Cloud. If you don’t know follow my instruction. Sign up in Wolfram Cloud. Then, log into your account.
Click the New Chat-Enabled Notebook option.
An editor page will show up where you can type and add your content. Once the editor opens, type your desired content there.
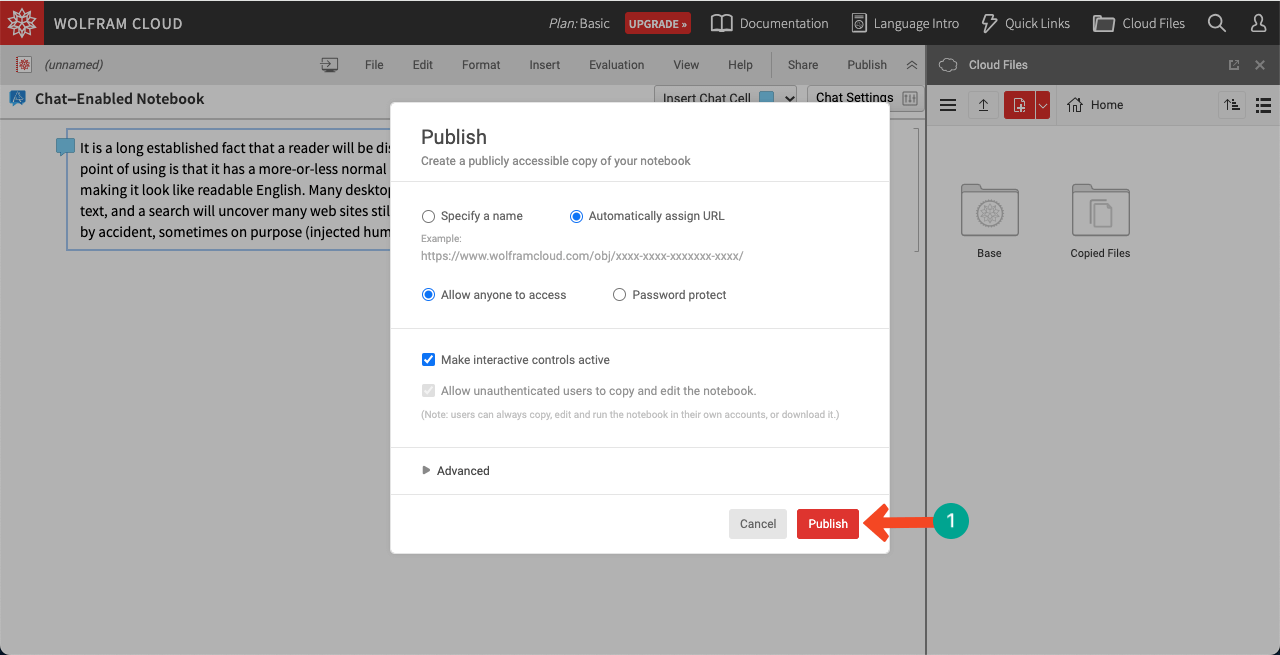
After your content is properly added, click the Publish button.

A pop-up will show up with a Publish button. Click the button.
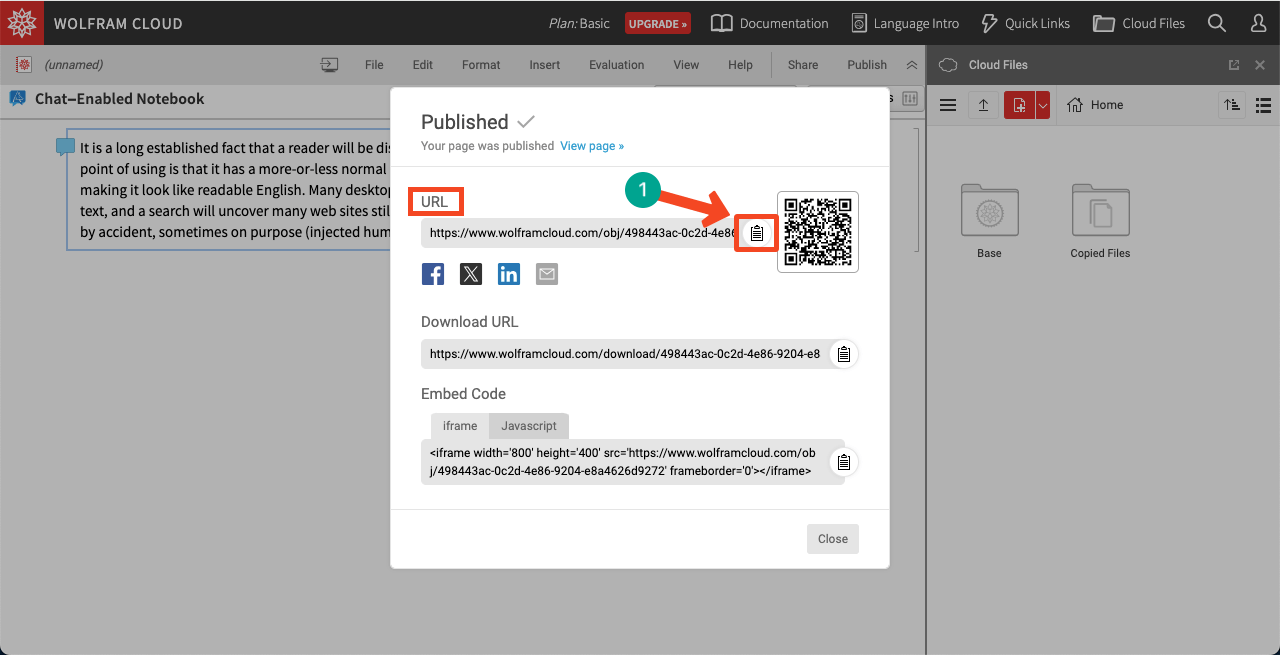
You’ll get another pop-up with several URLs.
Copy the top URL, which is next to the QR code.
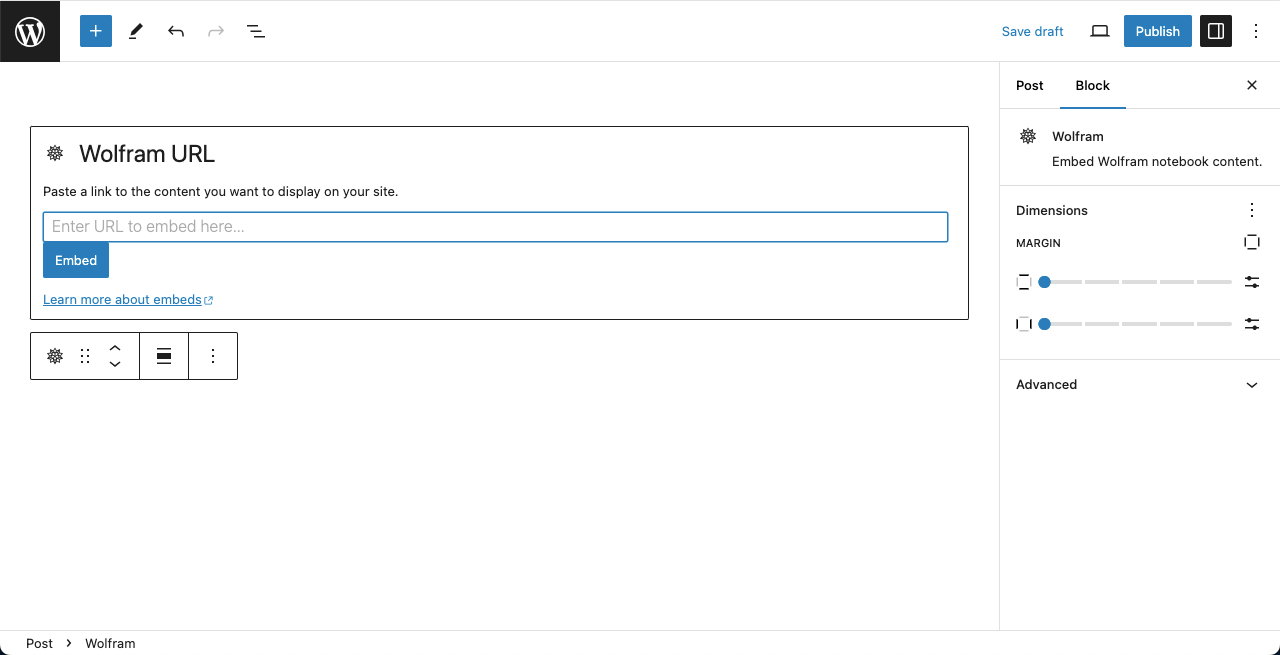
Step 03: Paste the Wolfram File Link to the Gutenberg Wolfram Block
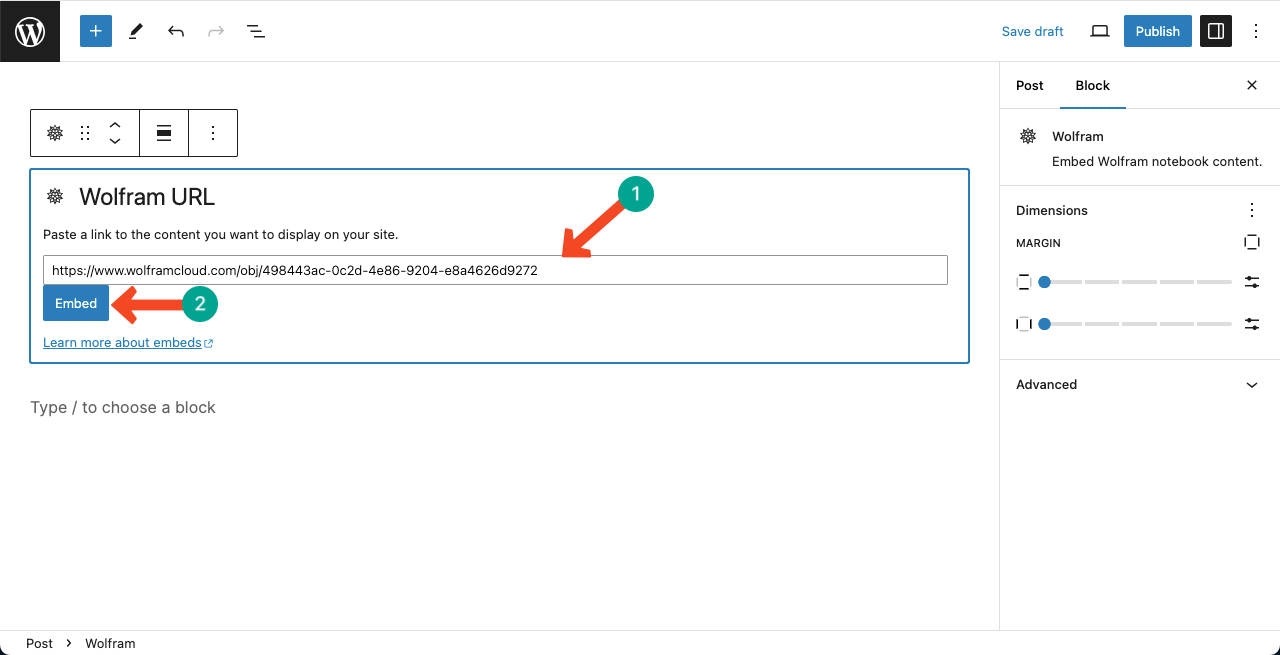
Come to the Gutenberg Wolfram block on WordPress. Paste the link to the respective box that you copied just a while ago.
Click the Embed button at the end.
Step 04: Preview the Wolfram Content on WordPress
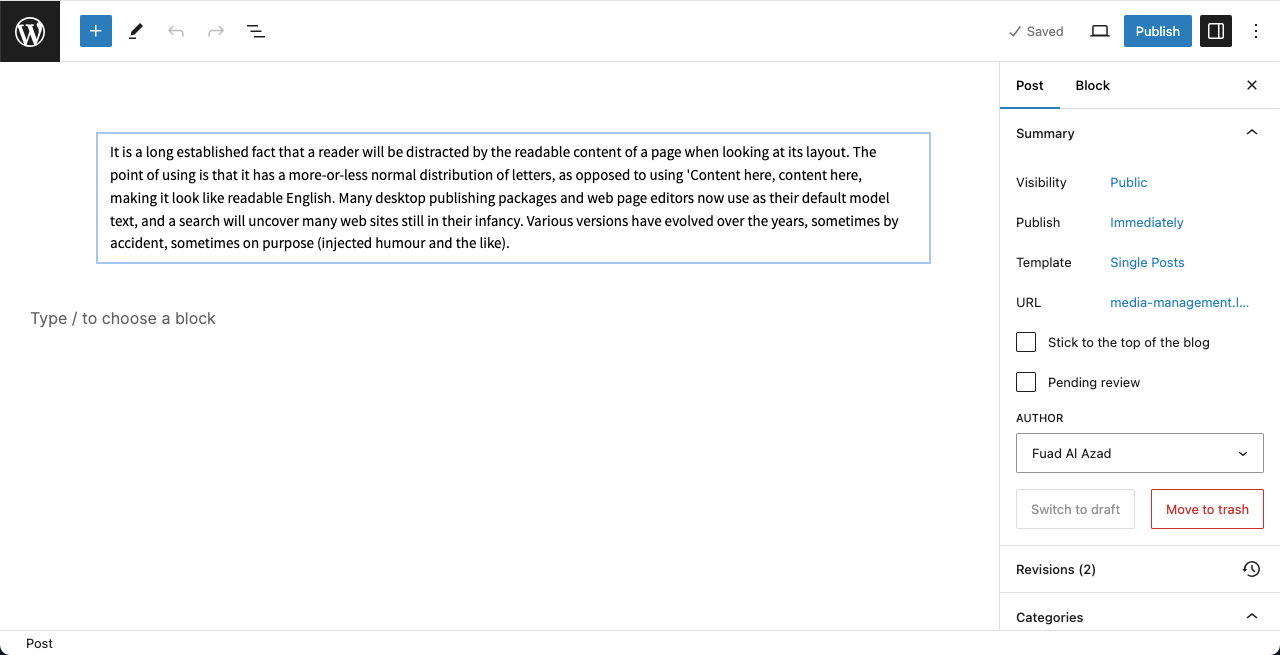
You’ll see the content is displayed in the editor instantly. Preview it.
Thus, you can add and use the Gutenberg Wolfram block in WordPress.
Conclusion
the Gutenberg Wolfram block is a remarkable addition to the WordPress block editor, offering users an array of possibilities for displaying and interacting with data. By properly utilizing the block, you can display your valuable data and computational information to users in a highly digestible way.
Hope you have found this tutorial helpful enough. Let me know what more you want to learn, especially about the WordPress content management system.