The Gutenberg group block is a powerful feature introduced in WordPress 5.0. This block acts as a container. It allows you to contain multiple blocks together with enhanced customization options.
In this tutorial post, I will show you how to use the Gutenberg group block effectively in WordPress posts and pages.
Step 01: Add the Gutenberg Group Block to a Post or Page
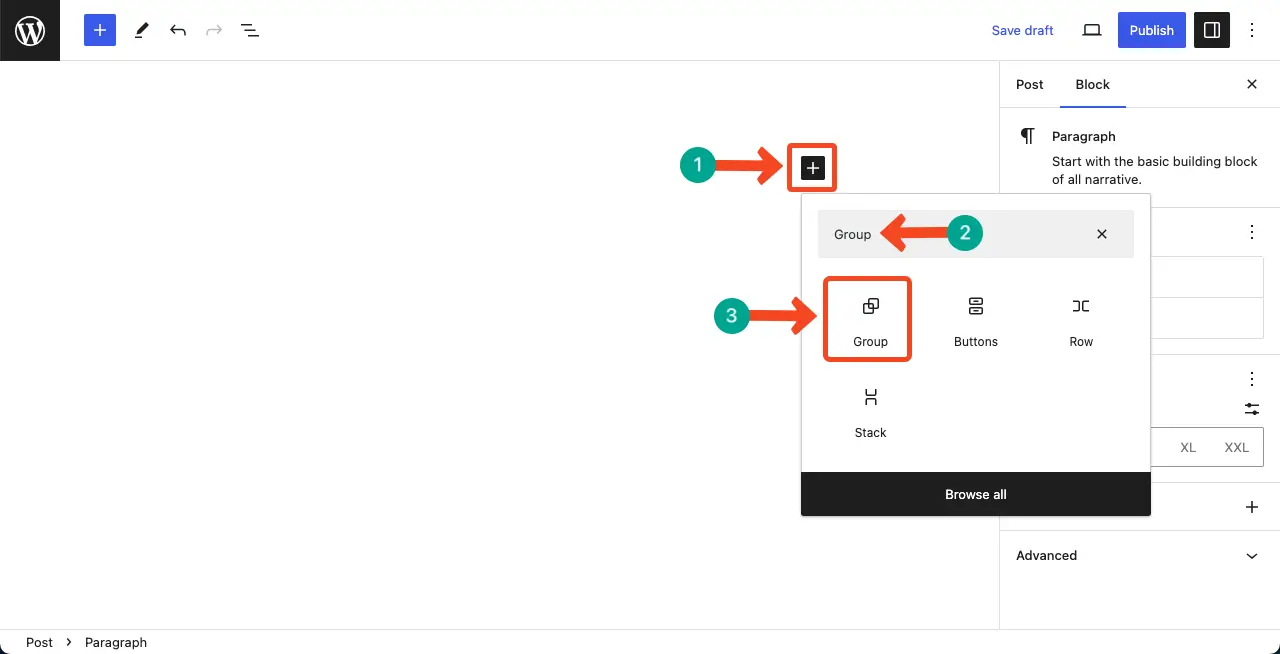
Open the WordPress editor and create a new post or page. Click on the (+) button to add a new block. Search for Group in the search bar or find the block. Click the block to add it to the editor.
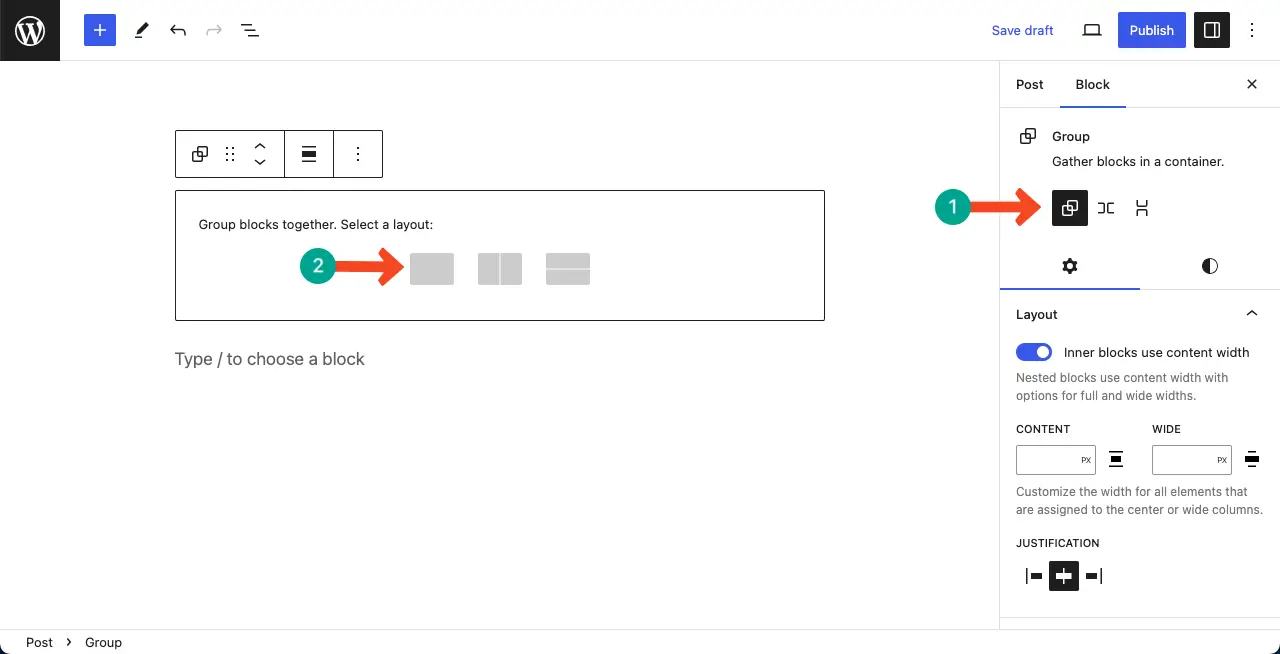
Select a layout. You may select the column-based, row-based, or plain layout.
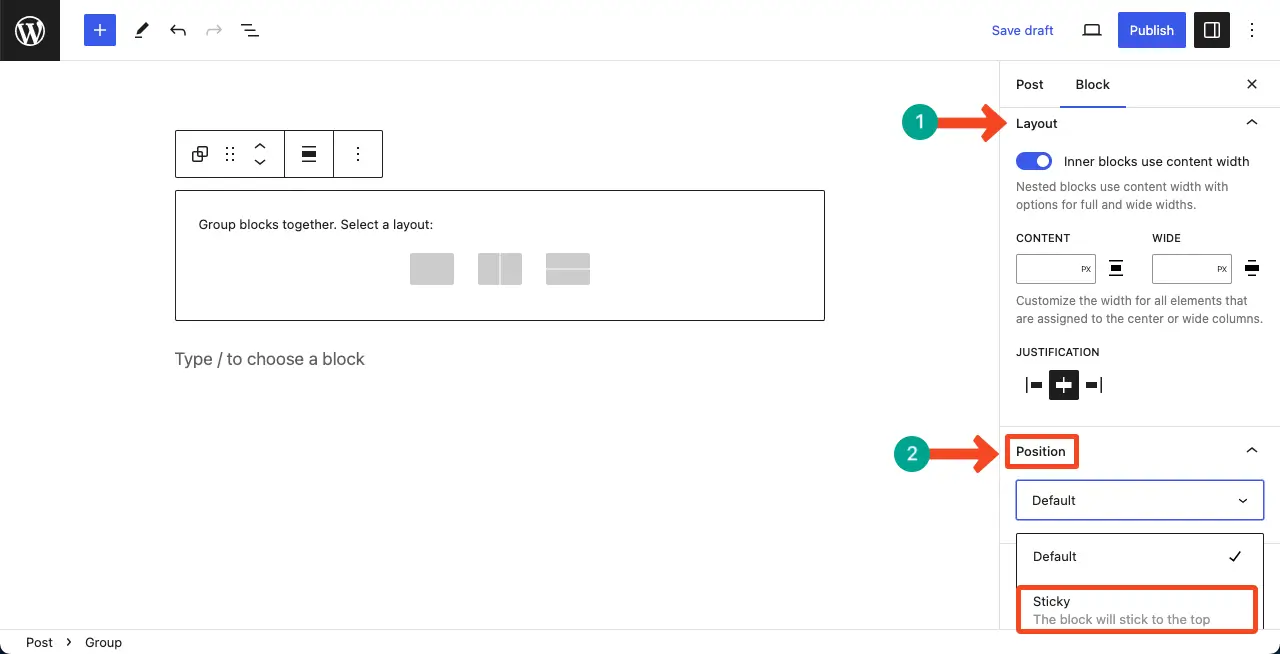
You may select the necessary configuration from the right sidebar. For example, if you want to make this group block sticky, you can enable this from the Position option.
Step 02: Add Content to the Gutenberg Group Block
Once the group block is added, you can start adding other blocks inside it. To add other blocks, click on the (+) button within the group block and search for the desired block type. I am adding the Paragraph, Image, and Button blocks for the tutorial.

Let’s first add the Paragraph block and desired content to it.
Then, select the Group icon on the Gutenberg toolbar. This will select the entire block and show the plus (+) icon within the block area.
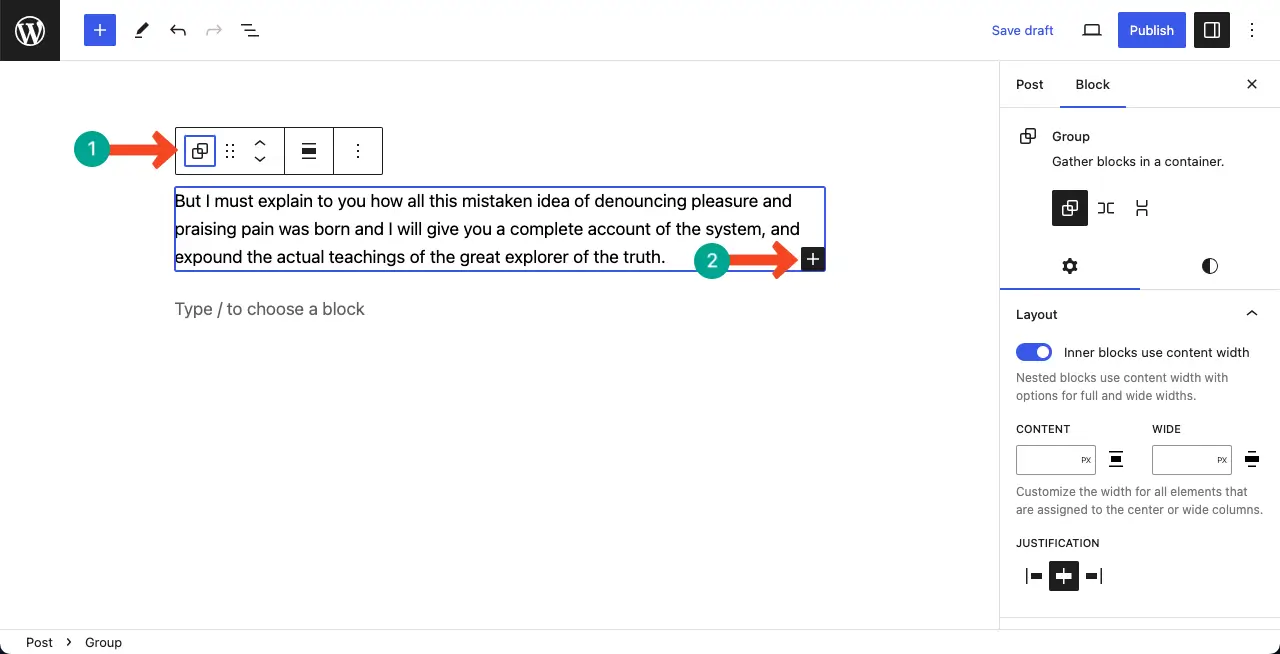
Click the plus (+) icon to add other blocks within the grouped area. You can see I have added the image and button blocks within the grouped area.
Step 03: Configure Settings and Customize the Gutenberg Group Block
Select the entire Group block by clicking on it. Come to the Settings tab on the right sidebar. You’ll get options to change the layout, resize the block and content width, and adjust the content alignment within the block.
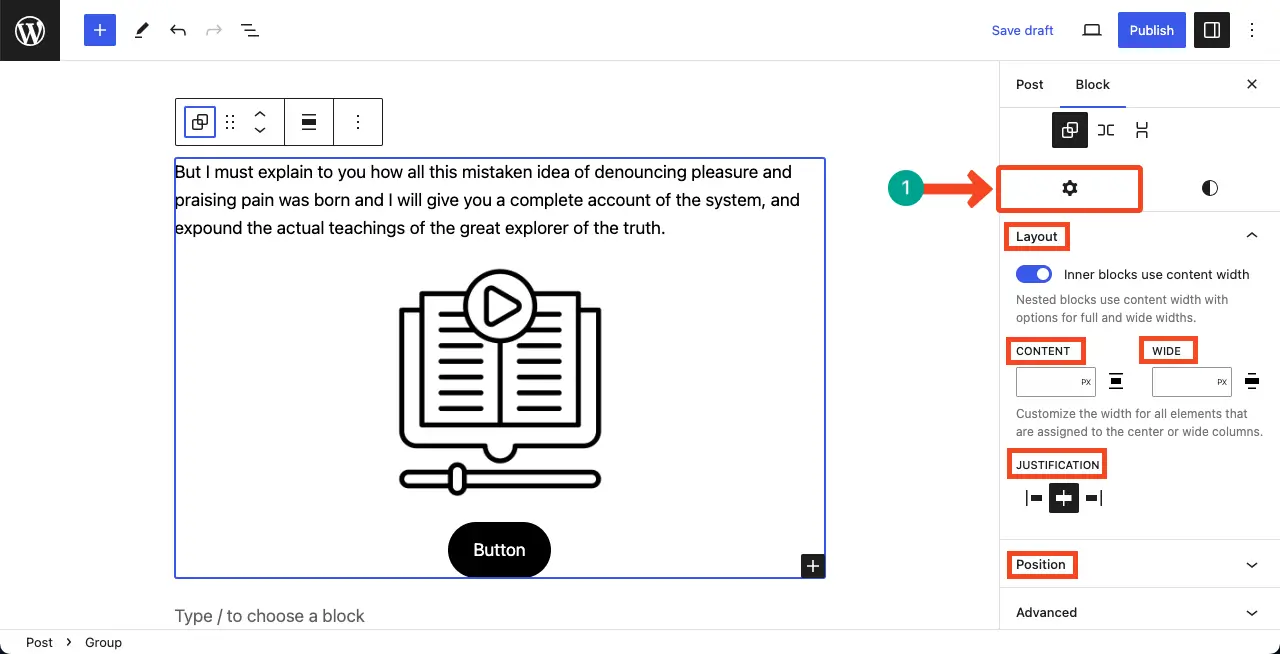
Next, come to the Styles tab. You can customize the block’s background color, text color, background image, typography, font size, padding, margin, block height, and block space.

Learn how to use the WordPress Media and Text block.
Best Practices for Using the Gutenberg Group Block
Like any other WordPress block, you’ll obviously find or figure out the helpful best practices for using the Gutenberg Group block. Let’s take a look at some of them in the discussion below.
1. Organize Related Content
The Group Block is useful for organizing related content. By grouping blocks together, you can keep them organized and move them as a single unit if needed. This is particularly helpful for managing complex layouts and maintaining consistency in your design.
2. Create Custom Layouts
The Group Block provides flexibility in creating custom layouts. You can add different types of blocks, such as headings, paragraphs, images, or even other group blocks, within a Group Block. This allows you to create visually appealing and structured content.
3. Customize the Appearance of the Block
You can customize the appearance of the entire Group Block by adjusting settings such as background color, border, and spacing between blocks. This allows you to create a cohesive look for the grouped content.
4. Try Nesting with Other Group Blocks
The Group Block can be nested within another Group Block. It allows you to create more complex layouts and templates. This feature is particularly useful for building block themes and designing headers, footers, and templates.
Conclusion
In this post, I have covered a basic tutorial on how to use the Gutenberg Group block. You can create wonderful layouts to showcase your web content by perfectly synchronizing the row and column blocks.
I’ll cover more tutorial posts on this idea in my coming posts. Stay with me and share new topic ideas in the comment box.