Graphics and visuals are a must for capturing the audience’s attention and enhancing the overall appeal of your content. Without visuals, your content will look boring, no matter how valuable texts and information you add. This is why, the idea of featured images has been so popular.
It summarizes the content of an entire blog post or piece of content in a single image. WordPress provides a default option to add a featured image for any blog post or page. Yet it offers a dedicated Featured Image block that you can integrate anywhere on your post/page editor.
In this guide, I’ll walk you through everything you need to know about the block including its basic functionalities. Let’s get into the discussion of how to use the Gutenberg Featured Image block in WordPress.
What Is the Featured Image in WordPress?
In WordPress, the Featured Image serves as a crucial visual element for posts and pages. It represents the main image associated with a particular piece of content. When you publish a post or page, the Featured Image is often displayed in search results, or within social media previews.
The Featured Image block is a default Gutenberg block in WordPress for managing and showcasing your post thumbnails directly within the editor. With the block, you can effortlessly add, edit, and customize your post thumbnails without leaving the editing interface.
This block empowers you to upload images, crop and resize them as needed, and even apply various effects and styles to enhance their visual appeal – all within a seamless editing workflow.
How to Add Featured Image to Post in WordPress
The WordPress Featured Image block is directly linked to the default featured image option. This means the image you add to the default featured image section will automatically be displayed on the block, and vice versa. So, let’s first add an image to the default featured image section.
Step 01: Open a Post and Add an Image to the Featured Image Section
Open a new post or an existing one. Navigate to Post > Featured Image section on the right sidebar. Click on the Set featured image box.
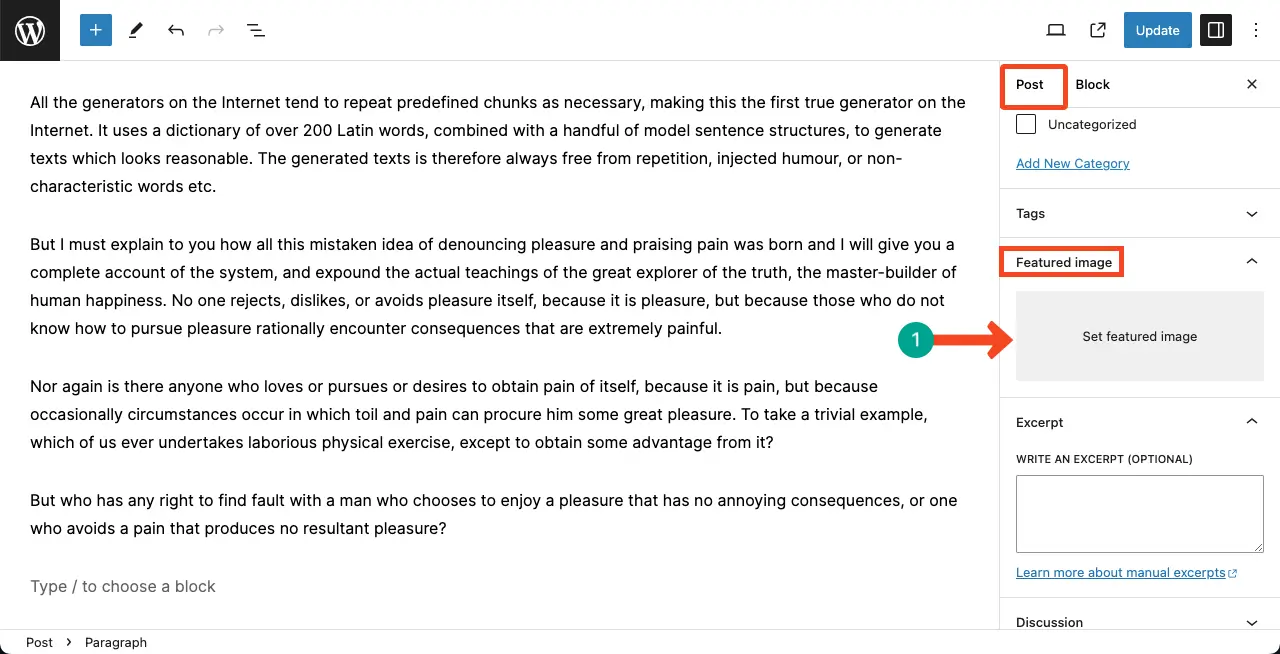
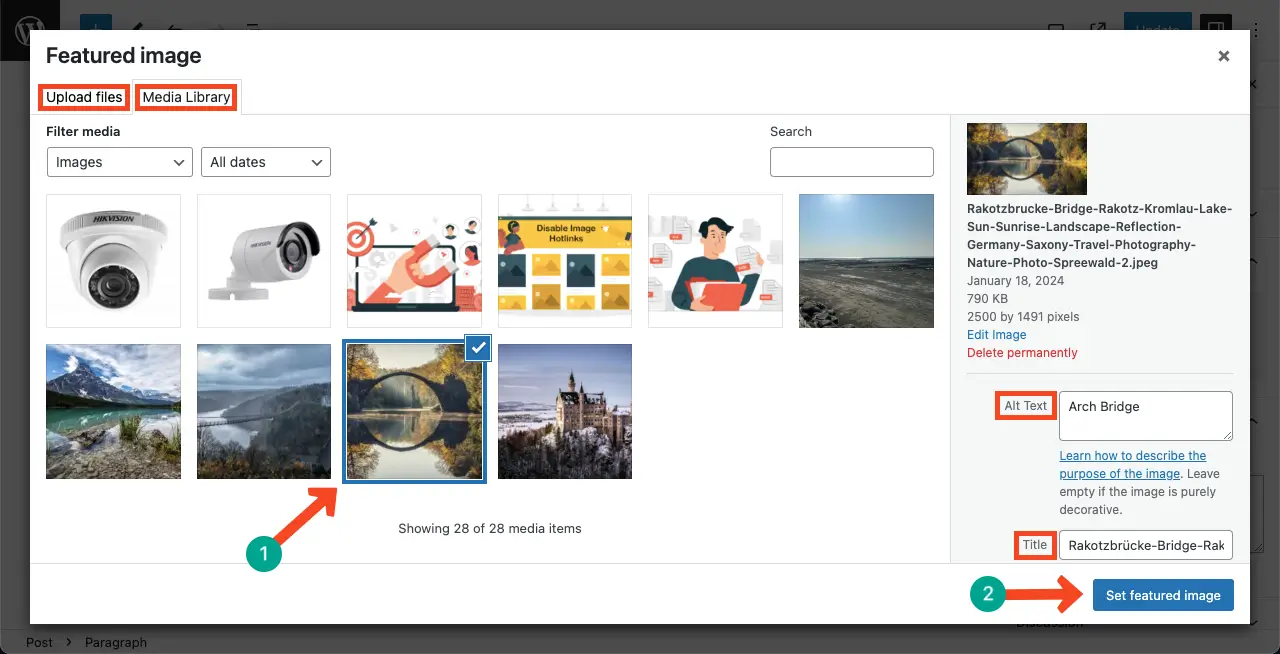
To use an existing image for the feature image section, select the image from the Media Library section. But to add a new image, use the Upload files option.
In this tutorial, I will add an existing file for the featured image. Don’t forget to add alt text and title to the image. Finally, click the Set featured image button.
Explore how to add alt text to images in WordPress.
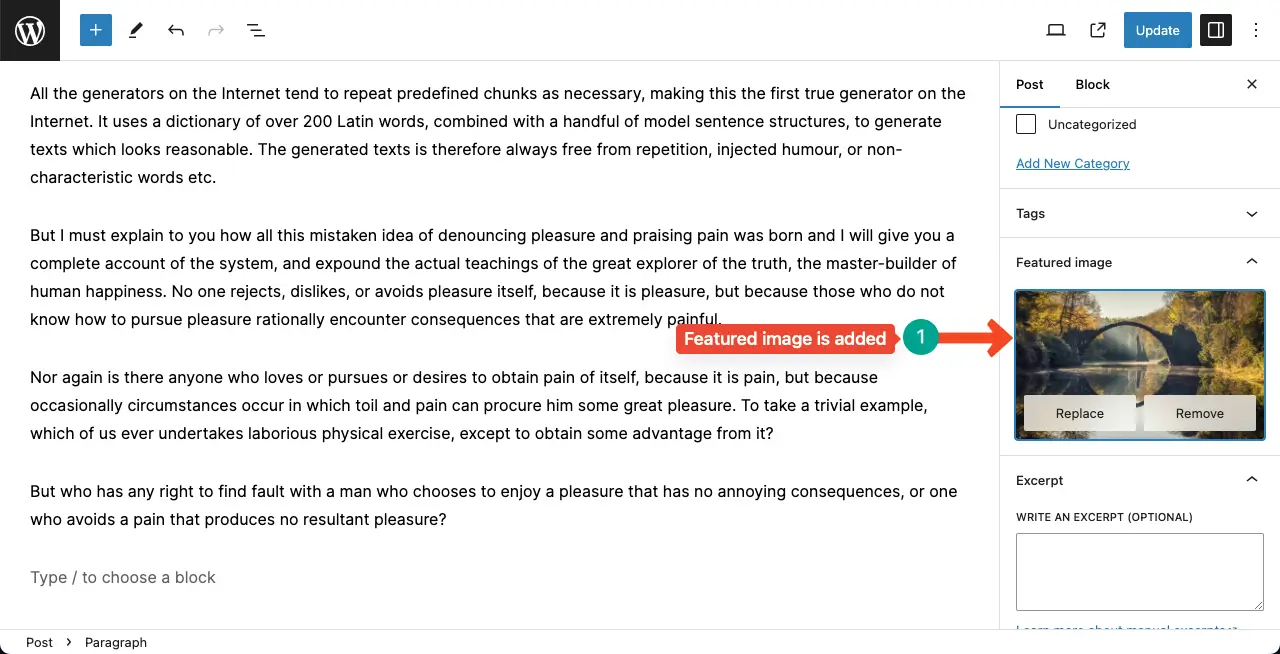
You can see the featured image has been added to the respective section of the post.
Step 02: Add the Gutenberg Featured Image Block to the Editor
Come to a suitable position on your post where you want to add the block. Find the Featured Image block by clicking the plus (+) button. Once you see this, add it to the editor.
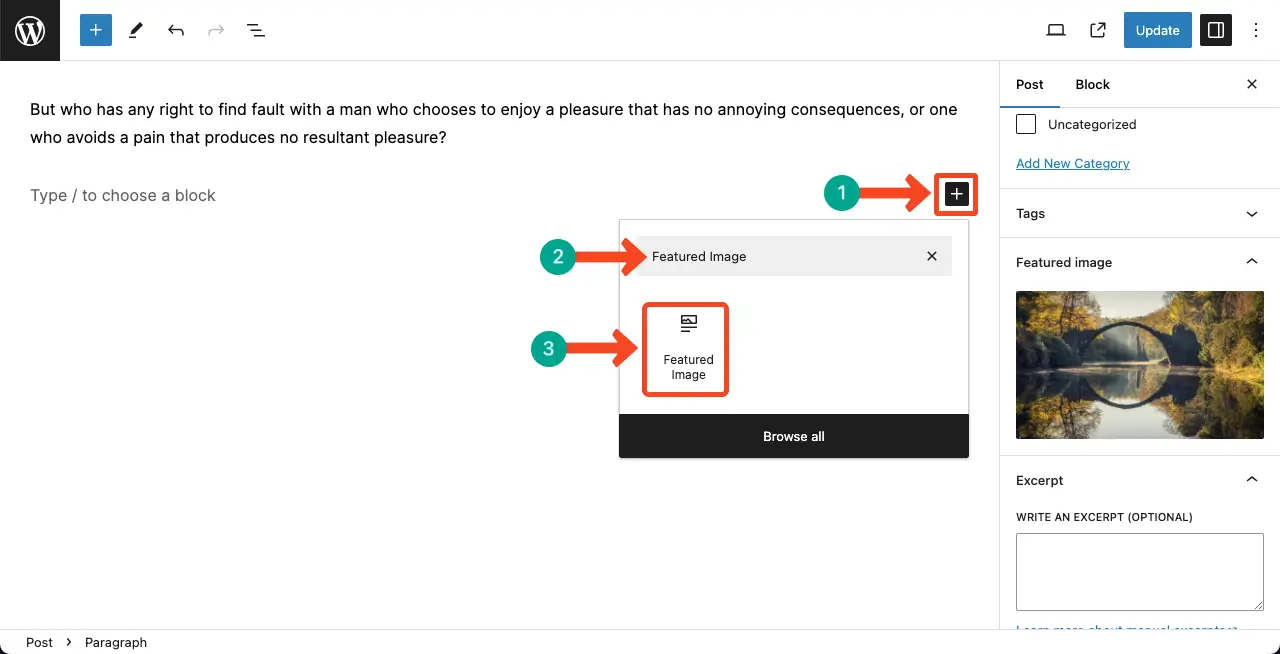
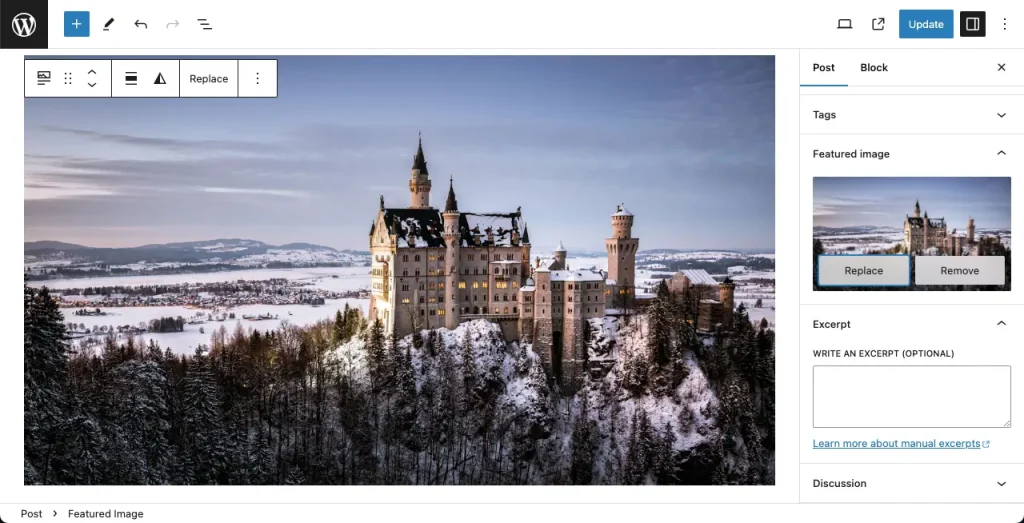
You can see the Featured Image block has been added displaying the same image I added to the respective section just a minute ago.
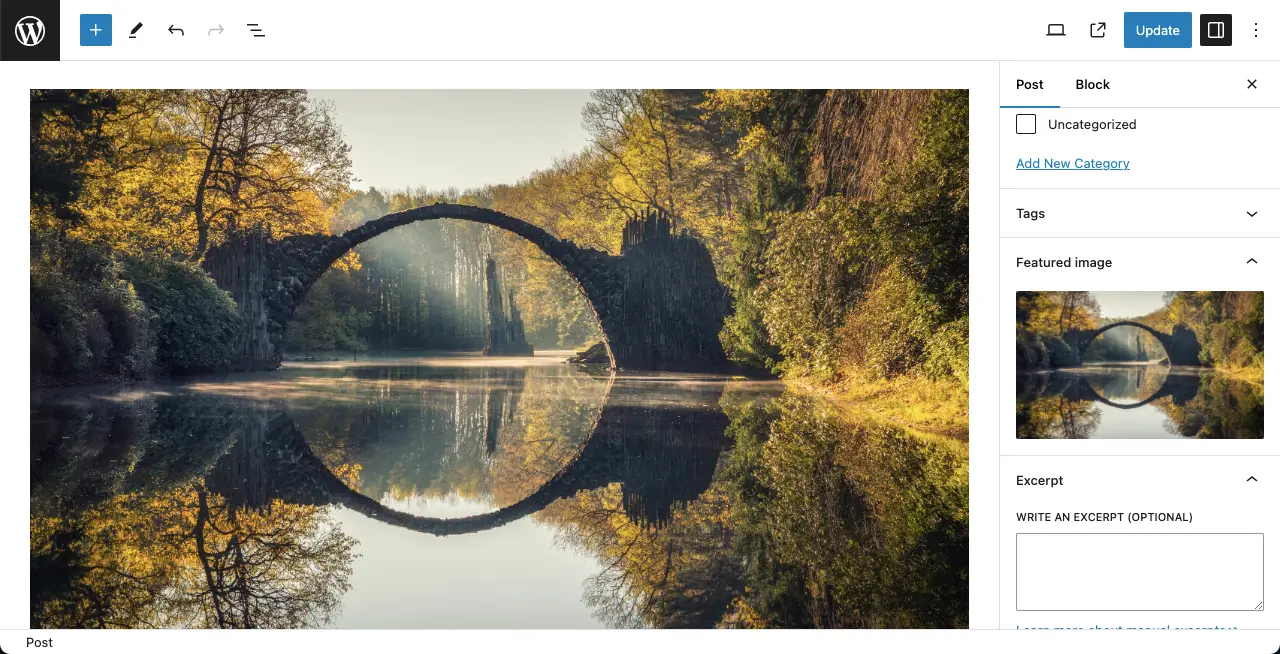
Step 03: Stylize the Gutenberg Featured Image Block
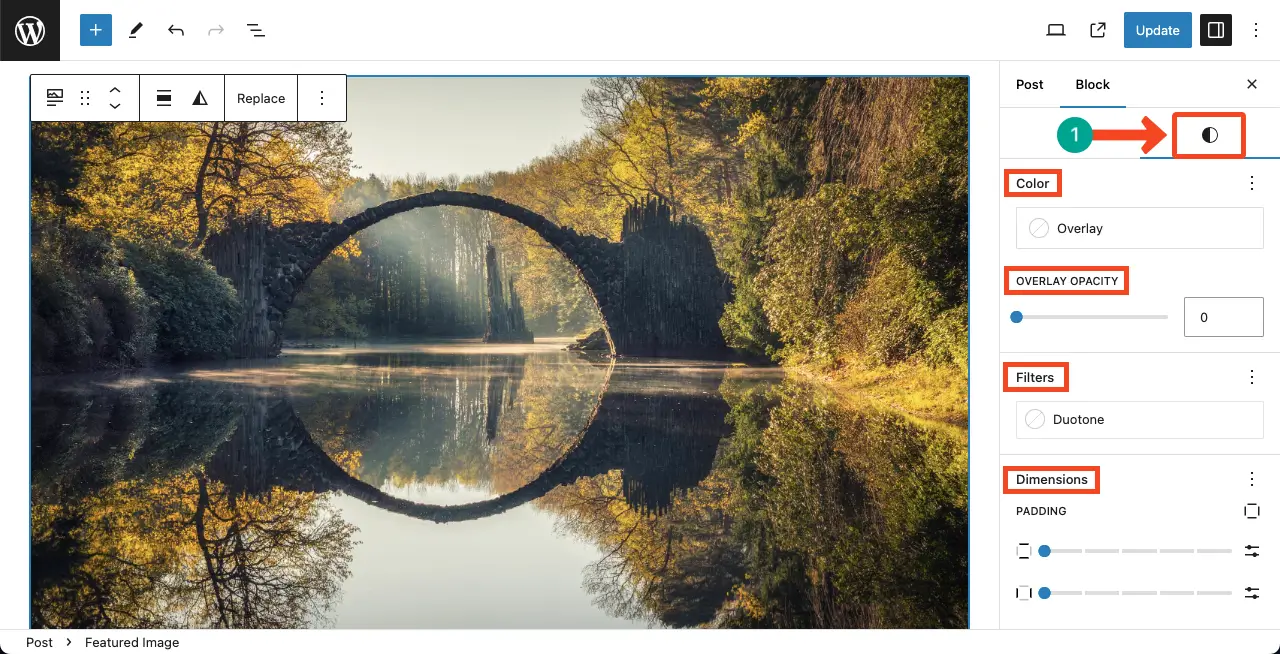
Go to the Styles tab keeping the block. You’ll get options to add an overlay color, overlay opacity, filters, and dimensions to customize the block. Hope you can do these customizations yourself.
However, for inspiration, you may explore the post on how to use the Gutenberg Duotone filter in WordPress.
Step 04: How to Change the Featured Image
Both the featured image block and section allow you to change the image. Here again, whatever option you use to change the image will automatically be applied to both fields.
Click any Replace button.
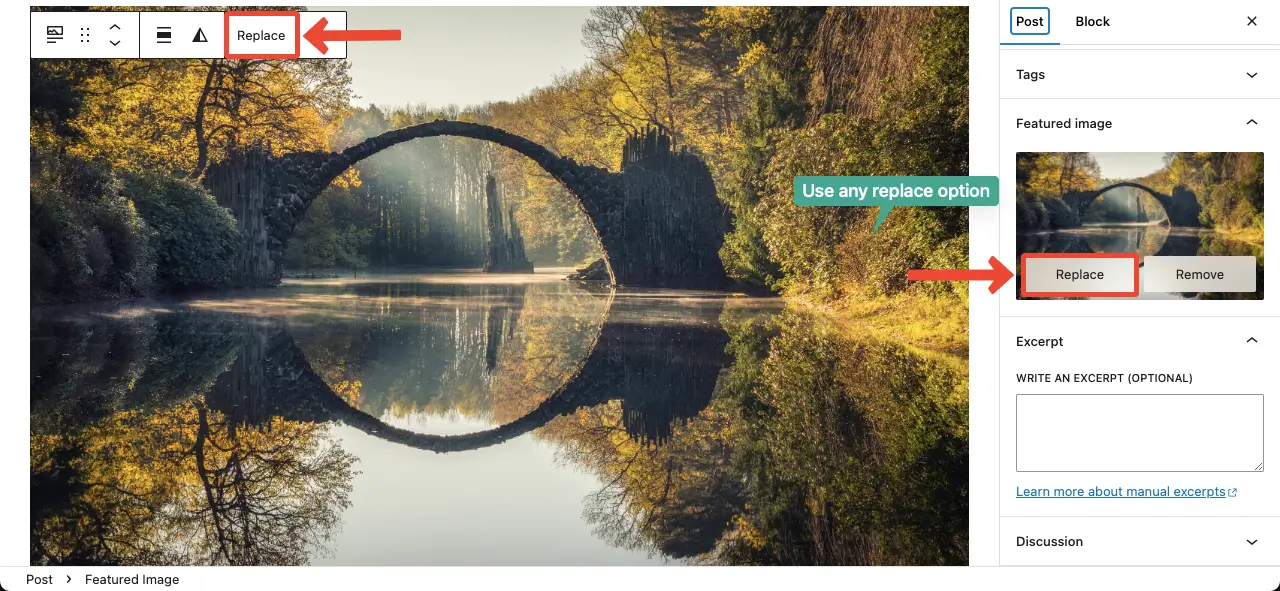
Select a new image to replace the featured image whether from the existing ones or uploading a new one from your local drive. Hit the Set featured image button at the end.
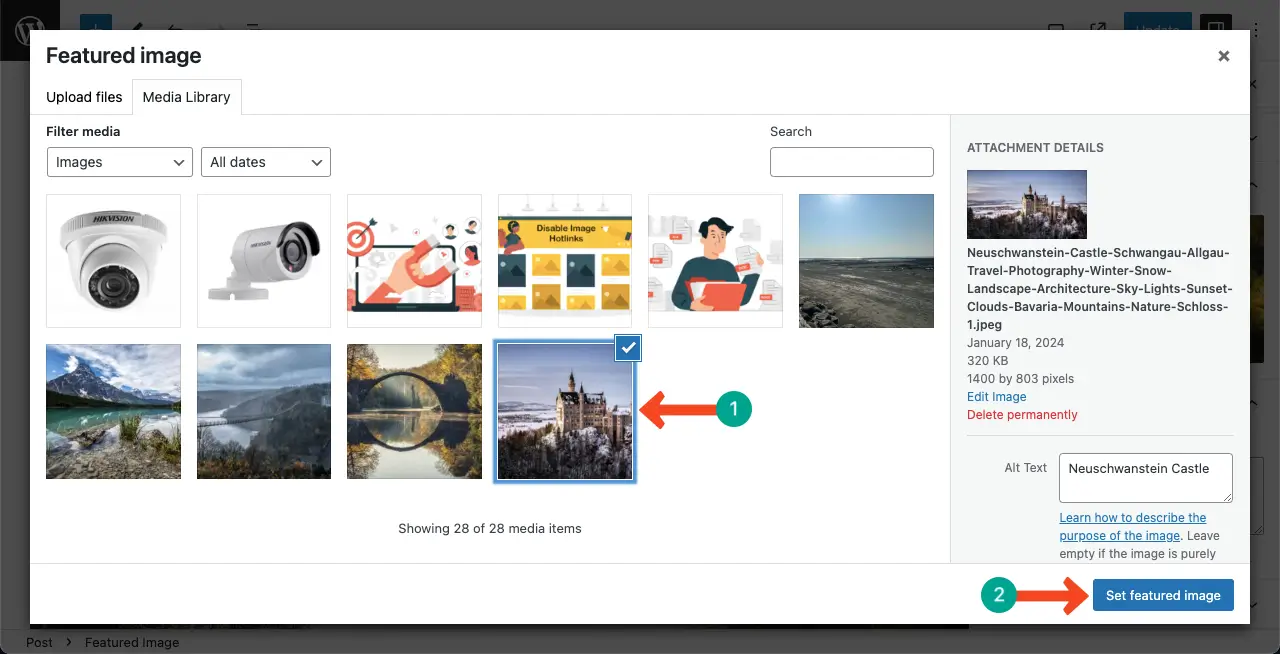
The featured image is changed.
Tips and Guides for the WordPress Featured Image Block
I will now share some tips and guides for the Featured Image block I learned through my personal blogging journey. Read them below.
1. Choose High-Quality Images
Select images that are high-resolution and visually appealing. High-quality images enhance the professionalism and attractiveness of your website.
2. Relevance to Content
Ensure that the Featured Image aligns with the content of your post or page. It should provide a visual representation or summary of what the content is about, enticing visitors to engage further.
3. Optimize for Web
Before uploading, optimize your images for the web to improve website performance. Compress images without sacrificing quality to reduce loading times and enhance user experience.
4. Consistency in Style
Maintain consistency in the style and format of your Featured Images to create a cohesive visual identity for your website. Consistency helps establish brand recognition and reinforces your website’s aesthetic appeal.
5. Consider Typography
If your Featured Image includes text, ensure that it is legible and complements the overall design. Avoid placing text in areas that may be obscured by overlaying elements or cropping on different devices.
6. Utilize Image Editing Tools
Take advantage of built-in image editing tools within WordPress or external software to enhance your Featured Images. Crop, resize, and apply filters or effects as needed to optimize visual appeal.
FAQ on the Gutenberg Featured Image Block in WordPress
Featured image is such an important web element without which any blog post today is incomplete. So, there are lots of questions in people’s minds about it. Some of these important questions will be answered in this section.
Is the featured image good for SEO?
The featured image doesn’t have a direct link to content ranking on the main search engine result pages. Yet, it has SEO value because it can rank your post in the image section of search engines. You may receive a considerable amount of clicks due to the captivating featured images in the image section.
What are the best tools to optimize the featured images?
1. TinyPNG
2. ShortPixel
3. WP Compress
4. Imagify
5. Kraken
Does naming images help SEO?
Yes, naming images can help with SEO. When it comes to image SEO, creating descriptive, keyword-rich file names is crucial. Search engines like Google use image file names to understand the subject matter of the image, so using relevant and descriptive names can improve your website’s visibility and SEO value.
Is it necessary to add the Gutenberg Featured Image block to a post?
Honestly, you don’t have to. Because you already have a default dedicated section on the right sidebar of any post/page to manage the featured image.
The featured image block will showcase the same image. So, what value does it carry? It’s better if you use the WordPress Image block.
What are the best feature image sizes for blog posts?
The best image size for blog posts can vary depending on the specific design and layout of your website. However, based on the search results, here are some general recommendations:
Aspect Ratio: It is often recommended to use a landscape image with an aspect ratio where the width is longer than the height.
Width: The recommended width for a featured image can vary, but a common suggestion is to use an image with a width of at least 1200 pixels to make it responsive on all devices.
File Size: It is important to optimize your images for web use to ensure faster loading times. Keeping the file size below 100kb is often recommended.
Conclusion
Although it’s a simple block, I have tried to cover a detailed tutorial post on it. If I ever come across the block or WordPress has introduced new features/plugins for the featured image, I will try to add them in this post in the coming days.
If you are benefitting after studying my post, leave feedback in the comment section below. Visit my blog page to explore more interesting posts on WordPress.
