Creating a website was never so easy before the release of Elementor. It’s a powerful drag-and-drop page builder by which you can create stunning web pages and design different types of websites from scratch without a single line of coding.
All you have to do is drag and drop the necessary widgets, customize them, and enable the necessary features. But there are several mandatory steps you must complete before creating any website. And you have to do the same here as well.
This article will provide a comprehensive guide on how to create a website with Elementor alongside completing the prior steps.
What is Elementor? A Short Brief
Elementor is a popular WordPress page builder plugin. It enables users to create and design websites visually without needing to write code. It offers a drag-and-drop interface that simplifies the process of building complex layouts and adding content, making web design accessible to both beginners and professional designers.
Elementor provides a good collection of widgets and templates by which you can create responsive designs for mobile devices. The plugin integrates with various WordPress themes and plugins, allowing for extensive customization and functionality enhancements.
Step by Step Guide on How to Create a Website with Elementor
We’ll now walk you through all the steps you need to cover for creating a website with Elementor. The first two steps are common in opening websites with any technology. We will enter into the main part from the third step.
Step 01: Choose a Catchy Domain Name
Selecting the right domain name is the first crucial step in building your online presence. It’s a unique address that users type into their browser to find the website online. So it is important to make the domain name catchy, memorable, and relevant to your website’s purpose.
Make sure it aligns with your brand and website’s identity. If possible, include keywords relating to your web content. Avoid hyphens-numbers and stick to letters. Choose the right domain extension. Make sure of social media compatibility.
Step 02: Select the Right Web Hosting Plan
Web hosting refers to an online server that stores web files, data, and content. It allows visitors to access the website anytime by typing its domain name into a web browser. Choosing the appropriate hosting plan can directly impact your web performance.
There are various types of web hosting, including shared, virtual private server, dedicated, and cloud hosting. Select the type that aligns with your website’s size and complexity. Also, determine your website’s requirements like traffic volume, storage, and any specific feature.
Some most popular web hosting providers are IONOS, HostGator, Bluehost, DreamHost, GoDaddy, Namecheap, A2 Hosting, Hostinger, and BlueHost.

Step 03: Install WordPress and Configure the Domain
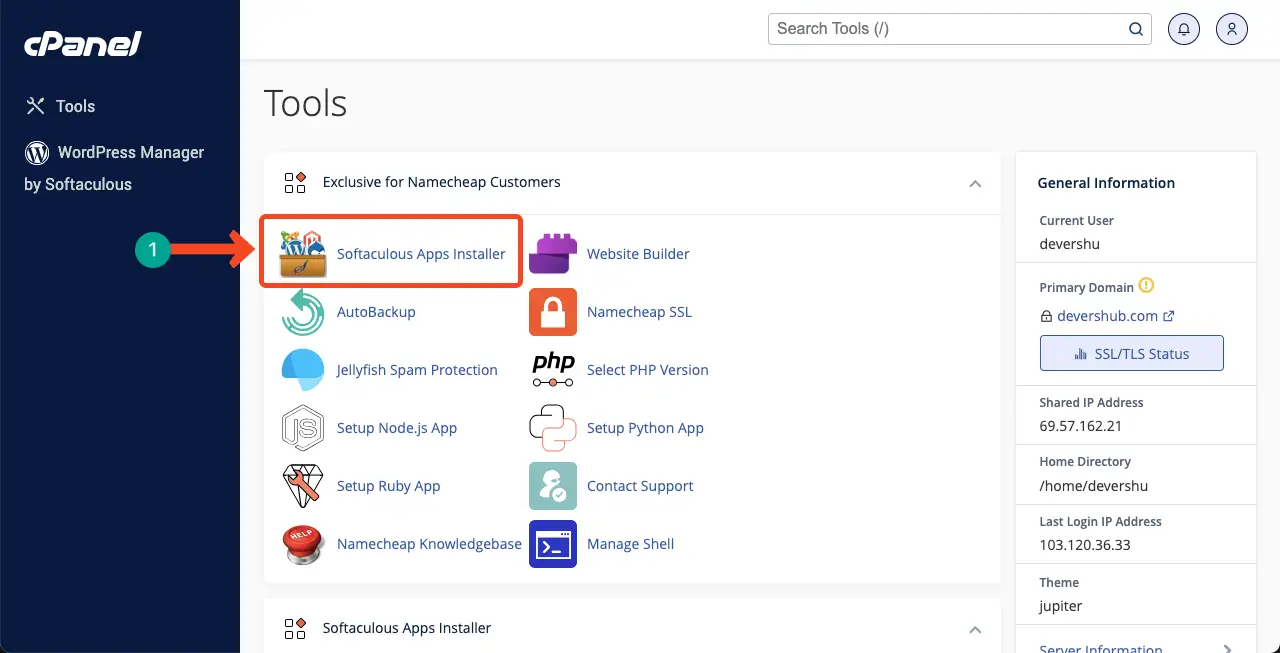
To install WordPress on cPanel and configure the domain, log into your cPanel account using the credentials provided by your web hosting provider.
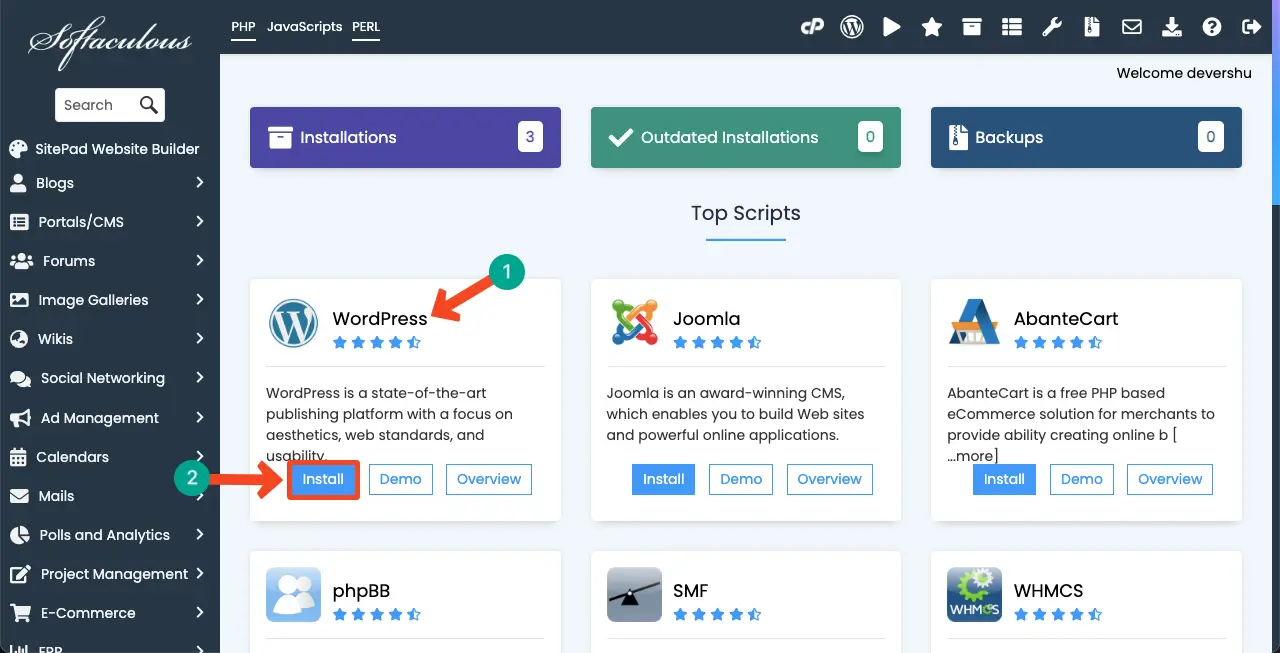
Inside cPanel, look for the “Softaculous Apps Installer” or a similar option that facilitates one-click installations. Click on the WordPress icon to initiate the installation process.
Once the WordPress installation interface opens, select the “Install” option. It will offer you some more options to configure.
Choose the domain where you want to install WordPress. Before that select your preferred language and protocol for your website. If you have an SSL certificate installed, opt for the language “https://“. Leave the “In Directory” field empty.
Then, set name and description for your website. Create an admin username and a strong password to secure your site dashboard. Enter your admin email address, as it will be used for important notifications and account-related communications.
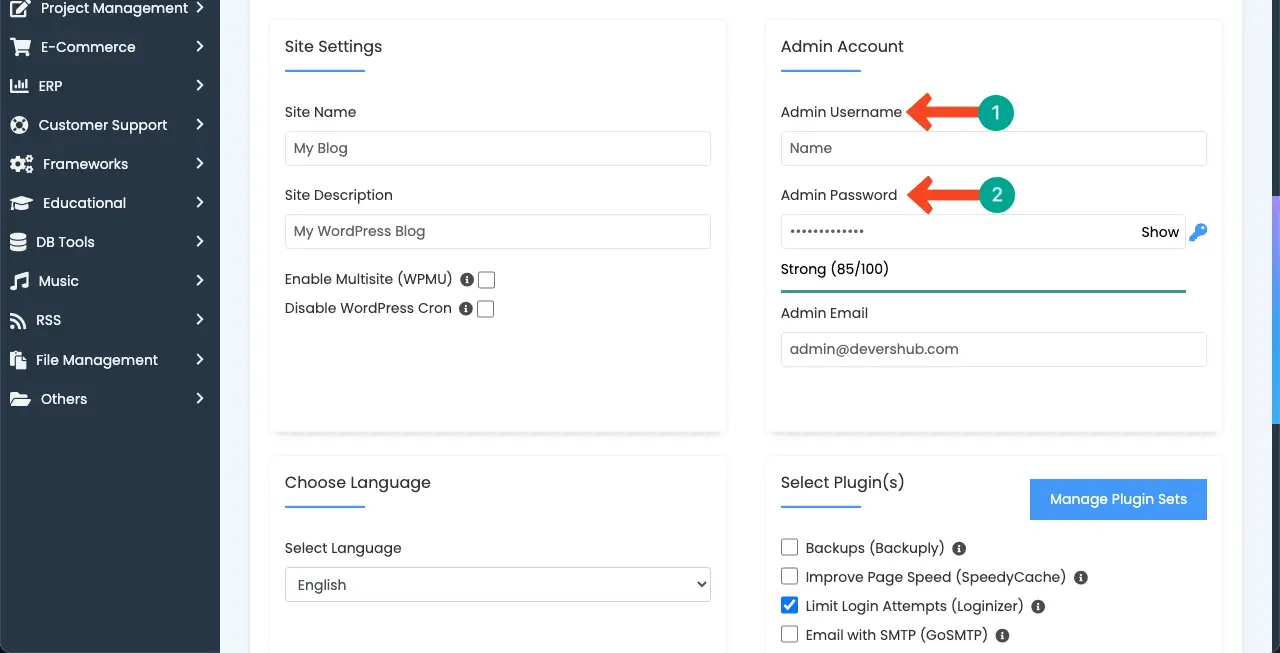
You may be presented with the option to choose certain plugins during the installation process. Leave this step. Because you can install plugins after configuring the website.
Once all the configuration is done, come to the ending section of the page. You’ll see the Install button. Press the button to begin the final installation process.
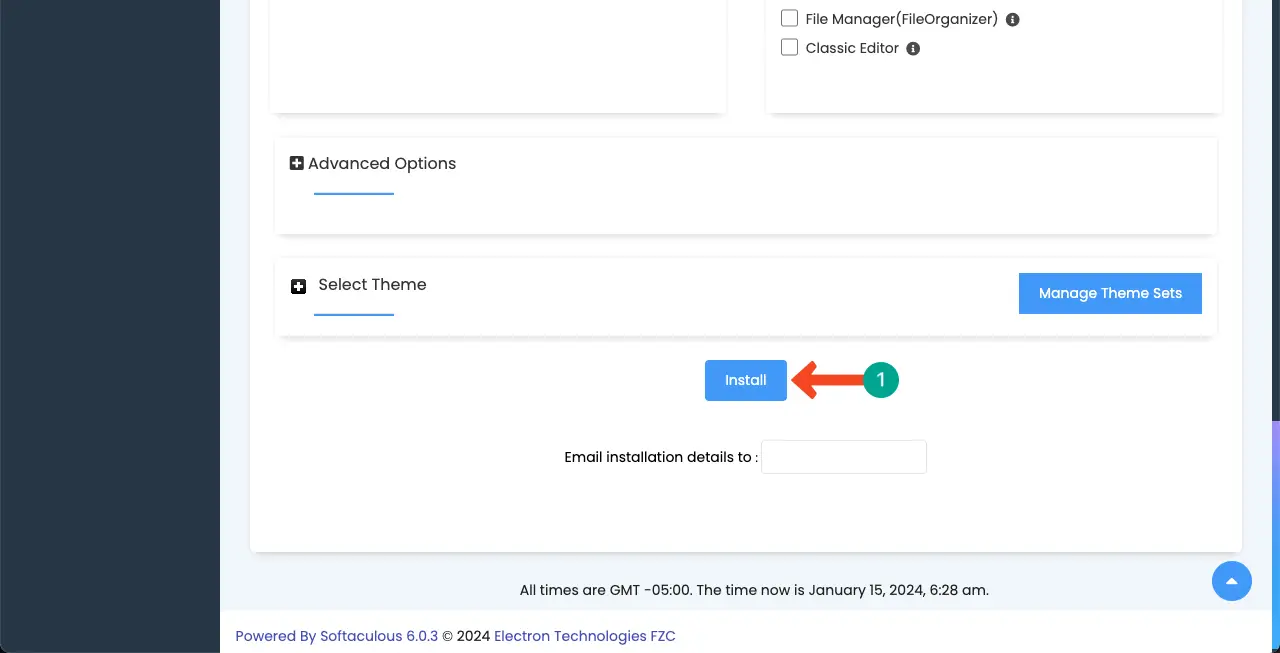
Once the installation process complete, you’ll receive confirmation along with the URL for accessing your WordPress dashboard. Access the WordPress dashboard using the provided admin URL and log in using the credentials you established during installation.
Step 04: Configure Basic Settings
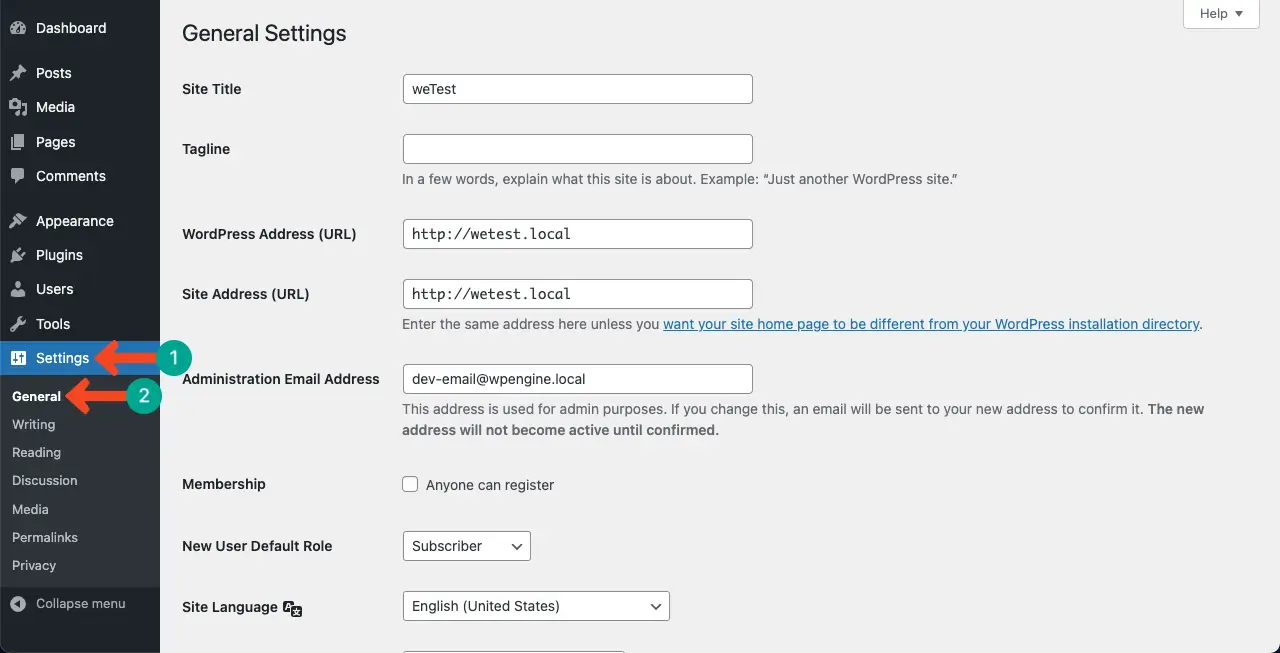
Get into your dashboard. Navigate to Settings > General. Here, you will get options to fine-tune your site’s title and tagline. You can also set the default role for new users. After that, keep exploring the other options in Settings.
Permalink is one of the crucial elements in Settings. It’s the specific URL structure that addresses a particular post, page, or content on a website. Go to Settings > Permalinks. Based on your website’s nature, define the right permalink structure for your site at the beginning.

Step 05: Install the Elementor Plugin
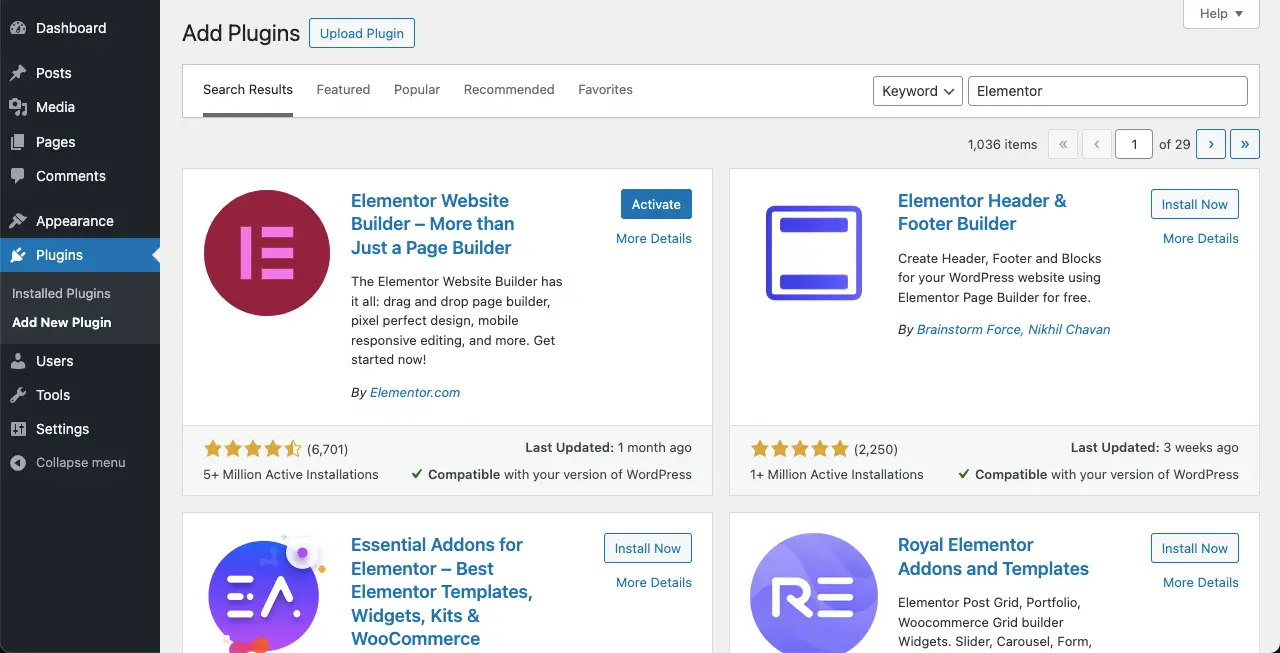
Navigate to Plugins > Add New Plugin. Type Elementor in the search box. Once the plugin appears below, install and activate it. But this one is the free version. You can design only basic-level web pages with it. You can’t create complex designs and advanced customizations.
You need the Elementor Pro version to get access to all the advanced features of the plugin. Moreover, the premium version will allow you to use numerous pre-designed templates by which you can design your landing page in no time.
If you want to go with the free version, jump into the next step. But if you want to use the premium version, download the Elemento Pro plugin from the below link. You’ll find multiple plans there. Choose the one you need.
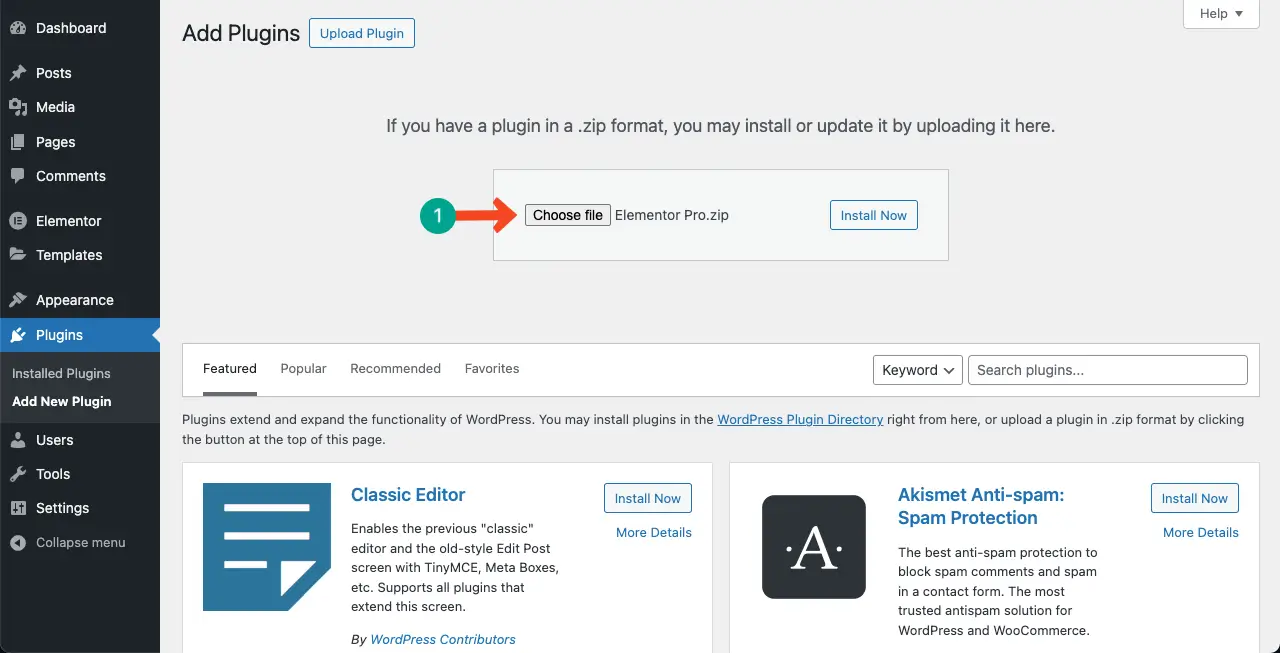
Once the plugin is downloaded, get into the WordPress dashboard again. Go to Plugins > Add New > Upload Plugin. Select Elementor Pro from your local drive by clicking the Choose file button. Hit the Install Now button. Activate it after the installation is completed.
Step 06: Create New Pages and Design with Elementor
What pages you need to create mainly depends on your website. For example, must-have pages for an agency site are home, service, about us, portfolio, blog, and contact us. Similarly, home, shop, single product, checkout, cart, and login are must in an eCommerce site.
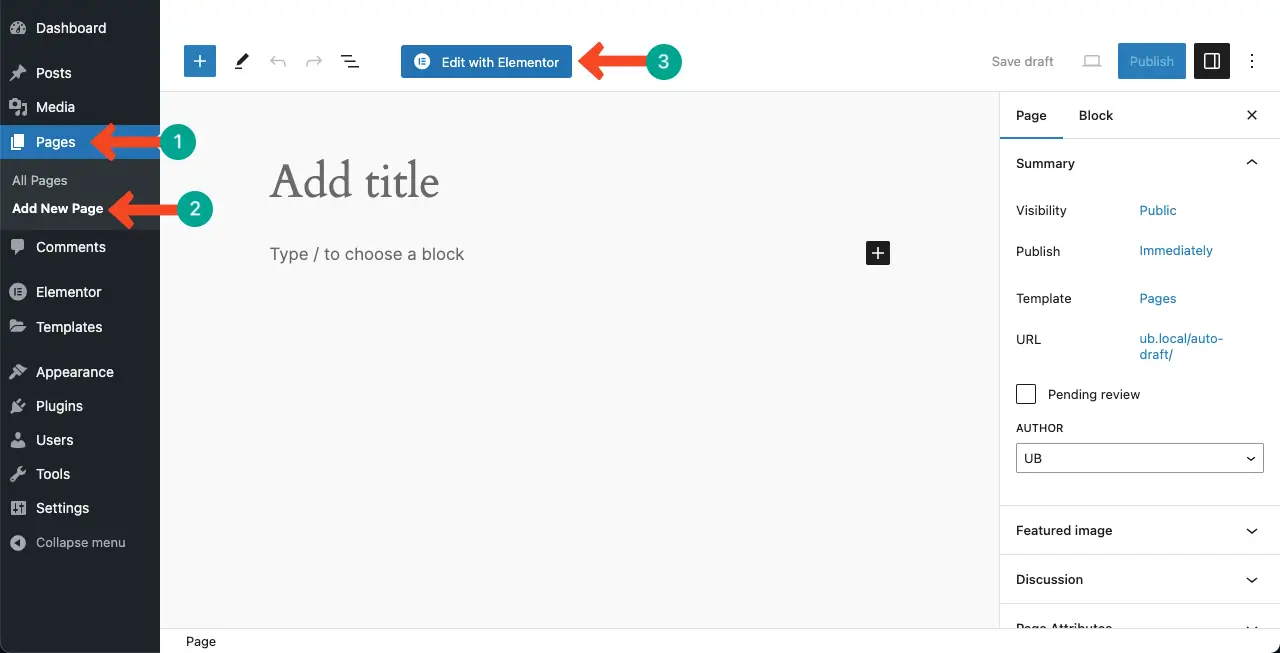
To create a new page, go to Pages > Add New Page. Give the page a name. Then, press the button Edit with Elementor. It will open the page on Elementor Canvas.
Step 07: Use Templates to Add Content to the Page
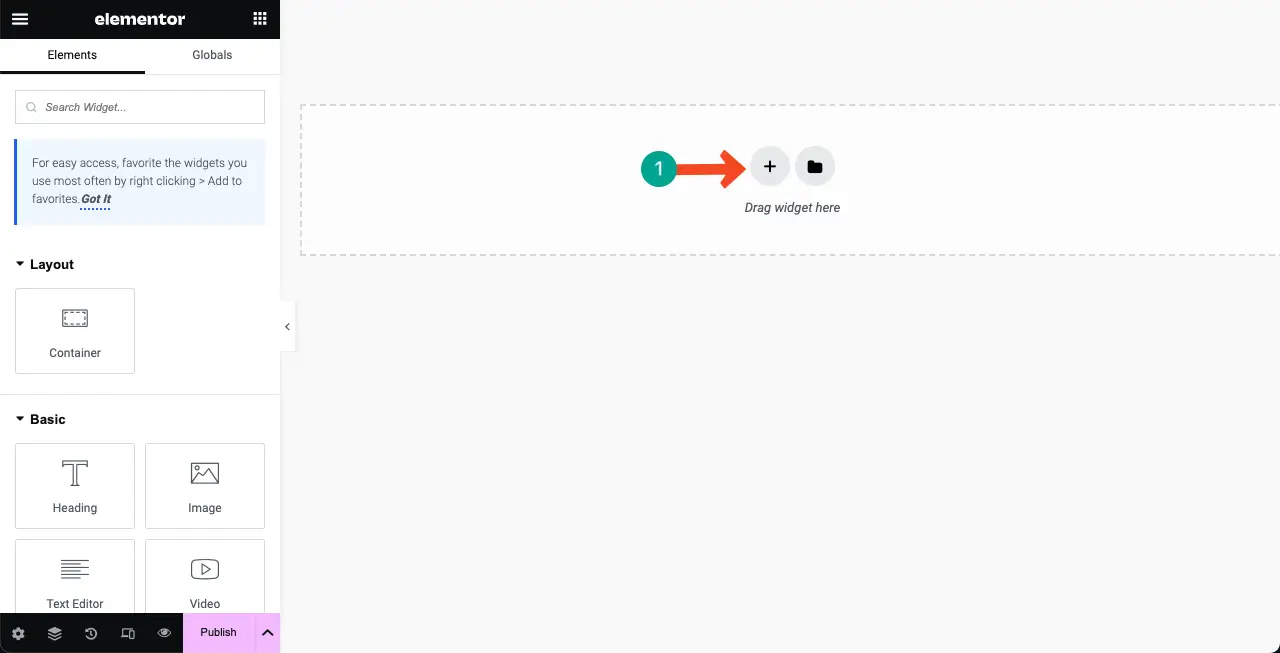
You may create the entire page using readymade templates or from scratch. To create the page from scratch, hit the Plus (+) icon.
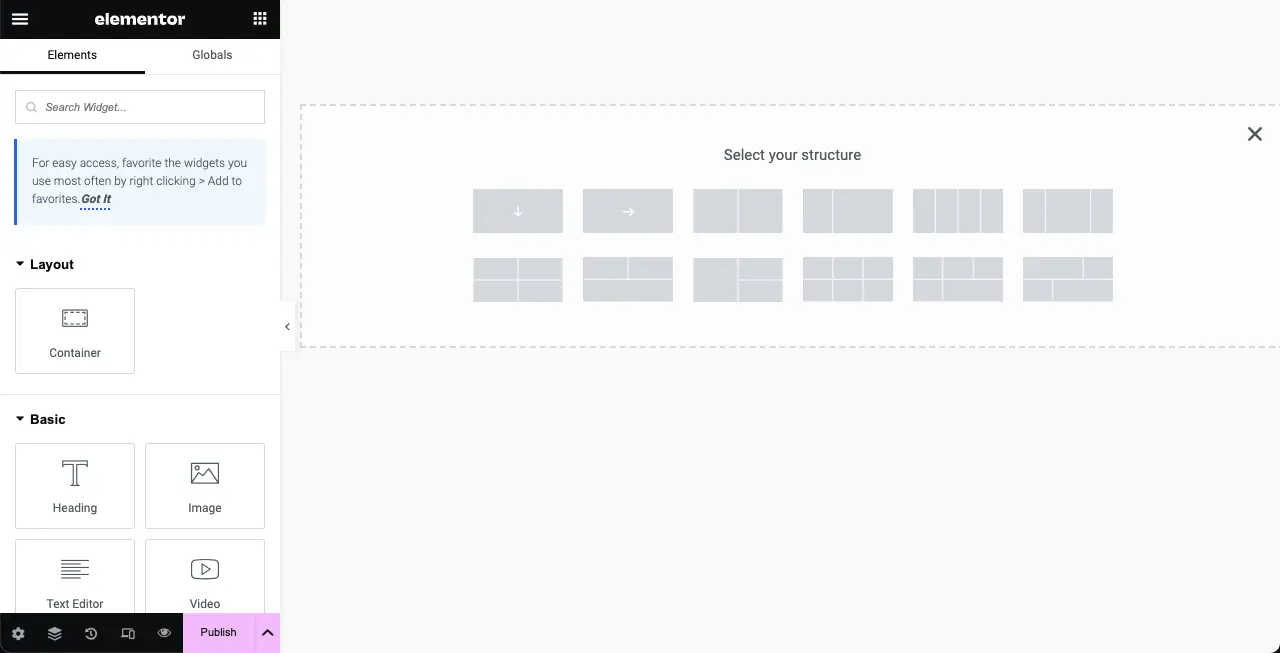
You’ll get several column structures. Select the one that goes with your content demand. We are selecting the first column to design our page.
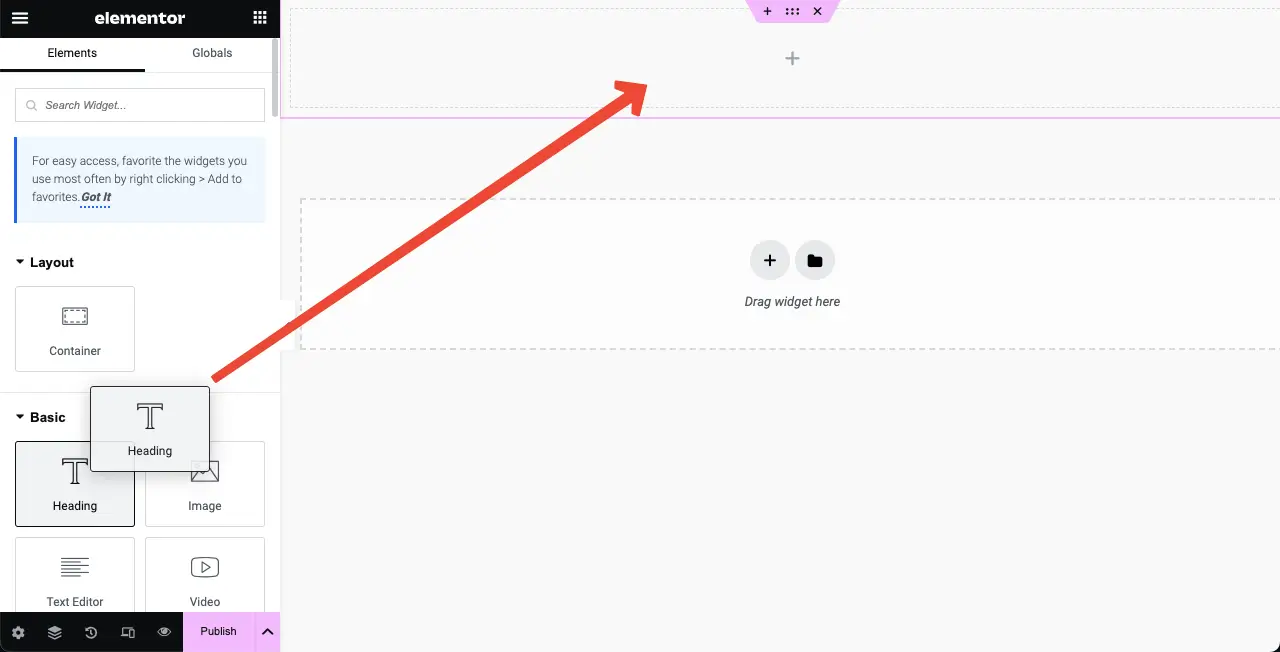
Now, it’s up to you to explore the widgets and put them on the canvas by dragging and dropping them to create the page layout. Hope you can do it alone.
# Use Pre-Designed Templates
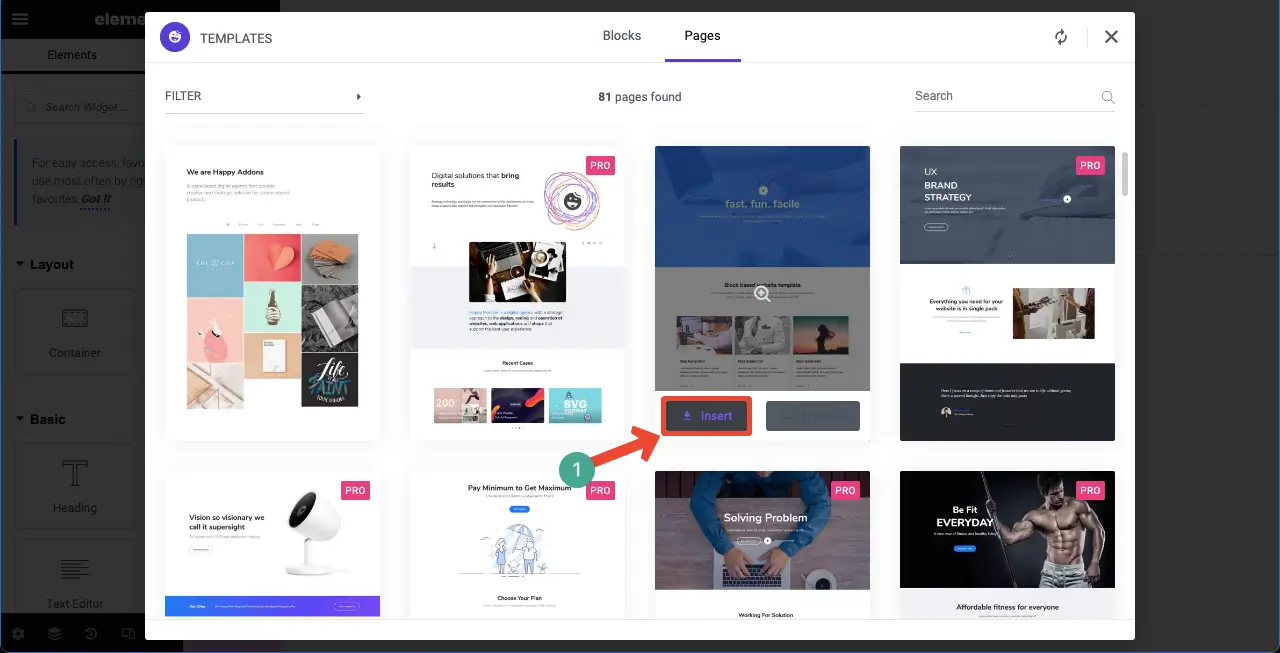
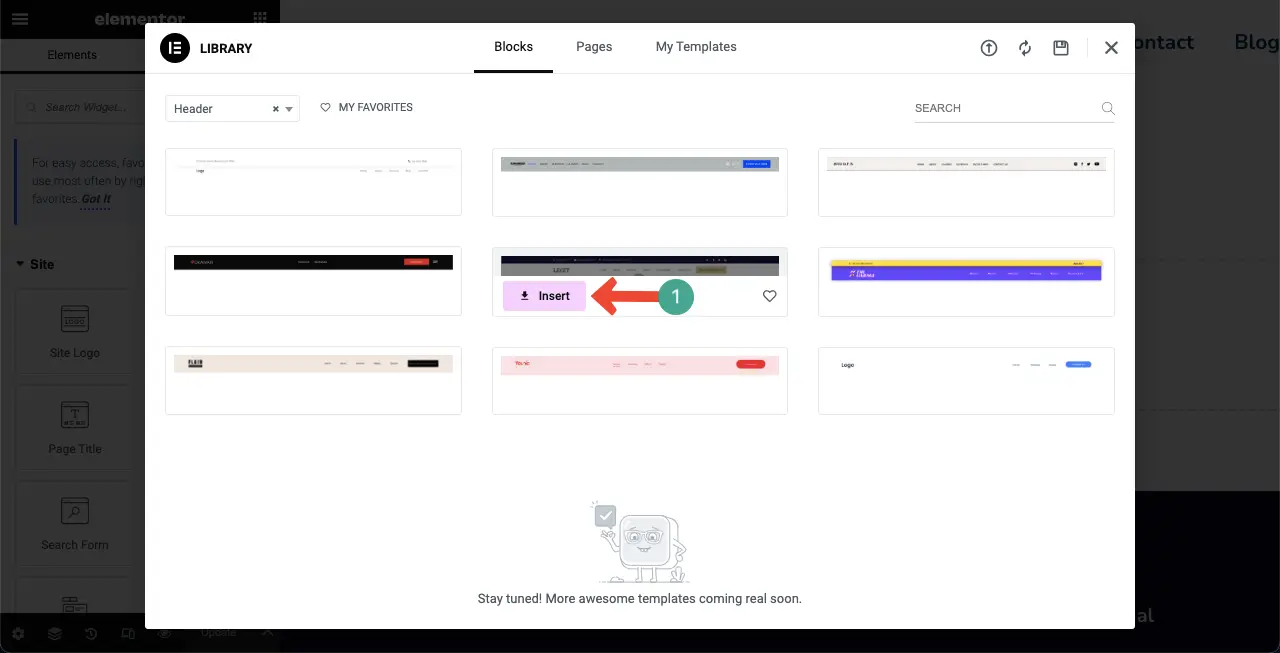
You’ll get both the readymade block and page templates in the Elementor library. You just need to insert the template you like based on your needs. Press the Elementor Template library icon.

Explore both the readymade block and page templates. Hover your cursor on whichever you like. You’ll get the Insert button. By clicking the button, you can add the template to the page.
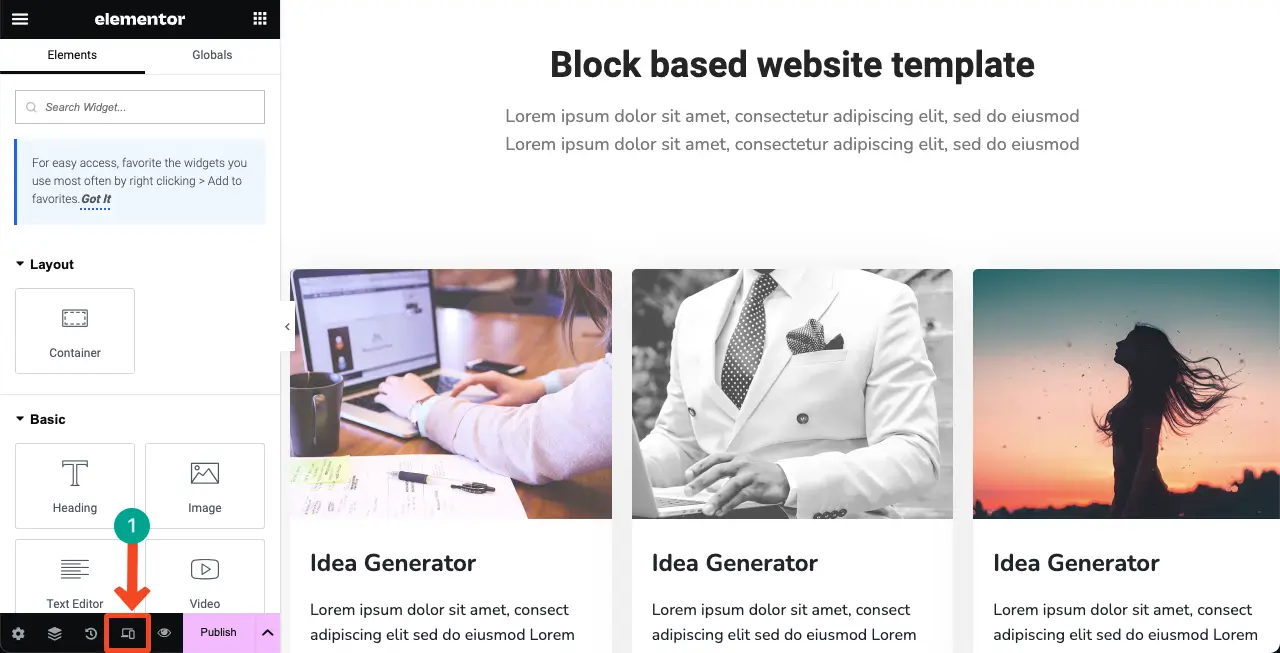
Step 08: Make the Page Mobile Responsive
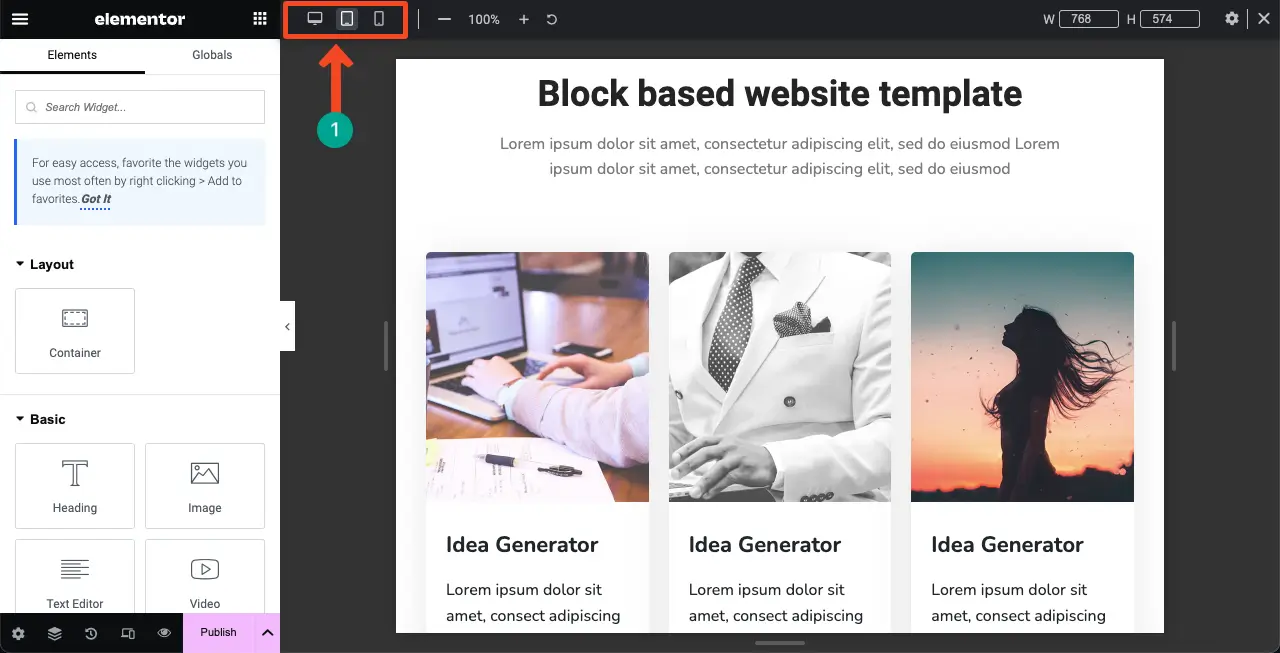
Hit the Responsive Mode icon from the bottom bar of Elementor. It will open up different device screen size options on the top bar. You can watch the current of your page on other screen sizes by switching between these device modes.
If the layout is not good enough on other screen sizes, modify the alignment of text, images, and other content elements to look well-balanced on mobile and tablet devices. Also, adjust font sizes to ensure readability on smaller screens.
Elementor allows you to set different font sizes for various devices. If necessary, resize padding and margins to create enough spacing between elements for particular devices.
When your design is done, live the page by clicking the Publish button from the bottom bar of the Elementor panel.
Step 09: Create a Header and Footer
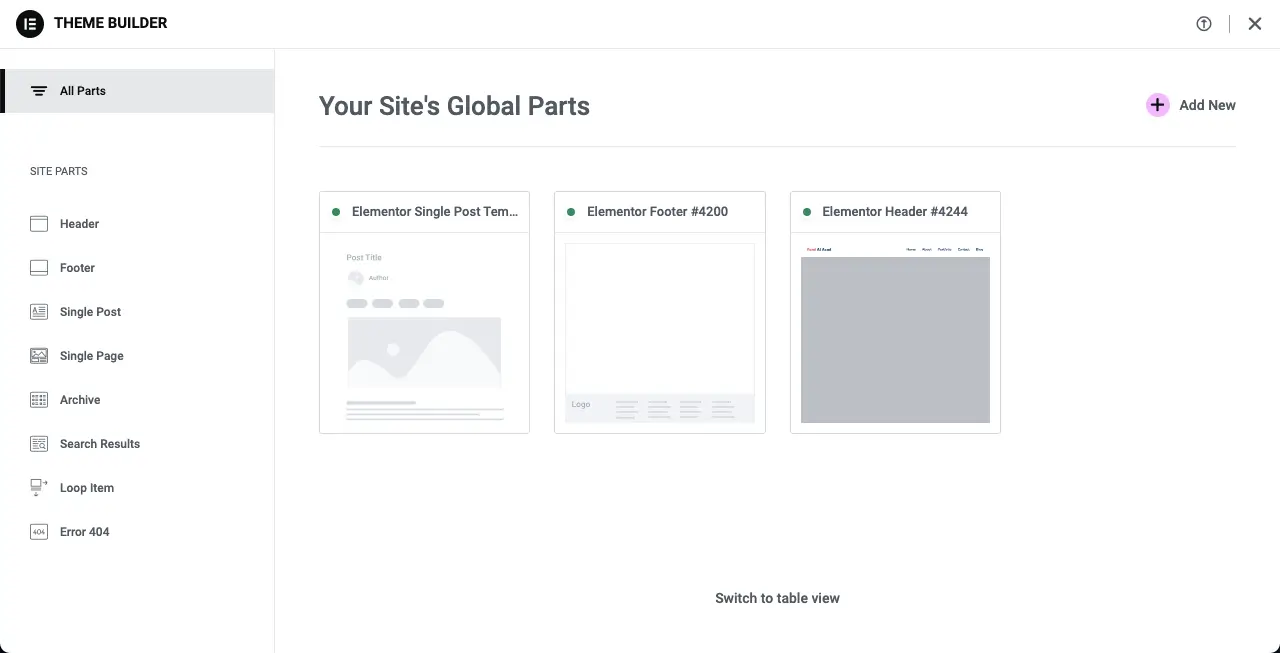
Elementor Pro comes with a powerful theme builder. It allows you to create stunning headers and footers for your website. Go to Templates > Theme Builder.
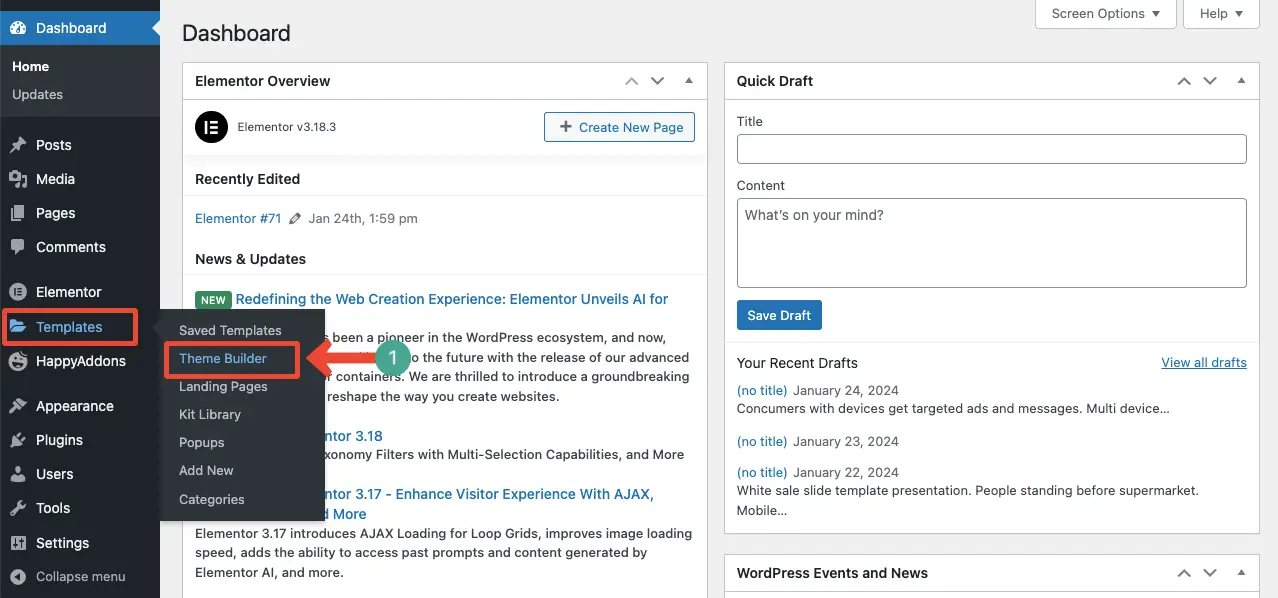
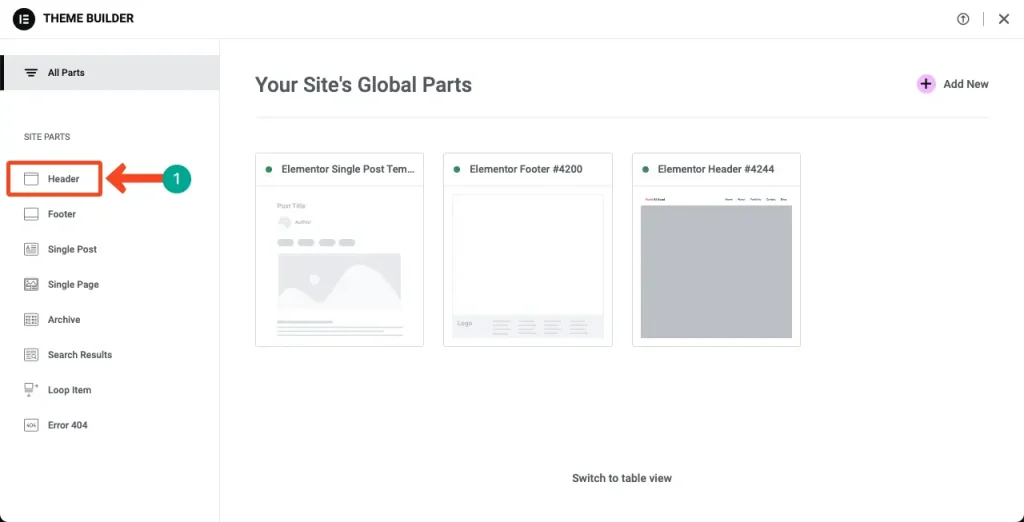
You’ll get the header and footer builder options in Theme Builder. You’ll get some other options there as well, like single post, single page, archive, etc. Now, click on the Header or Footer that you want to build and design.
Let’s for example, create a header. Click on the Header option. Then, press the (+) Add New button.
You’ll be taken to the Elementor canvas. You may create the header from scratch like the web page we showed you earlier. Or you can use a template.
In the same way, you can prepare a footer, whether using a template or from scratch.
Step 10: Publish the Website
Once your designs are done for the respective pages, header, footer, and other sections, you can publish them one by one. But before that, you may preview them to get a solid experience of how these designs will look after publishing the pages.
If any further corrections or customizations are necessary, you can execute them before making the website live.
FAQ on How to Create a Website with Elementor
When WordPress and Elementor merge together, you can create something extraordinary. But to do that, you have to grow your expertise in both of them. I will now answer some questions that are commonly found online related to how to create a website with Elementor.
Is Elementor good for building websites?
If you are no code user or don’t love to depend on coding, Elementor will really be a great tool for you when creating websites on WordPress.
Does Elementor slow down a website?
Yes, it makes websites comparatively a bit heavy because it adds extra layers of code and scripts that are necessary to facilitate its drag-and-drop interface and advanced design features.
These additional scripts and stylesheets increase the number of HTTP requests and can lead to larger page sizes, which in turn slow down page loading times.
How can I make an Elementor website fast-loading?
To make an Elementor website fast-loading, start by optimizing images using compression tools to reduce their file sizes without compromising quality.
Utilize a caching plugin and a content delivery network (CDN) to minimize server response times and distribute content more efficiently.
Limit the use of excessive widgets and complex animations that add unnecessary weight to the page.
Finally, regularly update Elementor and all plugins and remove any that are unused to ensure optimal performance and compatibility.
Does Elementor provide hosting and generative AI?
Yes, Elementor is currently providing hosting support.
It has introduced generative AI in 2023. Its AI tools allow you to generate texts and write HTML/CSS codes and images based on your prompts.
What are the alternative WordPress page builders to Elementor?
Some popular alternative page builders to Elementor are Divi, Beaver Builder, WPBakery Builder, etc.
Conclusion
Creating a website is a website process. Years ago people had to hire developers to create the backend and frontend of their desired websites. It would cost them a considerable amount of time and money. But with WordPress and Elementor today, you can create your own website without relying on professional developers.
However, there has been no change in the basic and sensitive aspects one should consider mandatorily in web designing. It is impossible for us to cover each of these topics in this short article. So in the future, I will cover many more articles on these topics in detail.
Besides, I will cover detailed discussions over the other popular page builders used in website design and development. Stay tuned with us for coming articles.