WordPress Table Block is one of the most useful blocks by which you can multifunctional tables within your blog posts and pages. It provides a user-friendly interface to present data, compare information, and organize content in a well-structured way.
I will show you how to create a table in your web posts and pages using the WordPress table block. Start exploring!
Step 01: Add the WordPress Table Block to Your Post/Page
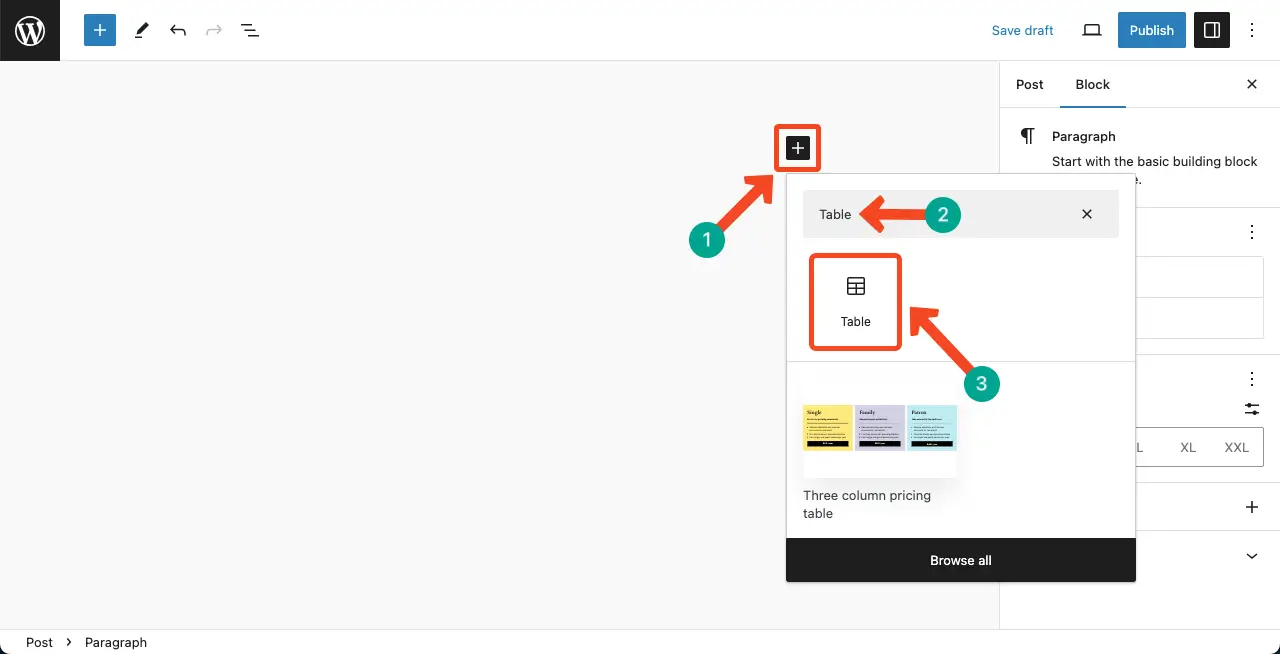
Open the WordPress editor and navigate to the desired post or page where you want to add the Table Block. Click on the (+) button to add a new block.
In the search bar, type Table to find the Table Block. Click on the Table Block to add it to your post or page content.
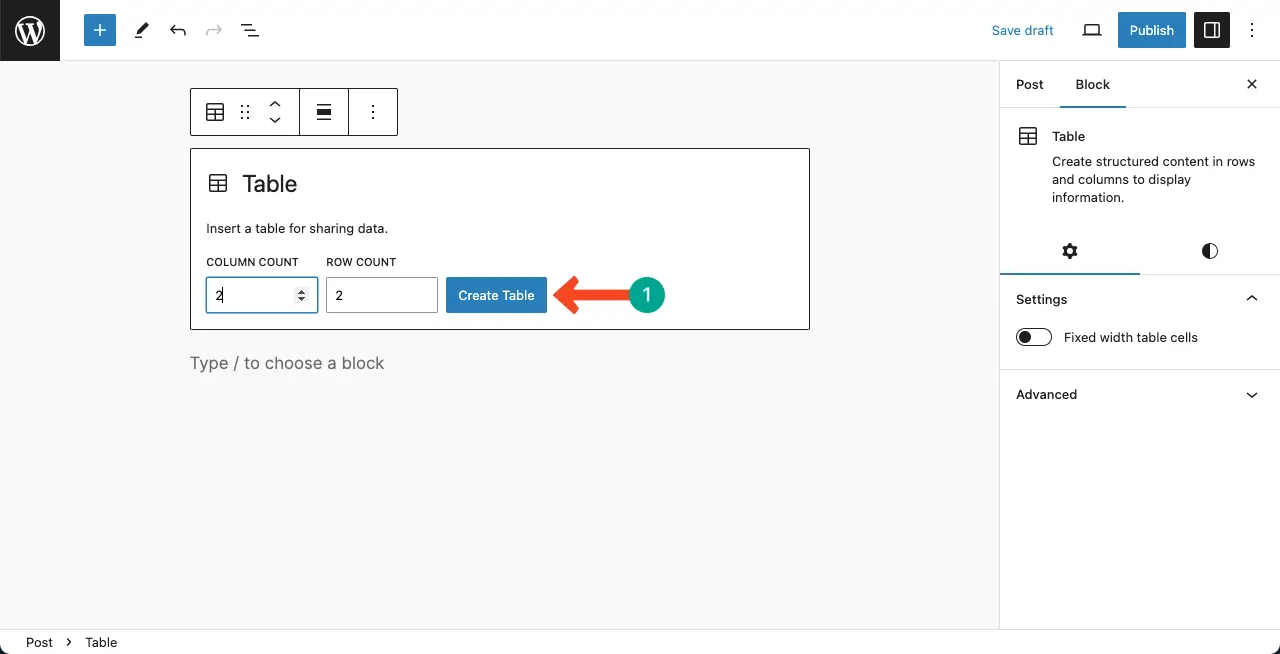
Define the number of rows and columns. You must set it to your needs. Click the Create Table button at the end.
Step 02: Enable the Header and Footer or Keep Them Disabled
Select the Table block by clicking the Table icon on the Gutenberg toolbar. This will bring the Settings and Styles tab under the block section on the right sidebar.
Under the Settings tab, you’ll find options to toggle on/off the Fixed width table cell, Header section, and Footer section. Toggle on to enable them. Keep them toggle off if you don’t need them.
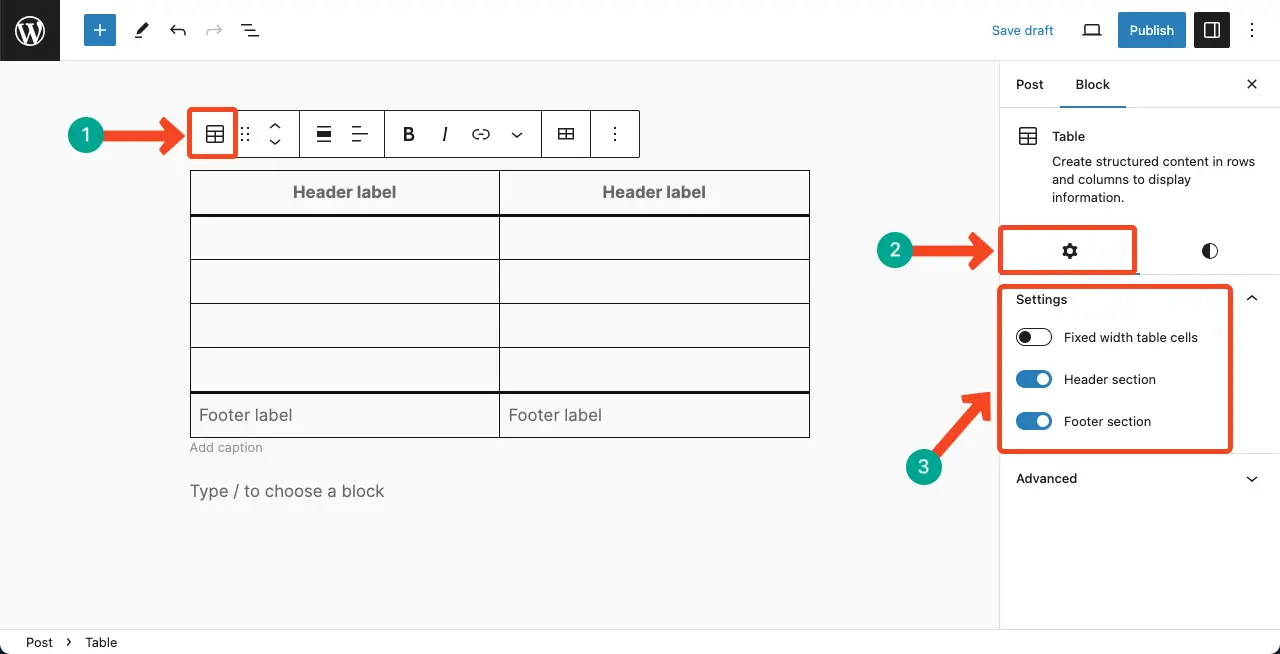
We’ll keep them disabled in this tutorial.
Step 03: Add Content to the Table
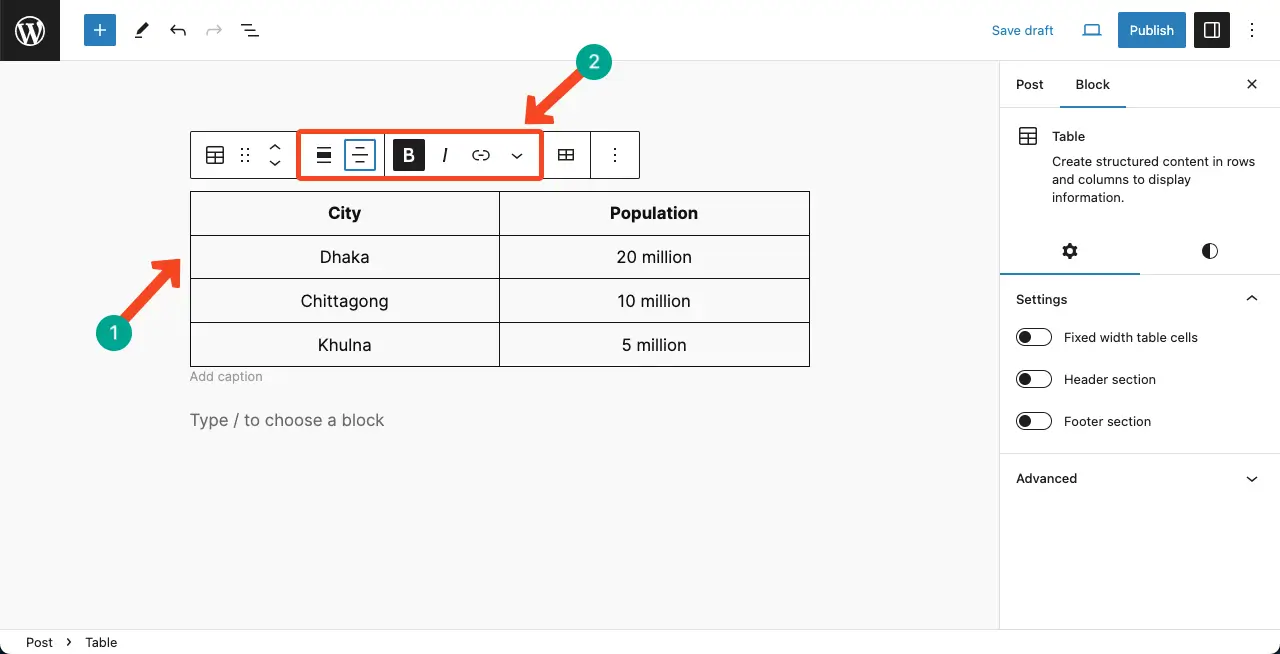
Add content to your rows and columns. For basic stylization, you can use the alignment, bold, and italic options on the Gutenberg toolbar. You can see we have centrally aligned the content and made the column titles bold.
Step 04: Stylize the WordPress Table Block
Come to the Styles tab. You’ll get lots of options on this tab. You can customize the table text color, text background color, typography, and font size.
Note: The problem is once you select a color for any particular cell, this will be applied to all the rows and columns on the table. You need to use custom table builder plugins to apply the color specifically on particular cells.

Step 05: Customize the Table Dimensions and Border Size
Scroll down the Styles tab a bit. You’ll find the Dimension and Border sections. The dimension section will let you change the block padding and margin. The border section will allow you to increase the table border.
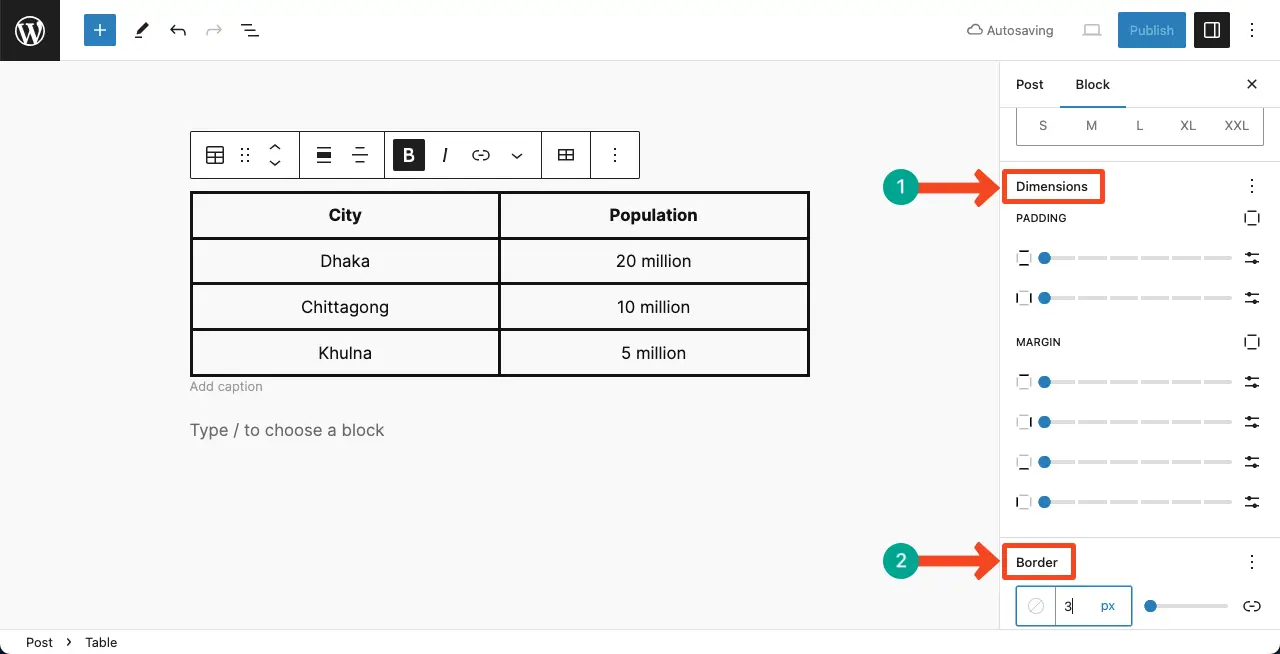
Make the necessary changes as you want.
Conclusion
So, your table is ready. Indeed, the WordPress table block misses many advanced features. Using this block, you can create only basic versions of tables. To make the table more advanced and visually captivating, you must use custom table builder plugins.
In our feature posts, we’ll introduce you to many table builder plugins and how to use them. Stay tuned with us.