A button is a clickable element that allows users to perform specific actions or navigate to different sections. It is typically designed to motivate users to execute any desired actions, like buying products, social sharing, submitting forms, etc.
WordPress comes with a default button block by which you can create and add buttons to your posts and pages. I’ll explain how to create a button in WordPress with a detailed guide in this post.
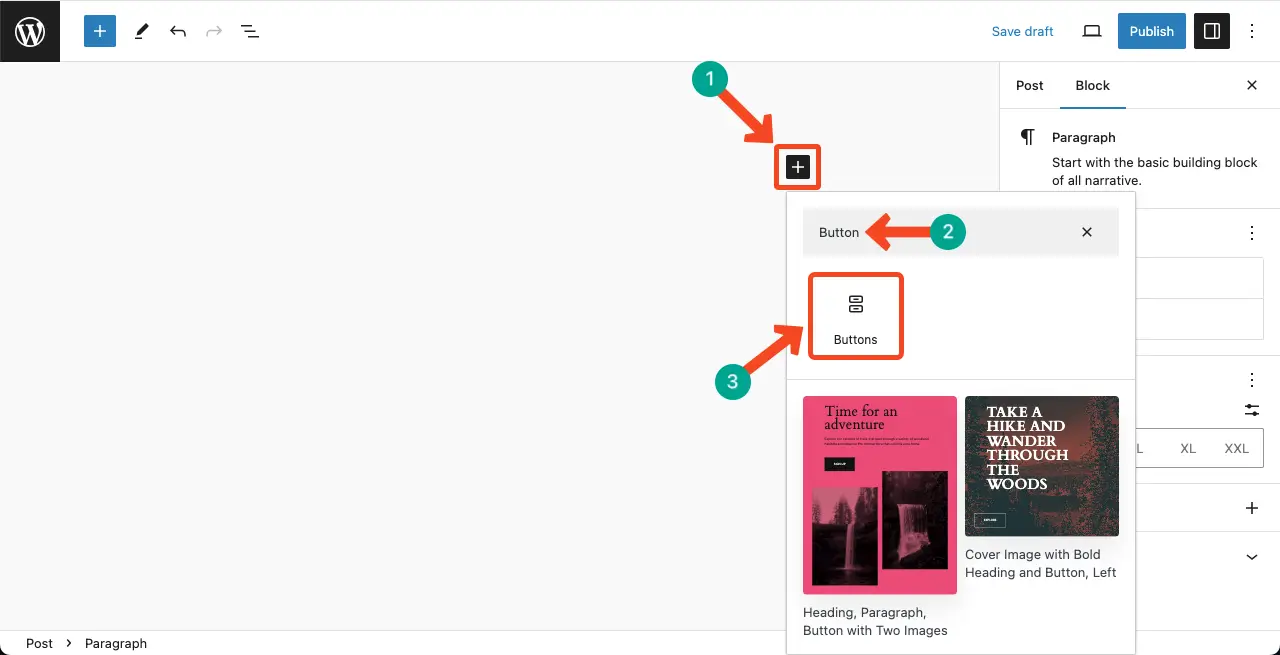
Step 01: Find and Add the WordPress Button Block
Open a new post/page or an existing one. Click on the “+” button to add a new block. Type the Button in the search bar and select the block from the available options. The block will instantly be added to your content area.
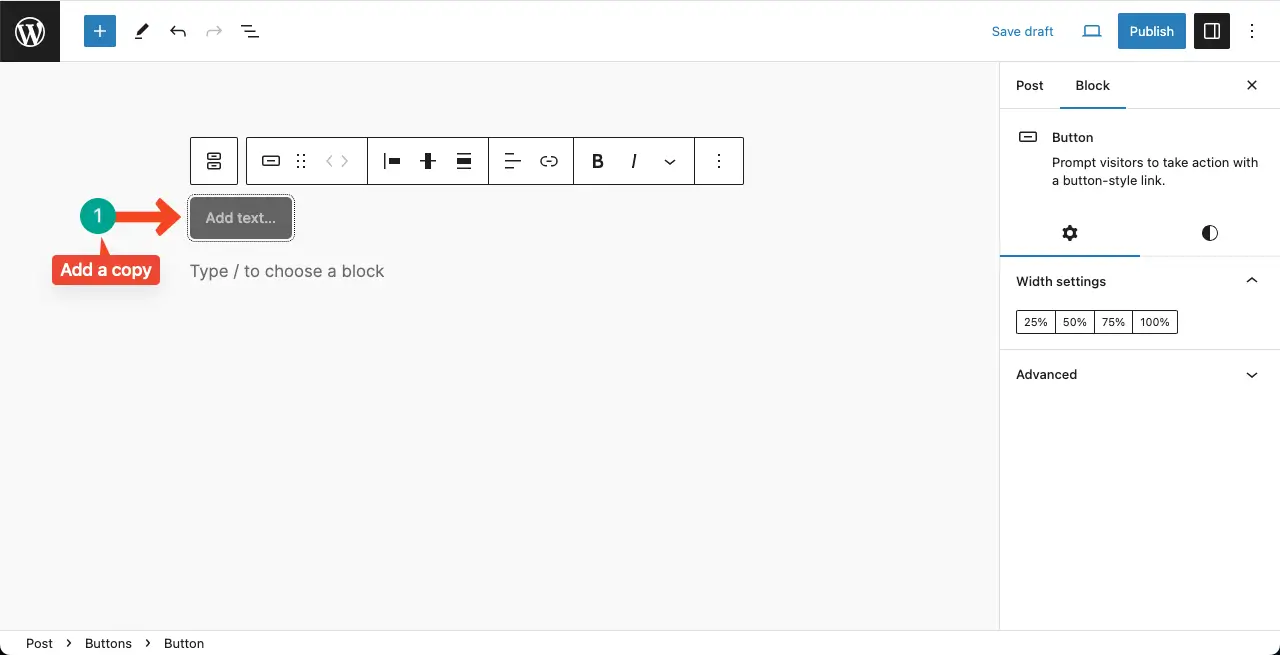
Step 02: Add a Text Copy to the Button
Take your cursor and click on the button. You’ll be allowed to type a copy, popularly known as CTA copy, on the button. Craft a suitable copy that triggers users to click it.
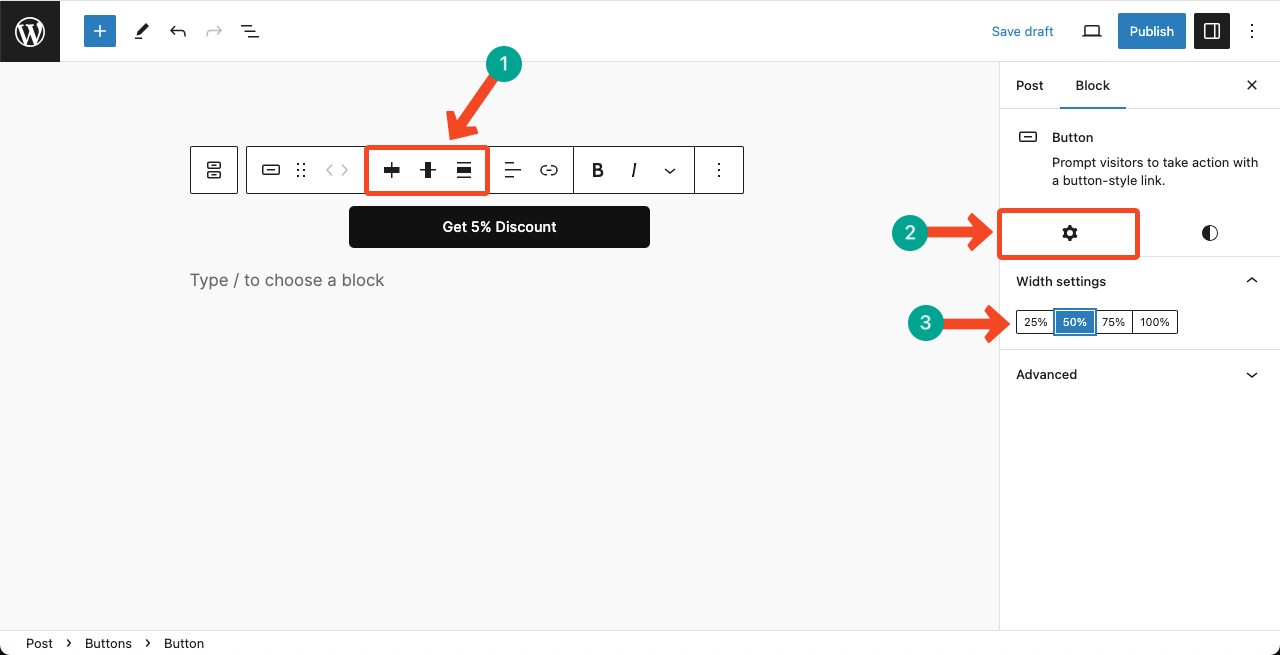
Step 03: Align the Button Block and Increase Its Width
You can see we have added a copy to the button. After that, we have centrally aligned it using the alignment options on the Gutneberg toolbar.
Next, we have increased its width by selecting a suitable width settings under the Settings tab.
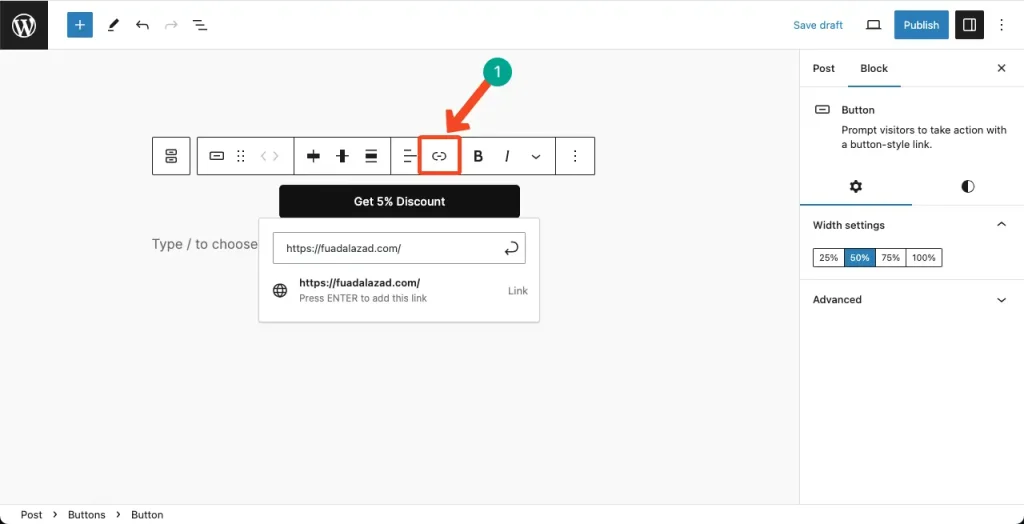
Step 04: Add a Link to the WordPress Button Block
Click the Link option on the Gutenberg toolbar. It will allow you to add a link to the box. Do it yourself.
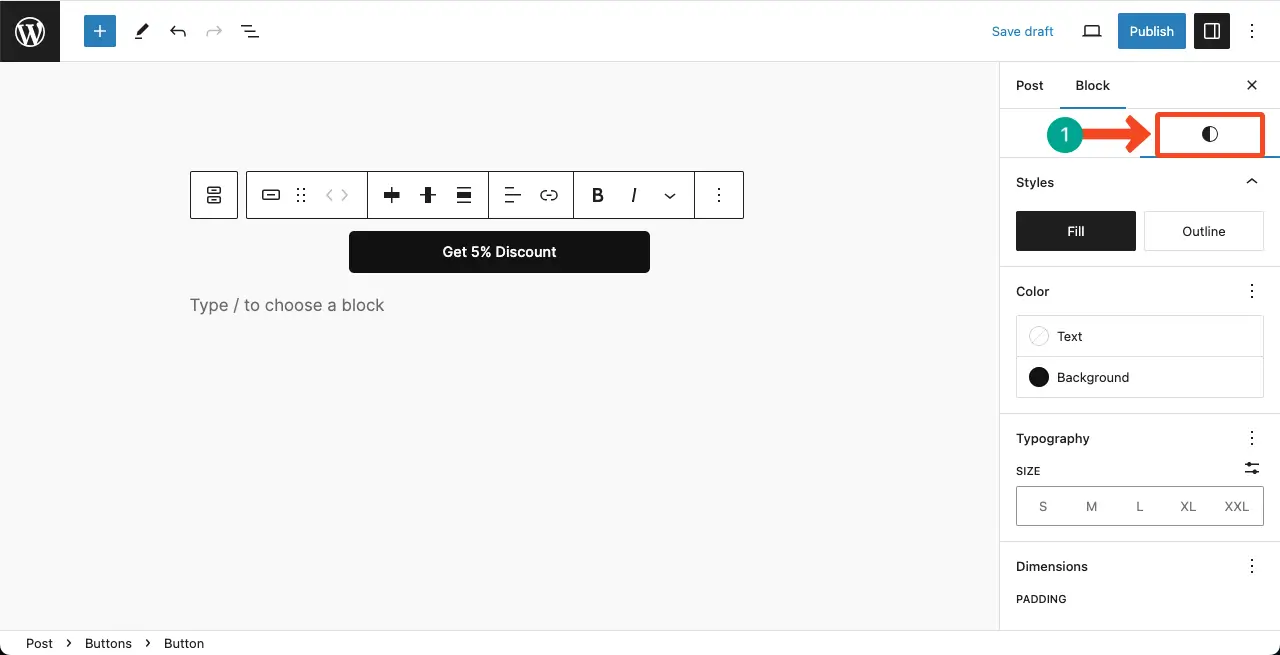
Step 05: Stylize the WordPress Button Block
Come to the Styles tab. You’ll get options to change the button block’s outline, text and background color, typography, font size, padding, border, and radius. Hope you can do them all yourself.
Best Practices for Using the Button Block in WordPress
As buttons are one of the most crucial elements in any website, you must use and place them carefully on your site so they can perfectly trigger visitors and users to execute your desired actions. Below, I have listed several best practices that you must keep in mind when using the block.
1. Add a Clear and Concise Label
When using the Button Block in WordPress, it is important to provide clear and concise labeling for your buttons. Use descriptive and action-oriented text that clearly communicates the purpose of the button. Avoid vague or generic labels that may confuse or mislead your users.
2. Place Strategically
Consider the placement of your buttons within your content where they are highly visible. Buttons should be strategically positioned to guide users toward desired actions, such as signing up for a newsletter, making a purchase, or accessing additional information.
3. Add a Moderate Stylization
Maintain a consistent styling for your buttons throughout your website. This includes using the same colors, font styles, and hover effects for buttons. Consistency in styling helps create a cohesive and professional look, enhancing the user experience and reinforcing your brand identity.
4. Use of White Space
Give your buttons enough breathing room by utilizing white space around them. This helps to visually separate the button from other elements on the page and draws attention to its call-to-action. Avoid cluttered or crowded designs that may distract or confuse users.
5. A/B Testing
Conduct A/B tests to compare different versions of buttons and measure their impact on user engagement and conversion rates. Use the data collected to make informed decisions about which button design works best for your website.
Conclusion
Creating buttons in WordPress has never been easier with the Button block. But remember to experiment with different styles and placements to find what works best for your specific needs.